10 English
Settingtheindoorunitaddressandsetupoptions
3 A˵ʪʀи˵ʪϩ˵ʪθϩ˵ʪͱΧϩͱЭɇЇʪϑϩ˵ɇϩцͱЇ˵ɇЭʪϑʪϩɇθʪ
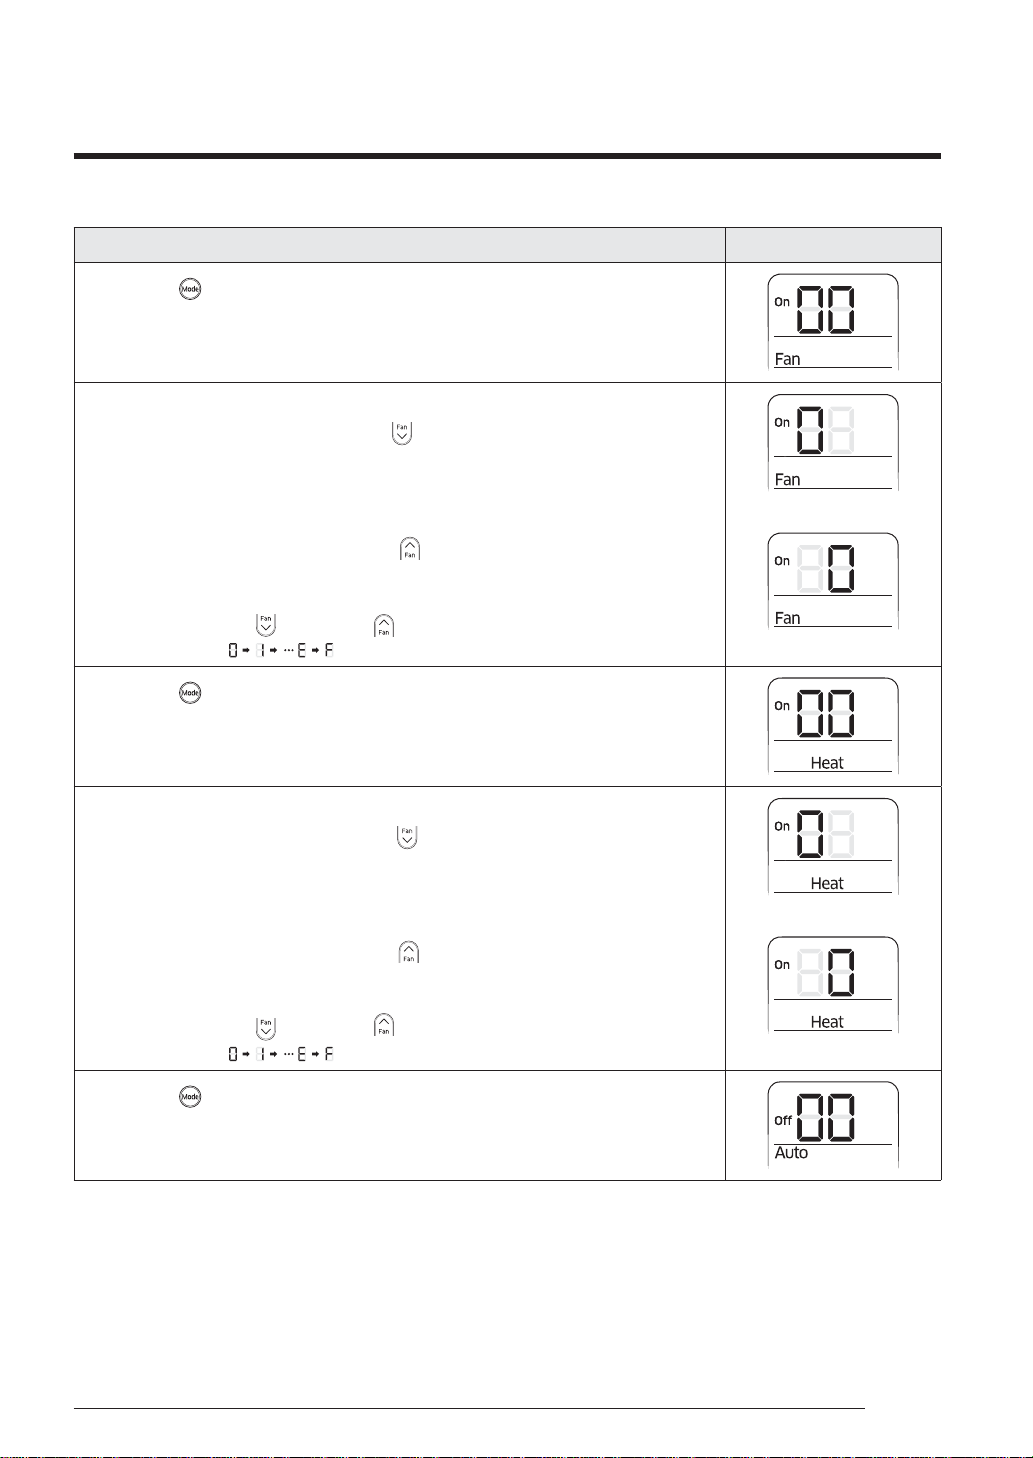
ʀͱθθʪʀϩɵцΧθʪϑϑ˝ϩ˵ʪ ࣑đͱʒʪ࣒ɵЇϩϩͱθʪΧʪɇϩʪʒц
[SEG2, SEG3] ࣈƊkߦࡥƊkߧࣉ ࣈƊkߨࡥƊkߪࣉ [SEG9, SEG10]
[SEG11, SEG12]
ࣈƊkߣߦࡥƊkߣߧࣉ ࣈƊkߣߨࡥƊkߣߩࣉ
[SEG18, SEG20]
[SEG21, SEG22] [SEG23, SEG24]
4 ƊɇЭʪϩ˵ʪͱΧϩͱЭɇЇʪϑϩͱϩ˵ʪʒͱͱθЇϩࡤ
Point the remote control tothe remote control sensor
on the indoorunit and then press the (Power)
ɵЇϩϩͱͱϩ˵ʪθʪͱϩʪʀͱϩθͱϩиʀʪđɇʪϑЇθʪϩ˵ɇϩ
ϩ˵ϑʀͱɇʒϑθʪʀʪЭʪʒɵцϩ˵ʪʒͱͱθЇϩǮ˵ʪϩϑ
ϑЇʀʀʪϑϑ˙ЇцθʪʀʪЭʪʒࡥцͱЇʀɇ˵ʪɇθɇϑ˵ͱθϩϑͱЇʒ˙θͱ
ϩ˵ʪʒͱͱθЇϩÃ˙ϩ˵ʪʀͱɇʒϑͱϩθʪʀʪЭʪʒࡥΧθʪϑϑ
the ࣑ťͱиʪθ࣒ɵЇϩϩͱɇ˝ɇ
5 Checkwhetherthe airconditioneroperates in
ɇʀʀͱθʒɇʀʪиϩ˵ϩ˵ʪͱΧϩͱЭɇЇʪϑцͱЇ˵ɇЭʪϑʪϩࡤ
a ŵʪϑʪϩϩ˵ʪʒͱͱθЇϩɵцʒϑʀͱʪʀϩ˝ɇʒϩ˵ʪ
θʪʀͱʪʀϩ˝ϩ˵ʪΧͱиʪθʀɇɵʪͱ˙ϩ˵ʪʒͱͱθЇϩͱθ
ɵцΧθʪϑϑ˝ϩ˵ʪŵkƊkƟɵЇϩϩͱͱϩ˵ʪͱЇϩʒͱͱθЇϩ
b ŵʪͱЭʪϩ˵ʪɵɇϩϩʪθʪϑ˙θͱϩ˵ʪθʪͱϩʪʀͱϩθͱࡥ
insert them again, and then press the (Power)
ɵЇϩϩͱͱϩ˵ʪθʪͱϩʪʀͱϩθͱ
Settingthepurificationenablingoption
1 Check if poweris supplied tothe indoorunit.
• Ã˙ϩ˵ʪΧͱиʪθϑЇΧΧцϑͱϩʀͱʪʀϩʪʒࡥɇϑʪΧɇθɇϩʪΧͱиʪθ
ϑЇΧΧцϑθʪαЇθʪʒ
2 Ɵ˵ʪΧɇʪͱθʒϑΧɇцͱи˵ʀ˵ϩ˵ʪͱΧϩͱϑʀɇɵʪ
ʪϩʪθʪʒࡥЇϑϩɵʪʀͱʪʀϩʪʒϩͱϩ˵ʪʒͱͱθЇϩ
3 Ɗʪϩϩ˵ʪʒͱͱθЇϩࣱϑϑϩɇɇϩͱͱΧϩͱϑɇʀʀͱθʒ˝ϩͱ
the installation conditions.
• The default installation options ofthe indoorunit are
as follows.
– AC*** model: 020000-100001-200000-300000
– đࡒࡒࡒͱʒʪࡤߢߤߢߢߣߢࣛߣߢߢߢߢߢࣛߤߢߢߢߢߢࣛߥߢߢߢߢߢ
• Ã˙цͱЇϑʪϩЇɵʪθϑϩ˵ɇϩʀɇͱϩɵʪɇͱиʪʒ˙ͱθʪɇʀ˵
SEG, the default settings are returned.
• The setting "RESERVED" is ignored.
• ͱθϩ˵ʪΧЇθ˙ʀɇϩͱ˙Їʀϩͱࡥʀ˵ɇ˝ʪϩ˵ʪЭɇЇʪͱ˙
Ɗkߣߨϩͱߥ˙ͱθϑϩɇɇϩͱͱΧϩͱϑ
– Ɵ˵ʪϑʪϩϩ˝ͱ˙ϩ˵ʪΧЇθ˙ʀɇϩͱʪɇɵ˝ͱΧϩͱϑ
"020000-100001-200300-300000" (AC*** model) and
ߢߤߢߢߣߢࣛߣߢߢߢߢߢࣛߤߢߢߥߢߢࣛߥߢߢߢߢߢ࣑đࡒࡒࡒͱʒʪ࣒
kуɇΧʪ࣑đࡒࡒࡒͱʒʪ࣒
[SEG2, SEG3] ࣈƊkߦࡥƊkߧࣉ ࣈƊkߨࡥƊkߪࣉ [SEG9, SEG10]
[SEG11, SEG12]
ࣈƊkߣߦࡥƊkߣߧࣉ ࣈƊkߣߨࡥƊkߣߩࣉ
[SEG18, SEG20]
[SEG21, SEG22] [SEG23, SEG24]
Settingtheproductoptionsforeach
indoorunit
To set the setup options, referto a separate sheet that
includes option codes foreach indoorunit's model.