6
SAMSUNG Video Wall Kit Setup Guide 2. Installation
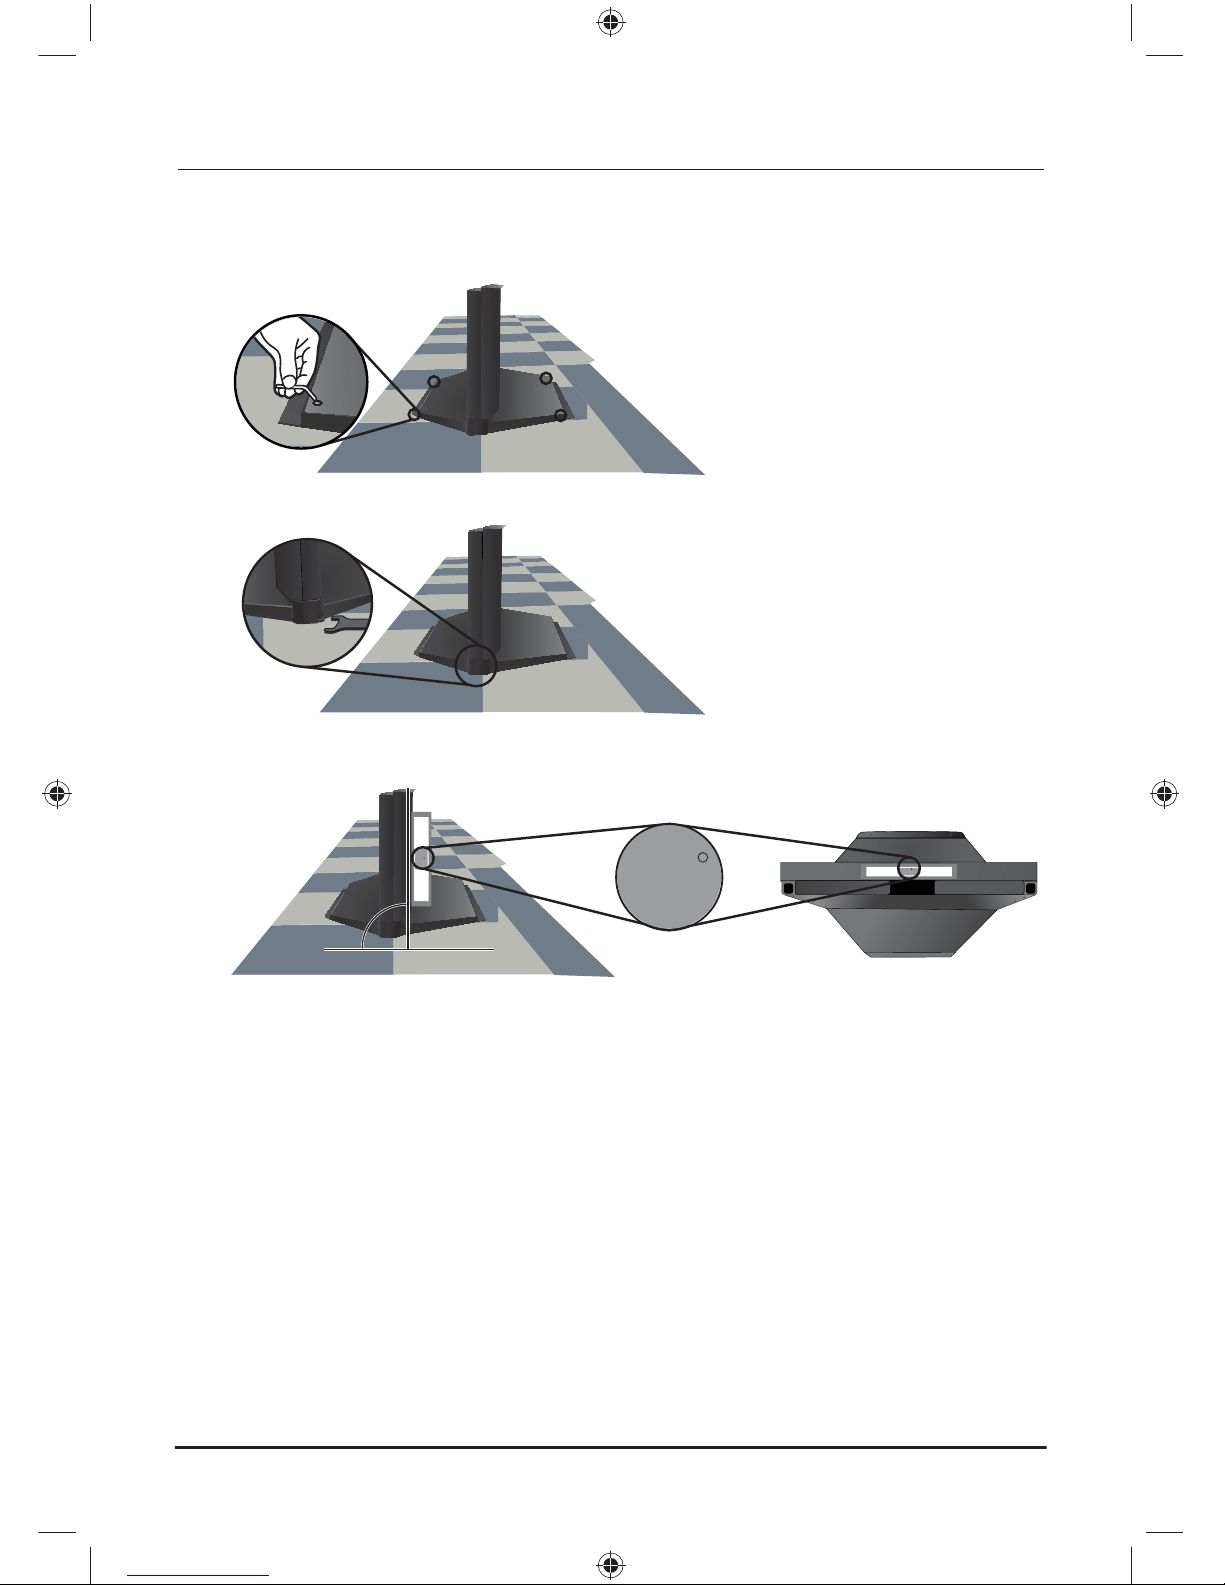
Arranging the Stand
Arrange the stand in the installation shape.●
(Level each of the stands referring to the descriptions in the “Adjusting Level” section.)
If you want the monitor inclined towards you, tilt it as far as you need it to go and fix it on the floor.➣
Assemble it follwing the same steps described previously.
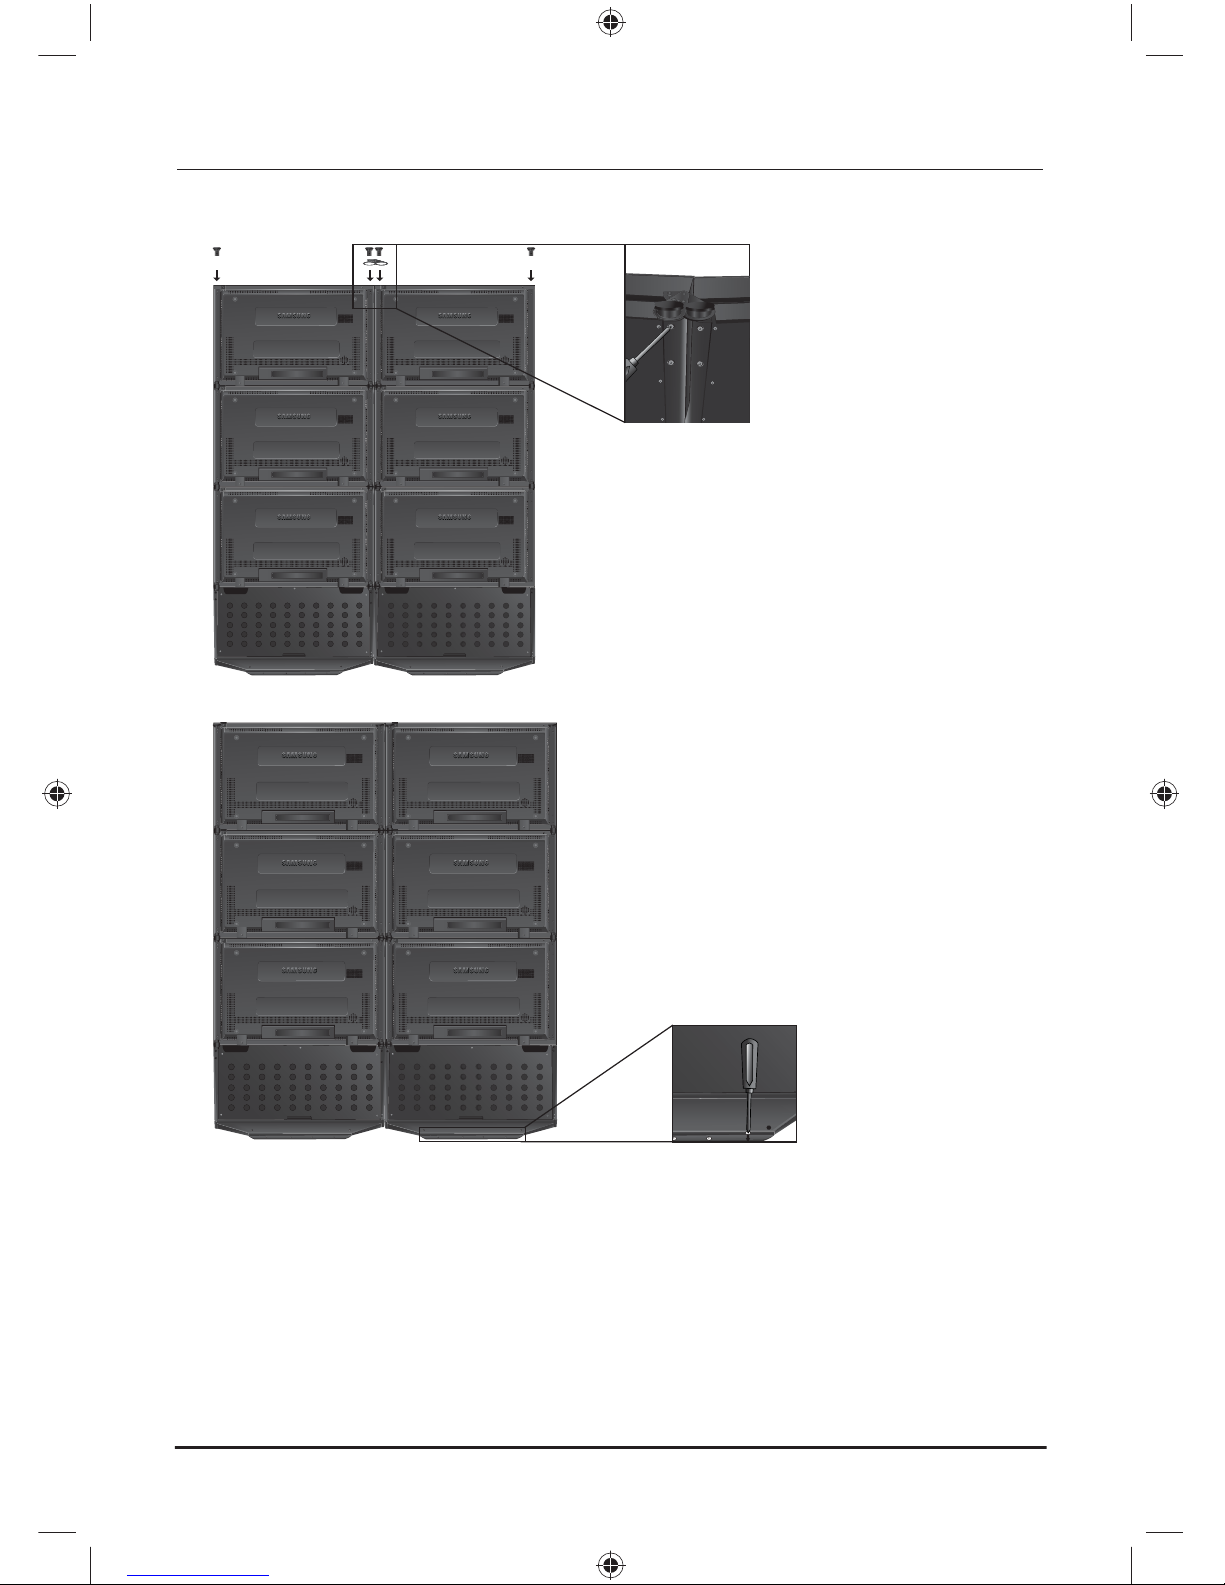
Assembling the Monitor
After stacking the necessary monitors on top of each other and fastening all the screws to the connectingN
parts.
To stack 3 or more monitors, two or more persons must work together.
1.
Insert the Middle Bracket-Links into the connecting pipe.
2.
Assemble the Ballast-Brackets.
Matrix_ID-Eng.indd Sec1:6Matrix_ID-Eng.indd Sec1:6 2010-06-08 3:36:292010-06-08 3:36:29