Contents
Unpacking.............................................................................................................................6
Product Overview.................................................................................................................7
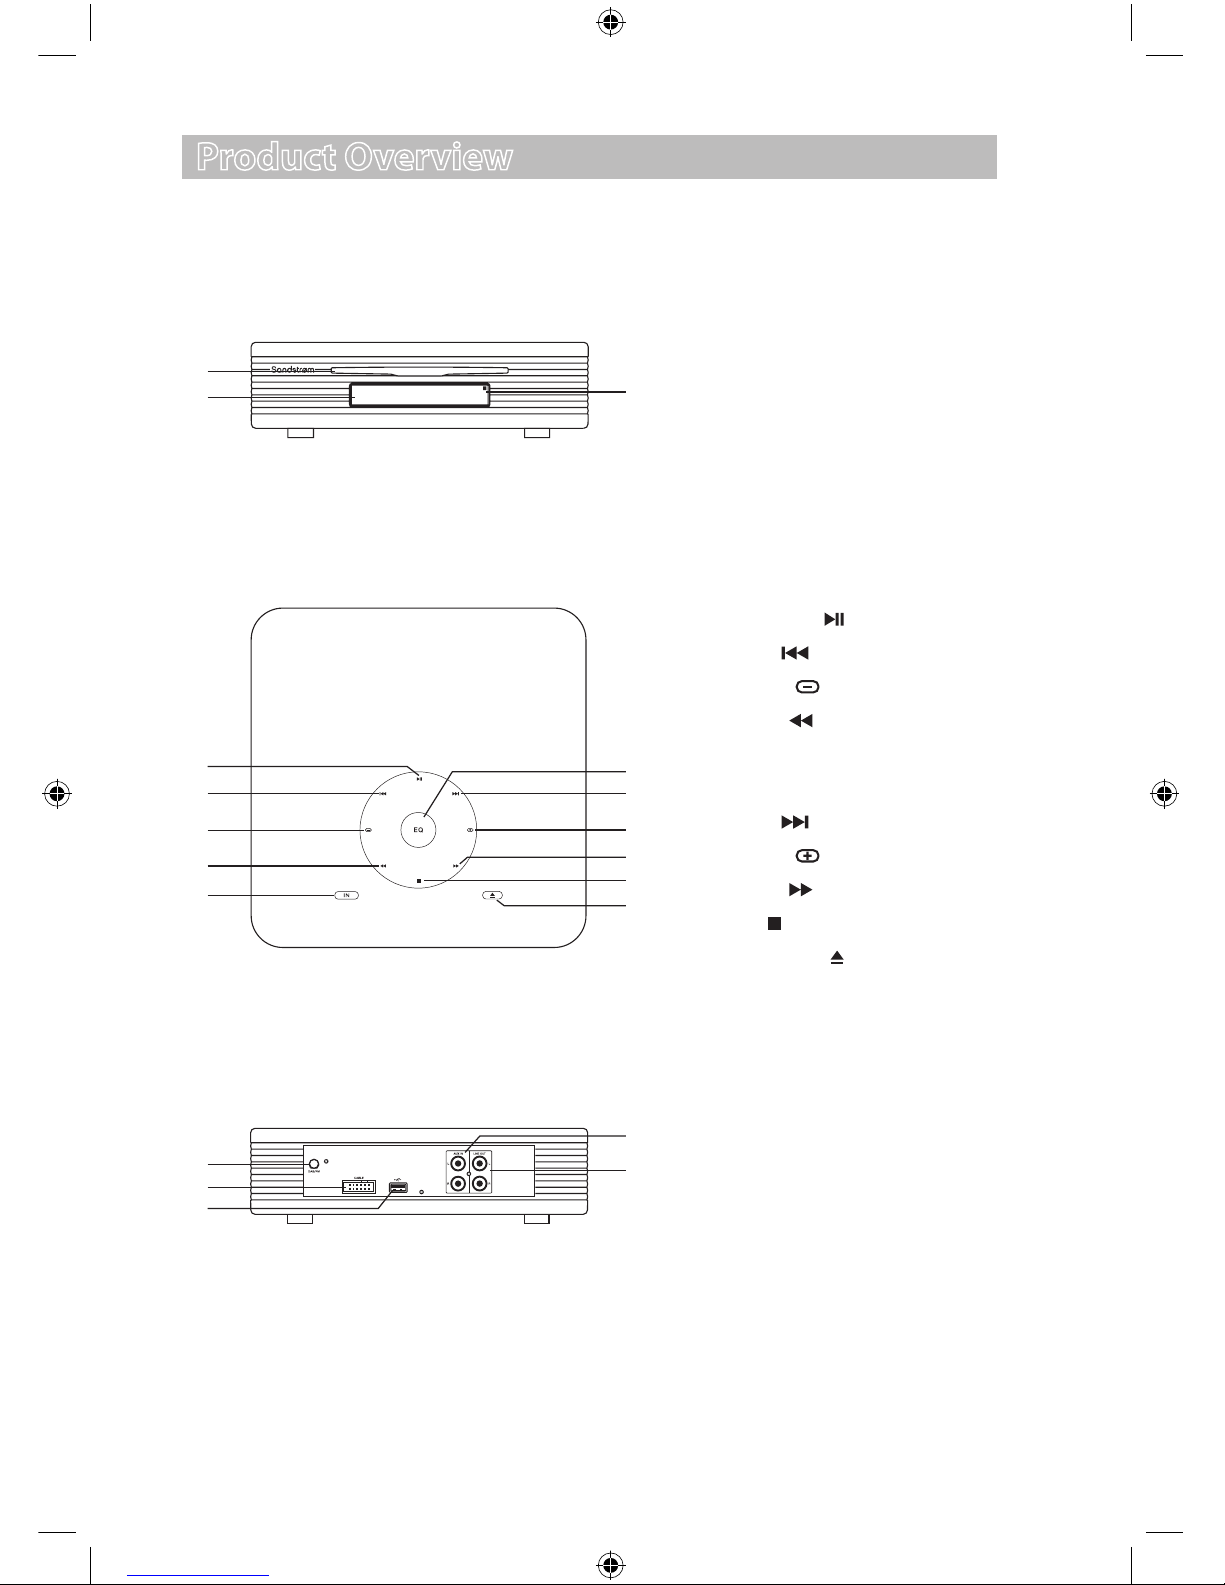
CD Player .........................................................................................................................................................7
Front View ..................................................................................................................................................7
Top View......................................................................................................................................................7
Rear View ....................................................................................................................................................7
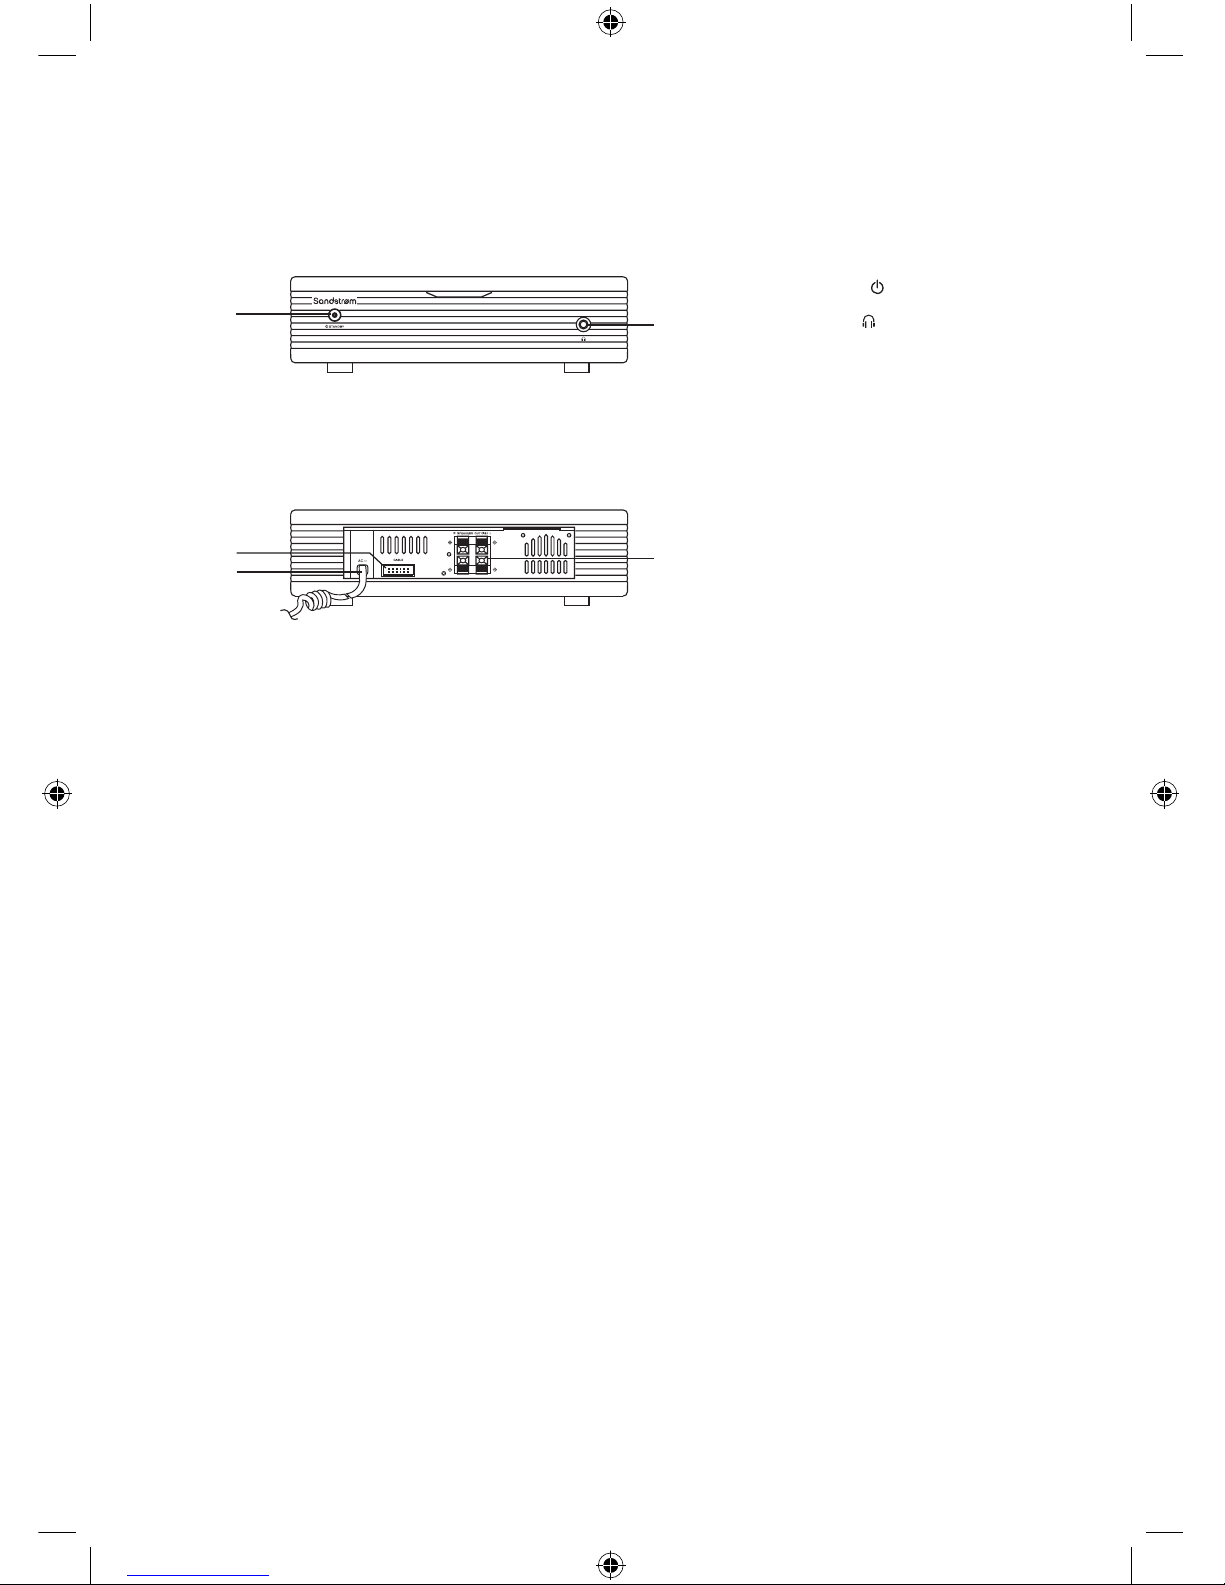
The Amplier .................................................................................................................................................8
Front View ..................................................................................................................................................8
Rear View ....................................................................................................................................................8
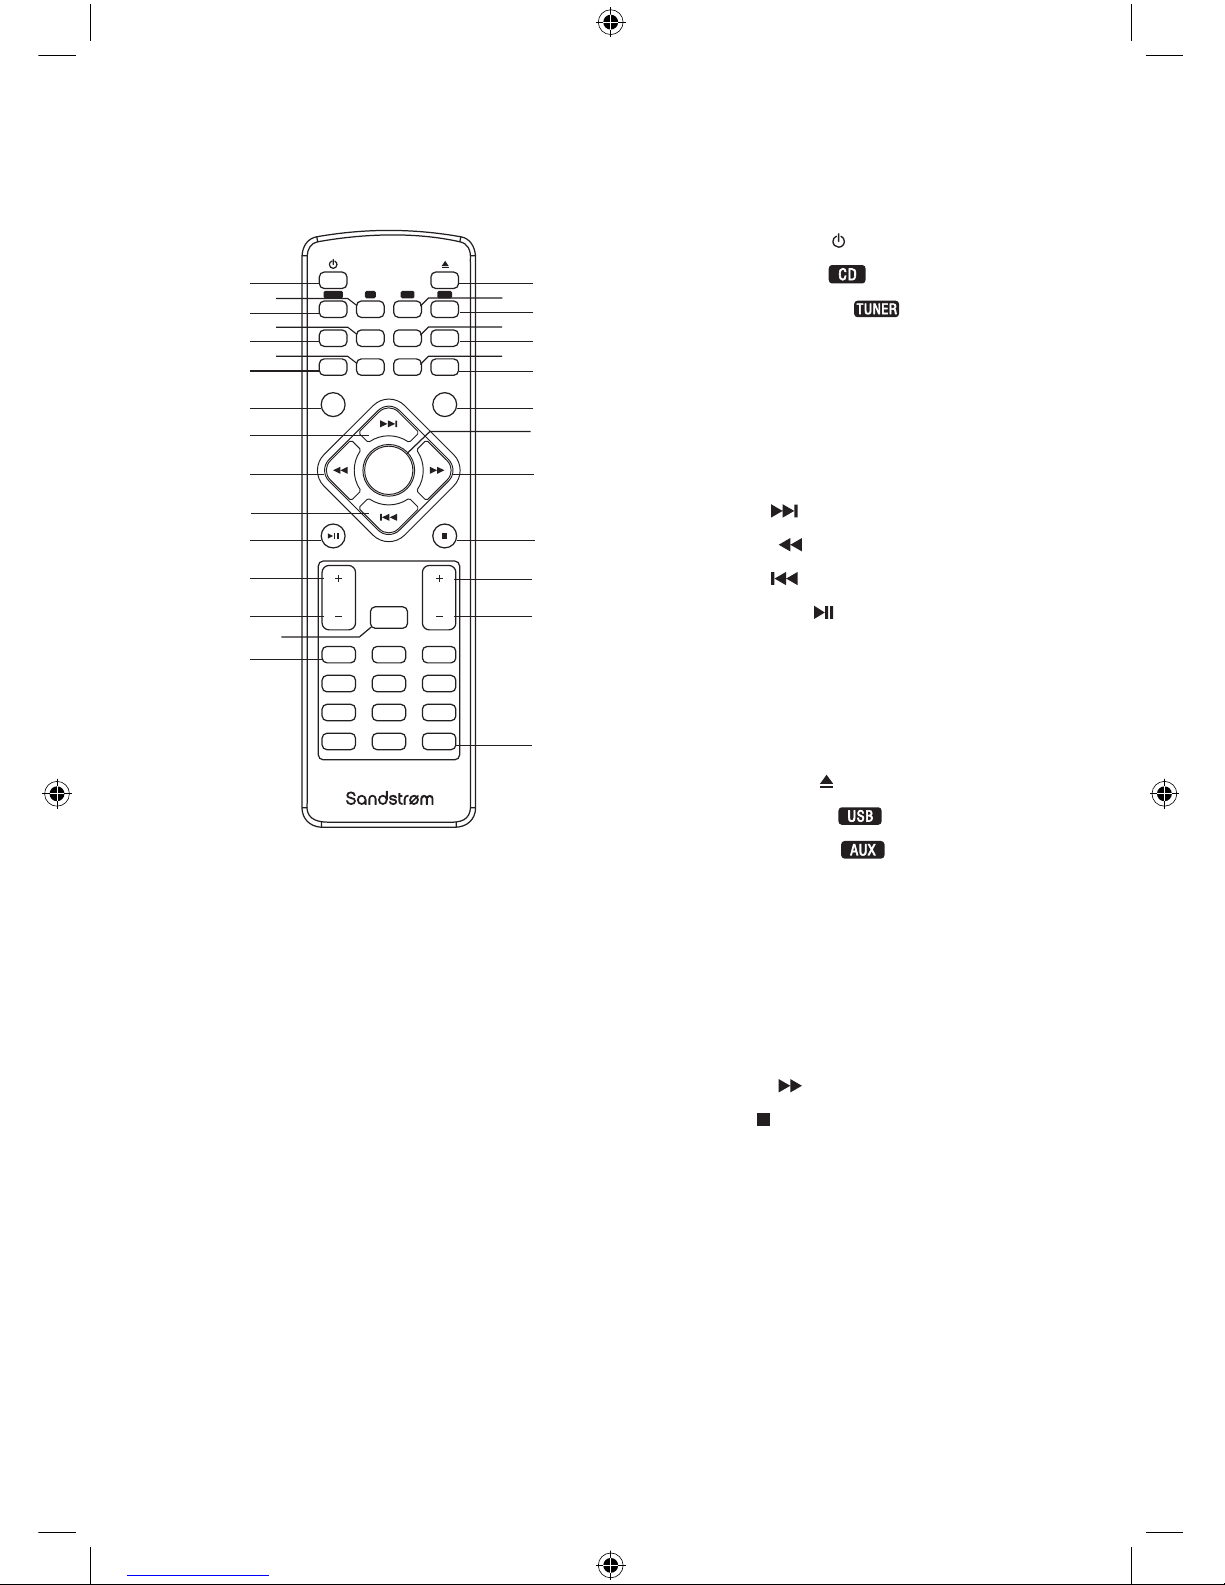
Remote Control.............................................................................................................................................9
Remove the Insulating Strip from the Remote Control............................................................... 10
Battery Installation for the Remote Control..................................................................................... 10
Handling the Battery........................................................................................................................... 10
Handling the Remote Control.......................................................................................................... 11
Remote Control Operation Range....................................................................................................... 11
Connections ........................................................................................................................12
Connecting the DAB/FM Aerial............................................................................................................ 12
Speaker Connections............................................................................................................................... 12
Connecting Auxiliary Equipment ........................................................................................................ 12
Connecting Control Cable...................................................................................................................... 13
Connecting Headphones ....................................................................................................................... 13
Connecting to the Mains Supply......................................................................................................... 14
ECO-Power/Standby Features ...........................................................................................14
Setting the Clock ................................................................................................................14
Setting the Clock Manually.................................................................................................................... 14
Setting the Clock Automatically .......................................................................................................... 15
Display the Clock....................................................................................................................................... 15
Setting the Sleep Timer......................................................................................................15
To Conrm the Sleep Timer ................................................................................................................... 15
To Cancel the Sleep Timer...................................................................................................................... 15
Setting the Daily on Timer .................................................................................................16
To Cancel the Daily Timer....................................................................................................................... 16
Sound Quality .....................................................................................................................17
Adjusting the Volume ............................................................................................................................. 17
Mute .............................................................................................................................................................. 17
Adjusting the Super Bass........................................................................................................................ 17
Control the Loudness............................................................................................................................... 17
Preset Equalizer.......................................................................................................................................... 17
SHFTPPH10_IB_final101208.indd 4 12/8/10 2:10 PM