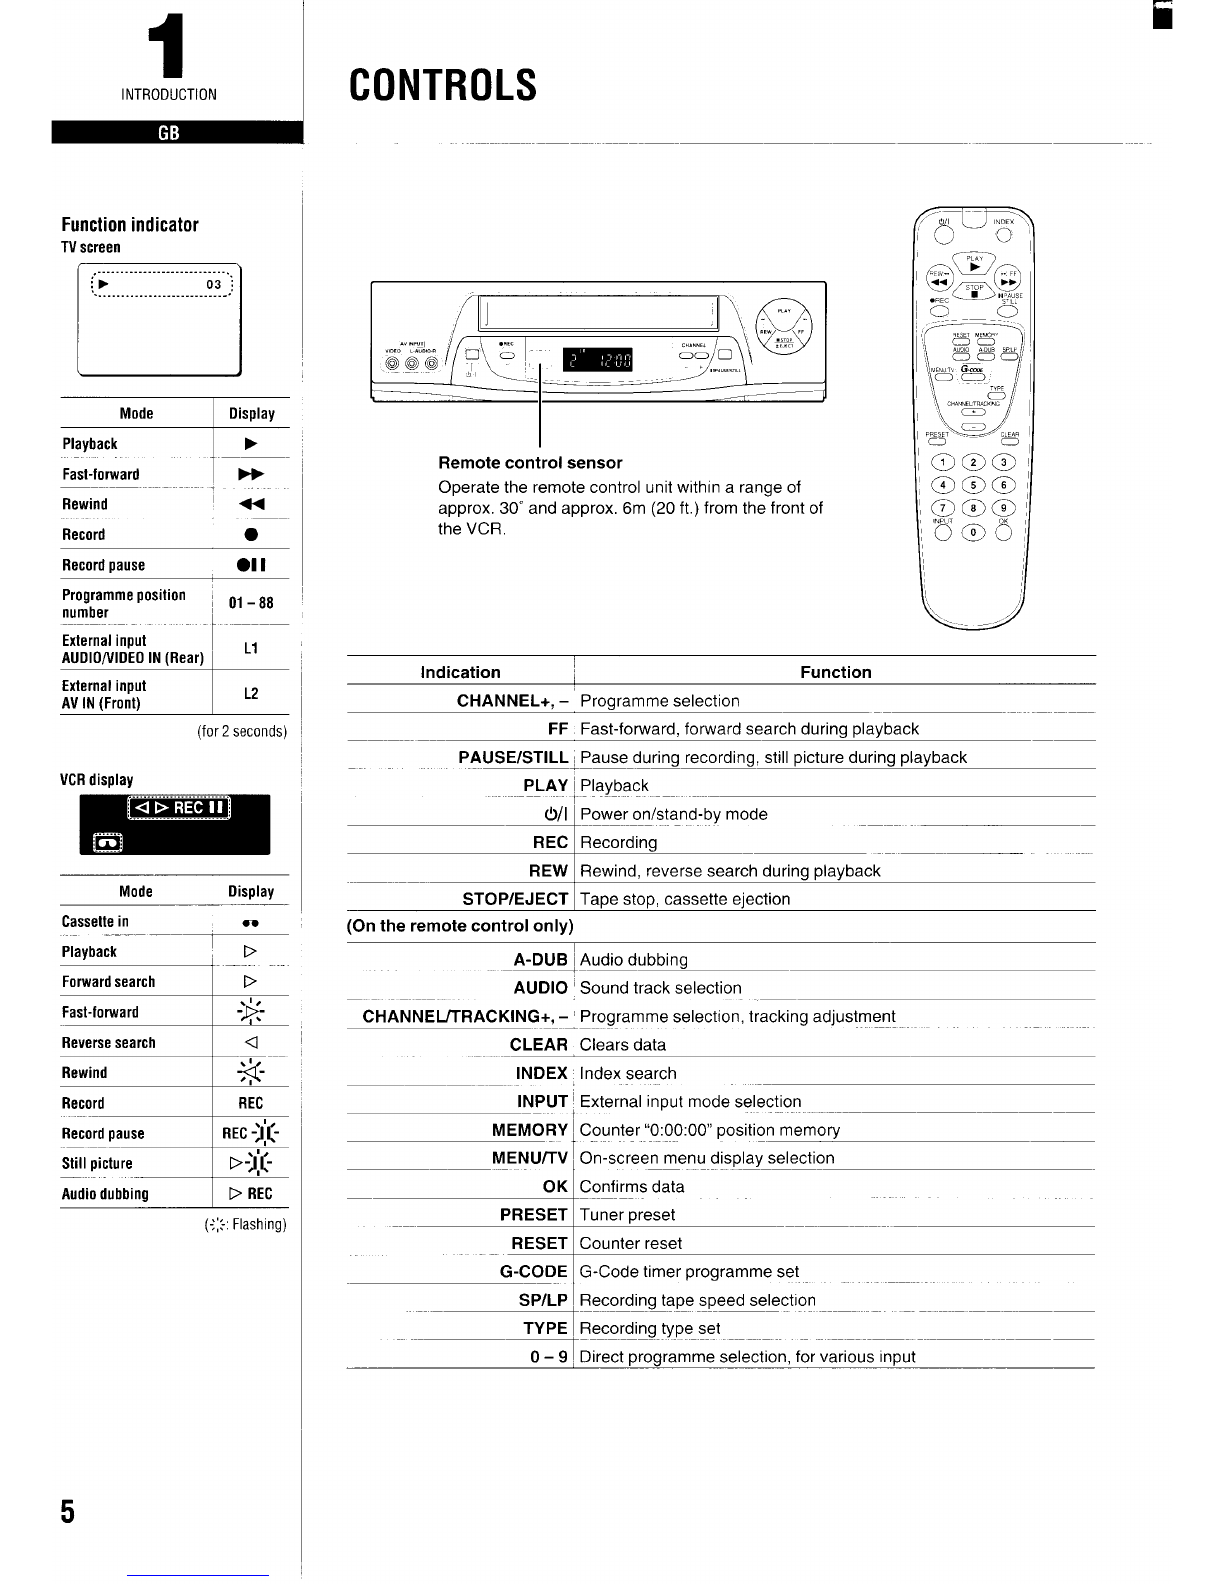
PREPARATION
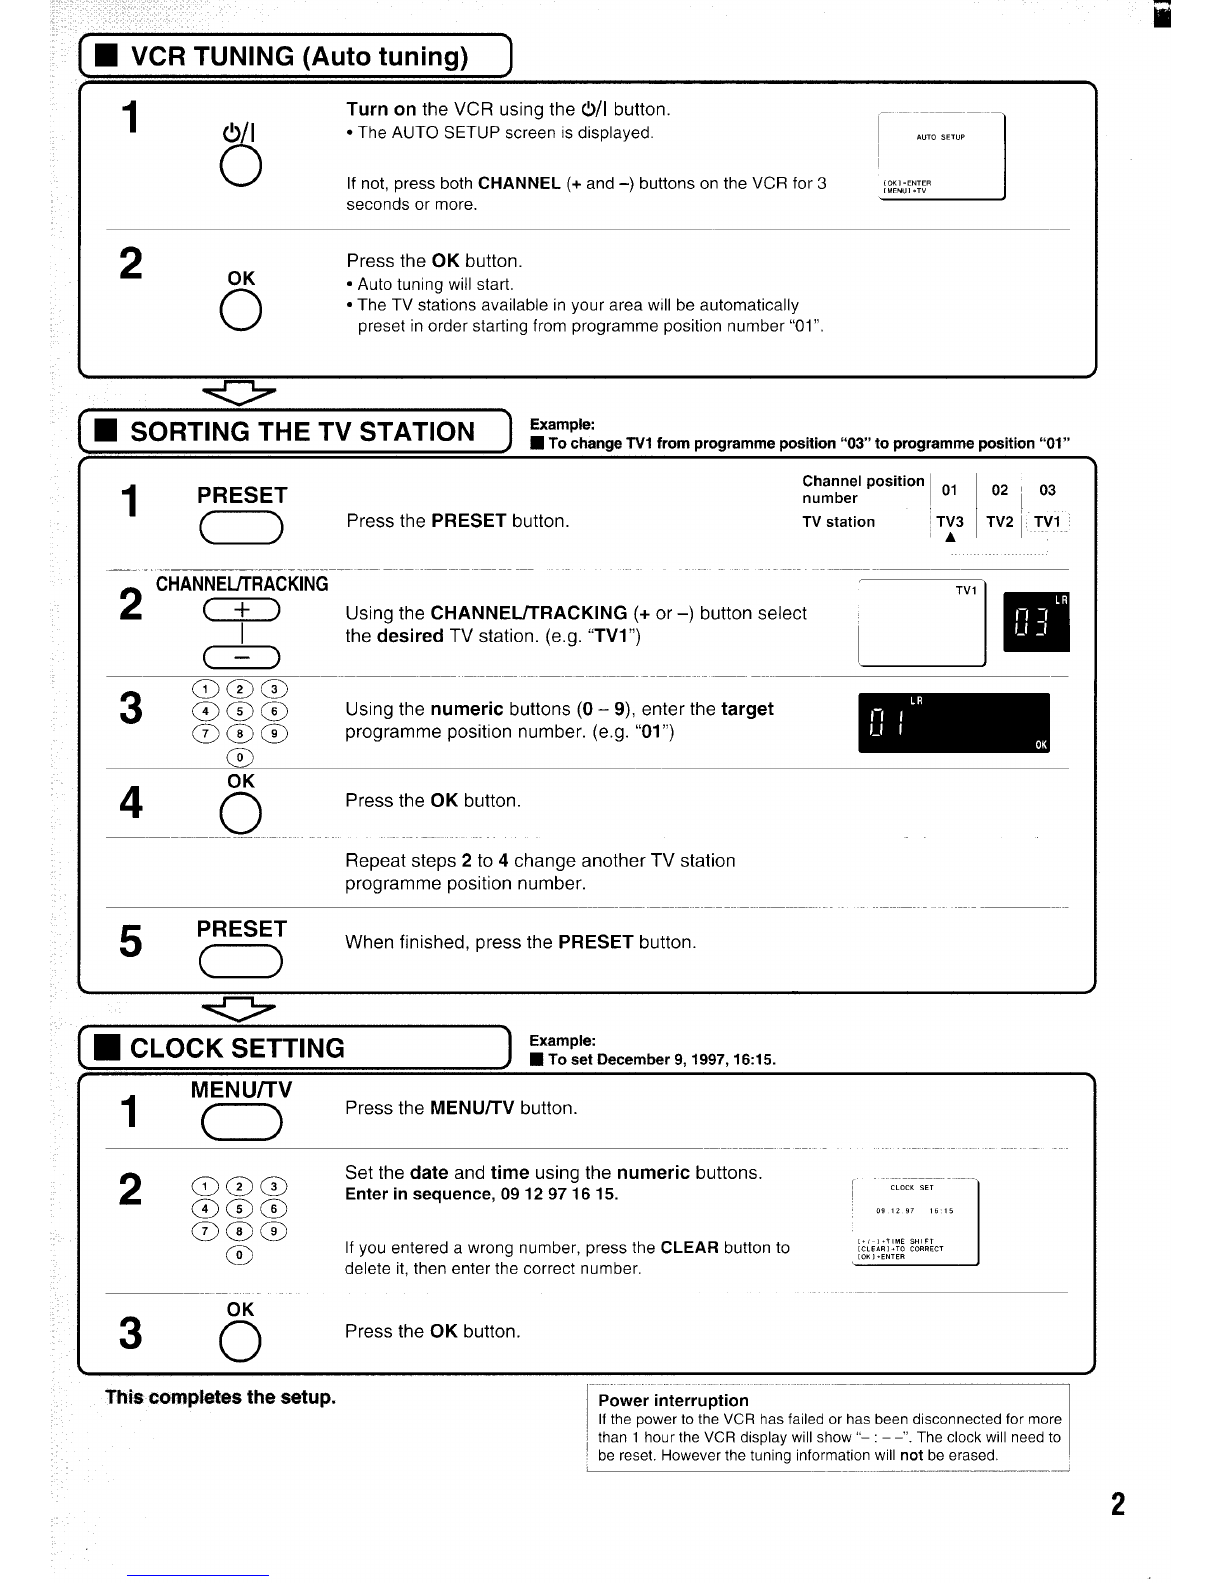
Sorting the TV stations
ExamP/e: To change TV1 from program me
position “03’ to programme position “01”,
Programme position I01 02 03
-—~ ..— ...........
TV station TV3 TV2 ~TV1 ~
1
2
3
4
t.~ ..........i
Press the PRESET button.
Using the CHANNEIJTRACKING (+ or –)
button select the desired TV station (e.g. TVl ).
r\
I
TV1 I
Using the numeric buttons (O–9), enter the
target programme position number (e.g. “01“).
Press the OK button.
Repeat steps 2to 4to change another TV
station programme position number.
5When finished, press the PRESET button.
Clock setting
ExamP/e: Date... 9December, 1997
1
2
3
Time... 16:15
Press the MENU~V button.
●When the date and time are not set, the
CLOCK SET screen will be displayed.
Press the numeric 4button,
Set the date and time usinq the numeric
buttons (O-9).
Enter in sequence, 0912971615
CLOCK SET
;-09-: i-z: -9i----- 756-75-~
[+/-l +Tl ME SHIFT
[CLEAR] .TO CORRECT
[OK 1*ENTER
If you entered awrong number, press the
CLEAR button to delet; it, then enter the
correct number.
Summer time/standard time adjustment
Press the CHANNEIJTRACKING (+ or –) button
to advance or retard the clock by one hour,
4When finished, press the OK button,
●Seconds will start counting from “00 as
the OK button is pressed.
The normal TV broadcast screen will
return,
Additional tuning adjustments
Fine tuning
If the tuning is not optimum, it can be
improved by manual fine tuning,
1Press the PRESET button.
2Press the FF or REW button to obtain the
best possible picture and sound.
3Press the OK button.
4When finished, press the PRESET button.
Skip function
If only programme position numbers 1to 30
have been preset, set the skip function for
programme position numbers 31 to 88, so that
only the preset TV stations will appear when
pressing the CHANNEIJTRACKING (+ or –)
button.
1
2
3
4
Press the PRESET button,
Using the numeric buttons or the
CHANNEIJTRACKING (+ or -) button,
select the programme position number to
skip.
Press the CLEAR button. The “S” indicator
will light,
To cancel the skip function, press the
CLEAR button again to erase the “S”
indicator.
Press the OK button.
Repeat steps 2to 4for every programme
position number to skip.
5When finished, press the PRESET button.
Manual tuning
This tuning mode can be used to modify the
settings entered by the Auto tuning function,
or to manually preset the TV stations to
particular programme position numbers,
1
2
3
4
Press the PRESET button,
Using the CHANNEIJTRACKING (+ or-)
button, select the desired programme
position number,
Press the PLAY button,
If the search stops on a broadcast other
than the one desired, press the PLAY
button again until the broadcast from the
desired TV station appears on the TV
screen.
Press the OK button when the desired TV
Is
PLAY
REW ~)\ ),-.
‘., FF
CHANNEL/
MENIJTV TRACKING
(+, -)
PRESET ~.r
7
CLEAR
o-9 000
0
cj OK
(New Zealand only)
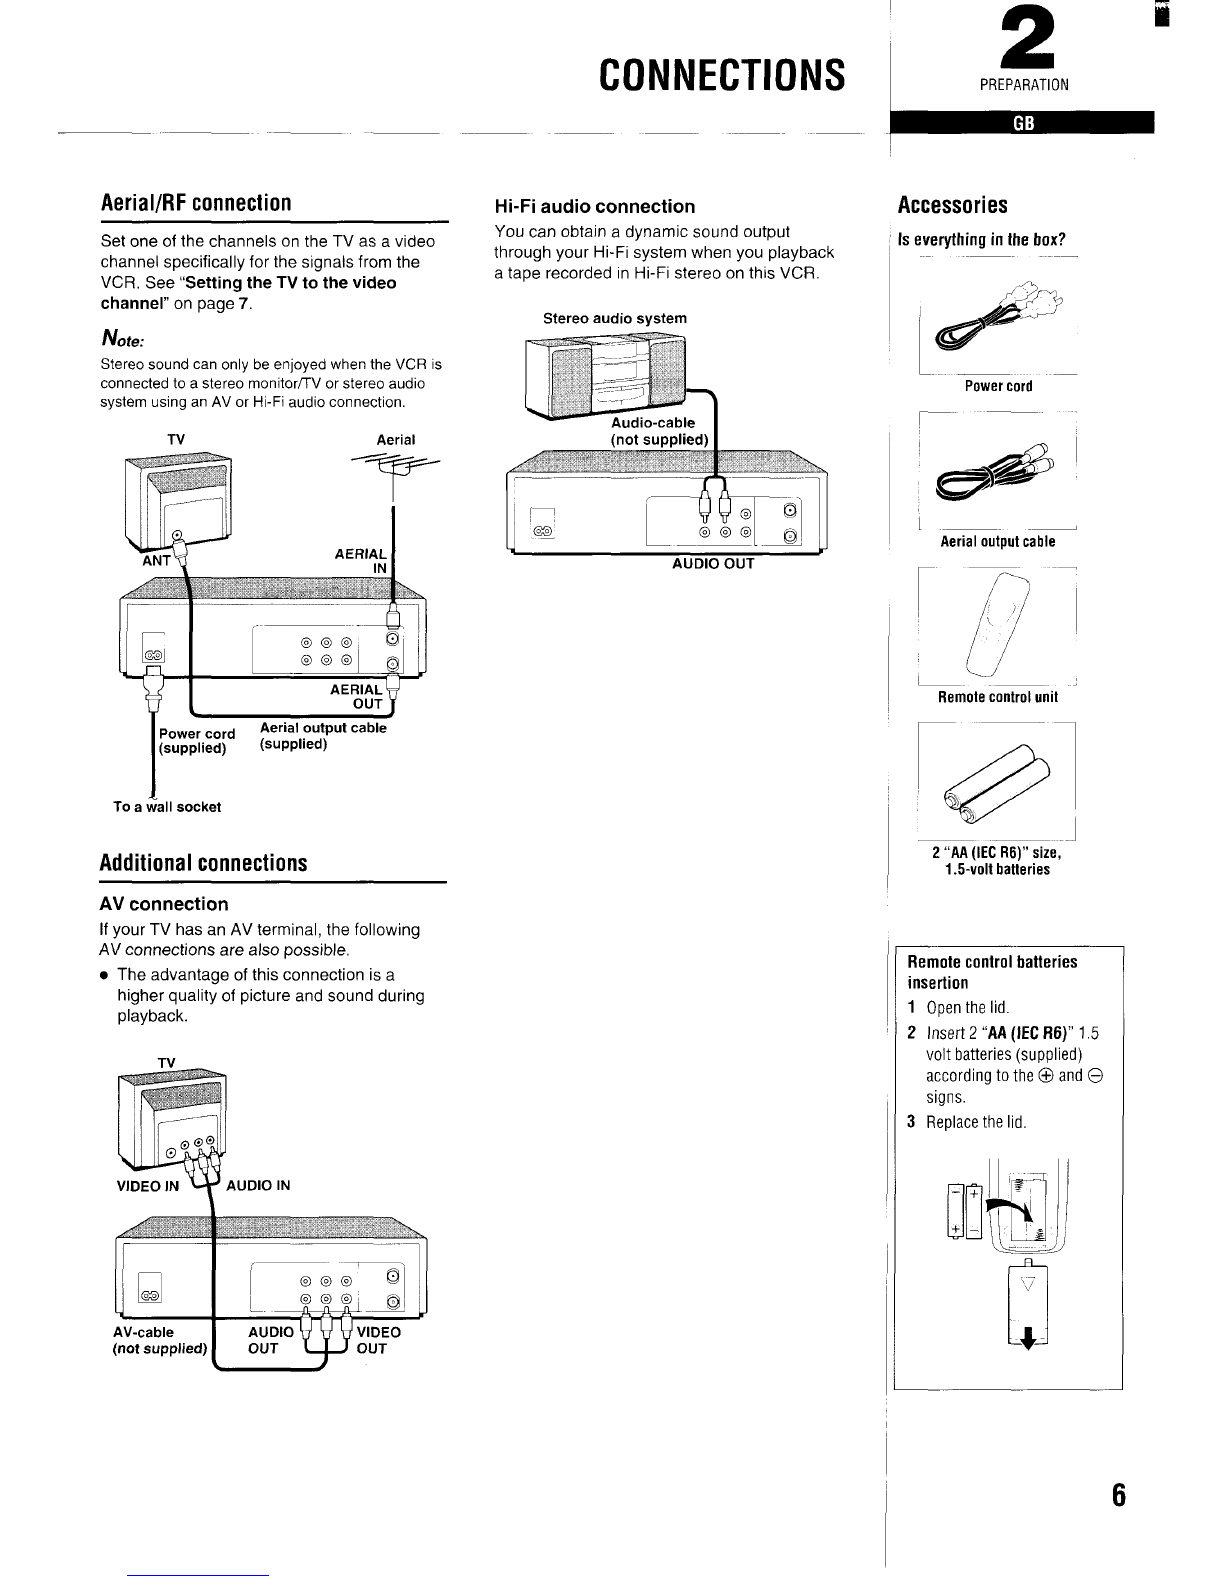
Tuningor presettingthe VCR
channels
This is very important for correct
G-Codeoperation.
Ideallyfor simpler operation,
channelsshould bepresetas
follows:
Television Programme
stat
ion Iposition number
TV 1fl—
TV 2 2
TV 33
Foradditional channelsin your area
it is overto you to selectthe most
logicalchannelpositionto place
them.
-
*When you usethe G-Code
function to programme a
recording from acertain
channel for the first time, it will
askyou the programme
position number that channel
was preset to. That setting will
be memorized and
automatically set the next time
the same channel is selected,
station appears on the TV screen.
Repeat steps 2to 4to preset another TV
station to another programme position number.
5When finished, press the PRESET button.
8