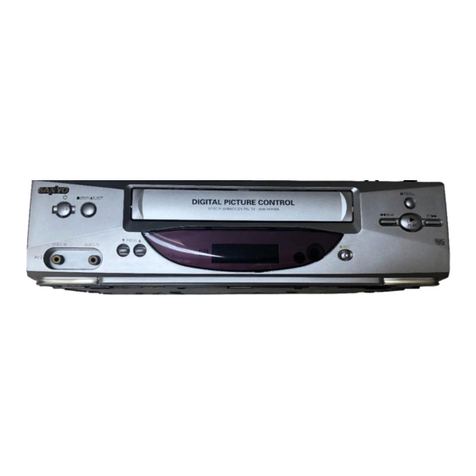
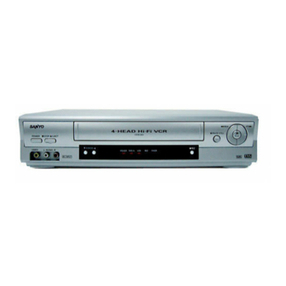
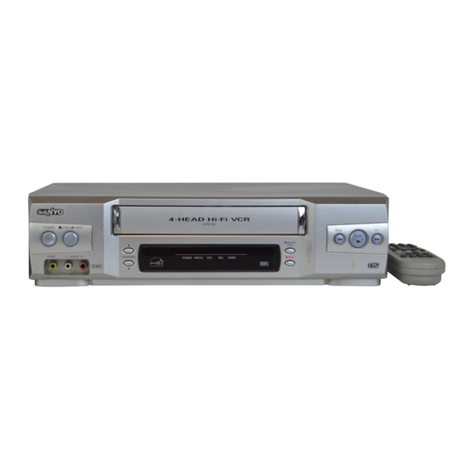
Sanyo VHR-590 User manual

FILE NO.
SERVICE MANUAL Siiiqphf
o
Video Cassette Recorder VHR-590
(Australia,NewZealand)
CONTENTS
SELF-DIAGNOSIS DISPLAY ............................ 2
l. DISASSEMBLY . . . . . . . . . . . . . . . . . . . . . . . . . . . . . . . . . ...5
2. ELECTRICAL ADJUSTMENT. ........................9
3. TEST POINTS FOR TAPE PATH ADJUSTMENT ....... 16 Please see other materials with Reference No.
4. PARTS LIST given in table below.
.ACCESSORIES ................................... 17
PACKING MATERIALS ............................. 17
CABINET &CHASSIS PARTS... .................... 17
Materials Model No. Reference No.
Mechanism V95 I
Manual Mechanism MM531433
II
MECHANISM PARTS .............................. 18 iI
ELECTRICAL PARTS ..............................20
CIRCUIT DIAGRAMS (Refer to the separate volume)
~“0”””“’”y ‘“T’CE~
The components designated by asymbol (~)in this schematic diagram designates components whose value are of special significance
to product safety. Should any component designated by asymbol need to be replaced, use only the part designated in the Parts List.
Do not deviate from the resistance, wattage, and voltage ratings shown.
NOTE: 1. Parts order must contain model number, part number, and description.
2. Substitute parts maybe supplied as the service parts.
3. N.S.PJ Not availableas service parts. ,, :>,.,*,.,
Design and specifications are subject to change without notice. .!,! l’ff!lA
PP4H/A, NZ 143155 35,36 REFERENCE No. SM531469

MechanismMode Display/HeadOutput Drop Warning Display/CylinderRotationAccumulated
Time Display
This unit displays the diagnosis contents of abnormalities and the mechanism mode on its display panel in 2-digit numbers.
When the head playback output has dropped, the “L” sign will be blinked. Some models (listed later) will also dispiaythe cylinder
rotation accumulated time.
These display shows the outline of the problems. Use it as areference when servicing the unit.
1.Self-DiagnosisContentsand MechanismMode Display
●When the STOP button on the remote control is pressed for about 10 seconds continuously, the self- diagnosis number will be
displayed on the reception channel display of the display panel and number indicating the failed mechanism mode (changed
mode when being shifted) on the tape counter “seconds” display for 3seconds each.
●During self-diagnosis display, displays other than the diagnosis number/mechanism mode number and the cylinder
accumulated rotation time display described later (some models only) will be turned off and when displays end, the normal
display will be returned automatically.
●Refer to “Self-Diagnosis Contents” for the self-diagnosis numbers and the “Mechanism Mode Display Contents” for the
mechanism mode numbers.
L‘;’’’’:’:
-w
Ill i{“””’”””?~~ng
,:::
Display panel
L! 2HI
00
II
Self-Diagnosis number Mechanism mode number
(Reception channel display) (Tape counter “Seconds” display)
Self-Diagnosis Contents
No. Problem Main Possible Cause Mechanism Operations and
State After Occurrence
00 There is no abnormality in the mechanism.
The cylinder motor does not rotate. ●The cylinder motor is faulty. Shifts to the STOP mode.
01 ●The control of the cylinder motor is
faulty.
●The tape winds around the cylinder.
The take-up reel does not rotate.
02 .The take-up reel is caught. Shifts to the STOP mode.
.The reel belt is faulty.
.The take-up torque has decreased.
The capstan motor does not rotate. .The capstan motor is faulty.
03 Shifts to the STOP mode.
.Tha control of the capstan motor is
faulty.
The tape cannot be loaded with the ●Error in the operations of tha tape Unloads, shifts to the INITIAL mode,
cassette inserted. loading mechanism,
(But unloading can be performed.) and the power goes off.
.Foreign particles in the tape Ioad-ing
04 mechanism.
●The tape end sensor is faulty.
●The reel brake of the tape cassette
has not been released.
Tape loading and unloading cannot be ●The tape guide is caught. The power isforcibly turned off with the
05 performed with the cassette inserted. ●The loading motor is faulty. mechanism at its current position.
●The control of the loading motor is
faulty.
–2–

L
15502(1 1D2
No.
06
07
08
09
Problem
Front unloading cannot be performed
whan ejecting the cassette.
(Front loading can be performed.)
Front loading and front unloading
cannot be performed when ejecting
the cassefie.
The mechanism becomes 1(REVIEW)
while moving from 2(IDLER), 3(STILL),
4(BRAKE), and to 5(STOP).
The mechanism becomes 7(INITIAL)
while moving from 1(REVIEW), 2
(IDLER), 3(STILL), 4(BRAKE), and to
5(STOP),
Main Possible Cause
oThe cassette drive mechanism is
faulty.
●The front door is caught.
●The tape cassette is caught in the
cassette drive mechanism.
●The main cam and front rack gear of
the front loading mechanism have
not engaged properly.
●The gears of the front loading
drive mechanism have not en-
gaged properly.
●The mechanism mode switch con-
tact is faulty.
●The mechanism mode switch con-
tact is faulty.
Mechanism Operations and
State After Occurrence
Front loads and shifts to the STOP or
INITIAL mode.
.When the power switch is turned on
before eject operations: Shifts to the
STOP mode.
.When the power switch is turned off
before eject operations: Shifts to the
INITIAL mode and the power goes
off.
The power is forcibly turned off with
the mechanism at its current position.
The power is forcibly turned off with
the mechanism at its current position.
Carries out tape take-up operations,
shifts to the INITIAL mode, and the
power goes off.
Note: For details of mechanism operations corresponding to the mechanism positions of the self-diagnosis numbers 08 and
09 above, refer to the separate volume on the V95 Imechanism manual.
These manual reference numbers are shown in the cover.
Mechanism Mode Display Contents
Mode No. Mechanism Mode Mode No. Mechanism Mode Mode No. Mechanism Mode
00 CASSETTE OUT 08 PLAY 16 VIDEO INSERT
01 STANDBY 09 REC 17 VIDEO INSERT -PAUSE
02 STOP 10 AUDIO DUBBING 18 AUDIO/VIDEO INSERT
03 STILL 11 X2 SPEED PLAY 19 REVERSE X2 SPEED PLAY
04 REC-PAUSE 12 CUE
05 AUDIO DUBBING -PAUSE 13 REVIEW
06 FRAME ADVANCE 14 FAST FORWARD
07 SLOW 15 REWIND 99 OTHERS
1-
2. HeadOutput DropWarning Display
.
.
When the STOP button on the remote control is pressed for 10 seconds continuously 10 seconds after play starts, “L” will
be displayed blinking at the first digit of the minutes position on the tape counter when the head output is lower than
the specified value to indicate an abnormality.
The cause of the abnormality maybe due to drop in the playback output caused by drop in the efficiency of the cassette used
or head clogging. Refer to “Head Playback Output Voltage Check” as ameans to judge the abnormality.
- - ,...,: ,j..’...,
Display panel Itl ““ I:.,, 1~ J
L! J~...i ,;........!‘L :~“’lJ ll_
IAI
I
Head output drop warning display
(Tape counter “lst digit of Minutes.” position)
–3–
15S01(N) D3
Head playback output voltage check
Warning
iassette Used Display Envelope Detection Output Voltage Main Cause
Envelope detec- lv -----------------------------------
Cassette tion output
with (IC301 Pin 25 or
normal C3016 HOT side:
see Fig. 2-l-1) OV k+05-095v g:~::::z
playback Switching pulse
output (TP1 83: see Fig. CH-I CH-2
2-l-2)
Envelope detec- 4V -----------------------------------
tion output
dt~” (IC301 Pin 25 or
C3016 HOT side:
blinking see Fig. 2-l-1) OV k~~:~than ‘::E=:::
Switching pulse been performed accurately
(TF’1 83: see Fig. CH-1 CH-2 ●One video head is clogged
Recorded 2-l-2) ●One video head has worn out
cassette
(With tabs) Envelope detec- 4V ----------------------------------- When the average output voltage
tion output
&05v
of the two channels is less than
“L” (lC301 Pin 25 or
C3016 HOT side:
blinking ~Less than ●Tracking adjustment has not
see Fig. 2-l-1) OV t0.5V been performed accurately
Switching pulse
(TPI 83: see Fig. CH-1 CH-2 ●Both video heads are clogged
2-l-2) ●Both video heads have worn
out
Envelope detec- 4V -----------------------------------
tion output
,, ,,
L(IC301 Pin 25 or
Rental C3016 HOT side:
blinking see Fig. 2-l-1) OV +Cr::than %:E:::
cassette Switching pulse been performed accurately
(Without (TP183: see Fig. CH-1 CH-2 ●One video head is clogged
tabs) 2-l-2) ●One video head has worn out
Some rental cassettes may have extremely low video playback outputs even when both video heads are
normal. As the average output voltage of the two heads may be less than 0.5V for some, no warning displays
will be shown.
3. Cylinderrotationaccumulatedtime displayOnly VHR-795E,VHR-775Eemploysthisfunction
(However,thisfunctionwillbe equippedonlyfrom the middleof produti”on.
.
.
Press the STOP button on the remote control for approximately 10 seconds and the cylinder rotation accumulated time
excluding the cassette out and standby operation time will be displayed on the “Hours” display in units of 100 hours. (“33” will
be displayed for 3seconds for 3,300 to 3,399 hours.)
To erase the cylinder rotation accumulated time display, press the RESET button on the remote control during the
accumulated time display.
Cylinder rotation accumulated display (Tape counter “Hours” display)
–4–

y15501(N) Ml
1. DISASSEMBLY
1-1.REMOVAL OF CABINET,MECHANISM UNIT,AND MAIN BOARD
REMOVING THE CABINET PARTS (Fig. 1-1-1 )2. Remove the screw@) at the back of the chassis.
1. Remove the cabinet and bottom cover by removing the 3. Remove the red screw@ in the chassis, remove the red
four screws ~and four screws@. screw @, and remove the holder in this order.
2. Remove the front panel by removing the locks of the 4. Remove the two screws@ and two screws@) of the
clamps (A) using ascrewdriver, etc. and slightly rotating mechanism unit. The two screws (@ of the cassette tray
the bottom part in the direction of the arrow. can be removed easily by pushing the tray lock lever in
Notes: ●Electrical adjustments for the this model can be the arrow direction to remove the lock as shown in the
performed with only the cabinet removed. enlarge view Aand by pushing the lid opener lever in
●When replacing the bottom cover, do not tighten the arrow direction to remove the lock as shown in the
the screws @too much. Excess tightness may enlarge view B.
damage the screw taps on the chassis. 5. Lift up the whole mechanism unit and main board (CP-I
PWB assembly), and as shown in Fig. 1-1-3, push the two
REMOVING THE MECHANISM MAIN UNIT AND THE lock clam~s (D) of the chassis in the arrow direction so
CP-1 PWB ASSEMBLY (Fig.1-l-2 and l-l-3) that they can be removed from the chassis.
After removing the cabinet parts, remove the mechanism
unit and the CP-I PWB assembly connected as follows.
1. First, remove the red screw@ of the TB-2 PWB, spread
M-PP4HIG-1
Fig.1-1-1
out the lock clamps (B) and (C) in the arrow direction
slightly and remove the TB-2 PWB and TM-1 PWB as
shown in Fig. 1-1-2.
-5–

15501(N) M2
M-PP4HIG 2
Tray Lock Lever
B
Fig.
1-1-2
M-PP4tVG-3
TB-2
PWB Assembly
Chassis
Fig. 1-1-3
-—
–/
-
–6–

r15502(1) M3
1-2.TEMPORARILYSEITING UPAND CONNECTINGCP-1PWB ASSEMBLY
The following is an example of how to place and connect the main board without ajig, when repairing the CP-1 PWB
+assembly.
1. Place the mechanism unit and main board up side down 2. Operate the unit using the buttons on TM-1 PWB or the
as awhole on aflat surface with the foil side of the main remote control.
board facing up.
L
-
‘L
M-PP4HIG-4
TM-1
CP-I PWB Assembly (Foil side)
\
s
Pw
c
\
Mechanism Main Unit Fig.1-1-4
1-3.INSTALLATIONOF THEFRONTPANEL
When installing the front panel to the chassis aller repaires and adjustments.
1. Pressing down the door opener lever of the mechanism Note: Opened cassette door position does not install the
main unit. front panel to the chassis.
2. Set the cassette door to half-opened state as shown in
Fig.1-l-5, and install the front panel to the chassis.
M-PP4H/G-5
;Ut&dg
Front Pa
(Position A) Cass~tte Door
(Position B) Fig. 1-1-5
–7–

1553s(N) L1
1-4.MAIN CIRCUITBOARD LOCATIONS
L-PP4WG
AD-1 PWB \
~VP-1 PWB Assembly
3in 1Tuner
(Tuner/lF/RF Converter)
TN-3 PWB (Australia)
TB-2 PWB
~lpWB>~ PW-IPWB

15601(N) S1
2. ELECTRICALADJUSTMENT
VCR PRESElllNG
This VCR need three basic presetting by using the menus displayed on-screen. After all connection have been made, then follow
steps 1to 3to preset the VCR.
The three presetting steps will be displayed in sequence on TV screen. The setting are entered with the remote control.
Turn on the VCR
1. Adjusting the TV receiver to the video channel: The AUTO SETUP screen will appear. When the video channel has been
preset, press the OK button on the remote control.
2. Country selection: Using the numeric button, select the country of use.
3. Language selection: When the desired language has been select, press the MENU/TV button directly before prevent auto
tuning will start.
When steps 1to 3have been finish, ready to operate the all operating mode.
2-1.SERVOCIRCUITADJUSTMENT
.These adjustments should be done upon completion of the tape transport adjustments.
●If the tape transport adjustments (except the tilt adjustment) are done after these adjustments, follow the procedures again
in section 2-1-3, “switching position adj. ”
●When acassette tape is loaded, auto-tracking will be set immediately after starting the first playback, as this will deviate
the tracking center set Be sure to press the channel buttons (+) or (-) several times directly after starting playback to prevent
Lauto-tracking from being set.
2-1-1. TEST EQUIPMENT AND STANDARDS REQUIRED
Oscilloscope Vertical sensitivity :5 mV/DIV, external trigger
Bandwidth :more than 10 MHz
Alignment Tape VHJ-0009 or VHJ-0023 :SP mode, monoscope, 6KHz
Blank Tape VHS-type cassette tape
Monitor TV
2-1-2. LOCATION OF ADJUSTMENT POINTS
L
“L
P36200E1S
*
O;---,CJ
1:
.....
CN352
ICI 02 D
Power
supply eTpl~~
Pari ............
.......... 0
Iclll
1
,-, 48
~~
Q
37
:: 13
:1 Iclol !/--., :
: ;- Fti: 2a !‘V
~~ >
::
L: !:
,-.. “&
:(....; ,
, .... ,
1.----}
~:
::
,:
-
PIC301 ‘:;;og4 :,
! [TN-3
~, ~o
E@EEl [~ ::pwB
,:::
AD-5 ~: ; ~h
.............!
................. PWB :: ;-j;,
L.....---...>- PWB IC602
:-...4-? ~~ $631
~%i!ian ~
~:
!. ...;
on u[SEPARATION
1
iJ1JLI
CP-1 PWB (Foil side) Fig. 2-1-1
–9-

15s01(N) S2
lli%u
IP3SOOC1S -TP183 m
Shield cas
VP-1 PWB Assembly Fig. 2-1-2
Note:
.Self-recording means “Record any broadcasting or video
signal and play back the just-recorded portion. ”
2-1-3. SWITCHING POSITIONADJ.
\Meesuring Point [Meesuring Equipment IAdj. Condition I
TPIOI Oscilloscope PLAY mode
(VIDEO OUT) Alignmenttape
TP183 (SW-P) (VHJ41009 or
VHJ-0023)
Adj. Locetion Adj. Value
IVR351 (SW-P) 16.5 H*0.5H I
1. Play back the alignment tape.
2. Set the tracking control position to the center by pressing
CHANNEL buttons (+) and (-) simultaneously.
Note: To set tracking to center accurately, press the two
CHANNEL buttons together.
3. Adjust VR351 (SW-P) so that the width of “T” becomes
6.5 H*0.5 Has shown in Fig. 2-1-3.
WS-SWP
IFront edge of’
vertical sync signal
J!t
Rise RF. SW. PULSE Fig. 2-1-3
2-1-4. SLOW TRAKCING ADJ.
Meesuring Point
Picture of
monitor TV
Vleesuring Equipment
Color bar generator
or
broadcasting monitor
Adj. Condition
Self-recording
(SP mode)
SLOW mode
Blank tape
----—--——.
Self-recording
(LP mode)
SLOW mode
Blank tape
Adj. Location Adj. Value
CHANNEL (+) button
CHANNEL (-) button
1. Set the tracking control to the center position by press
ing CHANNEL buttons (+) and (-) simultaneously.
2. Play back the self-recorded pottion and set the VCR in the
SLOW mode with the remote control unit.
3. Confirm that there is no noise on the slow playback
display.
4. Press the CHANNEL button (+) about three times and
check that noise dose not appear at the upper part of
the display.
5. Adjust the tracking control to the center again.
6. Press the CHANNEL button (-) the same number of
times as in the step 4(about three times) and check that
noise dose not appear at the lower part of the display.
Note
●CHANNEL button also servers as TRACKING button.
–lo–
----

15501(N) VI
2-2.VIDEOCIRCUITADJUSTMENT
L* In this model, video circuit adjustments are not performed. To check whether operations are normal, check the AGC level and
PB-Y level using the following method.
●Use the adjustment relay jig to provide simple repairing of the VP-1 PWB assembly.
2-2-1. TEST EQUIPMENT AND STANDARDS REQUIRED
Color Bar Signal Generator PAL Color bar signel with 100% white level (EBU color bar signel)
Oscilloscope Vertical sensitivity :5 mV/DIV, external trigger
Bandwidth :more than 10 MHz
Oscilloscope Probe Input capacity :Iessthan 25 pF (10:1)
less than 40 pF (1:1)
Covering frequency :DC -40 MHz (10:1)
DC-30 MHZ(1:I)
Digital Voltmeter DC range
Alignment Tape VHJ-0008 or VHJ-0023 :SP mode, color bar, 1kHz
(Color bar signal waveform is described below. Refer to Fig. 2-2-1)
Adjustment Relay Jig VHJ-0067 :12-wire flat cable for VP-1 PWB assembly
ALIGNMENT TAPE COLOR BAR SIGNAL
WPV-TCS 9
~:=~$
g--m
~s~>g%~%
hs>ou=rxfi Whlta
Iv
Vp-p
H. Sync signal
Color bar signal waveform (VHJ-0008)
Fig. 2-2-1
WPV-TCP
w
$%
sj:~j’g:
(75%)
vu lmo~
White Black
Color bar pattern (VHJ-0008) on monitor TV
Fig. 2-2-2
ADJUSTMENT RELAY JIG
Connect the flat cable end from the cylinder assembly to the
VP-1 PWB assembly using the relay jig to provide simple
repairing or adjustment of the VP-1 PWB assembly, as shown
in Fig. 2-2-3. Further, when adjusting the VP-1 PWB assembly,
be sure to make contact an end of shield case with bracket of
the VP-1 PWB assembly to maintain the shield effect. If the
VP-1 PWB assembly does not contact, there is insufficient
ground and no proper play back image can be obtained.
PPV-PP4HIE
dP-1 PWB Assembly3!?’
Relay Jig U
VHJ-O067
Flat Cable
/
Cylinder Assembly e,
.
Fig. 2-2-3
=tfu-
~
.....
3
.. . .. —___ .
–11–

16501(N) V2
2-2-2. LOCATfON OF TEST POINTS
P36200E1V
0TP102 L
m
by:.--_.-----...------_---__
------------------------?:!
----------------------------------
-----------------------
, , 1
~IC141
IC351
o
TP103~
o
148
0
37
13 Iclol
25
IC301
c)
iii.-.. l I
CP-I PWB (Foil side) Fig. 2-2-4
2-2-3. AGC LEVEL CHECK.
Measuring Point Measuring Equipment Adj Condition
—0.5 Vp-p *0.05 Vp-p
2-2-4. PB-Y LEVEL CHECK.
IMeasuring Point IMeasuring Equipment
TPIO1 Oscilloscope
(VIDEO OUT)
Adj Condition
PLAY mode
Alignment tape
(VHJ4008 or
VHJ-0023)
Adj. Location Specified Value
—1Vp-p *0.1 Vp-p
1II
1. Connect the color bar generator to the video input
terminal. 1. Terminate the video output terminal with a75Q
2. Make sure that the AGC level is 0.5 Vp-p *0.05 Vp-p as resistor.
shown in Fig. 2-2-5.
WPV-AGC 100’?4.White
/
A)
0.5 Vp-p k0.05 Vp-p
Lr
r
Fig. 2-2-5
2. Make sure that the video luminance signal level is 1Vp-p
to.1 Vp-p. (Refer to Fig. 2-2-6)
ww-pay White
1Vp-p
+‘H+Fig. 2-2-6
–12–

15501(N) Al
2-3.AUDIOCIRCUITADJUSTMENT
●
‘L Before making these adjustments, be sure
adjustments described in the tape path
to make the ●
adjustment,
especially the ACE heads adjustments (refer to the
separate volume “Mechanism Manual”) so that the tape
traveling between thesupplysideguide roller and loading
guide post runs without fluttering or curling.
2-3-1. TEST EQUIPMENT AND STANDARDS REQUIRED
Oscilloscope
AC Voltmeter
Before making these adjustments (except the ACE heads
adjustments), be sure to make the adjustments described
in section 2-1, “Servo Circuit. ”and section 2-2, “Video
Circuit. ”
I
Vertical sensitivity :10 mViDIV
Bandwidth :more than 30 MHz
Effective value indication
Input frequency :10 Hz -20 kHz
Input impedance :more than 1MQ
Measurement level :1 mV (full scale)
Frequency Counter input frequency :20 Hz -IOMHZ
,
Blank Tape IVHS-type cassette tape I
2-3-2. LOCATION OF ADJUSTMENT POINTS
P36 100CIA
z
J
● ● TP232
VF31 w‘p&’ e
m
I I
IC232
TP~33
B@
-..+.
,.’
,, ‘.
:‘..n
:’ E@
.:’ .
‘.. .“
‘., ,,’
.,,-...
IC231
AD-1 PWB (Parts side) Fig. 2-3-1
I
L
–13-

15501(N) AZ
AUDIO NORMAL CIRCUIT
Note:
.Set the following remote control button to the positions
indicated below, before making following adjustments.
REMOTE CONTROL BUITON POSfTION
TAPE SPEED SP
AUDIO FM (Hi-Fi) CIRCUIT
Note:
.Set the following remote control button to the positions
indicated below, before making following adjustments.
IREMOTE CONTROL BUITON IPOSITION I
ITAPE SPEED ISP I
IINPUT IAV IIINPUT IAv I
AUDIO L
2-3-3. BIAS LEVEL ADJ.
AUDIO Lor R
2-3-4. A-FM CARRIER FREQUENCY ADJ.
~
Measuring Point Measuring Equipment Adj. Condition
Adj. Location Adj. Value
VR231 (BIAS) 26 mVrms
1. Load the VCR with ablank tape and select the REC (SP)
mode without all incoming signal.
2. After confirming on the oscilloscope that a70 kHz *5kHz
sine wave is being output, adjust VR231 (BIAS)SO that the
AC voltmeter’s reading is 26 mVrms.
Measuring Point Measuring Equipment Adj. Condition
TP233 Frequency counter REC (SP) mode
Blank tape
Adj. Location Adj. Value
t
VR233 (L-FO)
i
1.4 MHz +5 kHz
---- ————--------- ----- —-- ———-—-—---
VR234 (R-FO) 1.8 MHz *5 kHz
1.
2.
3.
4.
5.
6.
Press the INPUT button on the remote control and select
“AV” .
After recording/playing back for 10 to 20 seconds with
the no-signal input, select Lch with the AUDIO button on
the remote control, and check the reading of the counter
connected to TP233.
If the carrier frequency of Lch is higher than 1.4 MHz,
rotate VR233 (L-FO)slightlyto the right, towards the board
component side.
Next switch to Rch and check the reading of the counter.
If the carrier frequency of Rch is higher than 1.8 MHz,
rotate VR234 (R-FO) slightly to the right, towards the
board component side.
After recording/playing back for 10 to 20 seconds with
the no-signal input again. If the carrier frequency of Rch
is higher than 1.8 MHz, rotate VR234 (R-FO) slightly to
the right. If lower, rotate slightly to the left. Switch to Lch
using the AUDIO button. If the carrier frequency of Lch is
higher than 1.4 MHz, rotate VR233 (L-FO) slightly to the
right. If lower, rotate slightly to the left.
Repeat recording/play back and checking of the
frequencies until the carrier frequency of Rch becomes
1.8 MHz *5kHz and that of Lch becomes 1.4 MHz t5kHz.
Note: The carrier frequency of the part recorded first is not
stable because it is written over. Therefore, no signal
recording for 10 to 20 seconds must be performed.
–14–

15501(N) Xl
2-4.MTS DECODERCIRCUITADJUSTMENT
L“ If adjusting the MTS Decoder circuit, special equipment .Before making these adjustments, be sure to make the
shown in section 2-4-1. is necessary. adjustments described in section 2-1, “Servo Circuit.”,
.Improper adjustment will cause loss of performance of section 2-2, “Video Circuit.”, and section 2-3, “/lUdiO
stereo sound and bilingual sound detection. Circuit.”
2-4-1. TEST EQUIPMENT AND STANDARDS REQUIRED
Audio Multiplex TV signal Generator
Oscilloscope
AC Voltmeter
Low Path Filter 15 kHz (48dB/oct)
2-4-2. LOCATION OF ADJUSTMENT POINTS
P36200E1X
;“ ;
L. ---,
CN303,8’” “>
h
rvvo :
IC602 1
11
:-”..;”:
::
0
[ [ V~631 I
:,
...../ Q~SEpARATION [
nl
CP-1 PWB (Foil side) Fig. 2.4.1
Note:
●Set the following remote control button to the positions
indicated below, before making following adjustments.
REMOTE CONTROL BUITON POSITION
TAPE SPEED SP
INPUT AV
AUDIO LR
2-4-3. SEPARATION ADJ.
rMeasuring Point Measuring Equipment ADJ. Condition
AUDIO OUTPUT Audio Multiplex TV E-E mode
terminal signal generator
EURO pin3(Lch) Oscilloscope
Low path filter
15 kHz (48 dB/oct)
IADJ. Location IADJ. Value
VR631 (SEPARATION) Minimum level
1.
2.
3.
4.
Input the output signal of the audio multiplex TV signal
generator into the VCR ANT input terminal.
Connect the oscilloscope to the audio output terminal
EURO pin3 (Lch) of the VCR via the LPF.
Set the audio multiplex TV signal generator as follows.
Audio signal Rch: 1kHz 30% modulation
Audio signal Lch: Unmodulation
Adjust VR631 (SEPARATION) so that the output of the
audio output terminal (Lch) is brought to its minimum
level.
L
–15–

15501(N) T1
2-5. IFCIRCUITADJUSTMENT
.In this model, the circuits of the TUNER, IF, and RF Note The 3in 1tuner dose not need any adjustments,
converter have been made into one. Therefore, should because precise adjustments were down befor
one circuit malfunction, the whole unit must be replaced. shipment.
.The adjustments for the IF (RF AGC) circuit of the 3in 1
tuner are described below.
2-5-1. TEST EQUIPMENT AND STANDARD REQUIRED
IMonitor TV II
2-5-2. LOCATION OF ADJUSTMENT POINT 2-5-3. RF AGC ADJ.
P36200B1T5
Rear Panel <0 h
,inl,unerm i--l!T
o
. .
X- These VRS are
positionad with
the models. WI::
—
VR -] Ml I[
II
I“qll
AD-1
PVJB
3in 1Tuner Fig. 2-5-1
IMeasuring point IMeasuring Equipment\ Adj. Condition I
Picture of Monitor TV E-E mode
monitor TV
Adj. Location Adj. Value
VR (RF AGC) SIN is best point
(on the 3in 1tuner) .-
1. Connect the monitor TV to the VHFIUHF antenna output
terminal.
2. Connect the VHF or UHF antenna to the VHF/UHF an-
tenna input terminal.
3. Receive the middle electrical field (70 dBp -90 dB@ of
the VHF or UHF channel, and slowly turn the VR (RF AGC)
from the point where snow-noise is present to the
point where it just disappears from the monitor TV.
4. Confirm by monitor TV that there is no beat and satura-
tion (S/N is best point) when receiving any TV channel.
3. TEST POINTS FORTAPEPATHADJUSTMENT
Test pointa TP182 (ENV) and TP183 (SW-P) for tape path adjustment are shown in figure below.
For adjustment, refer to the separate volume “Mechanism Manual (MM531433).”
P3600C1 T-TP183 m
TP181 1~{
Shield case m- 1Ir’p’”~
u
:;(,:.,- 1I
.. .,
)
l’”
wt-w
.--..._.—
VP-1 PWB Assembly Fig. 3-1
-.
–16–

4. PARTS LIST
LOC6TION PARTS NO.
ACCESSORIES
645011 633?
613 1538559
613 1640801
613 096 6773
OR 613011 7359
OR 613 1326132
OR 613 132 5975
OR 645 006 9406
A645 002 7642
OR A6450122606
DESCRIPTION
REMOCON,INFRARED
(WITH COVER BATTERY)
COVER BATTERY(FOR REMOCON)
INSTRUCTION MfiNUFIL
CABLE,ANT
CORD
CABLE,ANT
CORD
CABLE,ANT PAL
CORD,POWER
CORD,POWER
***** *%*x* ***** *******%********%**%**********%%*%%*****%%****%*
PACKING14ATERMLS
613 1643918 CARTON COSE(VHR-590 RUSTRALIA ONLY)
OR 613 164 3925 CARTON CASE
(VHR-590 NEW ZEALONO ONLY)
613 1609143 CUSHION,FRONT
613 1609150 CUSHION,BACK
613099 1768 POLYE COVER,INNER-K
Undesignated numeral shows
Location No.: CH-
N.S. P.: Not available as service parts
Met
Y
+7
LOCATION PORTS NO.
CABINET&CHASSIS PARTS
CH-1
CH-2
CH-3
CH-4
CH-5
CH-6
CH-7
CH-8
CH-9
CH-10
OR
CH-11
CH-14
OR
CH-17
CH-19
CH-20
CH-21
OR
CH-22
CH-23
CH-24
CH-25
CH-28
OR
CH-29
411 1370007
411 021 7907
613 1603363
4120525108
4120289406
613 1606036
411 021 3800
613 1640771
613 1603615
613 1640900
613 1640917
6450046025
613 161 0200
613 161 6226
613 1605091
613 1605022
613 1608030
613 1643840
613 1643857
613 1530478
613 1643819
613 1540781
613 121 1001
613 1640429
613 1640436
411 001 1901
DESCRIPTION
SCR L-TPG BIN 3X1O
SCR S-TPG BIN 4X12
COMPL PWB,VP-1
SPECIAL SCREW-2.6X12
SPECIAL SCREW
COVER TOP
SCR S-TPG BIN 3X1O
TERMINAL
COMPL PWB.PW-1
COMPL PWB,CP-1-fl
(VHR-590 AUSTRALIA ONLY)
COMPL PWB,CP-1-FI
(UHR-590 NEW ZEALANO ONLY)
TUNER,RF/TU/IF
COMPL PUB,TN-3
(UHR-590 AUSTRALIA ONLY)
COMPL PWB,TN-5
(VHR-590 NEW ZEALAND ONLY)
COVER BOTTOM
COMPL PUB,TB-2
COMPL PWB,TM-1
000R CASSETTE
(VHR-590 fYJSTRf)LIAONLY)
DOOR CASSETTE
(VHR-590 NEW ZEALANO ONLY)
SPRING
ASSY,CABINET FRONT
OEC INOICATOR
STOND,FELT,FRONT
COMPL PWB,AO-1
(VHR-590 AUSTRALIA ONLY)
COMPL PWB>AO-1
(VHR-590 NEW ZEALANO ONLY)
SCR S-TPG BIN 3X6
L! ,.p
EEiEiEl 4- 4“ CABINET &CHASSIS PARTS
–17–

MECHANISMPARTS
LOCATION PARTS NO. DESCRIPTION LOCATION
MECHANISMPARTS 1
11000
OR
11100
OR
11200
OR
11300
12000
OR
13000
OR
21000
22000
30000
OR
40000
OR
50000
OR
0099
0100
0300
040B
040C
0400
0800
0900
1000
1100
6070
6073
...............
613 164 5981
673 164 5974
6130962751
613095 9881
613 164 6001
613 164 5998
411 038 1608
613 1550759
613 1598980
412048 8601
411 047 4805
613022 4019
6450084454
613097 2170
613 163 7986
412 036 5001
412 036 0808
4120364905
412036 0709
613 1520578
613 1520738
613 1520660
613 1520417
613 152 0707
613 1520424
613 1522794
613 1522800
613 151 9480
613 151 9299
411 021 7907
4120488205
............
COMPL.CYLINDER,4H6P-R2
ASSY,CYLINDER,LWR 6K
OSSY)CYLINOERpLWR 6K
OSSY,CYLINDER.UPR 4H6P-R2
ASSY,CYLINOERtUPR 4H6P-R2
SCR PflN+W3X8
MOUNTINGJCYLINOER
MOUNTING,CYLINOER
SPECIAL SCREW-2.6X7
SCR Pr4N+FLG2.6X6
ROTORtMOTOR CYL
MOTOR?STOTOR?CYL OC 2W
SPACERJMOTOR
SPACER,MOTOR
SPECIAL SCREW 2.3X6
SPECIAL SCREW 2.3X6
SPECIAL SCREW 2.3X1O
COMPL.CASSETTE MECHANISM
STANO.L
FRAME,UNDER
SPRING,LIO OPENER
LEUER.RELEASE
SPRING,TRAY LOCK
GEAR,LOCK
GEAR;PINION
LEVER,OOOR OPENER
HOLOER,GEAR
SCR S-TPG BIN 4X12
SPECIAL SCREW-2.6X6
6102
10120
10140
10150
10400
20100
20200
20210
OR
OR
20300
20310
20400
20410
20600
20700
30300
30400
30500
30600
30700
30800
30900
31100
31700
31800
40100
40200
40300
50100
50110
50200
50210
PARTS NO.
613 151 6618
407 162 1102
407 1628705
4070430101
412048 8106
613 1605503
613 1604193
412021 5306
4120158900
4120158504
613 151 8889
4120487505
613 151 9701
4120454606
613 1522749
613 1522756
613 1603356
613 1520295
613 151 9411
613 1520318
613 1606166
613 1592193
613 1636996
613 1520189
613 151 8490
613 1520356
613 151 8759
613 1605282
613 1520271
6450089749
4120489707
6450085192
4120523500
m
/40200
nA. 801OA
--..-
OESCRIPTION
P#lo
LEO LN59L,(08003)
PHOTO OIOOE PN263L-(NC)
PHOTO OIOOE ON2170-R
SPECIAL SCREW-2.6X8
ASSY,REEL SUPPLY
ASSY,REEL TAKE UP
SPECIAL WASHER 3.1X6X0.3
SPECIAL WASHER 3.1X6X0.4
SPECIAL WASHER 3.1X6X0.5
COMPL,MOUNTING CLUTCH
SPECIAL SCREW-2.6X4
PULLEY,REEL
SPECIAL WASHER 2.4X6X0.25
GEAR,REEL S
GEAR>REEL T
ASSY)BRAKE SOFT T
SPRING,SOFT T
LEUER,SOFT S
SPRING.SOFT S
ASSY,BRAKE!S
OSSY?BRAKE T
SPRINGPBROKE
SLIOE?ACT BRAKE T
ASSY,BR(3KECAPSTAN
SPRING?BRr3KECAPSTAN
ASSY}LEVERrBT
ASSY)BRAKE$BAND
SPRINGjBT
HEAO)EROSE FULL
SPECIAL SCREW-2.6X1O
ASSY/HEADzR/P ACE
SPECIAL SCREW 2.6X12
m50200
701OA 701OC
//
?—6090B
w
EEEl wN.S.P. :Not available as service parts.
13000 MECHANISM PART 1—
–18–

LOCATION
5050A
5050B
5050C
50609
5060B
5060C
50700
50800
50900
51000
51010
6090A
OR
6090B
6090C
60910
61000
61100
701OA
701OB
701OC
70200
70300
70400
70410
801OA
801OB
,.,.-
PARTSNO.
613 151 8858
6130220233
4120484504
613 151 8872
6130220233
4120484504
613 1644762
613 1520387
4120488908
613 161 2365
4120334106
613 151 9152
613 1604636
613 151 9114
613 1520226
4120502802
613 151 9398
613 1523692
613 151 8803
613 1566033
613 152 0233
613 1563841
613 1520677
613 1520714
412049 1106
613 1597273
613 1585829
MECHANISMPARTS 2
10110 613 160 1574
10130 645007 1560
10160 4120487505
DESCRIPTION LOCATION
ASSY,MOUNTING)INCLINE
ASSY*GUIOEjROLLER
SPECIAL SCREW-2X3
ASSY,MOUNTING INCLINE
ASSY>GUIDEPROLLER
SPECIAL SCREW-2X3
ASSY?LEUER)LOAO
SPRING.LEUER L GUIOE
SPECIAL NUT-3X3
ASSY,LEUER.ACT L GUIOE
WASHER SLIT 2.6X5X0.50
GEARtRACK FRONT
GEARtRACK FRONT
GEAR;ROCK START
SPRING?RACK FRONT
SPECIAL SCREW-2.6X6
LEVER?EP SW
SPRINGJEP SW
ASSY,LEVERPPINCH ROLLER
MOUNTING.LIFT PINCH
SPRING!PINCH ROLLER
CAM.LIFT PINCH
GEAR)CAM PINCH
MOUNTING!OPENER
SPECIAL SCREW-2.6X16
LEVER,CLEANER
ASSYrROLLERrCLEANER
COMPL PWB.MC-1
SWITCHrMODE 1P-IT
SPECIOL SCREW-2.6X4
s
T
10200
10700
10720
10800
10810
20500
20510
20800
31000
31200
31300
31400
31500
31600
40400
5030A
5030B
5030C
5040A
5040B
5040C
60100
60200
60300
60400
60500
60600
60610
60700
60800
60810
70500
70510
PARTS NO.
4120488304
613 1530836
4120489608
613 151 8582
412048 8007
613 1604186
411 109 1605
613 151 9039
613 152 0165
613 159 0991
613 1590847
613 1520332
613 151 9459
613 1520349
613 1537583
613 1522763
613 1520370
613 151 8766
613 1522770
613 152 0363
613 151 8773
6450034305
613 151 8599
613 151 9107
613 151 9138
613 1603790
613 1564008
412051 6700
613 1599017
613 159 8997
4120488007
645008 1880
412 048 7604
DESCRIPTION
SPECIAL SCREW-2.6X8
MOUNTING.HARNESS
SPECIAL SCREW-2.6X3
ASSYJEARTH CYL
SPECIAL SCREW-2.6X6
ASSYtGEAR,FRICTION
WASHER Y 2.6X6X0.25
BELT,REEL
SLIOE)ACT BRAKE S
LEUER.CONTROL BRAKE
COMPL)LEUER?ACT BRAKE
SPRING,RETURN BRAKE
LEUER,CHANGE CLUTCH
SPRING,CHANGE CLUTCH
ASSYfLEVER SPRING BT
GEAR,LOAD S
SPRING.LOAO S
ASSY,LEUER?LOAO S
GEAR,LOAO T
SPRING.LOAO T
ASSY?LEVERJLOAD T
ASSY?MOTOR LOAOING
COMPL,GEAR,WORM
OAMPER
GEAR,WHEEL 1
GEAR,WHEEL 2
CAM?MAIN
SPECIAL WASHER 3.6X0.5
SLIOEtCRESCENT
MOUNTING,CRESCENT
SPECIAL SCREW-2.6X6
MOTOR?CAPSTAN DC 3W
SPECIAL SCREW-2.6X6
5040A. I
60
—MECHANISM pART 2
–19–

ELECTRICALPARTS
NOTE:
1!
2.
3.
4.
5.
6.
Materiala of Capacitors and Reaiators are abbreviated aa follows;
Resiatora 1A-SOLID Tantalum Solid Capacitor
MT-FILM Metallized Film Resistor AL-SOLID Aluminum Solid Capacitor
MT-GLAZE Metallized Glaze Resistor NP-ELECT Non-Polarized Electrolytic
OXIDE-MT Oxide MetallizedFilm Resistm Capacitor
OS-SOLID Aluminum Solid Capacitor with
Capacitor Organic Semiconductive
MT-POLYEST Metallized Polyester Capacitor Electrolytic Capacitor
MT- COMPO Metallized Composite Capacitor DL-ELECT Double Layered Electrolytic
Capacitor
Tolerance of Capacitor(l OpF over) and Reaiator are noted with follow avmbolea.
F............*lo/o G............*ZO/o J............*5V0 K... .........*loo/o
M............*200/0 N............*30010 z-,9.........+80% -–20%
Capacitor
U:UF P:PF
Inductors
UH :UH MH :mH
N.S.P. :Not available aaservice parta.
The ceramic capacitor andreaistora mounted on the PWB,maY betwo different twea of Parta,chitdleadl ess)wpe or diwrete(with lead
wire) type.Therefore,even though the location number is the same,you may encounter either chip or diswete parta on the PWB.
LOCATION PARTS NO.
CiMPLPWB,CP-I-A
COMPL.NO 613 1640900
COMPL.NO 613 1640917
(SEMICdNDUCTiRS)
Q1OO1
OR
OR
OR
Q1OO2
OR
OR
OR
Q1OO3
OR
OR
OR
Q1OO4
OR
Q1OO5
OR
OR
OR
Q1201
OR
Q1211
OR
OR
OR
Q1401
OR
OR
OR
OR
Q3503
Q3504
Q3551
OR
OR
OR
Q3552
OR
OR
405057 6201
405 057 6409
405 1237002
405 1237101
4050998508
405011 8401
4050930607
405011 8500
4050998508
405011 8401
4050930607
405011 8500
4050182501
4050006104
4050998508
405011 8401
4050930607
405011 8500
4050998409
405006 1806
4050998508
405011 8401
4050930607
405011 8500
4050998201
405006 1707
4050930508
4050998409
405006 1806
4050639708
4050639708
4050576201
4050576409
405 1237002
405 1237101
4050576201
4050576409
405 1237002
DESCRIPTION
(VHR-590 NJSTRALIA)
(VHR-590 NEW ZEALANO)
TR 2SC4038-Q
TR 2SC4038-R
TR 2S01991A-Q
TR 2SD1991O-R
TR 2SC4640S
TR 2SC1740S-Q
TR KSC2785-Y
TR 2SC1740S-R
TR 2SC4640S
TR 2SC1740S-Q
TR KSC2785-Y
TR 2SC1740S-R
TR 2SC3399
TR 0TC144ES
TR 2SC4640S
TR 2SC1740S-Q
TR KSC2785-Y
TR 2SC1740S-R
TR 2S01782T-AC
TR 2SA933S-R
TR 2SC4640S
TR 2SC1740S-Q
TR KSC2785-Y
TR 2SC1740S-R
TR 2SA1782S
TR 2SA933S-Q
TR KSA1175-Y
TR 2Srll782T-AC
TR 2SA933S-R
TR OTC144EL
TR DTC144EL
TR 2SC4038-Q
TR 2SC4038-R
TR 2SIJ1991A-Q
TR 2SD1991A-R
TR 2SC4038-Q
TR 2SC4038-R
TR 2S01991A-Q
LOC(lTION
Q3552
Q3553
OR
OR
OR
Q5001
OR
Q5002
OR
Q5003
OR
Q5004
OR
Q5101
OR
Q5102
OR
OR
OR
Q5103
OR
OR
OR
Q6001
OR
OR
OR
OR
OR
OR
Q6002
OR
Q6004
Q6005
OR
Q6006
OR
PARTS NO.
405 123 7101
4050576201
4050576409
405 1237002
405 1237101
4050946905
405 1260208
4050137006
4050137303
4050066702
4050067204
4050137006
4050137303
4050892103
4050892202
405013 6801
4050137006
4050137303
4050137204
4050136801
4050137006
4050137303
4050137204
4050736407
4050736506
405 026 9004
405026 9103
405 1147806
405 114 7905
405 1148001
4050182501
4050006104
405 0189500
4050037603
4050002205
4050182501
4050006104
DESCRIPTION
TR 2SD1991A-R
TR 2SC4038-Q
TR 2SC4038-R
TR 2SD1991A-Q
TR 2S01991A-R
TR 2SK1460
TR 2SK1460LS
TR 2SC2274-F
TR 2SC2274K-F
TR 2SA984-F
TR 2SA984K-F
TR 2SC2274-F
TR 2SC2274K-F
TR 2SC4483-S
TR 2SC4483-T
TR 2SC2274-E
TR 2SC2274-F
TR 2SC2274K-F
TR 2SC2274K-E
TR 2SC2274-E
TR 2SC2274-F
TR 2SC2274K-F
TR 2SC2274K-E
TR 2SK772-E
TR 2SK772-F
TR 2SK222-O
TR 2SK222-E
TR 2SK1104-P
TR 2SK1104-Q
TR 2SK1104-R
TR 2SC3399
TR OTC144ES
TR 2SC3901
(VHR-590 NEW ZEALANO ONLY)
TR 2SA1345
(VHR-590 NEW ZEALANO ONLY)
TR OTA144ES
(VHR-590 NEW ZEALANO ONLY)
TR 2SC3399
(VHR-590 NEW ZEALANO ONLY)
TR OTC144ES
(VHR-590 NEW ZEALAND ONLY)
–20–
Table of contents
Other Sanyo VCR System manuals

Sanyo
Sanyo VHR-M261EV User manual

Sanyo
Sanyo TLS-924 Manual

Sanyo
Sanyo VHR-H631 User manual

Sanyo
Sanyo VHR-1110 Series User manual

Sanyo
Sanyo VHR-VK310A User manual

Sanyo
Sanyo VHR-790 User manual

Sanyo
Sanyo VHR-H803E User manual

Sanyo
Sanyo VHR-510 User manual

Sanyo
Sanyo SRT-8960P User manual

Sanyo
Sanyo VHR-VX600 User manual

Sanyo
Sanyo VHR-830 User manual

Sanyo
Sanyo VHR-M262EV User manual

Sanyo
Sanyo HR-VX200 Manual

Sanyo
Sanyo VHR-757G User manual

Sanyo
Sanyo SRT-8960P User manual

Sanyo
Sanyo VHR-VK210P User manual

Sanyo
Sanyo VHR-390 User manual

Sanyo
Sanyo VWM-800 User manual

Sanyo
Sanyo VHR-495E User manual

Sanyo
Sanyo VWM-900 User manual