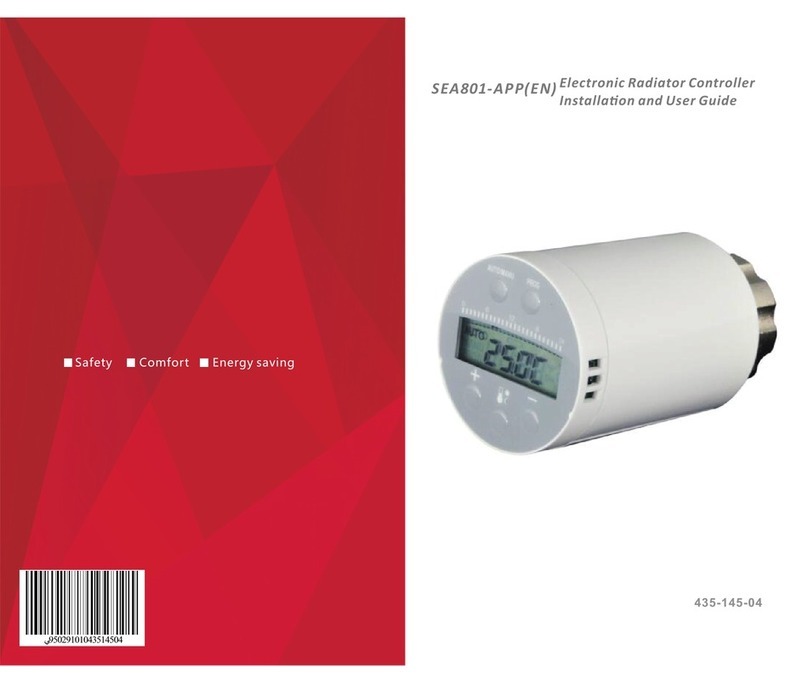
Saswell SEA801-Tuya Zigbee User manual

SEA801-Tuya Zigbee
INSTRUCTION
SEA801-Tuya Zigbee
INSTRUCTION

Content
Controller Introduction 01
Adapter Introduction 06
Controller Settings 09
Link APP 13
Recovery Factory Setting/
Exit network 23

Controller Appearance
50mm
88.6mm
Model
switch button
Programmable
button
UP button DOWN button
temperature button
Model switch button:switch work mode,
automatic mode or manual mode,automatic
mode is programming run.
1
Programmable button:short press the button
to enter the programming interface;press the
button for more than 3 seconds to enter the
time setting interface.
2
UP butto .n:adjust temperature or time
3
4Temperature button:short press for power off;
press for more than 3 seconds to query the
ambient temperature;short pressthe button in
programming setting interface for returnning
to the week selection interface.
DOWN button: .adjust temperature or time
5
Button description
1 2

Battery lifetime:1year
Temperature setting range:5℃~30℃
Temperature setting accuracy:0.5℃
Temperature display range:0℃~50℃
Operation temperature range:0℃~50℃
Shipping & storage temperature:-10℃~60℃
Frequency:2.400GHz
Wireless transmit range:Open distance 70M
Inside room range 30M
Power source:2 AA baterry
(Don’t use the rechargeable battery)
Specifications Controller Power Method
2AA battery
2After install battery then
put protection cover
1Open protection cover
Pls depend as picture “+” “-”to
install battery
Attention
12
3 4

Controller Installation
1Put battery in battery
compartment
3 When push road is
flush with base 4Install controller with
M30*1.5 screw thread
Interface of valve .
Tighten the copper
ring
5Press “+” button,diaply
will flushing,
controller will match
valve stroker,if match
succefully ,will during
initial setting
[ ]
2Display show
flushing
]
]
Adapter Selection
Pls confirm valve diameter
1/2 valve
(RA)
(RAV)
Danfoss
3/4 valve
+
long plunger
1/2 valve
Caleffi Giacomini
1/2 valve
+
short plunger
5 6

Adapter Installation
1
2
1/2 valve (RA)
1
2
3
3/4 valve(RAV)
Danfoss Please tighten the screws after
fixing the valve connector
Danfoss 3/4 valve need install long
plunger at the buttom of controller.
Accessories, please put directly on
the valve, forced to press the adapter
and valves can be stuck.
1
1
2
Caleff 1/2 valve
1/2 valve
Giacomini
Adapter, please put directly on
the valve, forced to press the
accessories and valves can be
stuck.
Giacomini 1/2 valve need install short plunger at
buttom of controller .
Accessories, please put directly on the valve,
forced to press the adapter and valves can be
stuck.
7 8

Unified Programmable (Show 1-7)
Select weekly period
Independent Programmable for 7 days
(Show number 1/2/3/4/5/6/7)
YEAR
HOUR/
MINUTES
Tips
After each cell replacement, it is required to
rematch the radiator valve stroke and carry
out the initial setting and programming setting.
If need to change year/month/date/hour/minutes ,
please long press “PROG” button for resetting.
Controller Default Setting Weekly Period Setting
Long press “PROG” button to choose month/date/
year,press “+” “-” to set ,when set finished will during
controller display interface .
Short press “PROG” button to enter the
programming setting ,press “+” “-” to select week ,
when finish set, press “PROG” button to switch
setting items ,and the start time setting .
DAY
MONTH
Long press “PROG” + “ ” 3-5s to enter network
time automatically update setting:
On: Turn on automatic update
OFF:Turn off automatic updates
Press “PROG” to switch On and OFF
9 10

Time Setting Temperature Setting
Press “+” “-” button to select the period of time ,short
press the “PROG” button to switch to the temperature
setting in the period of time.
There are 4 periods each day by default(including
time setting and temperature setting), it is required to
complete the setting of time and temperature in 4
periods of time at a time
period
period 1
06:00 20.0C 08:00 16.0C 18:00 20.0C 22:00 16.0C
week
Monday
Tuesday
Wednesday
Thursday
Friday
Saturday
Sunday
period 2 period 3 period 4
PRO G
Tips
Short press “AUTO/MANU”button for saving
the settings.
Don't operate and wait 10s for canceling the
settings.
Short press “ ” for returning to week selection.
Long press the “+” “-” button for restoring the
factory settings.
Press “+”or “-” to adjust the temperature ,short press
“PROG” and switch to the time setting in the next
period of time.
There are 4 periods each day by default(including
time setting and temperature setting), it is required to
complete the setting of time and temperature in 4
periods of time at a time.
1211

Link APP-Login Link APP-Add devices
Download:
Click App store or Android application market to
download “Smart Life”APP.
Registration and Login:
Click the “Register” to create account.
Enter your account password to log in
Register Create accout Login
Add gateway:
Click the list bar “Others”,
Select the gateway
(ZigBee) in the right
device list.
2
Click “Confirm CONFIG IND
lights on(green)”,and wait a
few seconds.
3
Enter the “HOME” interface
of the app,Click the “+” in the
upper right corner .
1
1413

Click “Connect”,automatically
search the device and wait a
few seconds until the search
progress is 100%
4
Click “Completed”,it means
the gateway added
successfully.
5
Add controller:
Tips
Before adding the gateway, you need to electrify
the gateway and connect the network cable
When adding a gateway, the mobile phone and
the gateway must connect to the same network.
Click the “Zigbee Gateway”
you have added at the“HOME”
interface.
1
Click “Add sub-device”for
enter the device list.
2
Select the type of device
you want to add (TRV) .
3
1615

long press controller
“AUTO/MANU”and“
+” until the screen
show “----”.
4
5Click “Confirm indicator
rapidly blink”on APP, and
the controller show ,“YES”
automatically the app
search the device and
wait a few seconds until
the search progress is 100%.
6Click “Completed”,it means
the controller added
successfully.
Tips
Gateway must be added before adding
controller.
Link APP-Temperature Setting
After the controller is added successfully,we can
control the device through the APP.
Press or slip the circular arc for
increase or decrease of the temperature.
Under the controller
opening programming
function:
Adjust the temperature
on the current interface,
which is effective only in
the current period of time
but recovers the original
programming in the next
period of time.
Under the controller
canceling programming
function:
Adjust the temperature
on the current interface,
and remain the current
temperature all long.
Tips
1817

Link APP-Pown On/Off Setting
Click “>> Slide off ” and drag to the right to achieve
“slipping for power off ”or “slipping for power on”.
If you are away for a long time, no heating
equipment is required at home and it is in the
cold state, you can directly switch it off and our
controller can automatically enter the “anti-freezing
mode”, which is started at the room temperature of
less than 5℃ and closed at the room temperature of
over 8℃, so as to prevent the radiator from heating
failure because of being frozen.
Tips
Link APP-Programming Setting
1
2
2019
Click the programming to enter
the programming interface.
Selecting the period of time
of 7-day programming,press
“ ”or “ ”to set temperatures
in the different periods of time.

Link APP
-Multi-day Programming Setting
Link APP
-Temporary Stay-out Setting
1
2
1If you need to stay out
temporarily,please click
“ ” key.
The temperature can remain
at 16℃,the energy-saving icon
“ ” turns green and is on
2After you arrival at home,click “ ” key to
recover the previous temperature setting.
Click the date to be edited and
confirm it.
Enter the programming interface
and then click the “7-day” key.
2221

Recovery Factory Setting/Exit network
Long press “+”and “PROG” at the same tine for
3-5s,and the controller show “ ” ,it means recover
factory setting/ exit network successfully.
23
AUT O
Table of contents
Other Saswell Controllers manuals