SatStation IRIDIUM 9575 User manual

User Manual
SatStation Extreme Dock
for
IRIDIUM® 9575

2
INDEX
Page
2 Index
2 What’s included
3 Installation warnings
3 –4 Speaker installation
4 –5 Junction box installation
5 –6 Power cable installation
6 Stereo mute
6 Microphone installation
7 Mounting of Cradle
8 Inserting & removing handset
9 Installation of External Antenna
9 Car kit operating procedures
9-10 Initiating Emergency SOS Mode
10 Data Transmission
11 Battery charging
11 Operating specifications
11 Privacy Handset
SatStation Deluxe Dock consists of:
1. Smart Cradle
2. Speaker
3. Junction Box
4. Visor Microphone.
5. Power cable
6. Privacy Handset & Cradle

3
Before beginning the installation process, determine the best locations for the mounting of the
Mounting Bracket, Handset Cradle, Visor Microphone, Speaker and Junction Box.
Consider the following guideline when planning the installation:
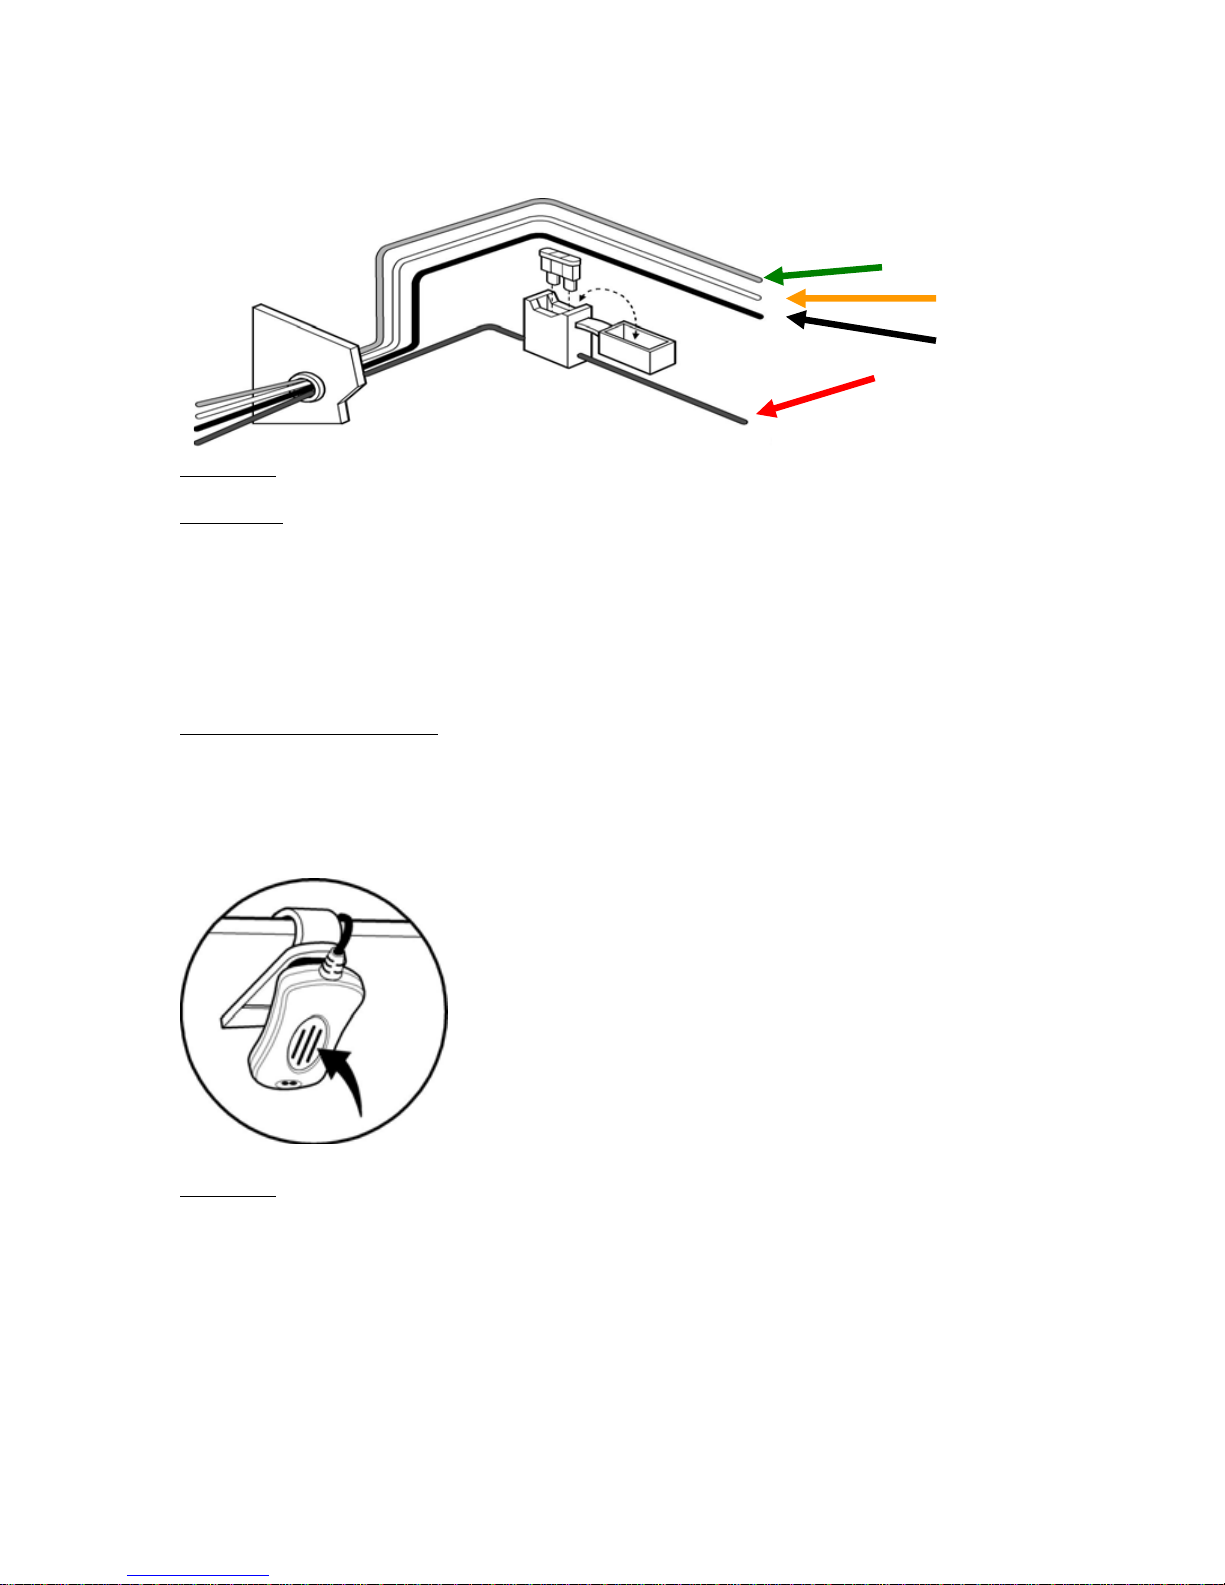
* DO use all mounting hardware provided.
* DO ensure that cables are not placed under stress.
* DO follow proper + and ‐ connections.
* DO crimp connectors securely.
* DO NOT attach components to any part of the vehicle that is not rigid or is subject to excessive
vibration.
* DO NOT install components in areas where rain or snow can easily get into them, such as next to a
vehicle window, which may be left open.
* DO NOT dress cables over sharp edges that could cause wear or tearing of cable insulation.
* DO NOT install components in locations where they might interfere with the vehicle operator or
operating controls.
* DO NOT install the Hands‐free Cradle where it will be difficult for the operator to reach.
! WARNING
VEHICLES EQUIPPED WITH AIR BAGS
An air bag inflates with great force. DO NOT place objects, including communications equipment, in
the area over the air bag or in the air bag deployment area. If the communication equipment is
improperly installed and the air bag inflates, this could cause serious injury.
It is recommended that the installation of the vehicle communication equipment be performed by a
professional installer/technician trained in the requirements for such installations. An air bag's size,
shape and deployment area can vary by vehicle make, model, and front compartment configuration
(for example, bench seat vs. bucket seats). Contact the vehicle manufacturer's corporate
headquarters, if necessary, for specific air bag information for the vehicle make, model, and front
compartment configuration involved in your communication equipment installation.
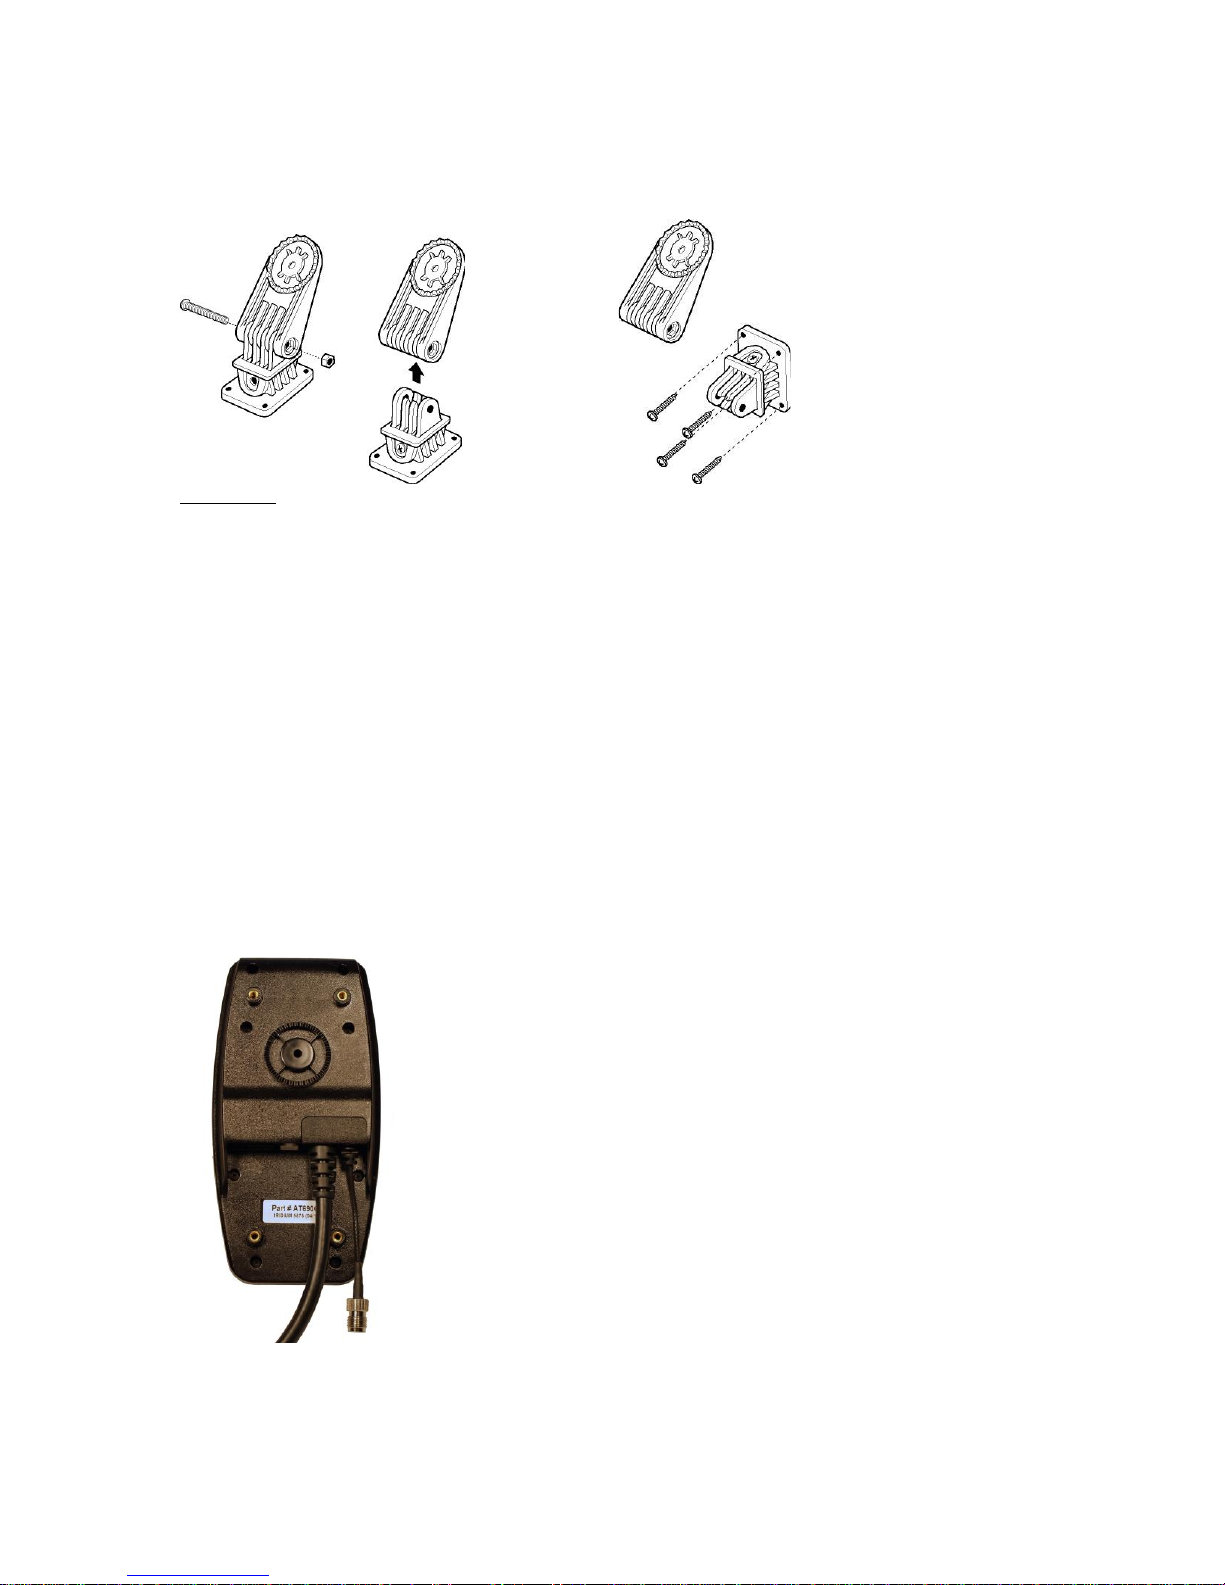
Speaker Installation Detail Location
1. Mount the Speaker beneath the dashboard on the passenger's side of the vehicle, out of the way of
the passenger, or some other convenient location.
2. Do not mount the Speaker on the dashboard or the rear window shelf.
3. The Speaker should be located more than four feet from the Car Kit Cradle.

4
Speaker Installation Procedure
1. The Speaker includes a mounting bracket, permitting it to be mounted in a variety of ways. Loosen
the thumbscrews on the side of the speaker and using the mounting bracket as a template, drill the
necessary mounting holes and secure the bracket with the self‐tapping screws provide
2. Position the Speaker on the mounting bracket and secure it by tightening the thumbscrews. The
mounting bracket is used to permanently mount the Speaker in place while permitting it to be tilted
to a desired angle.
Diagram 1
Junction Box Installation
1. Mount the Junction Box beneath the dashboard on the passenger's side of the vehicle or on the
center side post between the front seats. It must be protected from dirt and moisture and must be
afforded adequate space for cooling. There must be sufficient space to allow for connection of all
cabling.
Mounting Screws Mounting Screws
Diagram 2
2. Connect the Cradle Control Cable, the Speaker, Microphone, Power cable to their respective
corresponding sockets in the Junction Box, as shown in Diagram 3 below.

5
Mic. Speaker Cradle Privacy Handset Power
Diagram 3
3. Route the cables out of the way to avoid physical or visual obstruction.
Caution! The Hands‐free unit should be used with a negative ground system only.
Power Cable Installation
The power connector connection is as follows:
BOTH Green and Red need + 12 VDC
12VDC + Ignition 12 VDC +
Stereo Mute 12 VDC -
Diagram 4
1. Route the black lead of the main power cable to convenient negative supply voltage (ground)
chassis ground and the red lead to the positive supply voltage connection points. If it is necessary to
penetrate the firewall, use an existing opening.
2. If necessary, drill a new hole approximately 9/16” or 3.5cm in diameter. Make sure that there is
enough clearance on the opposite side. Insert a grommet into the hole to prevent damage to the
power cable.
3. Cut the black lead to the desired length.
4. If the connection is being made under the dash or in the vehicle cabin, connect the black lead
directly to the chassis of the vehicle. Note! Do not connect the black lead to the negative (‐) battery
terminal. The car could be damaged if there were a malfunction in the vehicle’s electrical system.
5. Cut the red lead to the desired length. This lead will be connected such that it has positive supply
voltage at all times, even when the vehicle is turned off.
6. If the connection is being made under the dash or in the vehicle cabin, connect the red lead to a
positive supply voltage point.
7. If the connection is being made in the engine compartment or directly to the battery, connect the
in‐line fuse holder between the red lead of the power cable and the desired positive voltage
connection point.

6
8. Route and connect the green lead to a convenient ignition switch supply point in the vehicle. The
green cable MUST be connected or the unit will not function correctly
To Car Supply Voltage
To Car Stereo
To Car Stereo
To Car Chassis Ground
Diagram 5
Stereo Mute
If the vehicle’s stereo system supports an external muting feature, route and connects the orange
wire to the car stereo system. Otherwise, the orange wire may be left unconnected and cut off or tied
out of the way.
NOTE! The Car Kit supports an “Entertainment Mute” function when connected to a car stereo
system that provides for external muting. This function is compatible with systems that mute the
audio output when the control line is connected to ground
Installation of the Microphone
Selecting the correct position for the microphone is vital for the successful performance of the
hands‐free unit.
1. The Microphone should be mounted either on the sun visor directly above, and facing, the
driver or on the headliner just above.
Must face driver
Diagram 6
1. To avoid visual or physical obstruction, route the microphone cable down inside the door molding.
Allow sufficient slack in the connector end of the cable to reach the Junction Box.
2. Plug the external microphone cord into the Junction Box as shown in diagram 3 above
Note! The microphone should not be mounted near a window or in a spot where road and ambient
background noise would be substantially high

7
Mounting of the cradle
Installation of the Mounting Bracket and Clam Cradle
Diagram 7
1. Remove the screw holding the top portion of the Mounting Bracket and separate the top portion of
the mounting bracket from the bottom portion.
2. Retain position of this screw, as it will be needed to reattach the top to the bottom as described
below.
3. Mount the bottom portion of the mounting bracket in the desired position in the vehicle using the
four self tapping sheet metal screws included, in such a way so as not to interfere with air bag
deployment and within easy reach of the driver operator to ensure easy access to the portable.
4. Maintain sufficient clearance above and below the Mounting Bracket for the Cradle and for the
cables
5. Attach the cradle to the top portion of the mounting bracket with a single screw through the rear of
the cradle.
6. In order to obtain a better position of the portable’s display when it is in the cradle, adjust the
angle of the cradle by loosening the screw and moving the cradle to the desired position. Retighten
the screw when finished.
Note: The Cradle contains four small holes on its back for an optional flush mount kit (not
included).

8
Inserting the portable phone into the cradle
Diagram 8
Before inserting the phone into the cradle make sure to remove the connection cover from the
bottom of the Iridium phone.
Press the top of the phone back into the cradle until the catch mechanism of the release button snaps
into place.
Press to Release
Diagram 9
Removing the Phone form the Cradle
1. Press the release button on the cradle, above the top of the portable.
2. Pull the portable up and out.

9
Installation of External Antenna
1. The antenna connection on the cradle has a TNC female connector that should be connected to a
coaxial antenna cable properly terminated with TNC male. Please ensure that the appropriate cable
is used for the length of the cable run and type of antenna.
2. An antenna suitable for use with the Iridium 9555 portable must be purchased and properly
installed in accordance with the requirements of the antenna manufacturer/supplier.
3. Use an approved antenna only. Unauthorized antennas, modifications, or attachments could impair
reception quality, damage the radio product, or result in non‐compliance to United States FCC
Regulations for RF exposure.
4. Position the antenna in such a way to maintain a separation distance of at least 8 inches (20cm)
between the antenna connected to the Car Kit Cradle and the body of any user, or nearby person, to
assure compliance with the United States FCC regulations on RF exposure.
5. Route the cradle’s antenna cable separately from all other cables (cradle to Junction Box cable,
microphone line, and power lines) associated with the Car Kit.
Car Kit Operating Procedure
Car Ignition connection
1. When the car ignition is ON, the Car Kit will stay on as long as handset is placed in the cradle and
the cable connected.
2. When the ignition is turned OFF the Car Kit will turn OFF after 60 minutes.
3. Use of the PTT in the vehicle will turn on the Car Kit for 8 minutes, after which it will turn off again.
Making or receiving a hands‐free telephone call
1. To receive an incoming hands‐free telephone call, press the” SEND" key on the handset’s keypad. A
confirmation tone that the phone has been answered will be heard through the speaker
2. To make a hands‐free telephone call, place the handset into the cradle and dial the desired number
on the handset's keypad and press the "SEND" key.
3. Adjust the speaker volume using the handset's volume control. 4. Incoming audio will be heard
through the speaker.
Initiating Emergency SOS Mode
1. The buttons on the front of the smart cradle are used to activate the Emergency SOS mode when
pressed simultaneously.
2. Press and hold both buttons simultaneously.

10
3. A twenty (20) second countdown will begin on the Iridium handset and the dock will beep
intermittently.
4. To cancel the distress call press the soft key labeled “CANCEL” on the Iridium handset before the
counter reaches zero (0).
Diagram 10
Emergency SOS Buttons hold simultaneously to engage.
Important: Important: Using this feature does not guarantee a distress call will go out or that the
phone will receive an accurate enough GPS fix to send a SMS and/or SBD message with your location
details. If the phone is not receiving a GPS signal, the SMS/SBD distress feature may not function
effectively (if enabled). Neither the manufacturer nor supplier of this docking station is liable in the
event of a failed distress call and/or message.
Data transmission
1. To transmit data, connect the USB plug into the corresponding receptacle on the side of the cradle.
2. Then follow the instructions included with your choice of Iridium data management software.
USB Data

11
Charging the battery
1. With the handset turned off, the car kit will charge the battery to 60% in approximately 1 hour.
The charge time will be longer if the handset is operational during charge time.
2. For operator convenience, the handset’s backlight will remain on for ease of viewing during
low/no‐light conditions.
NOTE! Batteries will charge within the temperature window of ‐10 C to +40 C (50 F to 104 F). If the
battery is outside the temperature window, no charge current will be supplied to the battery.
Operating Specifications
Input voltage range: 11V dc to 32V dc
Operating ambient: ‐30C to +60 C
Privacy Handset with Cradle
A privacy handset with cradle is included with the Deluxe Dock.
1. To use the Privacy Handset, plug the connector on the end of the coil cord into the corresponding
receptacle on the Junction Box. See Diagram
2. Remove the privacy handset from the cradle to answer an incoming call.
3. Return the privacy handset to the cradle to terminate an active call.
4. Press the button on the back of the privacy handset before placing it in the cradle to transfer the
audio on an active call to the speaker. The replacing of the handset into the cradle will then not
terminate the call.
5. If the Privacy handset is not placed into its cradle, after the call is terminated, a reminder tone will
be heard through the speaker, one minute after all activity is finished until the Privacy handset is
returned to its handset.
Table of contents