10
USING AUTOLEIL UNIT
WITH LEIL CONTROL UNIT
The device requires a Saunum Leil cont-
roller for operation and is suitable with
Saunum heaters.
NB! AutoLEIL requires the latest Saunum
Leil controller software. Before proceed-
ing, be sure to update the "Control
Panel" on the Leil touch screen.
AutoLEIL communicates with the Saunum
Leil controller via the data cable. Leil is
the main controller of the heater system,
whereas AutoLEIL is an accessory device in
the system.
AutoLEIL is recognised by Leil when they
are connected. AutoLEIL does not have its
own user interface it uses the touch screen
control panel of the Leil system and the
AutoLEIL functions will appear in Leil system
when the two systems are connected.
The automatic water dispensing unit will
turn o when the set time ends, when the
"Stop" button is pressed on Leil, when the
automatic dispensing function is turned
OFF via operating button, or when an error
occurs.
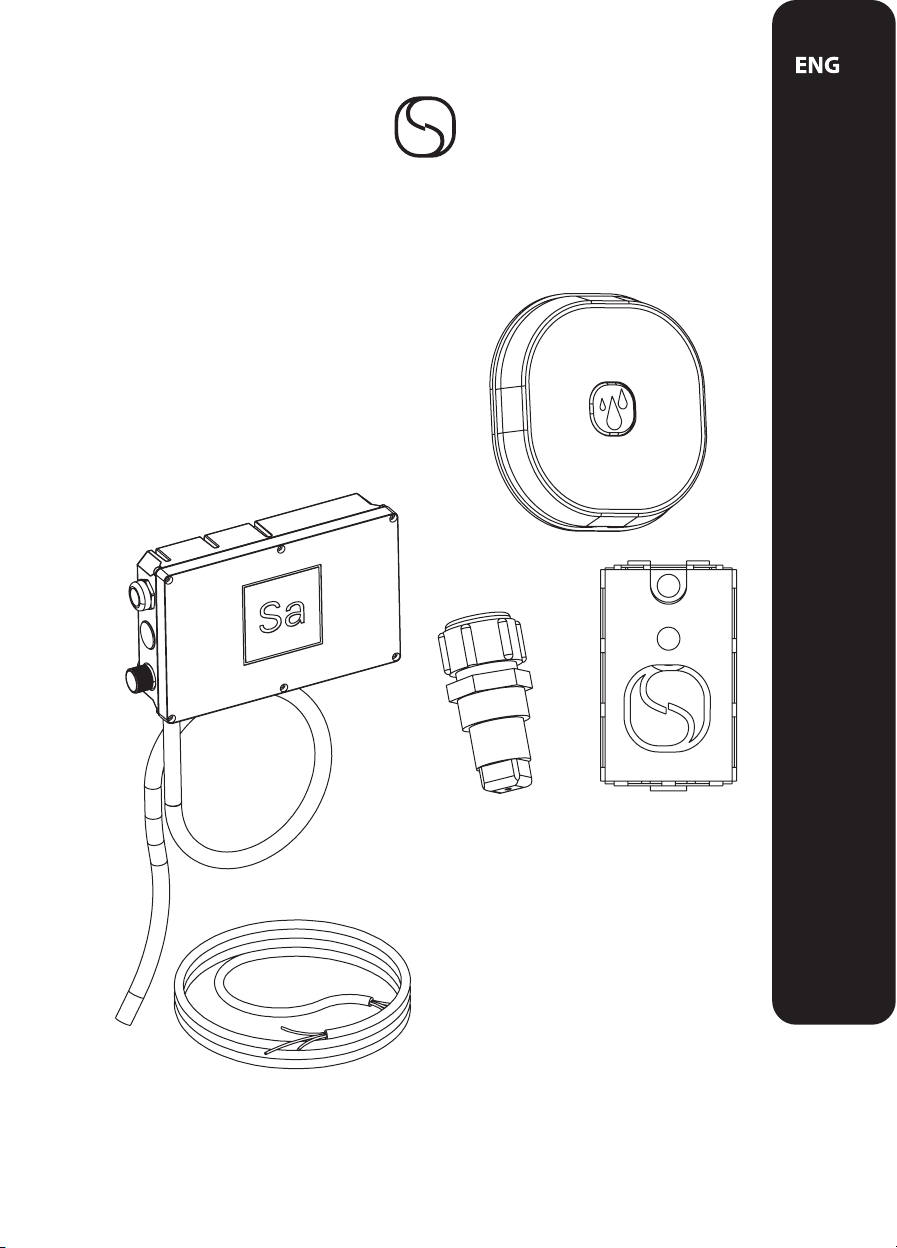
AUTOMATIC WATER
DISPENSING UNIT
The water dispensing unit is designed for
the automatic dispensing of water on the
INSTRUCTIONS FOR USE
heated stones of a sauna heater and scans
and maintains sauna climate according to
the user’s preferences through the sensors
and electronics of the unit. The automatic
dispensing of the water allows the sauna
user to sit back and relax, while the sauna
humidity is regulated automatically. Water
dispensing parameters and sauna climate
parameters can be modied through the
Leil touchscreen control panel.
• Controls the sauna room humidity
according to humidity sensor read-
ings by automatically dispensing
water on the heater stones.
• Alternatively, the unit can be set up
to throw user-specied amounts of
water at specied time intervals.
• Enables three pre-set sauna types
where the automatic water dispens-
ing is described separately.
• The operating button inside the sau-
na allows for a“push button”method
of throwing water on heated stones.
• Enables selecting a time for the sau-
na to be ready for use
After completing the installation of the
unit, the installer should give this manual to
the owner of the sauna. The product owner
should provide the manual to all persons
using or operating the sauna. Please read
more instructions for the installation, use,
and recycling, in the original user manual
of the control unit. Saunum reserves the