Saviour Medical Aquatic Sled User manual

USER MANUAL

Introduction
The Saviour Aquatic Sled is an inflatable sled that provides a tactical evacuation device for
transferring occupant(s)/casualties from within flooded houses to awaiting rescue craft, or those
that require transfer to boats or a place of relative safety, either borne directly on the sled or
those already in a Saviour Stretcher – for which it is specially designed to integrate. The width of
the sled is designed at 65cm to access and egress UK domestic doorways.
The sled may also be used to convey an occupant within it (either sat on, or strapped into the
sled, provided it is safe to do so, or within a Saviour Stretcher), along low friction surfaces such
as grass, snow, marsh or similar unstable ground.
Using the sled by these methods will provide an enhanced, improved speed, response to water
and floodwater incidents, including those where difficult access and egress conditions may exist.
Note: at no time should a person be left unattended in the sled, to ensure that the safety
of the occupant is monitored at all times, due to the high hazard water related
environment.

Sled Features
Item Description:
1: Integral fabric reinforcement for shoulders
2: Head and feet D-rings for pulling bridle(s)
3: Removable white coloured casualty retaining straps with
stainless steel clips
4: Rubbing strakes under each side “sponson”
5: SOLAS reflection tape on each shoulder
6: Lifting handles
7: HR. valves in side wall and air floor
8: Pressure relief valve in floor
9: Black pulling bridle(s)
10: Carrying bag
11: Inflation pump
12: Repair kit – in which are, adhesive,
fabric patches and a Halkey-Roberts
valve wrench similar to that shown here:
12
11
2
2
3
4
4
5
6
6
6
6
6
6
6
6
7
8
9
10
1
5
7
4
4

First Inflation of Sled
Carefully unpack from the original box on a level floor clear of dust, debris or sharps – preferably
on a ground sheet. For the first time preferably do it in indoors at ambient room temperature to
allow the materials to “settle” – after all it has probably been transported in cold conditions.
•Unpack from box – when opening box do not use a knife anywhere near sled or carrying
bag
•Take out of bag and unravel slightly and ensure valves are open to allow air intake. Ensure
area surrounding valves are clean to prevent ingress of dirt or moisture.
To check if valve is open or closed – push slightly on side wall or
floor and then if no air can be felt coming out of valve(s), they
are closed. To open valve push centre/poppet (usually yellow)
inwards gently and rotate (turn) quarter turn in either clockwise
or anti-clockwise direction - release centre/poppet and it will lock
in position. To close push centre/poppet inwards and rotate
quarter turn in either clockwise or anti-clockwise direction,
release gently to lock in the closed position. Close examination
of the inner parts of the valve will reveal the slots in valve centre
spindle into which the centre/poppet sprung part enters to either
lock open or closed. Closed being where the valve is functional and retaining air.
•lay out on floor slowly, firstly in ‘Z’ shape, then after 2/3 minutes stretch out straighter

First Inflation of Sled
•Now close the valves – from open position push centre/poppet (usually yellow) inwards
and rotate quarter turn in either clockwise or anti-clockwise direction, release gently to lock
in the closed position. (See more information about valve operation above.)
•Inflate the two compartments partially (using manually operated pump provided), again
allow fabric to “form”
•After 3/4 minutes fully inflate firstly the floor so that the pressure relief valve operates
•Carefully look at the pressure required on the outer face of side wall valve – if non-printed
on valve then inflate carefully to 0.25 bar / 3.6 psi / 24.82 Kpa. Go up to the stated
pressure, but do not over pressure so that they form a good almost “hard” shape"
•The pump provided has a low and high pressure setting and a gauge to assist with
inflation.
•When inflation is done for the first time allow the fabric to “rest” in the warmth of a room to
become the shape of sled and remove any indentations that may have formed in
transport.
•Recheck inflation of chambers.
•Ensure valve caps are inserted and locked in place by pushing slightly then
turning clockwise (release by turning anticlockwise and pulling away).
•Leave sled inflated for 24 hours the first time, and then re-check that the
sled is at or near the correct pressures. If pressure is not held please see
below

Sled not holding pressure
There may be small fluctuations due to atmospheric pressure or temperature changes – this is
normal.
However if large loss of pressure is detected then it is possible that the two part Halkey-Roberts
valves may have become slightly slack in transit.
To tighten the valve halves use the special
wrench.
First ensure valve is closed. (see instructions above)
Then fully insert the castellated part of the wrench into the valve holding the handle horizontal
with the valve outer surface
Turn clockwise so that the firm pressure is needed to move the wrench.
CAUTION: Do not over tighten. Over-tightening can crack the valve nut causing air leakage.
If the loss of pressure continues contact us for further advice.

Operational Use
Inflation of Sled:
Carefully unpack from the carry bag on a level ground clear of dust, debris or sharps –
preferably on a protective ground/salvage type sheet.
•Take out of bag and unravel slightly and ensure valves are open to allow air intake (but not
water)
•lay out on floor slowly firstly in ‘Z’ shape then stretch out straighter
•close valves – lightly press/push centre/poppet inwards and rotate quarter turn in either
clockwise or anti-clockwise direction
•Inflate fully (using manually operated pump provided) firstly the floor so that the pressure
relief valve operates
•Carefully look at the pressure required on the outer face of side wall valve – if non printed
on valve then inflate carefully to 0.25 bar / 3.6 psi / 24.82 Kpa. Go up to the stated
pressure, but do not over pressure so that they form a good almost “hard” shape
•The pump provided has a low and high pressure setting and a gauge to assist with inflation
level monitoring.
•Recheck inflation of floor.
•Ensure valve caps are inserted and locked in place
•Ensure that all straps are fastened correctly and held inside sled so as not to be a trip
hazard and ready for operations.
Deflation and Stowage:
After use, (ensure valve caps are inserted and locked in place to prevent egress of water or dirt)
wash off with clean water (clean with mild soap if needed for dirt) and allow the sled and all
straps to dry naturally and thoroughly (unclip straps and dry separately if necessary) before
storage. For suspected possible biological or pathogenic contamination, use a proprietary non-
damaging to fabric decontamination disinfectant e.g. Biochem and observe the manufacturer's
instructions.
If deflation to store is required:
1. When dry, ensure removal of non-sled related items that may be present
2. Arrange all straps tidily
3. Deflate both buoyancy chambers - floor and side walls by opening valves – slightly press
inner centre/poppet and turn to lock open (see above)
4. Slowly flatten on one side wall firstly - then form into ‘Z’ shape then bend and flatten further
so that it will fit into bag
5. At point of maximum compression close both valves and valve caps are inserted and
locked in place
6. Place into bag and snap clasps shut on bag
Note: the pump provided has a suction side to assist with full deflation

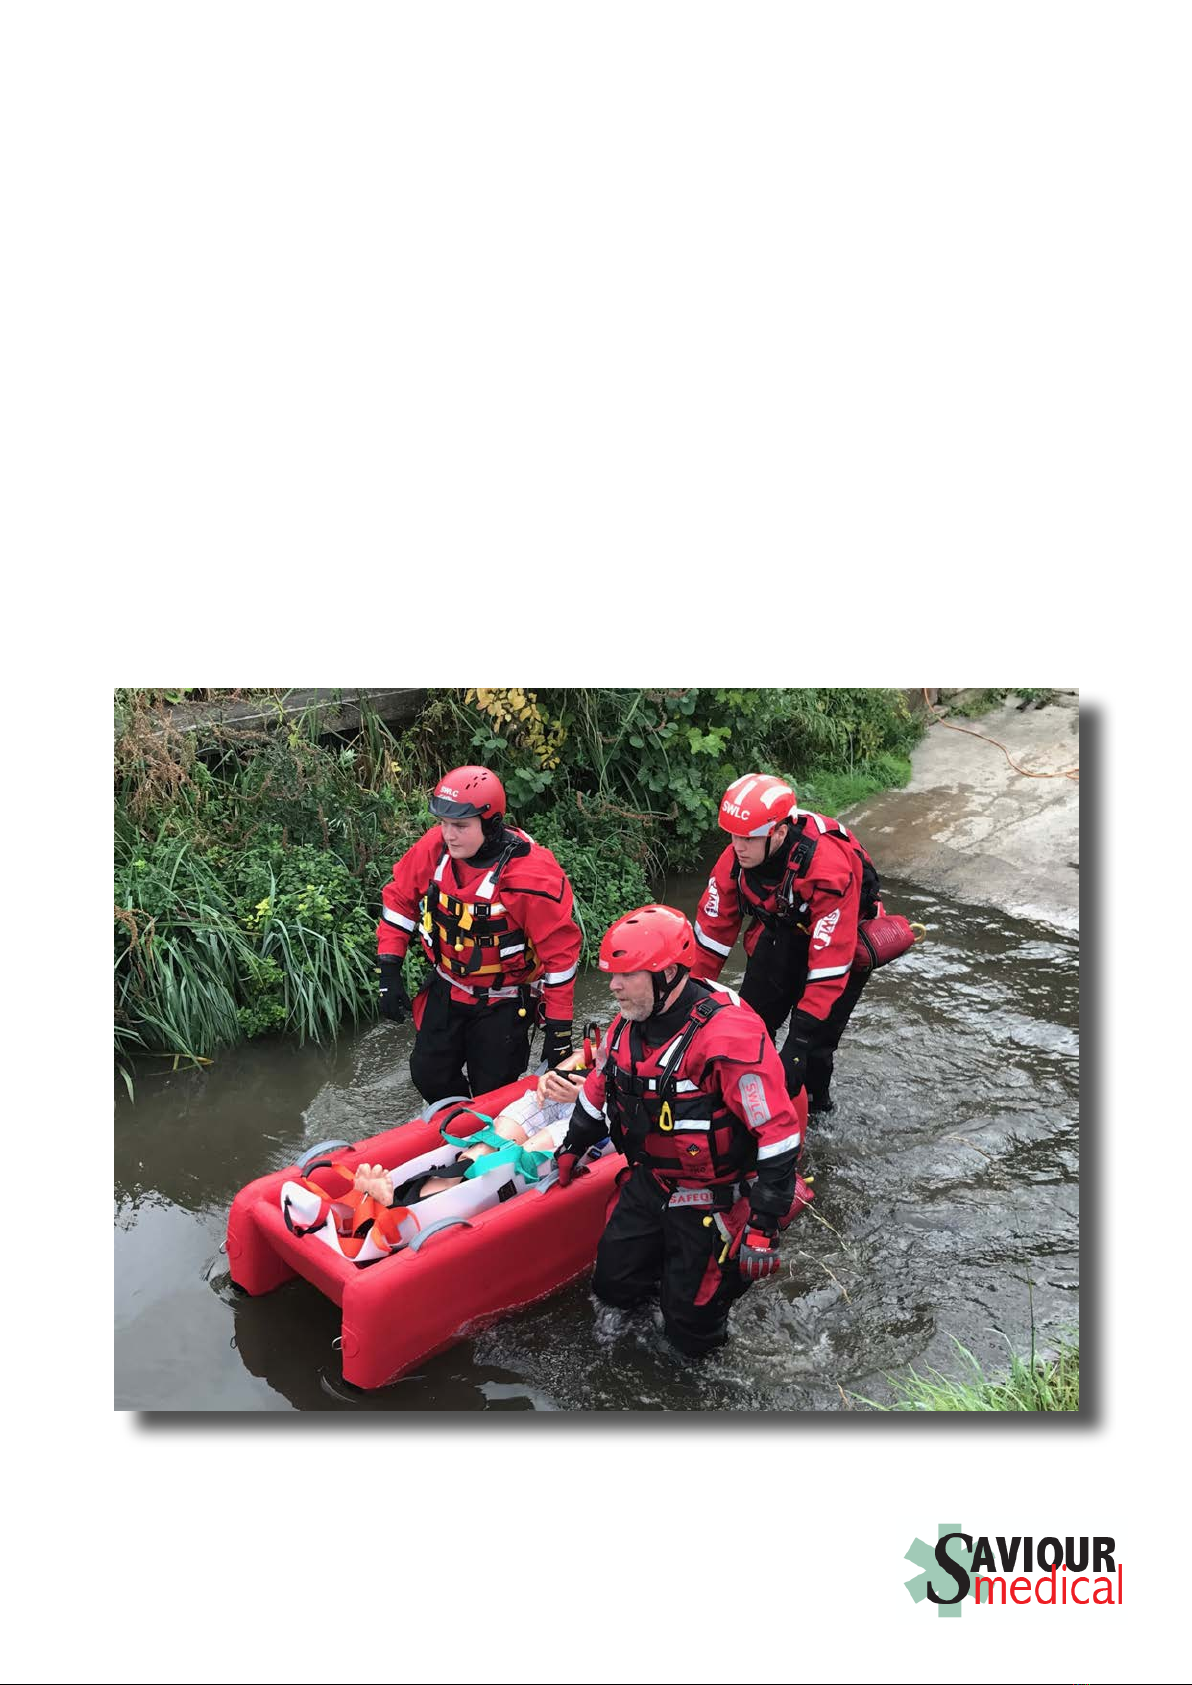
Casualty Transportation
Casualties can be transported either sitting or lying in the sled, or if already in a Saviour
Stretcher, placed directly inside.
Each occupant of a sled should wear the appropriate PPE (Personal Protective
Equipment).
Weight must be distributed evenly: do not move about suddenly, all movements with persons in
or on the sled must be made deliberately and slowly. Check for in
water obstructions and avoid sharps at all times during use,
although tough it is made of fabric. Stability and handling problems
can occur if the operator(s) mishandle(s) the sled.
The carrying capacity must not be exceeded.
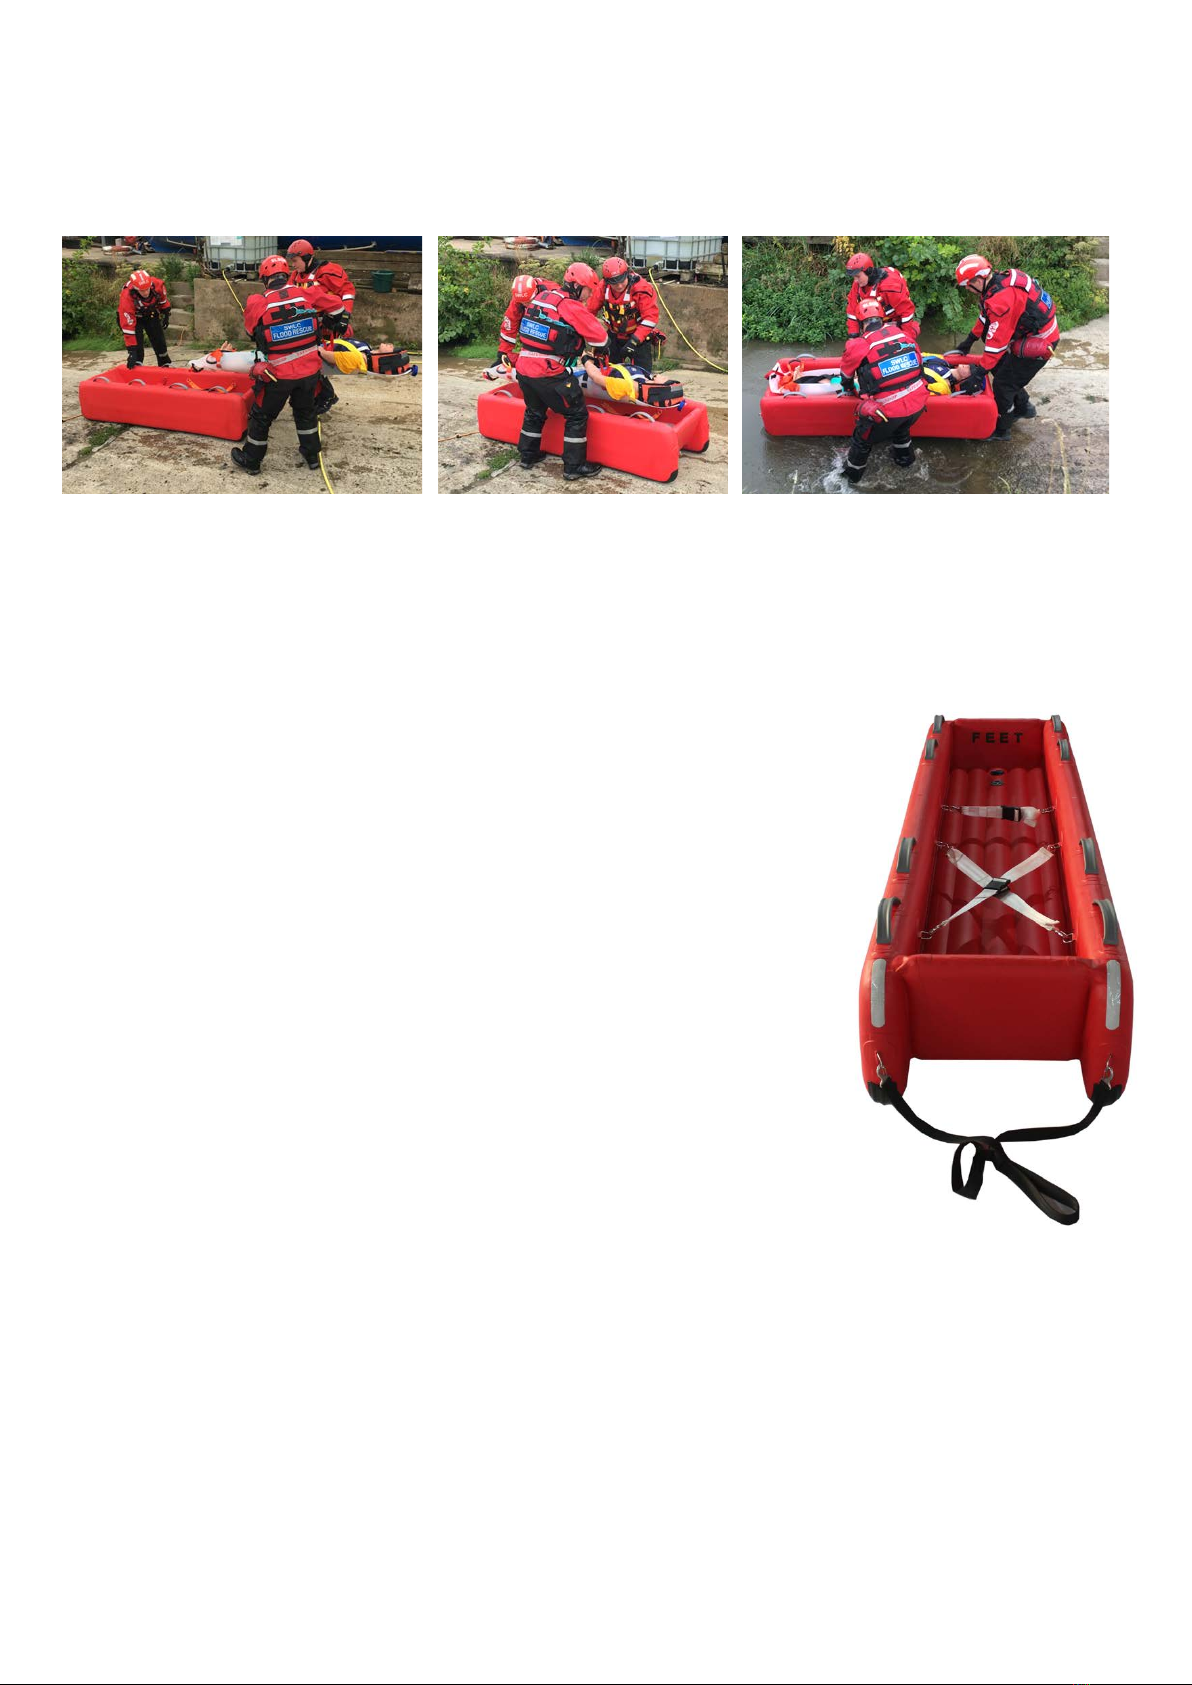
Black straps are provided at the head and foot of the sled to aid
stability and to tow, drag or stabilise the sled whilst moving the
device, particularly on low friction surfaces, such as water, mud,
grass, snow, marsh etc
The grey handles can be used to lift the sled, or assist with drag,
tow or stabilise.
White straps are provided to hold a person in the sled if required.
The white straps have quick release buckles to fasten, and also
have the ability to be removed from the sled via stainless buckles for
decontamination if required. If the person is already in a Saviour
Stretcher then these can be used to secure the stretcher into the
sled if required.
A person will, injury permitting, be placed in the orientation of the head towards the sign ‘HEAD’
and feet towards the ‘FEET’ sign. Due to the construction of the sled this generally provides a
slight head up or level position for the casualty when in use on water. If the person is in a
Saviour Stretcher and in the sled the interface of the stretcher and sled should give a head up
orientation. All this is of course dependent on circumstances and the build and or possible injury
suffered of the casualty. Should for any medical reason you require a head down position when
in use on water then reverse the patient and place the feet at the head end and vice versa – and
be monitored for effect. However, as with all good casualty handling no-one should be left in the
sled for any length of time or be unattended. This together with that the level of both the ground
being traversed and that of the sled on it should be carefully monitored.

Inspection and Maintenance
Inflatable sled walls and floor
The buoyancy walls and floor of the sled are manufactured from materials which require very
little maintenance. Wash the sled regularly using soapy water and hose down to remove dirt
etc. from the floor. Prior to washing ensure valve caps are inserted and locked in place.
Stubborn marks may be cleaned using an appropriate agent and then washed down as
above. Little maintenance is required. Periodically wash all areas down using warm soapy
water to remove dirt and stones. Check for wear and repair before storage. Do not re-stow
sled when still wet.
Inspection and Testing
It is suggested that inspection is carried out on delivery, after use and quarterly.
Recording of Tests
All sleds are to be identified by serial number found on inner of underside wall at either head
or foot. Details of the sled and identification should be recorded using the Units current
recording log. The results of all tests and inspections should be entered in the Unit current
recording log.
Upon Acceptance
1. Visual Inspection of sled fabric and seams
2. Check whole inventory of sled related kit is present
3. Record in log (as appropriate)
After Use
1. Wash down sled and clean as above.
2. Visual inspection of integrity of sled fabric and seams.
3. Check whole inventory of sled related kit is present (see above for list).
4. Remedy any defects.
5. Record in log. (As appropriate.)
Quarterly
1. If sled has not been used – check whole inventory of sled related kit is present (see above
for list).
2. Visual inspection of integrity of sled fabric and seams.
3. Remedy any defects.
4. Every second quarter fully inflate as per process and check for valve
leaks and resolve.
5. Record in log. (As appropriate.)

Technical Information:
Type
Saviour Aquatic Sled. 2.35m
Supplier
Saviour Stretchers Ltd. UK.
www.saviourmedical.com
Construction/Technical Data
Length – 2.35m
Beam – .65m
Sponson Dimensions each – 2.35m x .1m x .43m
Weight – approx. 24 kg
Air Chambers – 2 – main sled and separate floor section, floor fitted with pressure relief valve
and both inflated through ‘halkey roberts’ type valves
Carrying capacity – 1 person either secured in sled or in Saviour Stretcher.
Max. inherent buoyancy (total volume of air chambers) 230 litres.
Saviour Medical carries no responsibility for the use of this equipment. All operators
should be fully trained and competent in all features and safe usage of this device.
Table of contents
Other Saviour Medical Medical Equipment manuals