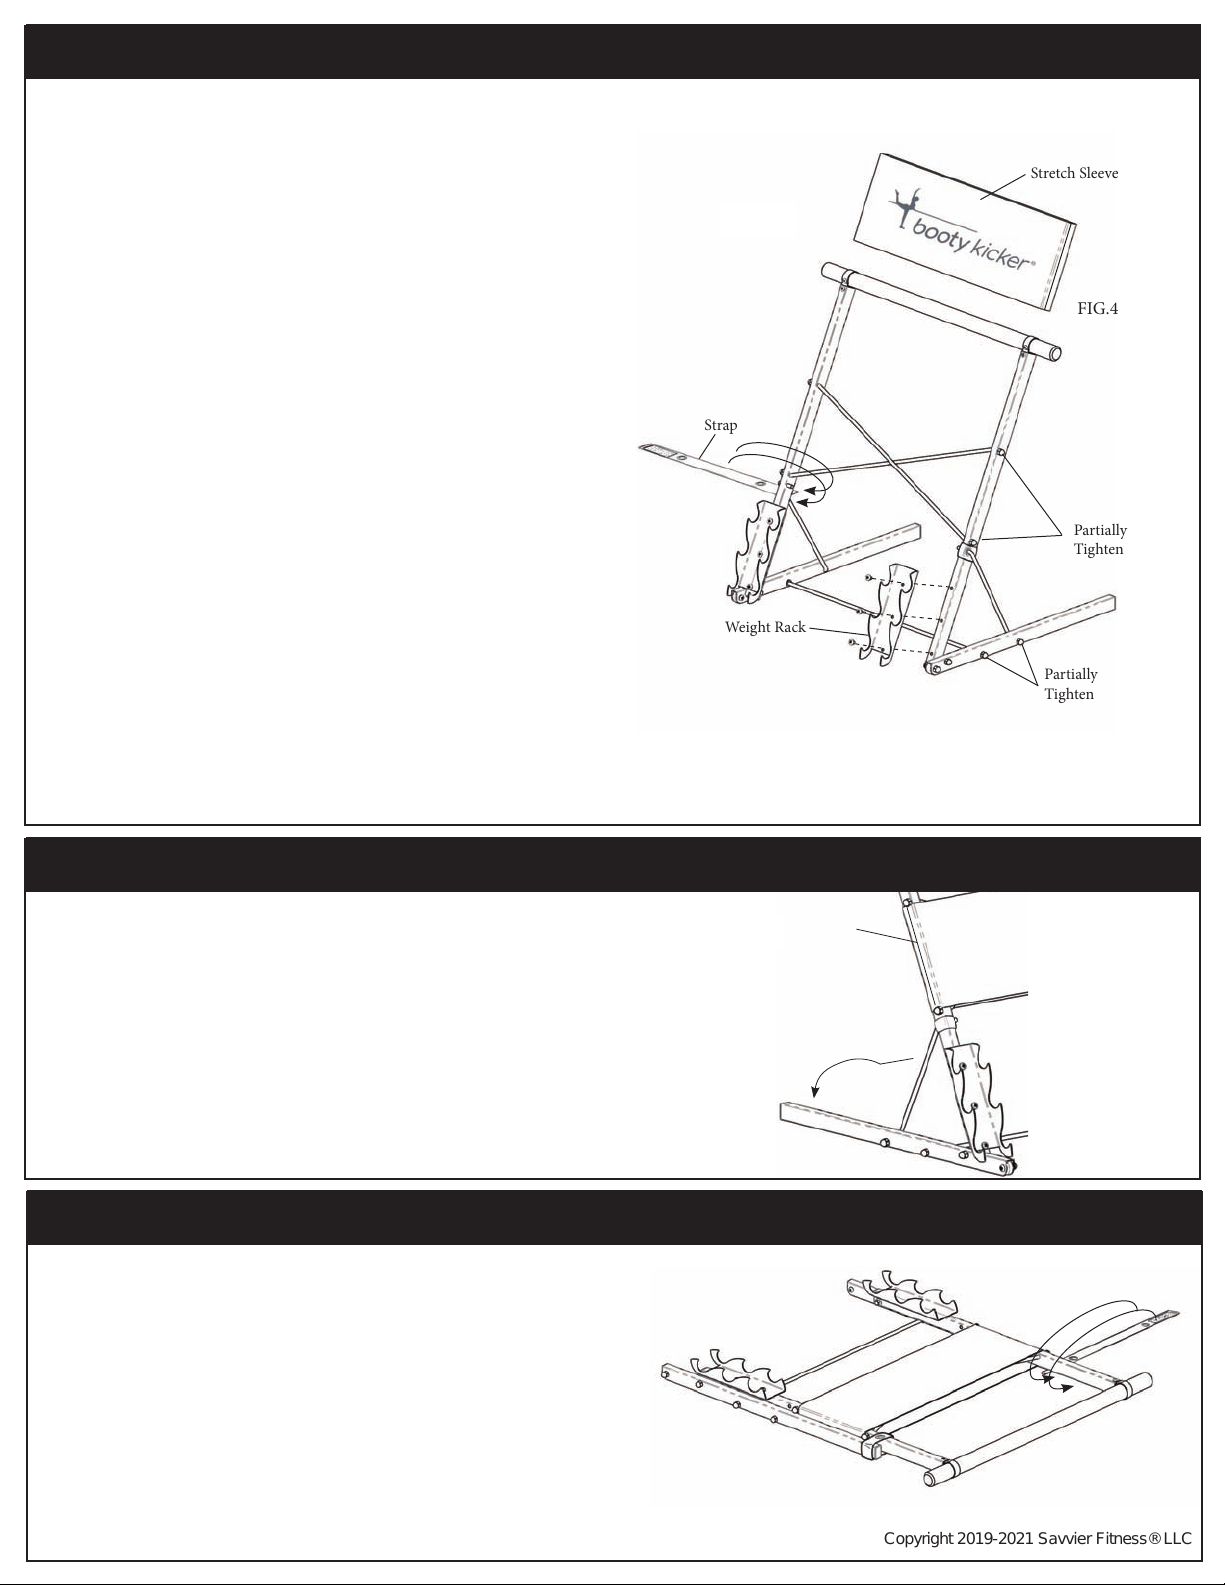
FIG.5
Stretch Sleeve
Seam
Folding
- Unwrap Strap. Gently pull
Gusset outward and fold
downward.
Step 4
• Be sure your Booty Kicker® is on a at level surface.
Placing light downward force on the Wooden Barre,
check that all four corners of the assembly are sitting
at on the oor. If the unit does not sit at or rocks, then
while standing at the Barre, carefully apply downward
and side to side force until the unit is resting at.
• Using the Tool provided, partially tighten the eight
Acorn Nuts of the Cross Rods, Base Rod and Folding
Gussets. Alternating sides as you tighten.
• Wrap the Strap two times around the Upright Bar,
engaging the two remaining holes of the Strap with the
open end of the Gusset Rod and secure the Velcro.
Repeat for the Strap on the opposite side.
• Check again the assembly is sitting at. If not at,
then slightly loosen the Acorn Nuts and repeat the
downward, side to side adjustment process. Once the
unit is sitting at, tighten the six Allen head screws
around the Brackets. Then fully tighten the six Acorn
Nuts of the Cross Rods and Base Rod. To allow folding,
gently tighten the Gusset Acorn Nuts. Conrm unit is
sitting at and if needed repeat the loosen / adjustment
/ tighten process.
• Place the Stretch Sleeve onto the Full Assembly, one
side at a time. Align the Sleeve between the Cross Bar
Acorn Nuts with the seam of the Sleeve between the
Cross Bar Acorn Nuts and the seam of the Sleeve at
the Upright Bar. As shown in Fig.5.
Step 5
Weight Racks
• Assemble the optional identical Weight Racks with the
weight openings facing upward. Align the three holes
of the Weight Stack to the Upright Bar, as shown in
Fig.4 and insert three Allen screws per side.
• Assure that the Weight Rack part is clear of the Base
Leg. Tighten each Allen screw.
• Place weights onto each Weight Rack, placing the
heaviest dumbbell at the bottom.
Folding
• Unwrap the Strap from each side of the fully assembled
Barre.
• While holding the Barre securely, gently pull outward on
a Gusset and fold the Gusset downward. Repeat on the
other side and fold the unit downward to meet the Base
Bar. As shown in Fig.6
• On each side, wrap the strap around both bars and
secure the Velcro.
• The folded Barre Assembly may be lifted and rolled.
Weights should be removed prior to moving or
transporting the Barre Assembly.
Copyright 2019-2021 Savvier Fitness® LLC
FIG.6
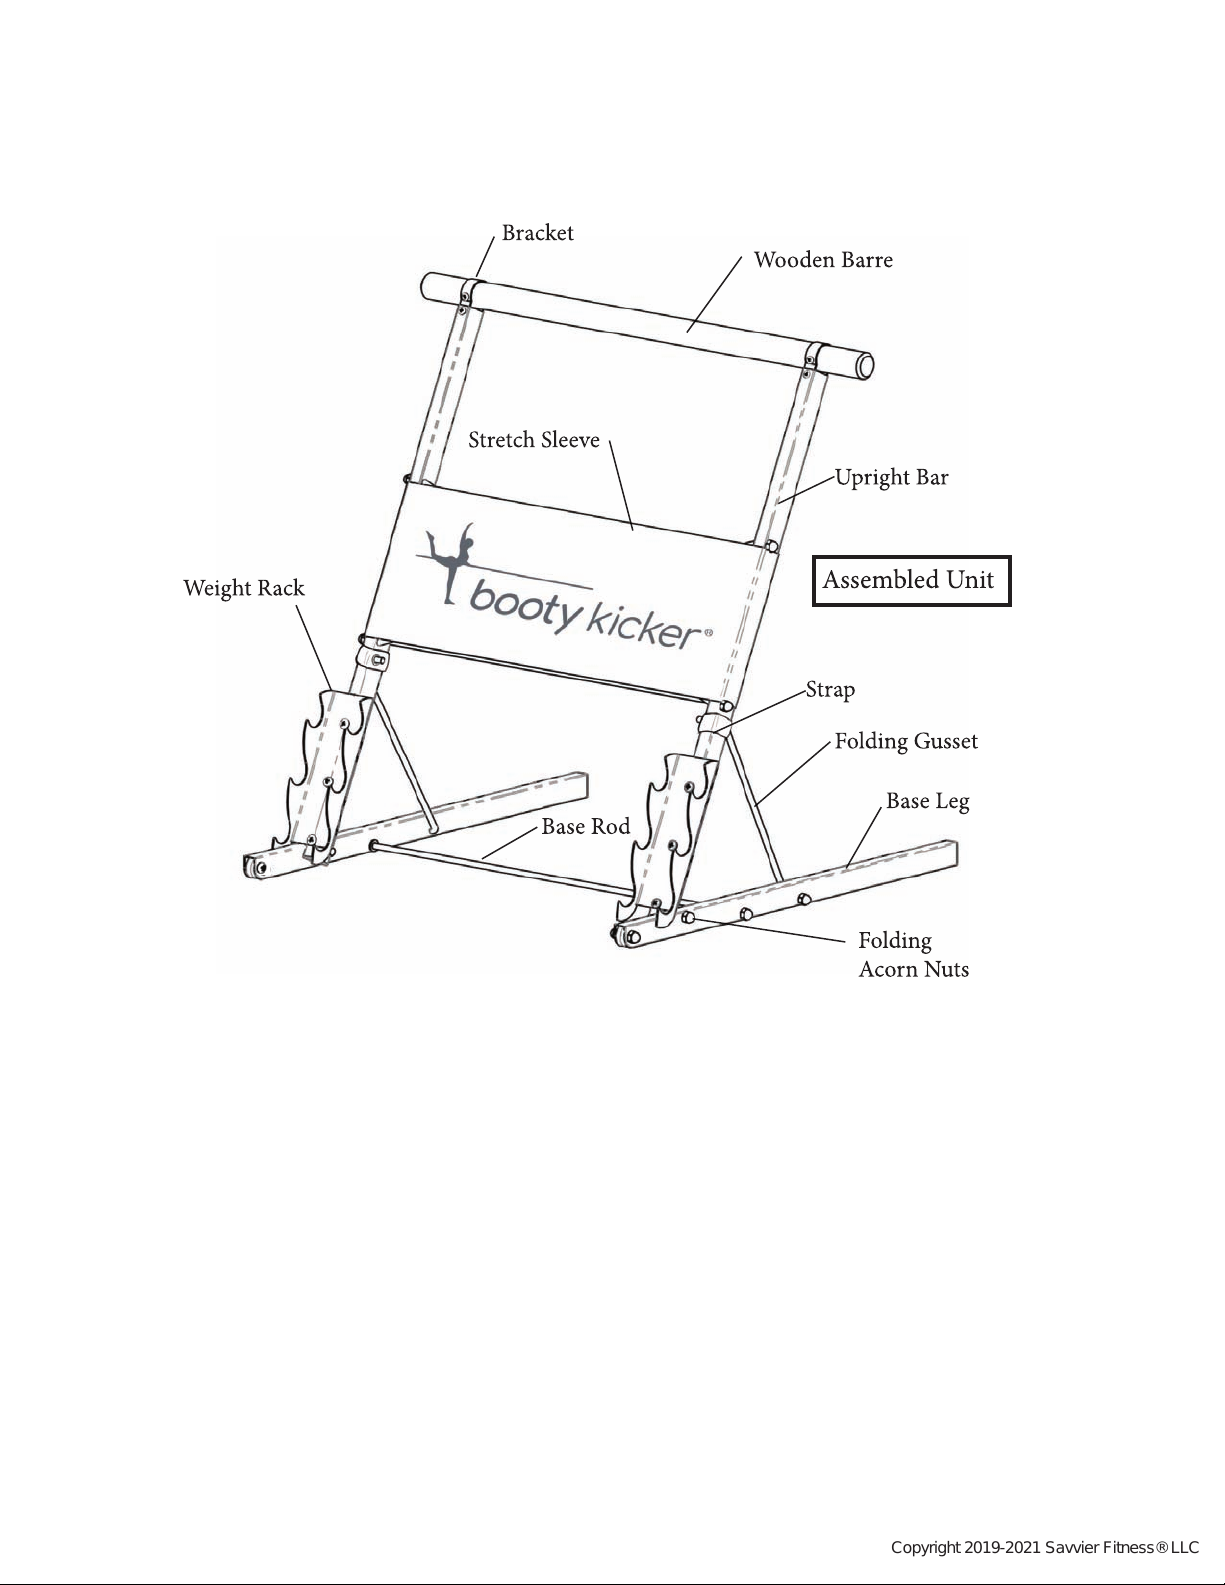
Step 4
Strap
Stretch Sleeve
Weight Rack
Partially
Tighten
Partially
Tighten
FIG.4