5
PREPARATION
The ScentDirect System and cartridge will need to be
retrofitted to appropriately work inside of the Tower.
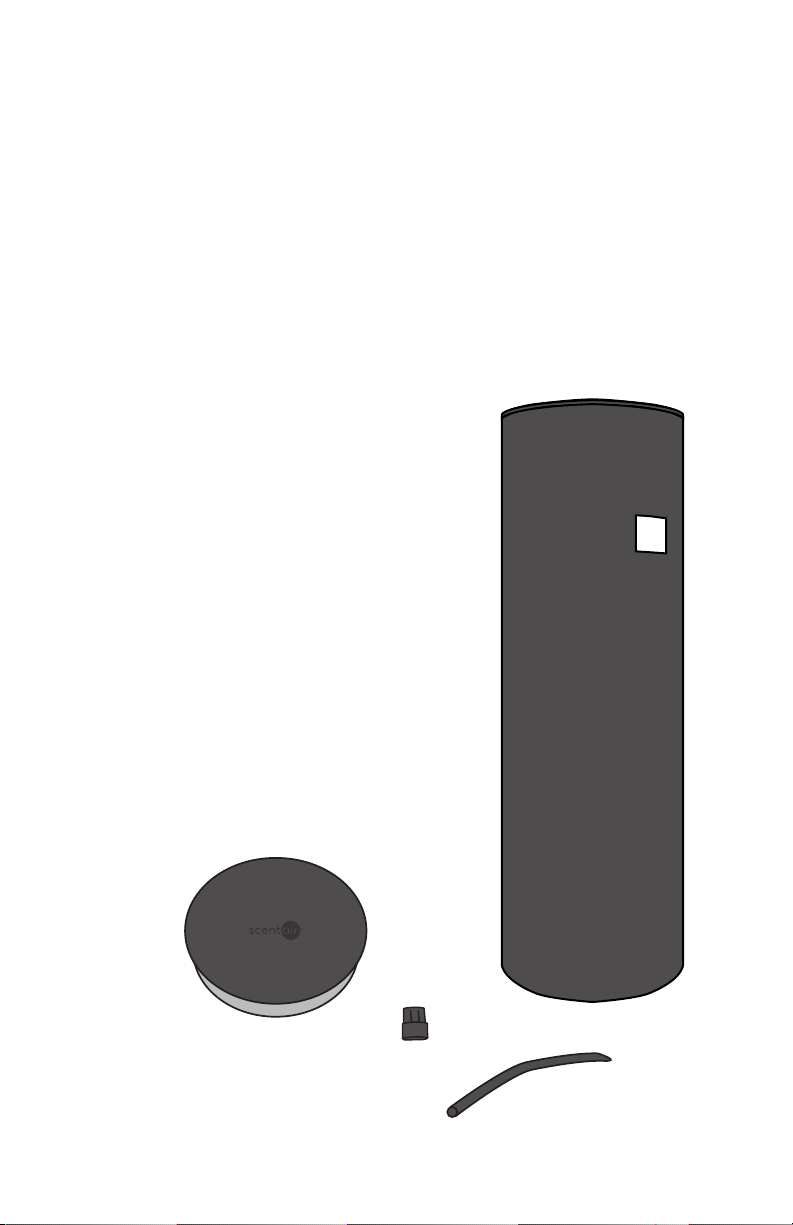
Before starting, completely remove all items from
their shipping boxes. Set the power supply to the side.
The wire cover will not be used in this application.
PARTS NEEDED:
• 1 - ScentDirect System
• 1 - ScentDirect Cartridge
• 1 - Black Extension Tube Cap
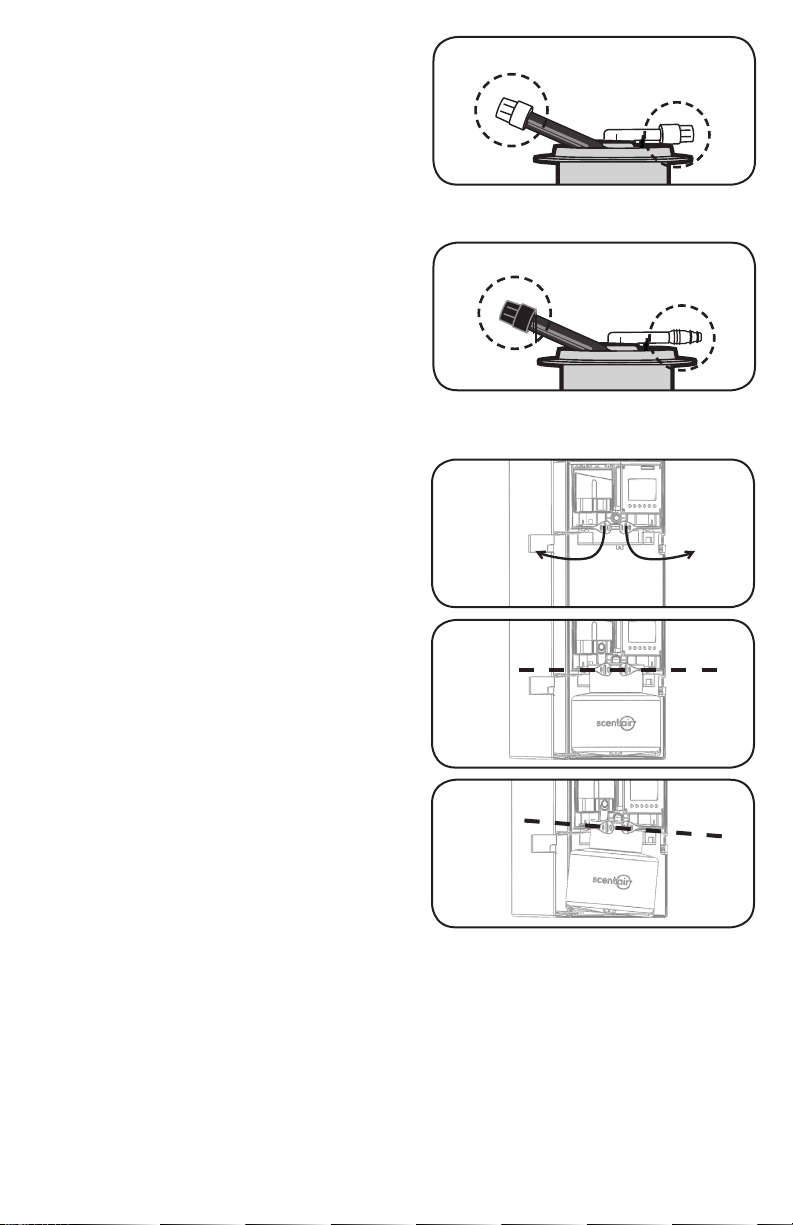
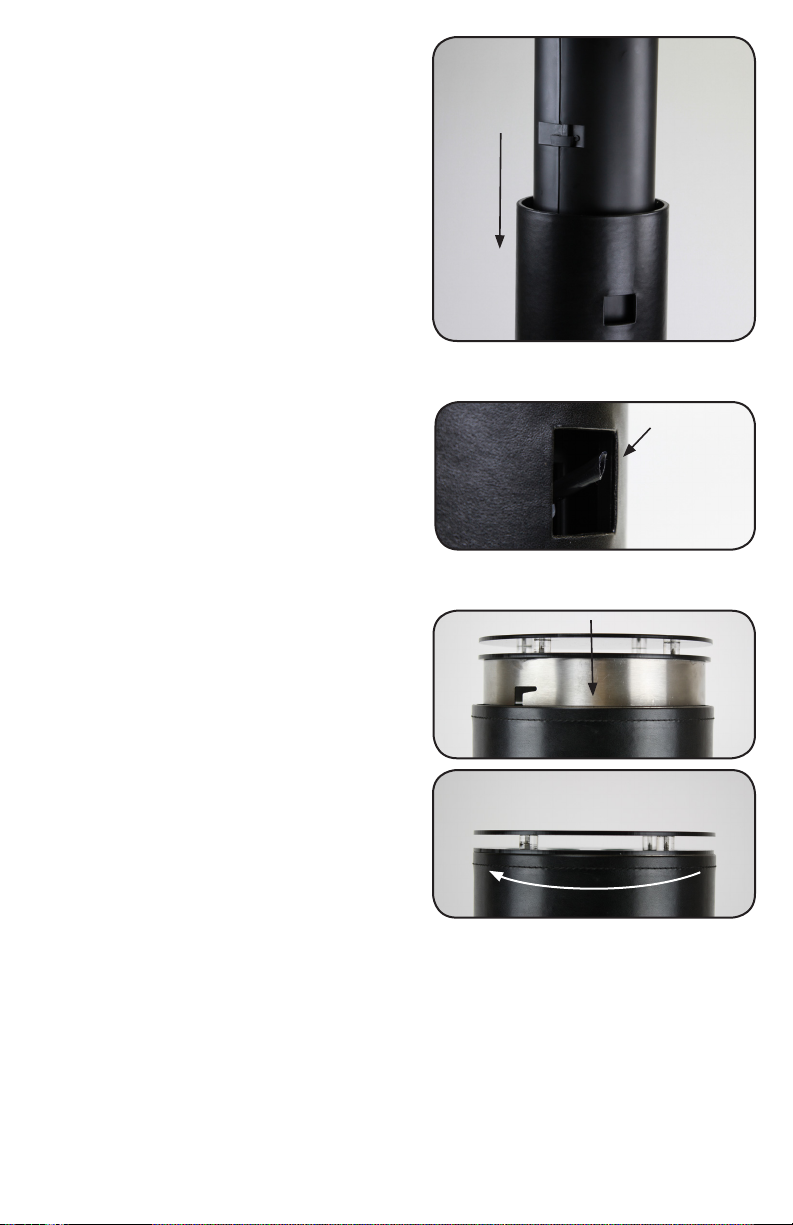
1. Unscrew the two shipping caps from the
ScentDirect cartridge. (Fig.1)
2. Screw the provided black extension tube
cap on the end of the black air outlet on the
ScentDirect Cartridge. (Fig.2)
3. Open the front door of the system by lifting
the door latch.
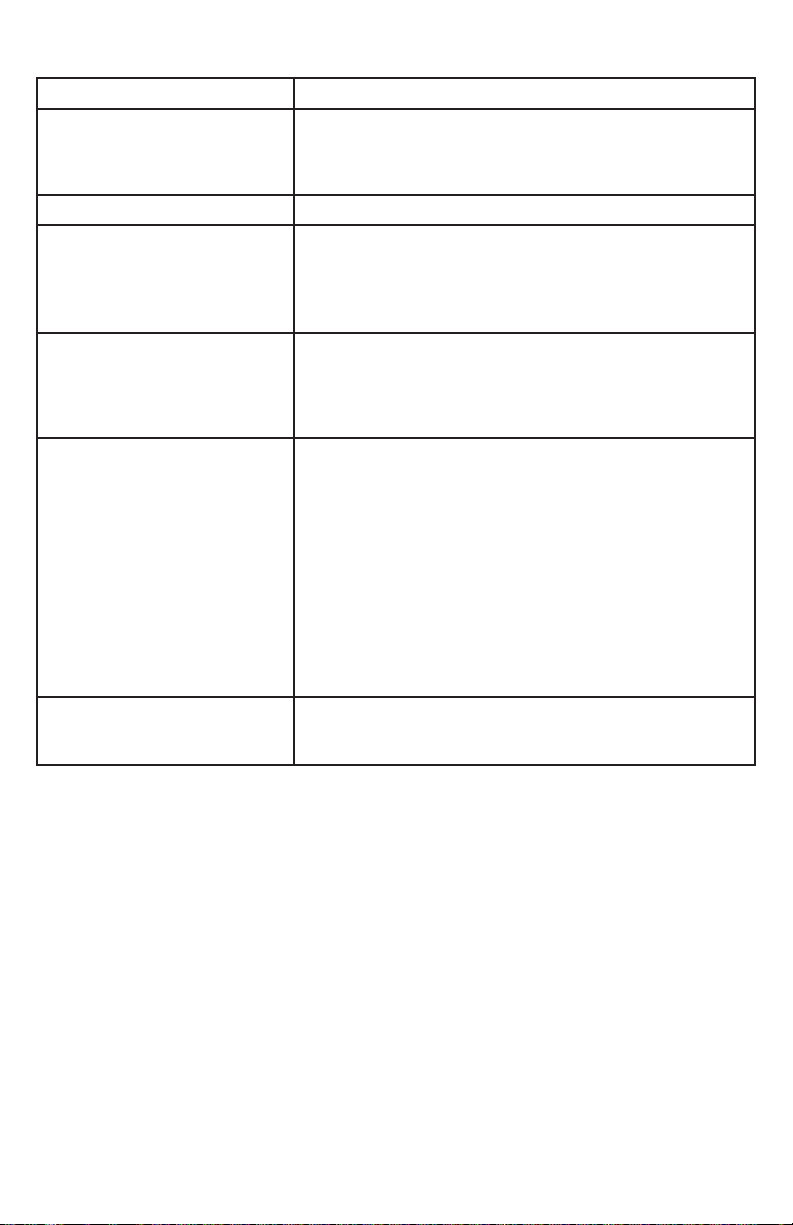
4. Pull the cartridge assembly removal levers
outward to allow the cartridge to be inserted
and slide the new scent cartridge assembly
into the system using the guide rails.
5. Insert the ScentDirect cartridge. The white air
inlet nozzle on the cartridge should align with
the air fitting in the back of the system.
6. Close the levers to lock the cartridge in place.
Do not force the levers. If they do not easily
close, ensure the white air inlet nozzle is
correctly aligned. (Fig.3)
7. Close and lock the ScentDirect housing door.
Fig.2: The black extension tube cap is attached to the black air
outlet nozzle on the cartridge. The air inlet tube does not have
a cap.
Fig.1: The ScentDirect cartridge will ship with white shipping caps
installed to prevent spilling.
Black Extension
Tube Cap
No Cap
Fig.3: The levers must be opened for the cartridge to be inserted.
Closing the levers locks the cartridge in place. Ensure the
cartridge is resting level on the guide plate and that the white air
inlet nozzle is correctly aligned to the air output fitting.
3
2