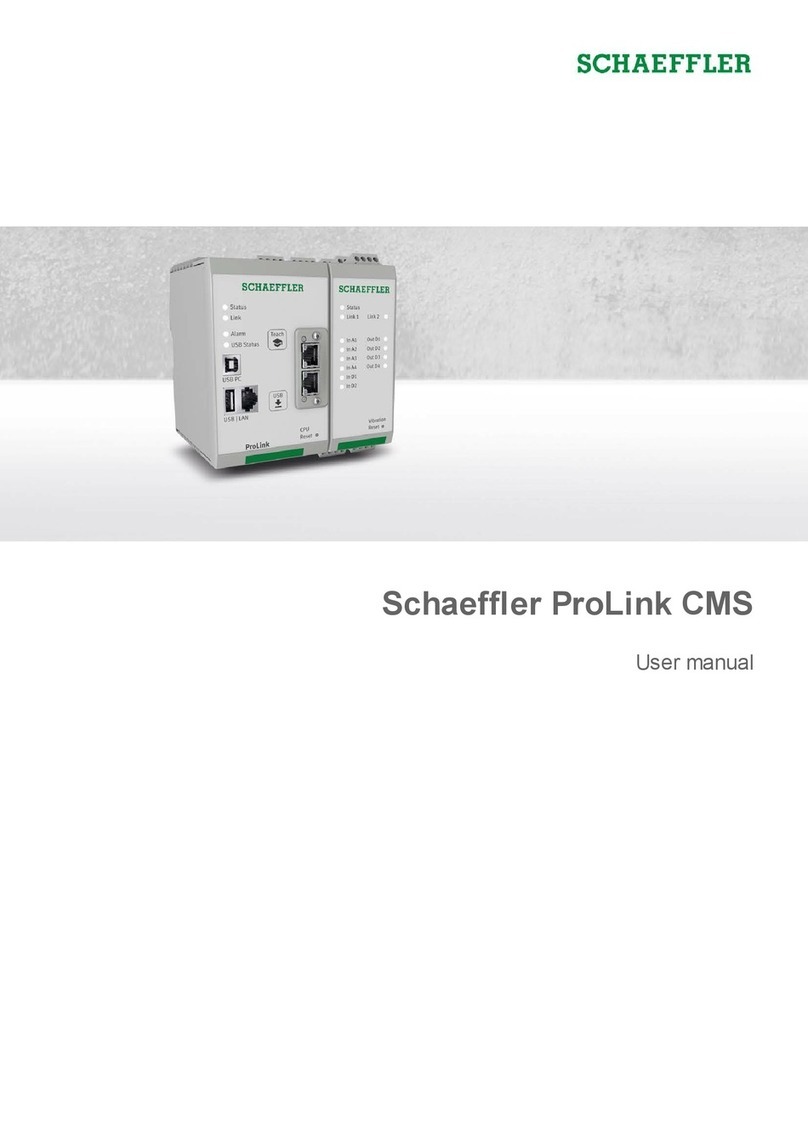
Schaeffler SmartCheck User manual

1
Schaeffler SmartCheck
User manual

2
Schaeffler Monitoring Services GmbH
Kaiserstraße 100
52134 Herzogenrath
Germany
Telephone: +49 (0) 2407 9149 66
Fax: +49 (0) 2407 9149 59
Email: industrial-services@schaeffler.com
Webside: www.schaeffler.com/services
All rights reserved.
No part of the documentation or software may be reproduced in any form or processed, duplicated or distributed using
electronic systems without our written consent. We would like to point out that the designations and brand names of the
various companies used in the documentation are generally protected by trademark, brand and patent laws.
Microsoft, Windows and Microsoft Edge are brands or registered trademarks of the Microsoft Corporation in the USA and/or
in other countries. Google Chrome™ is a trademark of Google. Loctite is a trademark of Henkel AG.
The software uses the following third-party provider libraries under their respective licences:
at91bootstrap, busybox, busybox-config, dropbear, expat, gdb, gettext, kexec-tools, kiss_fft, kmod, libcurl, libidn, libmodbus,
libunwind, linux
Full licence conditions for the respective libraries can be found in the software's program directory.
Version 1.16.0
Translation of the original user guide.
© 19/12/2019 - Schaeffler Monitoring Services GmbH
Imprint

3
Contents
Contents
.................................................................................................................................................... 41 General
.............................................................................................................................................................................................. 41.1 Safety inform ation
.............................................................................................................................................................................................. 41.2 Hazard symbols and signal w ords
.............................................................................................................................................................................................. 51.3 About this guide
.................................................................................................................................................... 62 Product description
.............................................................................................................................................................................................. 62.1 Intended use
.............................................................................................................................................................................................. 72.2 Modifications by the user
.............................................................................................................................................................................................. 72.3 Technical data
.............................................................................................................................................................................................. 82.4 Scope of delivery
.................................................................................................................................................... 93 Installation
.............................................................................................................................................................................................. 93.1 Installation site and m aterials required
.............................................................................................................................................................................................. 103.2 Dimensions
.............................................................................................................................................................................................. 113.3 Installing the device directly on a com ponent
.............................................................................................................................................................................................. 123.4 Installing the device on a sensor m ounting plate
.............................................................................................................................................................................................. 133.5 Closing the m ounting aperture
.................................................................................................................................................... 144 Set-up
.............................................................................................................................................................................................. 154.1 Connection overview
.............................................................................................................................................................................................. 164.2 Connection details
.............................................................................................................................................................................................. 184.3 Connecting inputs and outputs
.................................................................................................................................................................................. 18Connection configuration: Digital speed signal 4.3.1
.................................................................................................................................................................................. 20Connection configuration: Analogue speed signal 4.3.2
.................................................................................................................................................................................. 22Connection configuration: Analogue output signal 4.3.3
.................................................................................................................................................................................. 23Connection configuration: Digital output signal 4.3.4
.............................................................................................................................................................................................. 254.4 Connecting PC/Ethernet
.............................................................................................................................................................................................. 264.5 Connecting the pow er supply
.............................................................................................................................................................................................. 284.6 Connecting multiple devices
.................................................................................................................................................... 305 Operation and controls
.............................................................................................................................................................................................. 325.1 Reset and Teach buttons
.................................................................................................................................................... 346 Further information
.................................................................................................................................................... 367 Maintenance and repair
.................................................................................................................................................... 378 Decommissioning and disposal
.................................................................................................................................................... 389 Manufacturer/support
.................................................................................................................................................... 3910 Appendix
.........................................................................................................................................................0Index

4
1 General
1.1 Safety information
The Schaeffler SmartCheck vibration monitoring system is manufactured in accordance with the recognised
standards and guidelines (see Declaration of Conformity) and is safe to operate. Nevertheless, the device can pose
unavoidable residual hazards to users and third parties or to property, therefore it is imperative that all of the safety
information given in this guide is observed. The generally applicable safety and accident prevention regulations must
also be taken into account. Failure to do so may result in the health and life of persons being put at risk, or cause
damage to property. The safety information in this guide applies in the Federal Republic of Germany. In other
countries, the relevant national regulations apply.
According to its intended use, the SmartCheck device is not subject to EC Machine Directive
2006/42/EC.
This guide differentiates between
·
General safety information, which applies to the whole guide and is listed in this chapter
and
·
Specialised safety information, which you will find in each chapter, either at the start or accompanying
individual actions
General safety information
Schaeffler SmartCheck is integrated in a machine as a system for permanent machine monitoring. The system must
be installed in the machine, connected to machine components and operated in the machine within the
specifications set out in this guide (see Technical data ). The machine owner is responsible for installing the
device properly and for ensuring safe operation in the machine as a whole.
In addition to recording measured values, it is also possible to transfer characteristic values or alarms to superordinate
control systems via the SmartCheck outputs. In doing so, the limitations of use for the connected machine
components must also be observed, in addition to the SmartCheck specification. The machine owner bears sole
responsibility for this.
The Schaeffler SmartCheck device must not be used for safety-relevant tasks or for critical
switching operations! This applies in particular when these tasks or switching operations have
health and safety implications.
Operating personnel
SmartCheck may only be installed, operated and maintained by authorised qualified electricians who have received
training in accordance with the applicable, relevant regulations.
1.2 Hazard symbols and signal words
Hazard symbols used in this guide
Safety information and warnings are identified by specific, standardised hazard symbols. If no specific symbol applies,
a general hazard symbol is used.
General hazard symbol
DANGER
The nature and source of the hazard are specified here
Actions to prevent the hazard are explained here.
7

5
General
Specific hazard symbols
DANGER
DANGER FROM ELECTRICAL CURRENT!
This symbol indicates a danger from electric shock that can cause personal injury or even
death, or damage to property.
Signal words used in this guide
Signal words indicate the severity of the hazard that occurs if the actions to reduce the hazard are not taken.
·
Caution: Minor damage to property may occur.
·
Warning: Minor personal injury or severe damage to property may occur.
·
Danger: Personal injury may occur. There is a risk of fatal injury in particularly severe cases.
1.3 About this guide
This guide describes the installation and use of the Schaeffler SmartCheck device and contains important information
about using the device safely and correctly. Please read through this guide carefully before commissioning the
device, and keep it for future reference.
Make sure that
·
This guide is available to all users of the device.
·
If the product is passed on to other users, that this guide is also passed on with it.
·
Additions and amendments provided by the manufacturer are always attached to this guide.
Further information
In addition to the device described in this guide, the Schaeffler SmartCheck vibration monitoring system also includes
the integrated Schaeffler SmartWeb software, which is dealt with in a separate manual.
To operate the Schaeffler SmartCheck device, you will also need the supplied Schaeffler SmartUtility Light software.
This is also dealt with in a separate manual. You also have the option of purchasing the Schaeffler SmartUtility
software, which features enhanced functionality.
Definitions
·
Product: The Schaeffler SmartCheck device described in this manual.
·
User: person or organisation capable of putting the product into operation and using it.
·
Qualified person: a person who, by virtue of their relevant training and experience, is qualified to identify risks and
avoid potential hazards that may be caused by the operation or maintenance of a product.
Symbols used
This symbol indicates
·
Helpful additional information and
·
Device settings or practical tips that will help you to perform activities more efficiently.
Cross-reference symbol : this symbol refers to a page in the manual that provides further information. If you are
reading the manual in PDF format on a screen, clicking the word to the left of the cross-reference symbol will take
you straight to the section in question.
5

6
2 Product description
About the Schaeffler SmartCheck system
Schaeffler SmartCheck is a vibration monitoring system for permanent frequency-selective monitoring. Other
measurements can be captured, recorded and analysed using two integrated signals and up to three connected
signals. After the analysis, the system can switch outputs and display the status using LEDs depending on user-
defined alarm limits.
Inputs are available, which record additional signals, to allow the device to be integrated into a superordinate
system. These signals can be used as command variables for a dependent signal analysis, e.g. to initiate time or
event-controlled measurement tasks.
The Schaeffler SmartCheck device can be used to cover a wide range of applications; the SmartCheck device can be
configured to meet your own requirements using the integrated web application and Schaeffler SmartWeb
software. Multiple SmartCheck devices can be combined in a network. Regardless of the number of devices, they
can be managed centrally on a PC using the Schaeffler SmartUtility Light software, or optionally using the Schaeffler
SmartUtility software.
With Schaeffler SmartCheck, Schaeffler offers status monitoring that is optimised to suit your requirements.
The SmartCheck device is ready for measurement as soon as the power supply is connected.
To ensure optimum vibration monitoring from the outset, we recommend that you do not
start the SmartCheck device until
·
All connections have been correctly made, and
·
The machine to be monitored is in a normal operating state
2.1 Intended use
The Schaeffler SmartCheck device is intended solely for:
·
Capturing and analysing vibration measurement signals
·
Capturing temperature signals
·
Evaluating signals entering the device at its inputs
The Schaeffler SmartCheck device may only be operated within the limitations of use specified in the Technical
data .
Measured-value analyses and changes to settings may only be made using the supplied Schaeffler SmartUtility Light
software, the optional Schaeffler SmartUtility software, the integrated Schaeffler SmartWeb software, or where
possible, on the device itself.
Any other or additional use of the device is deemed to be not intended; the user bears sole risk for such use. The
user is responsible for the intended use of the device. This also includes observing this guide.
7

7
Product description
2.2 Modifications by the user
The user must not make any modifications to the Schaeffler SmartCheck device. The user may only make settings
on the device itself or via the Schaeffler SmartWeb, Schaeffler SmartUtility Light or Schaeffler SmartUtility software.
The user bears responsibility for any further modifications! Should you detect a fault with your Schaeffler
SmartCheck device, please contact our Support team.
2.3 Technical data
·
The SmartCheck device must not be used in measurement voltage categories II, III or IV!
·
Cover any M12 connections that are not in use with the plugs supplied. This is the only
way to ensure that the degree of protection is maintained.
Internal sensors
Vibration
Acceleration sensor (piezoelectric sensor)
Frequency range: 0.8 Hz–10 kHz
Measurement range: ±50 g
Temperature
Measurement range: -20 to +70°C
Measurement
Measurement functions
Acceleration
Speed and path by integration
Systemtemperature
Process parameters (e.g. speed, load, pressure)
Diagnostic methods
Time signal, demodulation, spectrumand trend analysis, speed and frequency tracking
Characteristic values (time range and frequency range)
Defined characteristic
values
DIN/ISO 10816
Calculated characteristic
values
RMS, frequency-selective RMS, constant component, peak, peak-to-peak, crest factor,
Wellhausen count, condition guard
Other user-defined characteristic values are possible.
Signal processing
Frequency resolution
1600, 3200, 6400 or 12800 lines
Min. line width 0.0039 Hz at 50 Hz (depending on low-pass)
Measurement resolution
24 bit (A/D converter)
Frequency range
0.8 Hz–10 kHz
Low-passes
50 Hz–10 kHz (50 Hz, 100 Hz, 200 Hz, 500 Hz, 1 kHz, 2 kHz, 5 kHz, 10 kHz)
High-passes (demodulation
only)
750 Hz, 1 kHz, 2 kHz (other filters on request)
Memory
Program and data
64 MB RAM, 128 MB flash
Inputs and outputs
Inputs
2 analogue inputs (0-10 V/0-24 V/0-20 mA/4-20 mA), frequency range 0-500 Hz, 12 bit
1 digital input (0-30 V, 0.1 Hz-1 kHz)
Outputs
1 analogue output (0-10 V/0-20 mA/4-20 mA), 12 bit
1 switching output (open collector, max. 1 A, 28 V)
Optional galvanic isolation between inputs and outputs
Interfaces
Control elements
2 capacitive buttons (learning mode, alarmreset, restart, factory settings)
Display elements
1 LED for displaying the status and alarms
1 LED for confirming buttons
2 LEDs for displaying communication
Communication
Ethernet 100 Mb/s
RS485 (not currently supported)

8
Electrical connections
3 reverse-polarity protected M12 plug connectors for supply, RS485, inputs/outputs and
Ethernet
Miscellaneous
Housing
Glass fibre reinforced plastic
Fixing
M6x45 hex socket head screw
Support area on machine: 25 mmØ
Power consumption
<200 mA at 24 V
Ambient temperature
-20 to +70°C
Internal operating
temperature
-20 to +85 °C
Power supply
16 - 32 VDC or
Power over Ethernet (PoE) pursuant to 802.3af Mode A
Dimensions
44 mmx 57 mmx 55 mm
Weight
Approx. 210 g
Protection type
IP 67
Operating system
Embedded Linux
Software
Schaeffler SmartWeb (Google Chrome or Microsoft Edge)
Schaeffler SmartUtility Light or optionally Schaeffler SmartUtility (additional cost)
Subject to technical modifications!
2.4 Scope of delivery
Scope of delivery
·
Schaeffler SmartCheck device with integrated Schaeffler SmartWeb software
·
User documentation for Schaeffler SmartCheck and Schaeffler SmartWeb on CD-ROM
·
Schaeffler SmartUtility Light software with user documentation on CD-ROM
·
1 fixing screw: M6x45 hex socket head screw
·
1 O-ring to secure the fixing screw in position
·
1 plug with logo to cover the mounting aperture
·
3 plugs to cover unused M12 connections
The standard scope of delivery for the Schaeffler SmartCheck device does not include any
cables for connecting the device.
Optional accessories
An extensive range of optional accessories for the Schaeffler SmartCheck is available from Schaeffler Monitoring
Services GmbH:
·
SmartUtility software with user documentation on CD-ROM; this software features enhanced functionality
compared with the SmartUtility Light software
·
M6 sensor mounting plate for mounting the SmartCheck device (stainless steel 1.4301)
·
Power cable for SmartCheck; 8-pin M12 socket on a free cable end
·
Ethernet cable for SmartCheck; M12 connector on RJ45
·
Input/output connection cables; 8-pin M12 connector on free cable end
·
M12 Y-splitter to facilitate wiring the power supply to multiple SmartCheck devices
Further information is available from your customer support representative (see Support).

9
Installation
3 Installation
The following sections contain important details about setting up the Schaeffler SmartCheck device on a machine
that you wish to monitor.
Ensure that the device is free from damage prior to installation.
In case of doubt, consult a qualified electrician or contact your customer support representative
at Schaeffler Monitoring Services GmbH.
3.1 Installation site and materials required
Installation site
To install the SmartCheck device, select a site with optimum vibration transfer. To monitor a bearing for example,
this would be near the roller bearing you wish to monitor and radial to the axis of rotation. It is recommended to
consult a vibration expert for this step to ensure optimum condition monitoring. Schaeffler Monitoring Services
GmbH offers a service that is tailored to your specific requirements. Further details about this can be obtained from
your customer support representative (see Support).
Please also note the following points:
·
The SmartCheck device must be mounted vertically in relation to the installation surface.
·
The installation surface must not be curved or uneven.
·
The surface should exhibit a mean roughness index of Ra = 3.2 µ m and should be free from impurities.
·
The SmartCheck device can be operated at ambient temperatures from -20°C to +70°C
Installation type
To ensure the SmartCheck device is installed safely and permanently, it should be mounted on the machine and/or
component that you wish to monitor.
The device can be screwed directly into a hole on the component. To do this, you will need to drill a tapped hole at
least 9 mm deep at the selected position; the surface must exhibit a mean roughness index of Ra = 3.2 µ m.
If this is not possible, you can bond an M6 sensor mounting plate to the installation surface and then screw the
device to the mounting plate. The sensor mounting plate is available as an optional accessory from Schaeffler
Monitoring Services GmbH.Materials
The following materials are also required to install the SmartCheck device:
·
Tool for creating the tapped M6 hole or an M6 sensor mounting plate including an adhesive suitable for vibration
measurement (e.g. Loctite 330)
·
Some lubricant (oil, grease)
·
Offset screwdriver for M6 hex socket head screw
·
A torque wrench (tightening torque 10 Nm) with socket for a 6-mm hex socket head screw
Optional items:
·
Vibration-resistant screw locking compound (e.g. Loctite 243 medium-strength threadlocker)
·
Cable ties for securing the cable

10
3.2 Dimensions
The following illustrations show the SmartCheck device from different perspectives with dimensions accurate to the
millimetre.
Basic dimensions from the front
This front view shows the connections of the SmartCheck device as well as the fixing screw protruding downward
and the sensor area.
Basic dimensions from the side
The side view shows the angled surface of the SmartCheck device; you can also see how far the connections
protrude and how the sensor area is dimensioned.
Basic dimensions in cross-section
The open cross-section affords a view into the mounting aperture of the SmartCheck device and shows the
dimensions of the fixing screw and sensor area.

11
Installation
3.3 Installing the device directly on a component
If you require the SmartCheck device to be screwed directly onto a machine or component, the following
prerequisites for the installation must be satisfied:
·
The component must have a minimum wall thickness of 9 mm.
·
The installation surface must not be curved or uneven.
·
The surface should exhibit a mean roughness index of Ra = 3.2 µ m
Proceed as follows:
1. Prepare a circular, smooth and level installation surface with a minimum diameter of 25 mm.
2. Now drill a perpendicular M6 hole at least 9 mm deep in the centre of the installation surface.
Detail drawing of device installed on a component
3. Clean the installation surface.
4. Apply a thin film of lubricant to the cleaned surface.
Adding lubricant will improve the transfer of vibrations.
5. Insert the M6x45 hex socket head fixing screw supplied into the SmartCheck mounting aperture.
·
To prevent the screw from falling out during installation, you can secure it where
necessary using an O-ring that is also included in the scope of delivery. Ensure that the O-
ring does not slip between the installation surface and the sensor area during installation as
this would impede vibration transfer and distort the measurement result.
·
You can also use an optional screw locking compound (e.g. Loctite threadlock) to ensure
the installation is permanent.
6. Align the sensor area of the SmartCheck device on the installation surface and hand-tighten the fixing screw
using an offset screwdriver. Ensure that SmartCheck is sitting flat on the surface to ensure optimum vibration
transfer.
7. Use a torque wrench to tighten and secure the connection to a tightening torque from 5 to 10 Nm.
To avoid damage, select the fixing screw and the torque setting in line with the material
properties of both the installation point and the screw.
8. Check that Schaeffler SmartCheck is seated securely.
9. Close the mounting aperture on the device by inserting the plug bearing the logo until it snaps in place.
You can now set up and connect Schaeffler SmartCheck.
13
14

12
3.4 Installing the device on a sensor mounting plate
If the SmartCheck device cannot be screwed directly onto a machine or component, you can bond an M6 sensor
mounting plate onto the installation surface and then screw the device to the mounting plate. The M6 sensor
mounting plate is available as an optional accessory from Schaeffler Monitoring Services GmbH. Please contact your
customer support representative (see Support).
In order to install the device using a sensor mounting plate, the following prerequisites must be satisfied:
·
The installation surface must not be curved or uneven.
·
SmartCheck must be secured square to the installation surface
·
The surface should exhibit a mean roughness index of Ra = 3.2 µ m
Proceed as follows:
1. Prepare a circular, smooth and level installation surface with a minimum diameter of 25 mm.
Detail drawing of device installed on a sensor mounting plate
2. Clean the installation surface.
3. Apply an adhesive that is suitable for vibration measurement to the surface (e.g. Loctite 330).
Please select an adhesive that is suitable for the installation site and the ambient conditions.
4. Position the sensor mounting plate on the adhesive and press it down firmly.
Wait until the adhesive has fully dried.
5. Clean the surface of the sensor mounting plate.
6. Apply a thin film of lubricant to the cleaned surface.
Adding lubricant will improve the transfer of vibrations.
7. Insert the M6x45 hex socket head fixing screw supplied into the SmartCheck mounting aperture.
·
To prevent the screw from falling out during installation, you can secure it where necessary
using an O-ring that is also included in the scope of delivery. Ensure that the O-ring does
not slip between the installation surface and the sensor area during installation as this would
impede vibration transfer and distort the measurement result.
·
You can also use an optional screw locking compound (e.g. Loctite threadlock) to ensure
the installation is permanent.
8. Align the sensor area of the SmartCheck device on the installation surface and hand-tighten the fixing screw
using an offset screwdriver. Ensure that SmartCheck is sitting flat on the surface to ensure optimum vibration
transfer.

13
Installation
6. Use a torque wrench to tighten and secure the connection to a tightening torque from 5 to 10 Nm.
9. Check that Schaeffler SmartCheck is seated securely.
10. Close the mounting aperture on the device by inserting the plug bearing the logo until it snaps in place.
You can now set up and connect Schaeffler SmartCheck.
3.5 Closing the mounting aperture
Close the mounting aperture on the device by inserting the plug bearing the logo until it snaps in place.
Mounting aperture with plug
The plug can be removed by inserting the blade of a flat-tip screwdriver under the bevels
beside the logo and carefully levering it out.
13
14

14
4 Set-up
You can use the connections on the Schaeffler SmartCheck device to
·
Set up inputs and outputs and various connection configurations
·
Set up a PC/Ethernet connection and
·
Connect the power supply
To set up and operate the SmartCheck device, you will need the following connection cables, which are not
included in the standard scope of delivery:
·
Input/output cables
·
Ethernet connection cable (Ethernet/PoE)
·
Power supply cable
·
The Schaeffler SmartCheck device may only be prepared for use by persons who are verifiably
qualified to do so in accordance with the relevant regulations.
·
Ensure that the SmartCheck device is de-energised while set-up operations are being carried
out.
General
Please note the following information when connecting cables:
·
Ensure that the sockets for the plug connections are clean and free from impurities. Dirt or moisture in plug
connections can impair signal quality.
·
When securing cables, ensure that they are not subjected to any mechanical strain. If necessary, fit strain relief
accessories.
·
Observe the minimum permissible bending radii for the cables. These can be found in the data sheets from the
cable manufacturer. A minimum bending radius of 60 mm is recommended for cables from the standard range of
accessories from Schaeffler Monitoring Services GmbH.
·
Attach the cables in such a way that they are laid firmly and cannot be knocked.
·
Do not lay signal cables parallel to high-power lines.
Example showing power supply cable from the standard range of accessories
16
16
17

15
Set-up
4.1 Connection overview
In the following graphic you will find:
·
A detailed circuit diagram with information concerning all of the connection options for the SmartCheck device,
i.e. concerning the inputs and outputs , communication via Ethernet and the power supply
·
An overview of the positions of plugs and sockets on the device
·
An overview of the pin assignments for the plugs and sockets
Use standard cables to connect external sensors, control signals and the power supply to
SmartCheck. You can obtain these cables from Schaeffler Monitoring Services GmbH or your
supplier.
18 25 26

16
·
The numbering of the connections corresponds to the numbering specified in the detailed
information for each individual connection. For more information, refer to the Connection
details section.
·
The information relating to the colours used for the cable assignments refers to the cables
in the optional accessories for the Schaeffler SmartCheck device.
4.2 Connection details
Use the M12 connections on the SmartCheck device to connect the inputs and outputs , the PC/Ethernet
connection and the power supply :
·
Connection 1: Input/output socket
·
Connection 2: Ethernet plug
·
Connection 3: Power supply plug
Details on the assignment of the various cables required can be found in the sections below.
Cover any M12 connections that are not in use with the plugs supplied. This is the only way
to ensure that the degree of protection is maintained.
Connection 1: Input and output socket
The inputs and outputs of the SmartCheck device can be connected using the top left socket.
The pins are defined as follows:
Pin assignment
No.
Signal
Colour*
Front view of the device
1.1
GND inputs
White
1.2
Digital input
Brown
1.3
Analogue input 1
Green
1.4
Analogue input 2
Yellow
1.5
GND outputs
Grey
1.6
Analogue output
Pink
1.7
Digital output
Blue
1.8
Not connected
Red
* Colour specifications apply for standard cables from the optional accessories for the Schaeffler SmartCheck device.
Connection 2: Ethernet plug
The Ethernet plug, which you can use to connect the SmartCheck device to your computer and to the
Internet/Intranet, is located at the top right.
16
8
16
16 17

17
Set-up
The pins are defined as follows:
Pin assignment
No.
Signal
Colour*
Front view of the device
2.1
TD+ transmission data
White/orange
2.2
RD+ received data
White/green
2.3
TD- transmission data
Orange
2.4
RD- received data
Green
* Colour specifications apply for standard cables from the optional accessories for the Schaeffler SmartCheck device.
Connection 3: Power supply plug
The power supply plug on the SmartCheck device, including the supply to the real time clock (RTC), is below. This
connection can also be used for RS485, e.g. to connect Schaeffler SmartCheck to your machine controller or to
other SmartCheck devices.
Communication via RS485 is not currently supported.
The pins are defined as follows:
Pin assignment
No.
Signal
Colour*
Front view of the device
3.1
Power supply, earth
White
3.2
Power supply, positive
Brown
3.3
RS 485+
Green
3.4
RS 485-
Yellow
3.5
Power supply, RTC, positive
Grey
3.6
Power supply, RTC, earth
Pink
3.7
Not connected
Blue
3.8
Not connected
Red
* Colour specifications apply for standard cables from the optional accessories for the Schaeffler SmartCheck device.
RTC power supply
By default, the SmartCheck device's internal clock, the real time clock (RTC), is supplied with power by the device
itself. This means that the clock is without current and that the time stops as soon as the device is switched off.
You can prevent this by supplying the internal clock (RTC) with additional power via pins 5 and 6 of the power
supply plug, e.g. by connecting it to a battery (min. 3 V) or an uninterruptible power supply (UPS) (see the graphic
in the Cabling multiple devices section).
This additional supply is not required if you refresh the time via an NTP server. To do this, the option "Use NTP
server to synchronise system time" must be activated in the Schaeffler SmartWeb software.
28

18
4.3 Connecting inputs and outputs
You have the option of using the SmartCheck device with two analogue inputs, one digital input, one analogue
output or one digital output. To do this, you will need to create a cable connection and connect your external
devices using the predefined cable assignment .
Proceed as follows:
1. Prepare the connection cable for the inputs and outputs.
2. Pick up the input/output cable.
3. Insert the plug into the input/output connection on the device (top left).
4. Lay the cable so as to connect it up to an external sensor or controller, for example. Refer to the general
information on laying cables.
5. Connect the cable.
An illustration of all the connection options for the SmartCheck device can be found in the Connection overview
section.
The following sections provide some detailed practical examples of input and output connections and their
configuration in the Schaeffler SmartWeb software. Further information can also be found in the Schaeffler
SmartWeb user documentation.
4.3.1 Connection configuration: Digital speed signal
This is how you connect a speed sensor to the Schaeffler SmartCheck digital input:
·
The speed sensor must have a resistor (pull-up).
·
When selecting the dropping resistor, please note the impedance of the input signal of
your digital input. Note the maximum switching current of the digital switching output of
the Schaeffler SmartCheck device (1 A/30 V) and the power of the dropping resistor.
·
If the speed sensor you are using only switches to earth (open-collector), you must
provide another resistor for the supply line (pull-up).
16
14
15

19
Set-up
You must also configure the digital input using the integrated Schaeffler SmartWeb software. To do this, open the
Configuration > Input configurations > Digital input field in the SmartWeb software. You can configure the
digital input using the Edit button as follows, for example:
Details of the possible settings can be found in the Schaeffler SmartWeb user documentation.
If you use the digital input and only generate one pulse per revolution and set this to
measure the speed, you must make sure that the pulses have a minimum duration of 300
µs.
Example:
You are using an optical sensor to measure the speed of your machine. You stick a
reflective strip on the shaft to generate the pulses. This reflective strip must be long
enough to generate pulses with a minimum duration of 300 µs. If your machine is
running at a maximum of 3000 rpm = 50 Hz, you can calculate what percentage of
the shaft circumference needs to be covered with the reflective strip as follows:
300 µs * 50 Hz * 100% (of the shaft circumference) = 1.5%
You therefore need to cover 1.5% of the shaft circumference with the reflective strip
to obtain a minimum pulse duration of 300 µs. For a shaft with a circumference of 1 m
(approx. diameter 32 cm), the calculation is as follows:
1 m * 1.5% = 1.5 cm
The reflective strip for a shaft with a circumference of 1 m running at a speed of max.
3000 rpm must therefore be at least 1.5 cm long.

20
4.3.2 Connection configuration: Analogue speed signal
You can connect a speed signal for a motor controller or a programmable logic controller (PLC) to the analogue
input of the SmartCheck device. Details of both options can be found in the sections below.
Analogue speed signal from motor controller
This is how you connect a motor controller to the Schaeffler SmartCheck analogue input; in our example, the motor
controller delivers a speed signal of 0-3000 rpm with 0-10 V:
You must also configure the analogue input using the integrated Schaeffler SmartWeb software. To do this, open
the Configuration > Input configurations > Analogue input 1 area in the SmartWeb software. You can
configure the digital input using the Edit button as follows, for example:
Details of the possible settings can be found in the Schaeffler SmartWeb user documentation.
Table of contents
Other Schaeffler Measuring Instrument manuals
Popular Measuring Instrument manuals by other brands

Texas Instruments
Texas Instruments GTLP user guide

Keysight Technologies
Keysight Technologies N5244BU-679 installation guide

Water Kits Supply
Water Kits Supply 6742 user guide

Tektronix
Tektronix 2715 user manual

Agilent Technologies
Agilent Technologies E5070A ENA Series Installation and quick start guide

Panasonic
Panasonic KW8M user manual