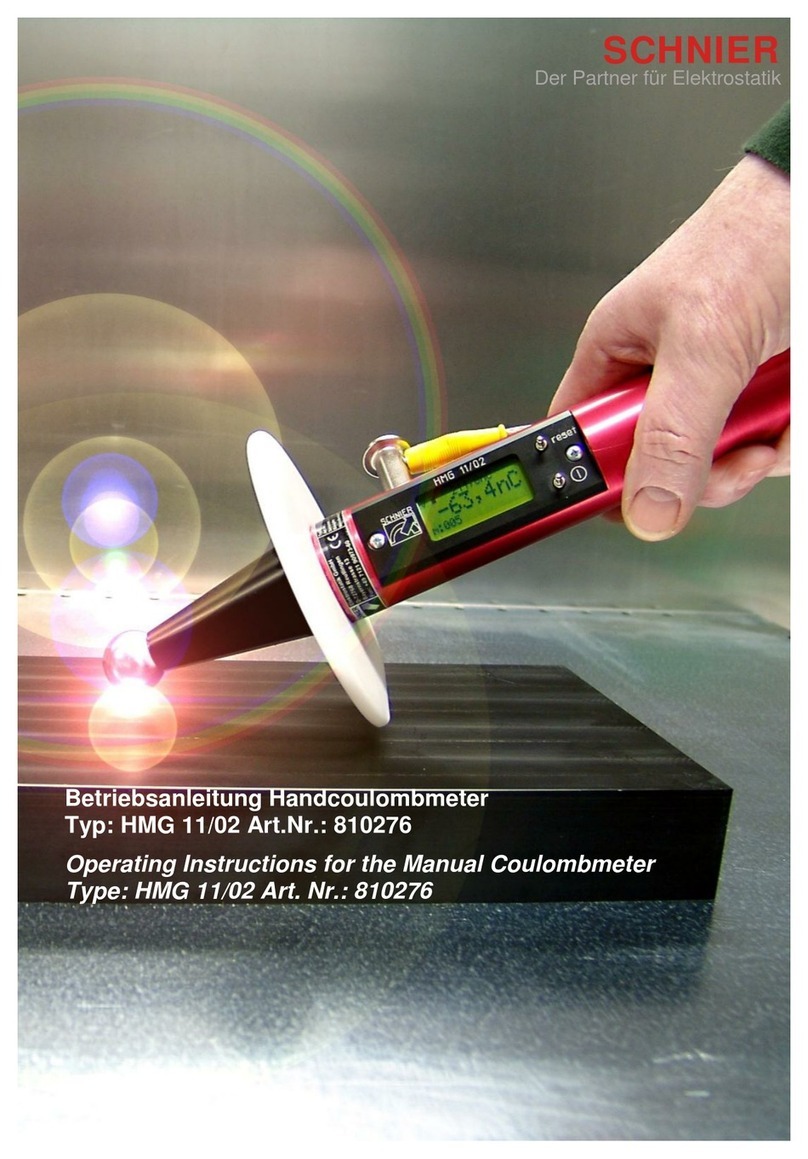
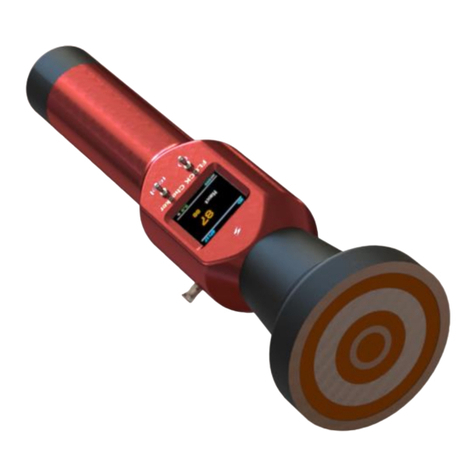
SCHNIER HMG 11/03 User manual

Operating manual 810461-BAL-DEEN-230117 Date: 17.01.2023 1 / 24 EN

Operating manual 810461-BAL-DEEN-230117 Date: 17.01.2023 2 / 24 EN
Inhalt
1.Product and manufacturer .................................................................... 3
1.1.Product description.................................................................... 3
1.2.Type designation .................................................................... 3
1.3.Specifications.................................................................... 3
1.4.Marking.................................................................... 3
1.5.Warranty.................................................................... 3
1.6.Manufacturer .................................................................... 3
2.Guide to these operating instructions.................................................................... 4
2.1.Accessibility of the operating manual / storage.................................................................... 4
2.2.Work safety symbols and expressions.................................................................... 4
3.Intended use and measuring principle.................................................................... 5
3.1.Measuring range for conductive test specimens.................................................................... 5
3.2.Coulombmeter circuit principle.................................................................... 6
4.Functionality and operation .................................................................... 7
4.1.Displays and control elements.................................................................... 7
4.2.Displays and Turning the coulombmeter on and off .................................................................... 7
4.3.Display.................................................................... 8
4.4.Ready for measurement.................................................................... 8
4.5.Measured value display after correct measurement.................................................................... 9
4.6.Measured value OK / NOK.................................................................. 10
4.7.Number of saved measured values.................................................................. 11
4.8.Largest saved measured value.................................................................. 11
4.9.Stopwatch display.................................................................. 12
4.10.Charge status .................................................................. 12
4.11.Function of the buttons (switches).................................................................. 13
5.Menu.................................................................. 14
5.1.Explanation of the menu items .................................................................. 14
5.2.Show memory (call up menu item 3).................................................................. 15
5.3.Display of the saved measured values (in menu 3).................................................................. 15
5.4.Clear memory (in menu item 4).................................................................. 16
5.5.Show time (in menu item 5).................................................................. 17
6.Measurements with the manual coulombmeter .................................................................. 18
6.1.Measurement.................................................................. 18
6.2.Exceeding the measurement range.................................................................. 19
6.3.Achieving optimum measurement results .................................................................. 20
6.4.Charging the battery.................................................................. 20
6.5.Functional test (replacement for battery test) .................................................................. 21
7.Maintenance of the handheld coulombmeter .................................................................. 22
EC Declaration of conformity .................................................................. 24

Operating manual 810461-BAL-EN-2300203 Date: 03.02.2023 3 / 24 EN
1. Product and manufacturer
1.1. Product description
The coulombmeter type HMG 11/03 is used for contactless measurement of the charge transferred in
a spark. It is a hand-held measuring device with color OLED display and integrated lithium-ion battery.
1.2. Type designation
HMG 11/03
1.3. Specifications
Power supply Lithium-ion battery (permanently installed)
Battery capacity 3,7 V / 3.000 mAh
Charging port USB-C (5 V, max. 1A)
Charging time Approx. 4h
Measuring range 5-200 nC (calibrated from 15 nC)
Resolution 0,1 nC
Measuring memory 255 measured values
Dimensions (LxHxW) 320 mm x 50 mm x 70 mm
Weight 640 g
Display OLED color display 128 x 128 px
1.4. Marking
1.5. Warranty
The warranty period is 24 months after delivery. Any kind of warranty expires if the device is opened,
modified, parts are replaced with non-original parts or these operating instructions are not observed.
1.6. Manufacturer
SCHNIER Elektrostatik GmbH
Bayernstr. 13
72768 Reutlingen
Germany
Fon: +49 (0) 71 21 / 90 973 -60
Fax: +49 (0) 71 21 / 90 973 -99
www.schnier.de
Managing Director: Olav Schnier
Commercial register Stuttgart
HRB 354 513
ISO 9001:2008 certified

Operating manual 810461-BAL-EN-2300203 Date: 03.02.2023 4 / 24 EN
2. Guide to these operating instructions
These operating instructions must be read, understood and observed in all points by all persons who
are responsible for this device. Only with knowledge of these operating instructions can errors be
avoided and safe and trouble-free operation be guaranteed. SCHNIER Elektrostatik GmbH accepts
no liability for damage resulting from non-observance of these operating instructions!
These operating instructions apply to:
Installation and maintenance personnel (e.g. machine setters, IT specialists, electrically qualified
persons) who have been trained by the manufacturer or operator regarding to the manual and
corresponding safety regulations.
Operating personnel (e.g. machine setters, IT specialists, electrically qualified persons) who have
been trained by the manufacturer or operator regarding to the manual and corresponding safety
regulations.
2.1. Accessibility of the operating manual / storage
The operating manual must be permanently available and ready to hand at the measuring
instrument for the responsible technical personnel (operating, maintenance, repair personnel, etc.).
The operating manual must be kept by the operator for the entire lifetime of the measuring
instrument. In case of resale of the measuring device, the operating manual must be handed over to
the new owner, as it is part of the measuring device.
2.2. Work safety symbols and expressions
Note: The expressions "live parts" or "active parts" in this operating manual stand for parts that have
a high voltage potential during normal operation.
Symbol Impact
This symbol warns of potentially hazardous situations which, if not
avoided, could result in death or injury.
This symbol warns of potentially dangerous electric shocks that
can result in death or injury if not avoided.
Warning of damage to the equipment or malfunctions
Note for simple, rational procedure

Operating manual 810461-BAL-EN-2300203 Date: 03.02.2023 5 / 24 EN
3. Intended use and measuring principle
The Coulombmeter Type HMG 11/03 is used for contactless measurement of the charge transferred
in a spark. It is not suitable for measuring surface charges, which only give a measured value on
contact. For a proper measurement, a spark must occur when the measuring ball approaches the test
specimen. If there is no spark discharge until contact is made, this measured value cannot be used.
Due to the charge transferred in the spark, the ignition hazard of this spark can be assessed.
The intended use is for measuring electrostatically charged, insulating or conductive surfaces. The
charge can be caused by friction or by a high voltage source (DC - max. 100 kV). The high voltage
source must be switched off and away from the test specimen at the time of measurement.
The coulombmeter can also be used to assess the ignitability of residual charges on coating
equipment.
Dangerous discharges for persons can occur at conductive surfaces/test objects depending
on the capacity and the charged voltage!
3.1. Measuring range for conductive test specimens

Operating manual 810461-BAL-EN-2300203 Date: 03.02.2023 6 / 24 EN
3.2. Coulombmeter circuit principle
The charge transferred from the charged test piece via spark/brush discharge to the ball electrode is
stored in capacitor C and then discharged to ground. The current, flowing across the measuring
resistor, is measured. By an integral calculation, the charge is calculated from current over time.
Q = I . t
The microcontroller "MP" used in the Coulombmeter analyzes the rising and falling current. The
measurement is triggered at a given slope and runs until a turning point in the current curve occurs.
This avoids erroneous measurements, e.g. due to influence or ionization.
The polarity of the measured charge is shown in the display.

Operating manual 810461-BAL-EN-2300203 Date: 03.02.2023 7 / 24 EN
4. Functionality and operation
4.1. Displays and control elements
4.2. Displays and Turning the coulombmeter on and off
The manual coulombmeter is turned on by pushing the I-switch upwards for at least one second.
The coulomb meter is switched off by confirming the menu item "switch off" by pressing the I key
upwards.
Irrespective of this, the coulombmeter switches off after 15 minutes without pressing a key or 15
minutes after the last value has been recorded.
Battery charge
indicator
Largest
measured
value
Number of saved
measured values
Ready for
measurement or
actual measured
value
R-switch
I-switch
Date
display

Operating manual 810461-BAL-EN-2300203 Date: 03.02.2023 8 / 24 EN
4.3. Display
4.4. Ready for measurement
“Wait” signals ready for measurement.
The results appear at this location after a measurement, adding the prefix.
Stopwatch display
Measured value OK / NOK
Largest measured
value (display nC
/s)

Operating manual 810461-BAL-EN-2300203 Date: 03.02.2023 9 / 24 EN
4.5. Measured value display after correct measurement
Display with measured
value of positive polarity
(Measured value:
+22,5 nC)
Display with measured
value of negative polarity
(Measured value:
-21,5 nC)

Operating manual 810461-BAL-EN-2300203 Date: 03.02.2023 10 / 24 EN
4.6. Measured value OK / NOK
Depending on the success of the measurement, the following appears in the display:
The measurement was successful, no measurement error was detected.
The zero point could be or cannot be maintained, e.g. error due to corona charge. The
measurement result is not very useful.

Operating manual 810461-BAL-EN-2300203 Date: 03.02.2023 11 / 24 EN
4.7. Number of saved measured values
Number of saved measured values.
m:003 = 3 measured values present in memory.
There are currently 3 measured values stored here.
4.8. Largest saved measured value
Display of the largest saved measured value.

Operating manual 810461-BAL-EN-2300203 Date: 03.02.2023 12 / 24 EN
4.9. Stopwatch display
The second counter runs since releasing the “Reset switch” and stops when a measured value is
recorded (this indicator can be switched off in the settings).
4.10. Charge status
The charge level for the built-in lithium-ion battery is displayed as a bar graph in the upper left
corner.
Depending on the ambient conditions, operation up to 35 hours is possible with a fully charged
battery.
If the battery level display shows only one bar, the device should be charged with the supplied
charger. If the battery level is too low, measurements are no longer possible.

Operating manual 810461-BAL-EN-2300203 Date: 03.02.2023 13 / 24 EN
4.11. Function of the buttons (switches)
R-switch (r)
Only active in measurement operation!
The measurements are reset and the second counter restarted in both
switch directions.
Upward: saves the measured value
Downward: deletes the measured value.
Exception:
When the timer function is active, the timer can be restarted by pushing up until a valid measured
value is recorded without previously having to save something.
I-switch (I)
Upward: Turns on the device. Guides through the menu when
turned on.
Downward: Selects the menu item.
↑upward
↓downward
↑upward
↓downward

Operating manual 810461-BAL-EN-2300203 Date: 03.02.2023 14 / 24 EN
5. Menu
To get to the menu with the I-switch “pushing up”
The arrow points to the selected menu item.
Further “pushing up” switches to the next menu entry.
“Pushing down” executes the selected menu item.
5.1. Explanation of the menu items
1Switches the manual coulombmeter off
2Returns to measurement mode
3Indicates the saved measured values
4Access to menu deleting the memory values
5 Access to the following settings:
- “Activate” time (stop watch yes/no)
- Vibration (Vibration during a measurement data recording: yes/no)
- Date (Set date and time)
When leaving the item, push upward to accept the settings
6Enables calibration of the device, requires consultation with SCHNIER
(Item can be left by repeated “pushing down the I-switch).

Operating manual 810461-BAL-EN-2300203 Date: 03.02.2023 15 / 24 EN
5.2. Show memory (call up menu item 3)
When turned on push the I-switch upward to get into the menu.
Push I-switch upward until line 3 “show memory” is selected.
Push I-switch down to deselect line 3 “show memory”,
afterwards, the list appears with the saved measured values.
5.3. Display of the saved measured values (in menu 3)
A) Sequential number of the measurement
B) Measured value in nanocoulomb or possibly with measurement error symbol.
C) Time from time-counter reset up to measurement data recording in seconds
D) Date and time of the measurement
Switch functions in this menu:
“I-switch pushed up”: select next value or scroll display.
“I-switch pushed down”: return to measurement mode.
“R-switch pushed up”: direction change for measured value selection.
“R-switch pushed down”: deletes the upper displayed measured value, maximum and minimum
are recalculated.
A)
B)
C)
D)

Operating manual 810461-BAL-EN-2300203 Date: 03.02.2023 16 / 24 EN
5.4. Clear memory (in menu item 4)
When turned on push the I-switch upward to get to the menu.
Push I-switch upward until line 4 “Clear memory” is selected.
Push I-switch downward to select line 4 “Clear memory”.
To delete the memory the query must be confirmed by pushing the R-switch down.
(R-switch “pushed down”: delete; R-switch “pushed up”: do not delete).

Operating manual 810461-BAL-EN-2300203 Date: 03.02.2023 17 / 24 EN
5.5. Show time (in menu item 5)
When turned on push the I-switch upward to get to the menu.
Push I-switch up until line 5 “Show signal time” is selected. Push I-switch down to select line 3
“Show signal time”
Using the I-switch upward with “Show signal time”,change between “Yes” (stop function active) and
“No” (stop function deactivated).
Switch downward activates the selected function.

Operating manual 810461-BAL-EN-2300203 Date: 03.02.2023 18 / 24 EN
6. Measurements with the manual coulombmeter
The manual coulombmeter must only be operated when grounded!
The included ground connection wire must be plugged onto the POAG socket and
connected with ground.
The wire should hang with no loops (prevent self-induction).
6.1. Measurement
oTurn on the device by pushing up the “I-switch” for at least one second.
oCome near the test object with the ball electrode of the device until the indicator displays a
measured value instead of “Wait”.
oRemove the device from the test location and read or save the measured value.
oIf this appears
then the measurement was successful.
A display of
moved the zero point and the measurement is questionable.

Operating manual 810461-BAL-EN-2300203 Date: 03.02.2023 19 / 24 EN
6.2. Exceeding the measurement range
If the following appears in the display, then
the measurement range for negative charges is exceeded (blue minus sign as prefix)
or
the measurement range for positive charges is exceeded (brown plus sign as prefix)
Measured value or measurement range exceeded.
The actual value exceeds the displayed value, thus the measurement must be discarded.
A stopwatch is activated when the time measurement is turned on. The stop process is started when
releasing the R-switch and stops as soon as a measured value is recorded. The stopped time is
displayed in seconds.
After successful measurement, the measured value can be deleted by “pushing down” the R-switch
or added to the measured value memory by “pushing up” the R-switch.
Only after pushing the R-switch up or down can a measurement be done again and “Wait” again
appears in the display.
If no measurement is executed, the coulombmeter automatically turns off after approx.
15 min. to increase the service life.

Operating manual 810461-BAL-EN-2300203 Date: 03.02.2023 20 / 24 EN
6.3. Achieving optimum measurement results
Electrostatic charges are generally subject to climatic influences. Therefore, measurements on charge
transfer should no longer be carried out at a rel. humidity > 50 %. Because the measured values are
also influenced (albeit to a lesser extent) by the abs. humidity, a higher rel. humidity can be tolerated
at 10 °C, for example, than at 30 °C, for example.
The ball electrode should approach the test object at a speed of about 1 m/s if possible. If a tuft
discharge has not yet occurred up to a distance of about 2 mm, the electrode should not be moved
further until contact is made, as this could then lead to a contact discharge of an e.g. antistatically
equipped part. In this case, the MZQ limits are not applicable.
The ball electrode should be moved as perpendicularly as possible to the surface of the project; a
grazing approach can lead to several, rapidly successive tuft discharges, whose individual charge
pulses - if their interval is less than 10 µs - would be added together. The result would then be an
excessively high measured value.
Care must be taken to ensure that the ball electrode is only used free of scratches and deposited dust
particles. In both cases, corona discharges may occur which will falsify the measurement result.
If the instrument is moved from a cold storage area to a warmer area, condensation of humidity may
occur, resulting in deterioration of electrical insulation, which may cause erroneous measurements.
Therefore, sufficient adjustment time should always be allowed for measurements after abrupt
temperature changes.
Since electrostatic charges are often subject to strong fluctuations, a larger number of measurements
should always be carried out to evaluate a hazardous situation, taking into account as far as possible
all influences relevant to charging (e.g. climate, speed, contact pressure, etc.).
6.4. Charging the battery
If the battery indicator in the display of the coulombmeter shows only one bar, the built-in lithium-ion
battery should be charged using the USB charger supplied. If the charge level is low, the
Coulombmeter switches off to protect the battery and no more measurements are possible.
The charging time is approx. 4 hours when the lithium-ion battery is fully discharged and the
supplied charger is used, depending on the ambient conditions.
The built-in lithium-ion battery has the longest service life when stored at constant moderate
temperatures in a partially charged state.
Table of contents
Other SCHNIER Measuring Instrument manuals
Popular Measuring Instrument manuals by other brands

Bühler technologies
Bühler technologies GAS 222.35 manual

Meec tools
Meec tools 010989 operating instructions

UWT
UWT NivoRadar NR 7200 Series Technical Information/Instruction manual

Chauvin Arnoux
Chauvin Arnoux E3N user manual

Major tech
Major tech MT155 instruction manual

Amprobe
Amprobe LCR55A user manual