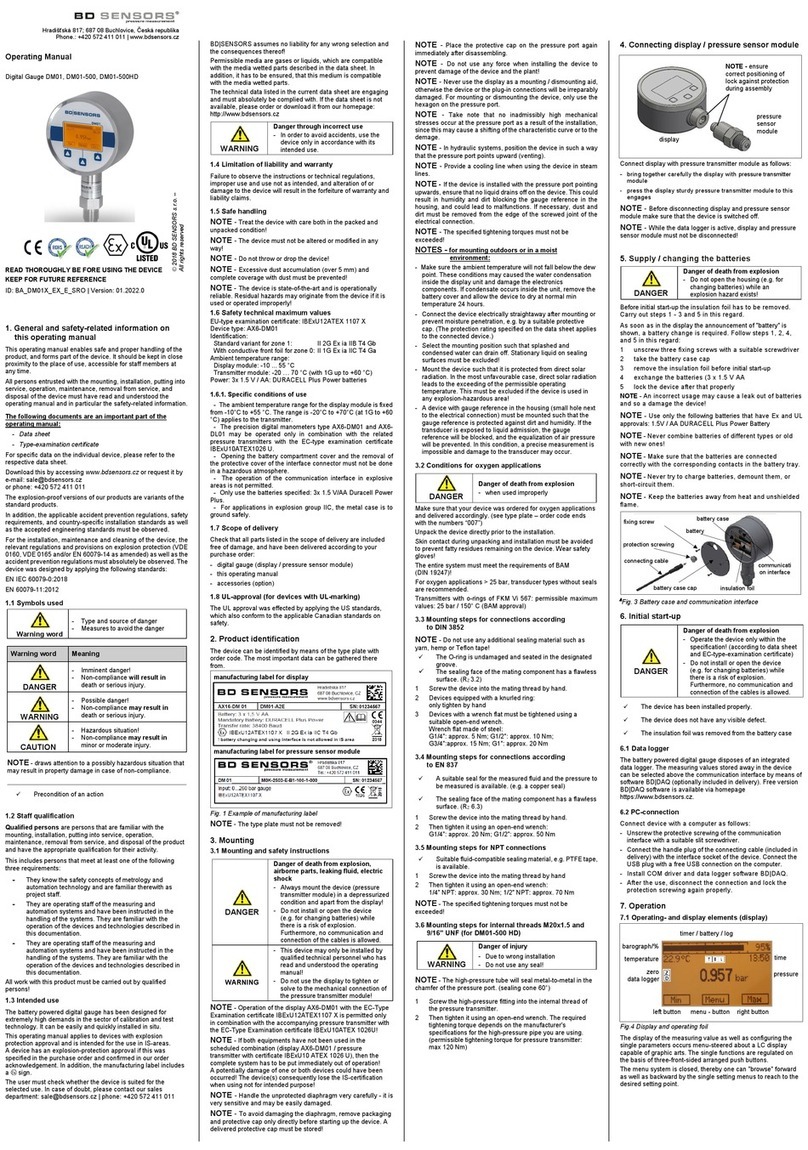
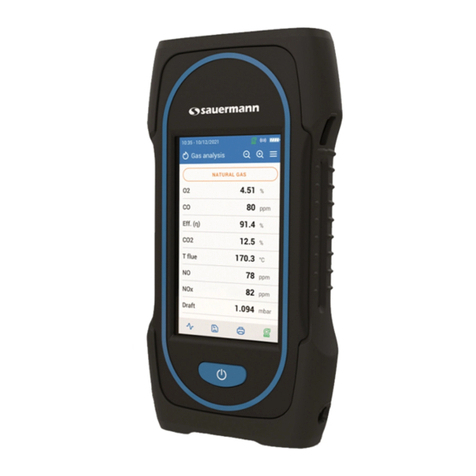
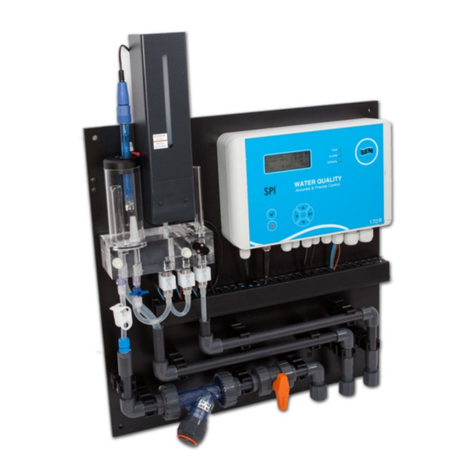
SPI C170 CHLORINE User manual

User Manual
SPI-C170
CHLORINE


SPI – C 170 CHLORINE
V1 20130904 1
Index
SPI-C170 ............................................................................................................................................. 1
1. INTRODUCTION ........................................................................................................................ 3
2. DESCRIPTION AND OPERATION ................................................................................................. 5
3. SAFETY ..................................................................................................................................... 7
4. TRANSPORT AND STORAGE ....................................................................................................... 8
5. ASSEMBLY AND INSTALLATION ................................................................................................. 9
6. COMMISSIONING ................................................................................................................... 11
7. OPERATION ............................................................................................................................ 12
8. MAIN MENU ........................................................................................................................... 14
9. OVERVIEW ............................................................................................................................. 15
10.CALIBRATION ........................................................................................................................ 16
11.SETTINGS ............................................................................................................................... 27
12.ALARMS ................................................................................................................................ 36
13.MANUAL OPERATION ............................................................................................................ 42
14.REPORTS ............................................................................................................................... 44
15.MAINTENANCE ...................................................................................................................... 47
16. CONFIGURATION .................................................................................................................. 50
17. DECOMMISSIONING ............................................................................................................. 57
18. DISCARDING ......................................................................................................................... 58

SPI – C 170 CHLORINE
V1 20130904 2
Foreword:
The manual for the SPI-C170 is meant for the following authorized employees:
- Electrotechnical staff
- Watertechnical staff
- Laboratory staff
This manual is made for the installation and operation of the SPI-C170 Chlorine.
In this manual you will find various enumeration characters:
(-) Enumeration of functions
(1.) To be performed actions
- Please read this manual thoroughly
- Only let authorized staff work with the SPI-C170
- Make sure the manual is available for every user
- In case of emergency, please contact your supplier
Limited warranty
This manual is made with care, although SanEcoTec is not taking any responsibility according the
consequential for any failures made in this manual.
Copyright notice
All rights reserved. No part of this publication may be reproduced, stored in a retrieval system, or
transmitted, in any form, by any means, electronic, mechanical, photocopying, recording or
otherwise without permission in writing from your supplier.

SPI – C 170 CHLORINE
V1 20130904 3
1. Introduction
1.1 Purpose of the SPI-C170
The SPI-C170 is designed for correctly measuring, controlling, and guarding a water treatment
process.
The SPI-C170 is suitable for the following sectors:
Water companies
Other locations that measure and regulate Chlorine levels
1.2 Important specifications
The most important specifications of the SPI-C170 are:
Measuring the Chlorine level
Measuring the pH level
Measuring the flow
Controlling the dosing pumps for Chlorine and acid
Flow protection (No flow, no dose)
Circulation contact protection
A supply voltage of 12VDC
reagents colour
Specifications of the measurable parameters:
Chlorine
Method: reagents colour
pH
Method: pH gel-electrode
Flow
Method: Via pulse or current sending flow meters like VDO or INEL (if your type isn’t
mentioned, please contact your supplier)
Measurement
Method
Range
Accuracy
Chlorine
Reagents
colo
u
r
0
-
2,5
mg/l
0
–
1 mg/l ± 0.05
1 – 2,5 mg/l ± 0.1
pH
Electrode
1
-
14 pH
± 0.05 pH
Flow
Puls
e or
Current
0
–
100 %
± 1%
The accuracies are based on strict adherence to the procedures in this manual.

SPI – C 170 CHLORINE
V1 20130904 4
1.3 Warnings
The SPI-C170 is designed and produced with the greatest care. However, you should take into
account that:
- The SPI-C170 makes use of dangerous and harmful chemicals.
- No higher supply voltage than 12VDC is used.
1.4 Background information
After years of collaboration with a team of specialists in the field of water treatment, the SPI
measure and control system was introduced. The SPI-C170 is the fourth generation of its kind. The
SPI-C170 is a water control system based on the colorimetric measuring method that utilizes
reagents colour discoloration. The intensity of the discoloration after a measurement with the
reagent is a measurement of the quantity of Chlorine in the water. The greatest advantage of
colorimetric measuring is that it is not affected by external factors like pH and flow.
1.5 Conditions of use
Surroundings free of aggressive vapours
Temperature of the room housing the SPI-C170 is between 5C - 40C
Relative humidity not > 80%
No condensation

SPI – C 170 CHLORINE
V1 20130904 5
2. Description and operation
2.1 Description of the SPI-C170
The SPI-C170 is supplied and preassembled on one assembly plate provided with:
1 Control-unit
1 Analysis-unit
Dimensions (L x W x H) = 480 x 480 x 100 mm
All parts are installed either water technical or electro technical. See figure 2.1.1.
2.2 Operation of the SPI-C170
The sample water is fed into the buffer jar. The buffer serves, as the name implies, as a buffer from
where the water can flow to the measuring cell. The surplus water will flow back to the pool’s buffer
system. The SPI-C170 will run the measurements of the water within a freely adjustable time. See
figure 2.2.1.
The measuring cycle of the SPI-C170 is as following:
Empty cell of previous measurement
Fill cell with the sample water and empty once more (rinse)
Fill cell with to be measured water and start measuring the zero value and empty again
Provide a shot of reagent, and fill the cell with a limited supply of water, measure the
discoloration
Fill the cell with some extra water and measure the discoloration again (2nd measurement to
check the saturation of the reagent, and to adapt the reagent valve time to save reagent), then
empty cell
Fill cell with the to be measured water and empty once more (rinse)
Fill cell fully with water
The drain valve empties the cell after every step. That water exiting the cell is led to the sewer.
2.3 Software structure of the SPI-C170
The SPI-C170 makes use of simple operating software. The complete operation is executed using the
buttons on the unit. The display shows measured values and settings. The hardware features an
internal memory wherein data, reports, and calibration settings are stored. This data is available on
demand and provided with a date and time of occurrence. When you have the optional SPI-REMOTE
software, it is possible control and see the information of the SPI using the network or internet. With
the optional SPI-GRAPHS software, you can use the data downloaded with the remote software, and
use this for data acquisition.

SPI – C 170 CHLORINE
V1 20130904 6
Figure 2.1.1.
Figure. 2.2.1
Analysis
-
unit
Control
-
uni
t
Buffer jar
Reagent vial
Filling tube
Drain tap
Supply valve
Reagent valve
Drain valve
Overflow tube
Filter

SPI – C 170 CHLORINE
V1 20130904 7
3. Safety
3.1 Safety regulations
The SPI-C170 is as careful as possible designed with the eye on safety. We tried to reduce the safety
risks to a minimum.
The SPI-unit is supplied with a 12VDC adapter via a power outlet.
While the SPI-unit and the analysis-unit are placed next to each other, the water is not
interfering with the electrical systems.
Using the remote software (optional) you can use our services to provide assistance over
distance
3.2 Risks
We would like to appoint the remaining risks. You need to handle these carefully by fully instructed
and authorized staff:
Refilling the reagent
Cleaning spilled compound
Store reagent in a cool, dark environment, provided with instructions.
Keep the SPI-unit and the analysis-unit clean from any remaining reagent, because this will
create stains with time.
3.3 Personal protective equipment
Wear while in direct contact with the reagent safety glasses, latex gloves and protective clothing.
3.4 R-S sentences
Reagents colour R36/37/38
Harmful to the eyes, respiratory system and skin.
R25
Causes severe burns.
S2
Keep out of reach from children.
S20
Do not eat or drink.
S24/25
Avoid contact with the skin and eyes.
S45
In case of accidents, immediately seek professional help.

SPI – C 170 CHLORINE
V1 20130904 8
4. Transport and storage
4.1 Disassembly
To disassemble the SPI-C170, follow the following procedure:
1. Remove the adapter from the power outlet so that the unit is powerless.
2. Remove the reagent vial from the holder (watch out for spilling reagent from the tube).
3. Empty the reagent vial, and seal it with the cap.
4. Empty the buffer jar using the drain tap.
5. Remove possible pH electrodes and store these for later use (don’t forget the protective cap with
KCl-solution).
6. Flush the valves with clean water or when possible, distilled water. Do this by filling the buffer jar
with this. Especially the reagent valve needs extensive cleaning. The reagent will cristalize when
it dries. Do this by replacing the reagent vial with a container of clean water. Now control the
valves a few times. See chapter 10.1.4.3 Times & test, and for the reagent valve chapter 10.1.4.2.
7. Flush the analysis-unit well with clean water, then make sure the unit is empty and dry.
8. Clean all tubes with clean water and dry.
9. Remove all inserted cables from the SPI-unit.
10. Before the taking the assembly plate off the wall we point out once more that all parts should be
dry.
11. Take the SPI-unit off the wall.
4.2 Transport
1. After disassembly, make sure the SPI-unit is placed in a firm box, with the components facing
upwards. This may also be standing upward.
2. Protect the corners well from impacts.
3. Cover the upward facing components with filling or air foil.
4. Close the box with tape.
5. Make sure the box remains free from damage.
4.3 Storage
While storing make sure the environment meets the following requirements:
Moisture free
Free of corrosive vapours
Temperature between 5C - 40C

SPI – C 170 CHLORINE
V1 20130904 9
5. Assembly and installation
The assembly and installation of the SPI-C170 is described in the following paragraphs. On the right
side of the pages you’ll find pictures or schemes that will clarify the text.
5.1 Assembly
The SPI-C170 consists of 2 main units:
Control-unit
Analysis-unit
See figure 5.1.1.
5.2 Installation
The SPI-C170 is completely preassembled on one assembly plate provided with the units as named in
chapter 5.1.
Check prior to installation:
The water supply is taken care of and brought to where the SPI is going to be
The power outlet is in an acceptable range of the SPI-unit (100-240VAC 47-63Hz)
The return to the buffer tank is taken care of and brought to where the SPI is going to be
The drain to the sewer is taken care of and brought to where the SPI is going to be
Please follow the instructions for installing the SPI-C170:
1. Remove the SPI from the box.
2. Check if the cables are installed correctly in the cable glands
3. Mount the assembly plate to the wall.
4. Connect the water supply to the buffer jar, and provide enough flow (minimal 5 L/h).
5. Connect the return to the buffer tank to the buffer jar.
6. Connect the drain to the sewer to the buffer jar.
7. Connect the cables from the control unit as in figure 5.2.1.
Supply: supplied adapter
pH electrode
Flow measurement 4-20 mA signal
Flow measurement pulse signal
Circulation contact
Disinfection pump (Chlorine)
Acid pump
Supply water contact
Alarm contact
Cell contacts (LED and receiver)
Valve contacts (supply, drain and reagent)
8. Place a vial of reagents colour in the holder, apply the cap, and insert the reagent tube through
the cap.
9. The SPI-C170 can now be commissioned

SPI – C 170 CHLORINE
V1 20130904 10
Figure 5.1.1.
Figure 5.2.1.
Analysis
-
unit
Control
-
unit
Buffer jar
Reagent vial
Supply and drain

SPI – C 170 CHLORINE
V1 20130904 11
6. Commissioning
6.1 Turning on the SPI-C170
The following procedures are to be followed to turn on the SPI-C170:
1. Put the 12 VDC adapter in the power outlet.
2. The boot screen appears on the display. The current software version is also displayed.
See figure 6.1.1.
6.2 Language choice
The SPI-C170 can be set to work with various languages. More about this can be found in chapter
15.4.
6.3 Indication LEDs
After the SPI-C170 has configured itself, the blue LED will start flashing.
On the front panel of the SPI-C170 control-unit are a total of 3 LEDs. The explanation of these LEDs
are as following:
Blue ON/OFF ; Working
Red continued ; Alarm
Red ON/OFF ; Turned off alarm
Orange short ; Measuring
Orange continuous ; Manual operation active
See figure 6.3.1.
The images of the screens in this manual are for presentation and indication only. The
shown values and settings may not be correct for your situation.
Figure 6.1.1
Figure 6.3.1
SEM SPI C170
Version: 1.00
Tag plate
Indication LEDs
Display
!

SPI – C 170 CHLORINE
V1 20130904 12
7. Operation
7.1 Navigation
Using the keyboard, you can perform all operations. You simply follow the options through the menu
structure on the display.
Navigating through the menu structure is done using the arrow buttons. The display displays a
maximum of 4 lines a time. The menus often contain more information or possible choices. To
display these, you can browse through using the arrow buttons.
Page up with the arrow ‘up’ ( ).
Page down with the arrow ‘down’ ().
Page back with the arrow ‘left’ ().
Confirming a selection with ‘enter’ ( ).
Confirming is performed using the ‘tick’ (). To go back the the main menu, or cancel certain
settings, you use the cross mark ().
See figure 7.1.1.
To return to the main menu after every step, press ().
Figure 7.1.1.
Navigation buttons
Confirming
Main menu/ cancel
!

SPI – C 170 CHLORINE
V1 20130904 13
7.2 Selecting a choice
When you made a decision in the menu, you can select and enter this option by navigating the cursor
to the correct line using the arrows. This cursor is always at the end of the sentence, and will flash.
Most often, the indication that you can enter a next menu is done with the ‘>’ symbol. When you
select this symbol with the cursor and you press enter, you will go into this menu. Going back is
always done with the left arrow ().
See figure 7.2.1.
Figure 7.2.1.
7.3 Changing a value or setting
When a value or setting needs to be changed, and you press enter on that specific setting, a special
menu appears. This menu displays the current setting, as well as the minimum and maximum
settings this value can have.
With the cursor (▓) you select what digit to change, and you use the up () and down () buttons
to modify the value. If you have made your choice, you press the tick () button to confirm and safe.
If you want to cancel and not safe the setting you press the cross () button.
See figure 7.3.1.
Figure 7.3.1.
|--_ADJUST VALUE---|
| Max: 100 |
| Min: 0 |
| Set: [ 8
▓
] |
Overview ▓
Calibration
>
Settings >
Alarms
>

SPI – C 170 CHLORINE
V1 20130904 14
8. Main menu
Using the main menu, all important functions of the SPI-C170 can be reached. The main menu is
what you get to see after starting the SPI-C170, and is where you always get back to. The main menu
consists of the following options:
Overview – in this menu, the most important measurements and current alarms are
displayed
Calibration – in this menu you can calibrate specific measurements connected to the SPI-unit
Settings – All kinds of settings to regulate the operation of the SPI
Alarms – Gives a status of the current alarms that may or may not be active
Manual operation – Here to possibility will be given to operate the SPI-C170 in automatic,
semi-automatic or manual mode
Reports – A variety of reports of specific functions and measurements
Maintenance – The maintenance mode can be activated here
Configuration – Important options concerning the hardware setup of the system and more
See figure 8.1.
The main menu is where you end up after pressing the cross () button.
figure 8.1.
Overview >
Calibration
>
Settings >
Alarms
>
Manual operation >
Reports >
Maintenance >
Configuration >

SPI – C 170 CHLORINE
V1 20130904 15
9. Overview
You can find the most important measurements and values and relevant information in the overview
menu as in figure 9.1. You can enter this menu by selecting Overview from the main menu.
A special character is present behind some of the lines indicating its status. More about these
characters can be read in chapter 12.1.
The lines respectively represent tie following:
1. Current time and general alarm status
2. Current Chlorine value
3. Current pH value
4. Current Flow value (Dashes represent that no flow sensor has been installed, the alarm
character is now ‘X’)
5. Current Chlorine pump control
6. Current acid pump control
7. Circulation status
8. The final line is able to show a possible alarm.
Figure 9.1.
Overview 09:35 C
Chlorine mg/l:0.82 .
pH :6.92 .
Flow 180m3 :116% .
Chlorine pump% : 4.
Acid pump % : 3.
Circulation : OK
CELL FAILURE

SPI – C 170 CHLORINE
V1 20130904 16
10.Calibration
All measurements connected to the SPI-C170 must be regularly checked and, if necessary, be
calibrated. This ensures the quality of the measurements made. You can enter this menu by selecting
Calibration from the main menu.
Calibrating the measurements is done by using calibrated third party equipment. The following
measurements can be calibrated on the SPI-C170 Chlorine:
Chlorine
pH
See figure 10.1.
Figure 10.1.
10.1 Chlorine
At the procedure of calibrating Chlorine you are able to choose between 2 different methods of
calibration:
With handmeter (a relatively fast method to calibrate Chlorine measurement using a
handmeter)
With fluids ( a method to calibrate the Chlorine measurement using professional calibration
fluids)
Next to calibrating you can also choose for:
Restore calibration (restores the calibration settings to the factory settings)
Settings (various settings for controlling the valve times, checking the current cell values and
refilling the reagent vial)
See figure 10.1.1.
Figure 10.1.1.
Chlorine calibration
With handmeter >
With fluids
Reset calibration
>
Se
ttings >
Calibration
Chlorine >
pH >

SPI – C 170 CHLORINE
V1 20130904 17
10.1.1 Calibrating with handmeter
When you select Calibrating with handmeter the menu as in figure 10.1.1.1 will appear. Here you can
perform a calibration using a third party handmeter. Now perform the following instructions:
1 Take a sample from the drain tap under the buffer jar and measure this with the handmeter.
Refer to the handmeter’s instructions here.
2 Compare the value of Current with the measurement of the handmeter.
If there is a big difference between the current and metered values, press enter ( ).
3 You now get to see the Adjust Value screen where you must enter the correct metered value
at Set
4 Press the tick () now.
5 The measurement has been calibrated.
Start calibrating the measurement only after at least one measurement has been
performed. Otherwise this could cause a wrong calibration.
Figure 10.1.1.1.
!
Hand calibration
Current : 0.69 mg/l
Metered : 0.65 mg/l
Press (V)to save

SPI – C 170 CHLORINE
V1 20130904 18
10.1.2 Calibrating with fluids
Calibrating using fluids guarantees a more dependable calibration then when using a handmeter. The
system lets you first perform a zero point measurement, and after that a measurement using a
control fluid of your choice. The measurement will then be calibrated at 2 points.
To calibrate with fluids, select
calibrating with fluids, the menu as in figure 10.1.2.1 will appear.
Figure 10.1.2.1
Follow the following steps to calibrate with fluids:
1 Make sure you have the correct control fluids and tools within reach. Here we will use a
control fluid of 0.52 mg/l.
Select the line Cal at … mg/l and press enter ( ). Fill in the value of your control fluid in mg/l, and
confirm with the tick ().
Now select Begin 0 mg/l calibration and press enter ( ). The menu of figure 10.1.2.2 now appears.
Figure 10.1.2.2.
When you scroll down you have free use of the valves. Just select and press enter ( ). Use the
supply valve to fill the cell with water.
Now select Remeasure and press enter ( ). The actual value now needs to show between 980
and 1015 millivolt (mV).
Fluids calibration
Current : 0.50 mg/l
Cal at : 0.52 mg/l
Begin 0 mg/l calib >
Calibration at 0mg/l
Expect : 980-1015 mV
Actual : 964 mV
Begin 0.52mg/l cal >
Supply valve >
Drain valve >
Colour valve >
Remeasure >
Table of contents
Other SPI Measuring Instrument manuals
SPI
SPI DIAL CALIPER User manual
SPI
SPI SPI-P170 User manual
SPI
SPI 10G12 User manual
SPI
SPI ABSOLUTE DIGITAL CALIPER User manual
SPI
SPI 11-983-4 Instruction Manual
SPI
SPI 40G03 User manual
SPI
SPI 20-186-3 User manual
SPI
SPI Ground Gard Traveler Operating instructions
SPI
SPI 94200 Instruction Manual
SPI
SPI D141 User manual
Popular Measuring Instrument manuals by other brands
Photonwares
Photonwares PeakSeeker user manual
GHM
GHM DeltaOHM LPPHOT02 operating manual

Endress+Hauser
Endress+Hauser Viomax CAS51D operating instructions

Thermo Scientific
Thermo Scientific TruNarc user guide
2B Technologies
2B Technologies UV-106W quick start guide
Heraeus
Heraeus Digilance V Instructions and operating manual
