Contents Page
1. Preparation of the seat unit for use
1.1 Transport.................................................................................................................2
1.2 Safety measures prior to use..................................................................................2
1.3 Safe disposal of the packaging material................................................................. 2
1.4 Location of the instructions..................................................................................... 2
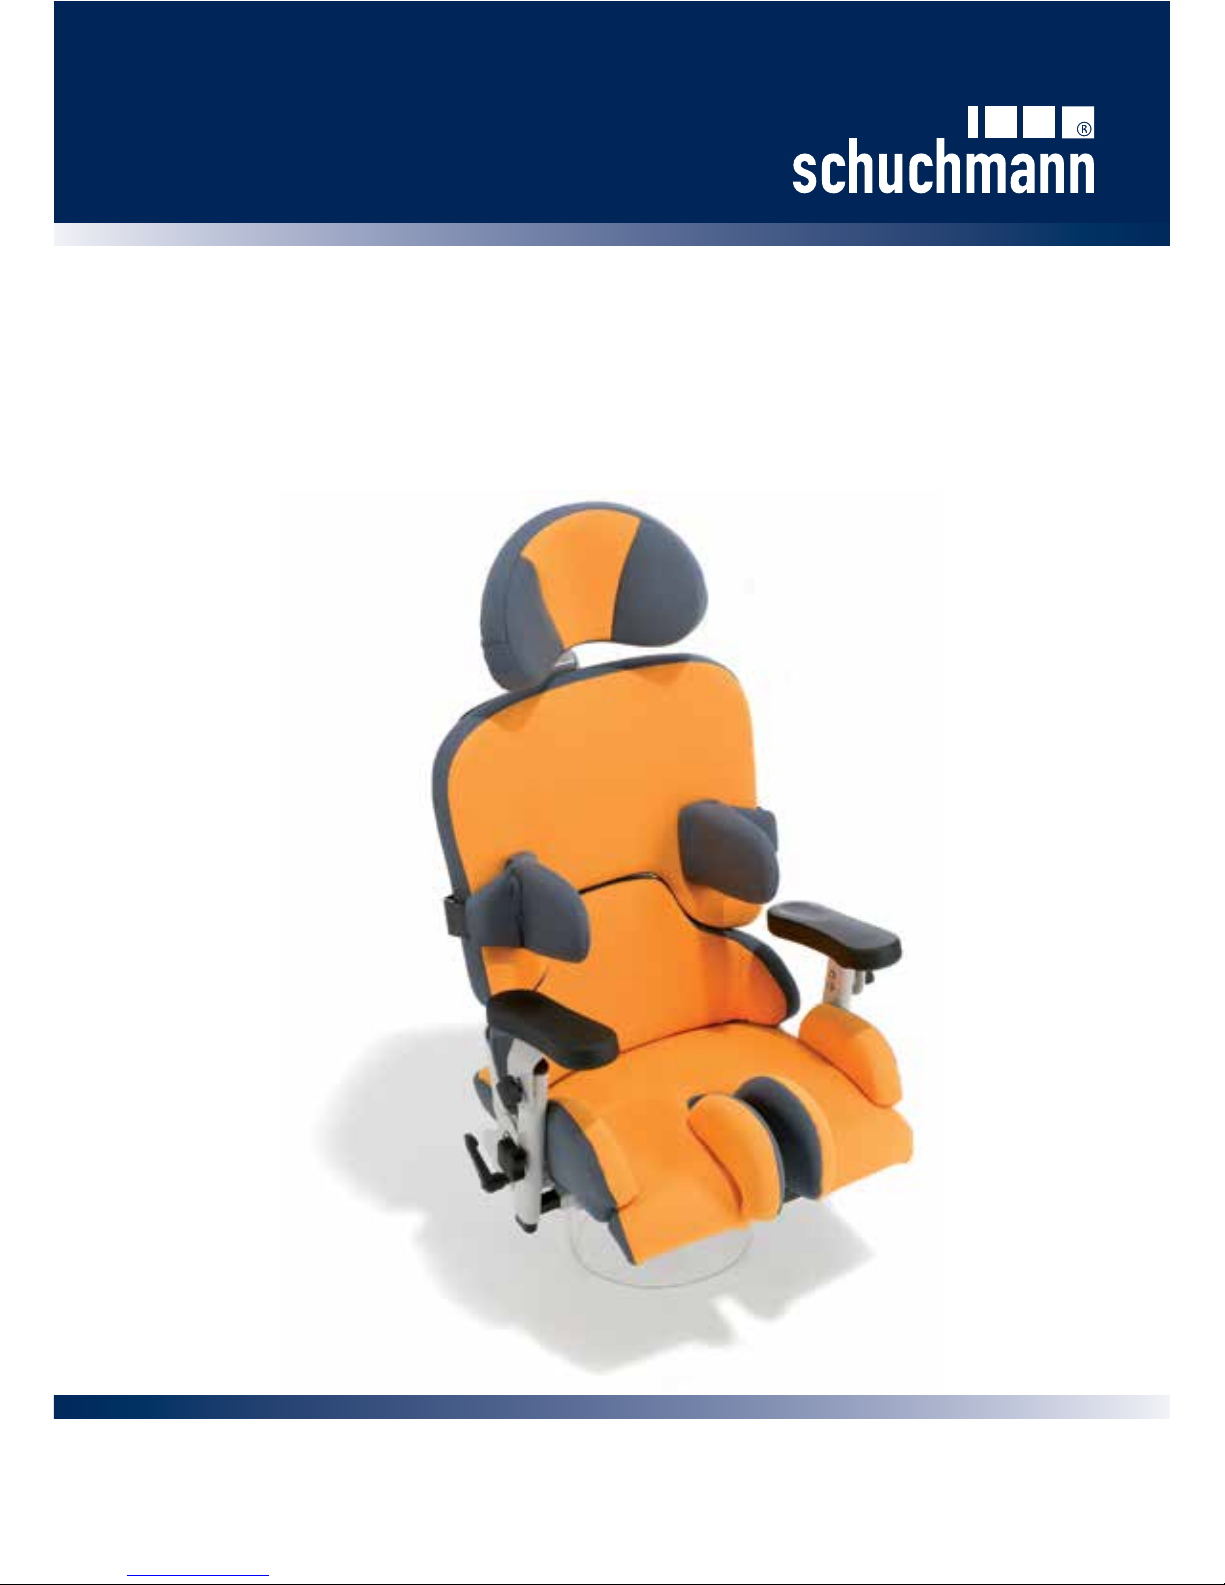
2. Product description
2.1 Material information................................................................................................ 3
2.2 Areas of application, use according to the intended purpose................................. 3
2.3 Use not in accordance with the intended purpose / warning guidelines................. 3
2.4 Equipment for basic model..................................................................................... 4
2.5 List of accessories.................................................................................................. 4
2.6 Product overview.................................................................................................... 4
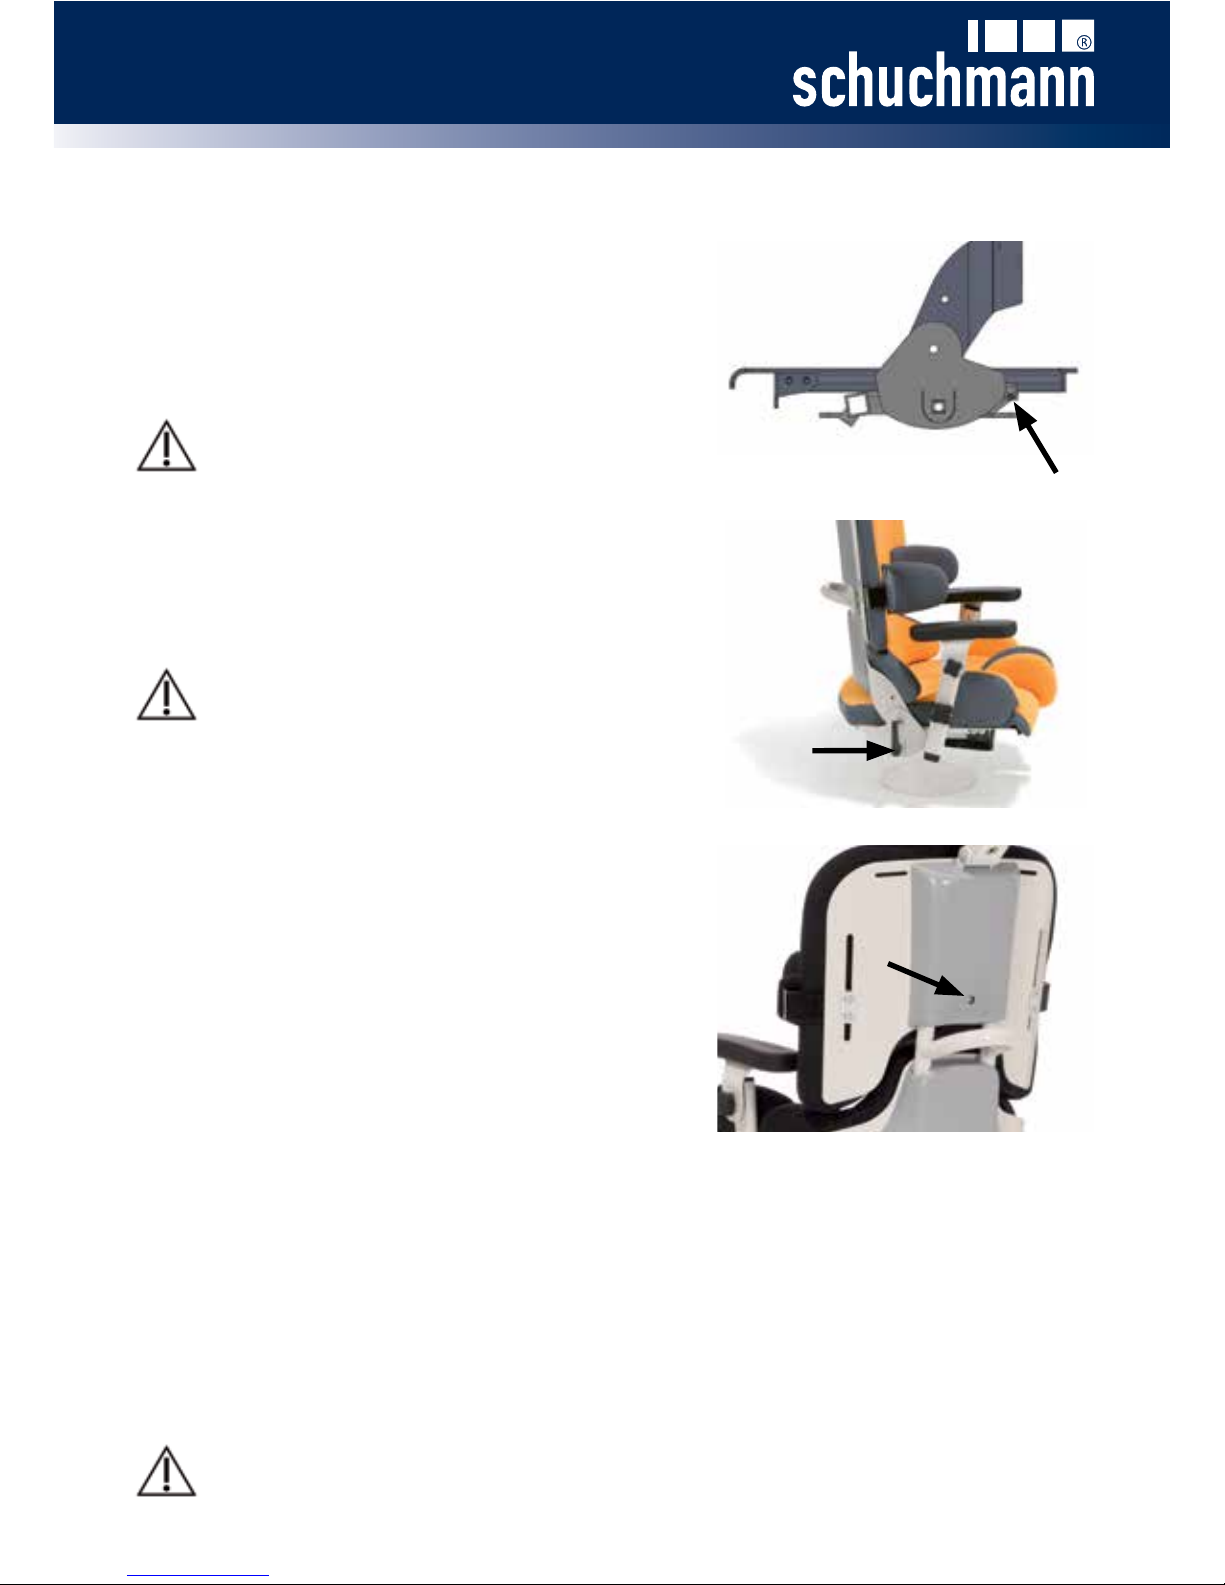
3. Settings
3.1 Seat depth.............................................................................................................. 5
3.2 Back inclination.......................................................................................................5
3.3 Back height............................................................................................................. 5
3.4 Armrests................................................................................................................. 6
3.5 Adapter / adaptation to seat depth..........................................................................6
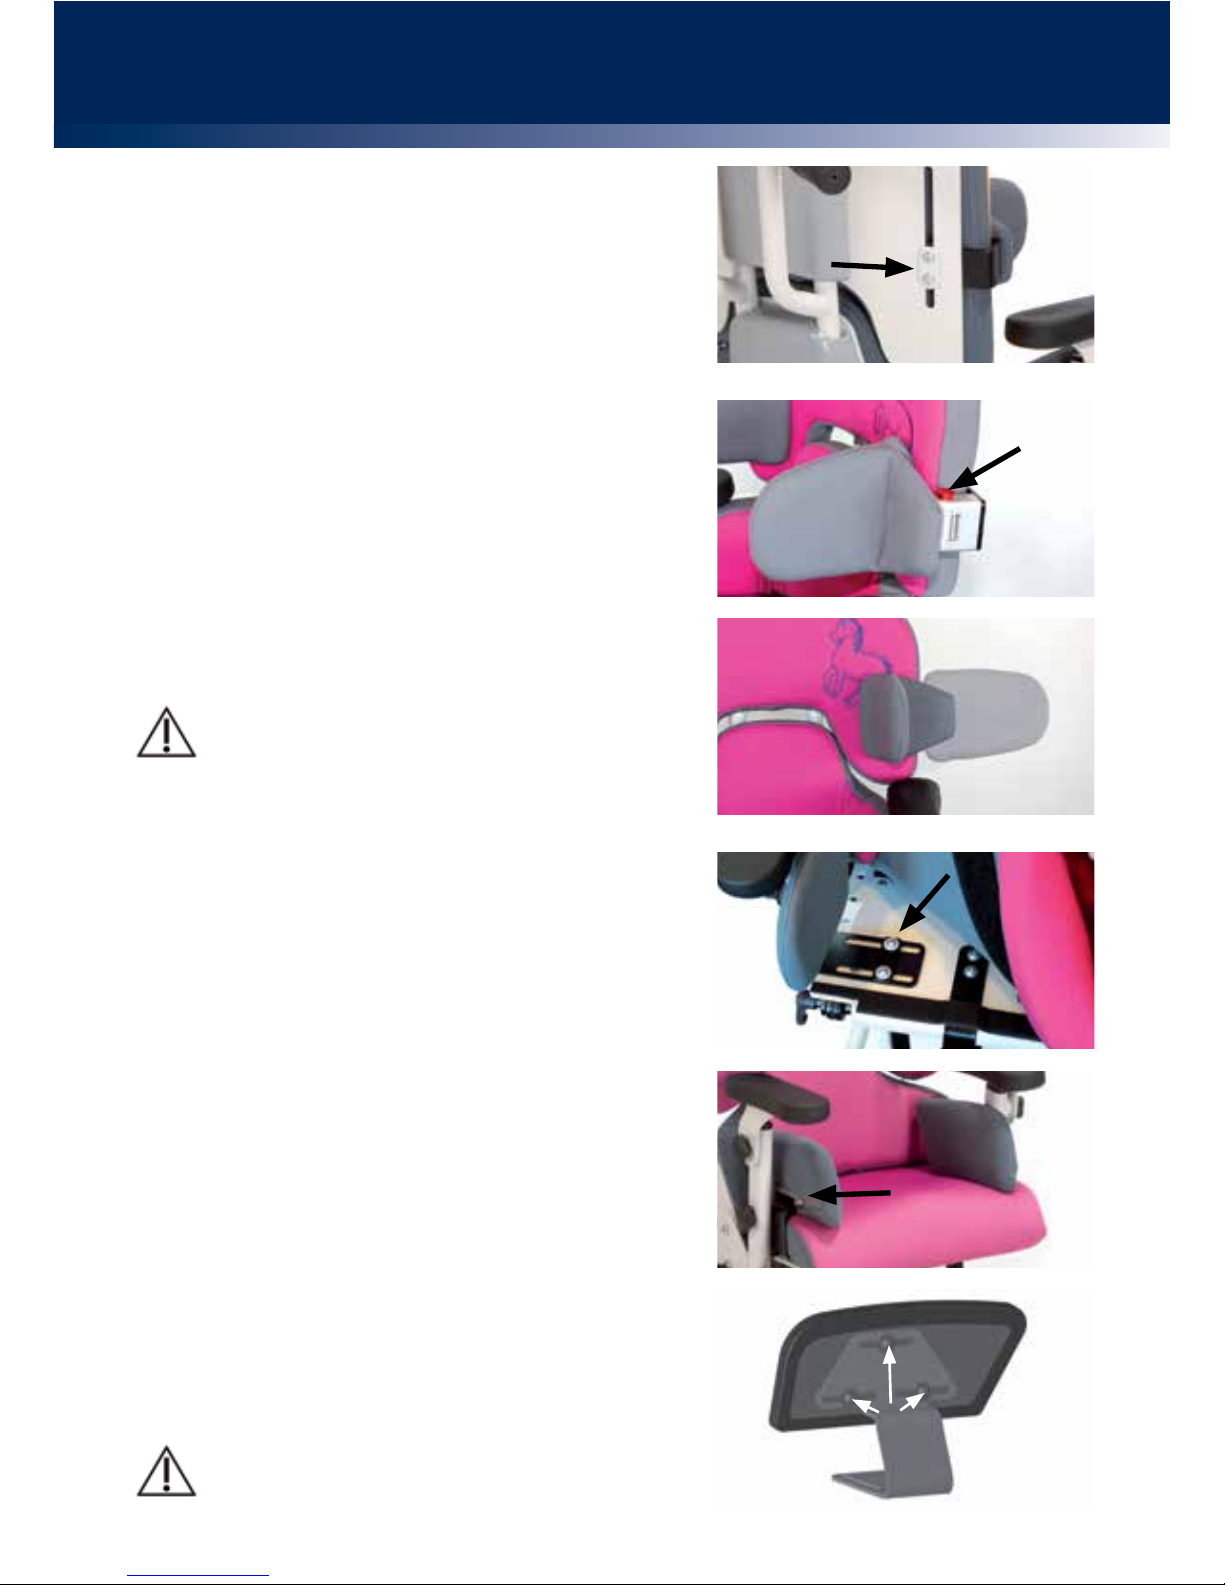
4. Accessories
4.1 Headrest................................................................................................................. 7
4.2 Removable back..................................................................................................... 7
4.3 Thorax pelotte pads................................................................................................ 8
4.4 Foldable thorax pelotte pads.................................................................................. 8
4.5 Thigh guides........................................................................................................... 8
4.6 Abducting leg guides.............................................................................................. 9
4.7 Adjustable pelvic guide........................................................................................... 9
4.8 Therapy table........................................................................................................10
4.9 Knee abduction wedge......................................................................................... 10
4.10 Foot bank / footrests (xed-mounted to the seat unit)..................................... 10-11
5. Repairs and cleaning
5.1 Cleaning................................................................................................................11
5.2 Repairs..................................................................................................................11
5.3 Spare parts............................................................................................................11
6. Technical data.............................................................................................................. 12
7. Guarantee..................................................................................................................... 12
8. Identication
8.1 EC declaration of conformity.................................................................................13
8.2 Serial number / date of manufacture.................................................................... 14
8.3 Product version.....................................................................................................14
8.4 Issue of the document.......................................................................................... 14
8.5 Name and address of the manufacturer, specialist dealer supplying the product..14
1