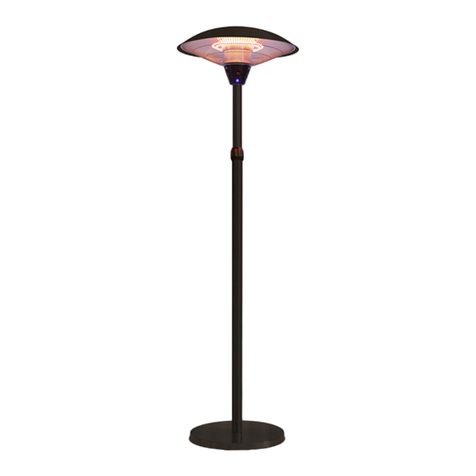
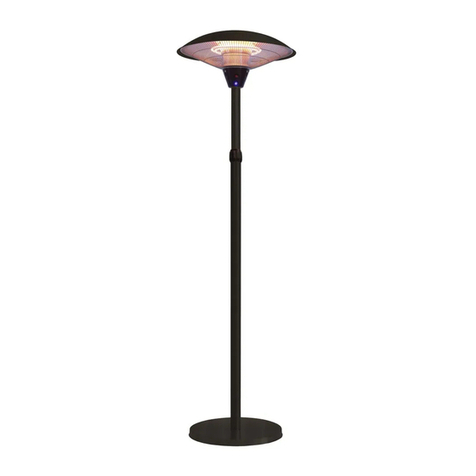
Schuller 768191 Installation guide

INSTRUCCIONES
DE
M
O
NT
A
J
E
ARTÍCULO
7
68191
ESTUFA DE PARED
·HEAT MUSIC· 1500W
Lea atentamente estas instrucciones antes de
usar la estufa de pared halógena.
Para ver la ficha técnica de producto
co
m
p
l
et
a,
puede usar el siguiente código QR:
Para cualquier duda técnica pongase en contacto con nuestro
De
p
a
r
t
a
m
e
nto
Técnico. Estamos a su servicio en nuestro email i
r
od
ri
gu
ez
@
s
c
hu
ll
e
r.
e
s
o
en
nuestro teléfono 961 601 051 Ext. 229 Rev.06.21
INSTRUCCIONES IMPORTANTES:
Al usar aparatos eléctricos, siempre se deben seguir las
precauciones básicas siguientes para reducir el riesgo de incendio,
descarga eléctrica o lesiones.
1. Lea estas instrucciones.
2. Conserve estas instrucciones.
3. Preste atención a todas las advertencias.
4. Siga todas las instrucciones.
5. No utilice esta estufa cerca del agua.
6. Limpiar solo con un paño seco.
7. No bloquee las aberturas de ventilación. Realizar la instalación
conforme a las instrucciones del fabricante.
8. No lo instale cerca de fuentes de calor como radiadores, rejillas de
calefacción, estufas u otros aparatos (incluidos amplificadores) que
produzcan calor.
9. No anule el propósito de seguridad del enchufe polarizado o con
conexión a tierra. Un enchufe polarizado tiene dos clavijas, una más
ancha que la otra. Un enchufe con conexión a tierra tiene dos clavijas
y una tercera clavija de conexión a tierra. La clavija ancha o la tercera
clavija están para su seguridad. Si el enchufe suministrado no encaja
en su tomacorriente, consulte a un electricista para reemplazar el
tomacorriente obsoleto.
10. Proteja el cable de alimentación para que no se pise ni se pellizque,
especialmente en la zona de los enchufes, los receptáculos y el punto
por donde sale el cable de la estufa.
11. Utilice únicamente los accesorios especificados por el fabricante.
12. Úselo únicamente con soporte o trípode especificado por el fabricante
o vendido con la estufa.

13. Desenchufe la estufa durante tormentas eléctricas o cuando no la
vaya a utilizar en un periodo largo de tiempo.
14. PRECAUCIÓN: Riesgo de descarga eléctrica. NO abra ni intente
reparar el calentador usted mismo.
15. Esta estufa puede alcanzar temperaturas altas cuando está en uso.
Para evitar quemaduras NO toque las superficies calientes.
16. Mantenga los materiales combustibles, como muebles, papel, ropa y
cortinas al menos a 1 metro de la parte delantera de la estufa y
manténgalos alejados de los lados, la parte superior y la parte trasera.
No coloque toallas u otros objetos encima de la estufa.
17. Tener cuidado cuando la estufa sea utilizada por niños o gente
discapacitada. No deje la estufa desatendida mientras esté en
funcionamiento.
18. NO opere la estufa con un cable dañado o después de que el
calefactor no funcione bien, se haya caído o se haya dañado de
alguna forma. Enviar la estufa para una revisión a un reparador
autorizado, para un ajuste eléctrico o mecánico o para reparación.
19. Esta estufa no está diseñada para usarse en baños, áreas de
lavandería o lugares interiores similares. Nunca coloque la estufa
donde pueda caer en una bañera u otro recipiente de agua. NO la
sumerja en agua u otros líquidos.
20. NO toque el panel de control ni lo enchufe con las manos mojadas.
21. NO inserte ni permita que objetos entren en ninguna abertura de
ventilación o escape, ya que esto puede causar una descarga
eléctrica o un incendio, o dañar el calentador.
22. Para evitar posibles incendios, NO bloquee las entradas o salidas de
aire, NO la use en superficies blandas, como una cama, donde las
aberturas pueden bloquearse.
23. La estufa tiene elementos calientes que producen arcos o chispas en
el interior. NO lo use en áreas donde se use o almacene gasolina,
pintura o vapores o líquidos inflamables.
24. La estufa no está diseñada para usarse con una alargadera. Enchufe
el cable directamente en un enchufe de pared apropiado. Si se usa
una alargadera, esta debe tener el cable de 2,5mm de sección.
25. Para evitar incendios o descargas eléctricas, conecte la estufa
directamente a un tomacorriente de 240V.
26. Para desconectar la estufa, apague los controles, luego retire el
enchufe del tomacorriente y tire firmemente del enchufe. NO lo
desenchufe tirando del cable.
27. Siempre desenchufe la estufa antes de moverla o cuando no esté
en uso. Utilícela únicamente para el uso doméstico descrito en
este manual. Cualquier otro uso no recomendado por el fabricante
puede provocar incendios, descargas eléctricas o lesiones. El uso
de accesorios no recomendados o vendidos por distribuidores no
autorizados puede ser peligroso.
28. NO intente reparar o ajustar ninguna función eléctrica de este
aparato. El hacerlo anulará la garantía. El interior del aparato no
contiene piezas reparables por el usuario. Solo personal calificado
debe realizar las reparaciones.
29. Conecte únicamente a tomas de corrientes debidamente
conectadas a tierra.
30. Los niños deben estar controlados para asegurar que no jueguen
con la estufa.

Advertencia!
La estufa tiene un voltaje nominal de 220-240 voltios. El cable
tiene un enchufe. Un adaptador como se muestra en C está
disponible para conectar enchufes de tres clavijas con conexión
a tierra a enchufes de dos ranuras. El enchufe de conexión a
tierra que se extiende desde el adaptador debe estar conectado
permanentemente a tierra. El adaptador no debe usarse si hay
disponible un enchufe de pared con conexión a tierra de tres
ranuras.
NO ANULE DEL ENCHUFE LA SEGURIDAD DE LA
CONEXIÓN A TIERRA. .
Accesorios
Instalación en la pared
•
Cuando fije el calentador a la pared, asegúrese de que las
bisagras estén en la parte inferior para que la tapa quede en la
posición abierta.
•
Distancias mínimas requeridas:
a) 50 cm de la pared lateral
b) 50cm del techo
c) mínimo 180 cm del suelo
Techo
Descripción Cant
1 Tornillo de expansion M6*50 4
2 Llave M6 1
3 Llave allen tipo L hexagonal (4mm) 1
4 Mando a distancia 1
suelo

MANTENIMIENTO
Desenchufe la estufa y déjela enfriar completamente.
Para mantener limpia la estufa, la carcasa exterior se puede
limpiar con un paño suave y húmedo. Puede usar un
detergente suave si es necesario. Después de limpiarla,
seque el aparato con un paño suave.
NO use alcohol, gasolina, polvos abrasivos, cera para
muebles ni cepillos ásperos para limpiar el calentador. Esto
puede causar daño o deterioro a la superficie del calentador.
Aunque este calentador está aprobado para uso exterior, NO
sumerja el calentador en agua por su seguridad.
Espere hasta que la estufa esté completamente seca antes
de usarlo.
Proceso de montaje a la pared
.Siga los pasos a continuación para instalar la estufa
Paso 1: insertar 4 tornillos de expansión en la pared.
PARED
Paso 2:
Quite las tuercas, las arandelas de bloqueo y las arandelas planas de los
cuatro tornillos de expansión. Guárdelas para el siguiente paso.
PARED
Step3: Instale la estufa en la pared

Instalación a un tubo
La distancia entre el soporte del producto y el techo no debe ser
inferior a 10 cm.
La distancia entre el soporte y la pared no debe ser inferior a 10 cm.
Lejos de inflamables, explosivos.
La estufa no debe cubrir directamente a ningún otro objeto.
Asegúrese de que la distancia de irradiación no sea inferior a 50 cm.
Prohibido colocar hacia el techo o la pared.
No toque la zona de calentamiento ni su capa exterior.
No cubrir!
Accesorios y pasos de instalación
Descripción Cant
1 Tornillos M6*12 4
2 Soporte U 1
3 Tuercas M6 4
4 Placa antideslizante 1
5 TornillosM6*50 2
6 Mango M8*25 1
7 Llave Allen tipo L hexagonal 5mm 1

Paso 1: fije el soporte "U" al calentador
Estufa
Acabado!
Paso 2: fije el soporte "U" al tubo
tubo
Operación
Conecte el cable de alimentación a una fuente de alimentación de
220-240 V y 13 amperios que esté ubicada en un área segura y
seca.
Activación
Presione el interruptor【I, para poner la estufa en modo standby.
Toque una vez para encender el calentador. Toque dos
veces para apagar el calentador.
Toque una vez, para encender el altavoz Bluetooth. Toque
dos veces para apagar el altavoz.
Toque para encender la función de temporizador. La estufa se
apagará después de 2 horas.

Mando a distancia
Temporizador
Altavoz
Especificaciones técnicas
• Fuente de alimentación 220-240V, 50-60Hz
• Potencia máxima 1500w
• Peso neto 3 kg
• Clase de aislamiento I
Presione una vez para encender el calentador, y presione dos
veces para apagarlo.
Presione una vez para encender el altavoz Bluetooth, y dos
veces para apagarlo.
Presione para encender la función de temporizador. El
calentador se apagará después de 2 horas.
Cuidado y mantenimiento
•
Cuando esté desconectada del suministro eléctrico, limpie el
exterior de la estufa con un paño húmedo. Nunca use
productos de limpieza corrosivos o solventes ni lo sumerja en
agua.
•
Cualquier mantenimiento o reparación, incluido el reemplazo
del tubo halógeno, debe ser realizado por un electricista
calificado o en un centro de servicio recomendado.

ASSEMBLING INSTRUCTIONS
ITEM 768191
·HEAT MUSIC· WALL
HEATER
1500W
Please read these instructions carefully before
using your new wall heater
You may use the following QR code to view
the
complete technical data sheet of the
p
r
o
d
u
ct
:
If you have any technical questions, please do not hesitate to contact our technical
Department. We are at your disposal in our emai: irodriguez@schuller.es
Rev.06.21
IMPORTANT INSTRUCTIONS:
When using electrical appliances, basic precautions should always
be followed to reduce the risk of fire, electric shock, and injury to
persons, including the following:
1. Read these instructions.
2. Keep these instructions.
3. Heed all warnings.
4. Follow all instructions.
5. Do not use this apparatus near water.
6. Clean only with dry cloth.
7. Do not block any ventilation openings. Install in accordance with the
manufacturer’s instructions.
8. Do not install near any heat sources such as radiators, heat registers,
stoves, or other apparatus (including amplifiers) that produce heat.
9. Do not defeat the safety purpose of the polarized or grounding-type
plug. A polarized plug has two blades with one wider than the other. A
grounding type plug has two blades and a third grounding prong. The
wide blade or the third prong are provided for your safety. If the
provided plug does not fit into your outlet, consult an electrician for
replacement of the obsolete outlet.
10. Protect the power cord from being walked on or pinched particularly at
plugs, convenience receptacles, and the point where they exit from
the apparatus.
11. Only use attachments/accessories specified by the manufacturer.
12. Use only with the cart, stand, tripod, bracket, or table specified by the
manufacturer, or sold with the apparatus. When a cart is used, use
caution when moving the cart/apparatus combination to avoid injury
from tip-over.
13. Unplug this apparatus during lightning storms or when unused for long
periods of time. SEPTEMBER 30, 2015 UL 60065 51
14. CAUTION: Risk of Electric shock. DO NOT open or try to repair the
heater yourself.

15. This heater may get hot when in use. To avoid burns. DO NOT let
bare skin touch hot surfaces.
16. Keep combustible materials,such as furniture, pillows, bedding, paper,
clothes,and curtains at least 3ft from front the front of the heater and
keep them away from the sides,top,and rear. DO NOT place towels or
other objects on the heater。
17. Extreme caution is necessary when any heater is used by or near
children or the disabled. Do not leave the heater unattended while in
operation.
18. DO NOT operate any heater with a damaged cord or after the heater
malfunctions, has been dropped or has been damaged in any manner,
Return heater to authorized service examination, electrical or
mechanical adjustment, or repair.
19. This heater is not intended for use in bathrooms, laundry areas and
similar indoor locations. Never locate heater where it may fall into a
bathtub or other water container. To protect against electrical hazards,
DO NOT immerse in water or other liquids.
20. DO NOT touch the control panel or plug in with wet hands.
21. DO NOT insert or allow foreign objects to enter any ventilation or
exhaust opening as this may cause an electric shock or fire, or
damage the heater.
22. To prevent a possible fire, DO NOT block the air intakes or exhaust in
any manner, DO NOT use on soft surfaces, like a bed, where
openings may become blocked.
23. A heater has hot and arcing or sparking parts inside. DO NOT use in
areas where gasoline, paint, or flammable vapors or liquids are used
or stored.
24. The heater is not intended for use with an extension cord. Plug the
cord directly into an appropriate e wall receptacle, If an extension cord
is used, if must be a minimum 2.5mm and rated not less than 1875
watts
25. WARNING: Risk of fire-keep combustible material such as furniture,
papers, clothes, and curtains at least 3 feet(0.9) from the front of
heater and away from the sides and rear.
26. To avoid fire or shock hazard, plug the unit directly into a 240V
electrical outlet.
27. To disconnect heater, turn controls OFF, then remove plug from outlet,
Pull firmly on plug, DO NOT unplug by pulling on the cord.
28. Always unplug the unit before moving or whenever the heater is not in
use. Use only for intended household use as described in this manual.
Any other use not recommend by the manufacture may cause fire,
electric shock, or injury to persons. The use of attachments not
recommend or sold by unauthorized dealers may cause hazards.
29. DO NOT attempt to repair or adjust any electrical functions on this unit,
doing so will void your warranty, The inside of the unit contains no
user serviceable parts. Only qualified personnel should perform all
servicing only.
30. Connect to properly grounded outlets only.
31. Children should be supervised to ensure that they do not play with the
appliance.

Warning
This heater has a voltage rating of 220-240 volts. The cord has a
plug. An adapter as shown in C is available for connecting
three-blade grounding-type plugs to two-slot receptacles. The
grounding plug extending from the adapter must be connected to
a permanent ground such as a properly grounded outlet box. The
adapter should not be used if a three-slot grounded receptacle is
available.
DO NOT DEFEAT THE SAFETY PURPOSE OF THE
GROUNDED PLUG.
Assembling Process To Wall
Accessories
Ref. Name Qty
1 Explosive bolt M6*50 4
2 M6 spanner 1
3 ‘L’ hexagonal wrench(4mm) 1
4 Remote control 1
Installation to Wall
When fixing the heater to a wall, ensure hinges are in the
underside so that the lid hands down in the open position.
Minimum required distances:
a) 50cm from the side wall
b) 50cm from the ceiling
c) Installation height above 180cm
MAINTENANCE
Unplug the unit and let it cool completely.
To keep this unit clean, the outer shell may be cleaned with a
soft, damp cloth. You may use a mild detergent if necessary.
After cleaning, dry the unit with a soft cloth.
DO NOT use alcohol, gasoline, abrasive powders, furniture
polish, or rough brushers to clean the heater. This may cause
damage or deterioration to the surface of the heater.
Although this heater is outdoor approved, DO NOT immerse
the heater in water for your safety.
Wait until the unit is completely dry before use.

Follow the below steps to install the heater
Step 1:put 4 Explosive bolt M6*50① into the wall.
Step 2:
Take off the nuts, the spring locks washers and the plain washers
from four explosive bolts. Keep them for the next step.
Step3: Installer the heater on the wall
Installation to tube
Product support from the ceiling should be no less than 10cm;
Warm distance from the wall should be not less than 10cm;
Far from inflammable, explosive;
Any object that is directly covered by the product is prohibited;
Make sure that the irradiation distance is not less than 50cm;
Children are prohibited from using without a guardian;
Prohibited toward ceiling or wall;
No direct touch to the heating zone and its outer shell;

Do not cover !
Accessories and installation steps
Step 1:fix the ‘U’ support to heater
Step 2: fix the ‘U’ support to tube
Ref. Name Qty
1 M6*12 screws 4
2 ‘U’ support 1
3 M6 nuts 4
4 Non-slip mat 1
5 M6*50 screws 2
6 M8*25 handle 1
7 ‘L’ hexagonal wrench(5mm) 1

Complete!
Operation
Connect the power cable to a 220-240 V, 13 amp supply that is
located in a safe, dry area.
Activation
Press the switch 【I】,the heater will be in the ready mode.
Touch the once, the heater will turn on and touch the
twice will turn off the heater.
Touch the once, the Bluetooth speaker will turn on and
touch the twice will turn off the speaker.
Touch the , the timer function will turn on and the heater
will turn off after 2 hours.
Remote Control
Press the once, the heater will turn on and press twice will
turn off the heater.
Press the once, the Bluetooth speaker will turn on and press
twice will turn off the speaker.
Press the ,t he the timer function will turn on and the heater
will turn off after 2 hours.
Care and maintenance
• When disconnected from the electrical supply, clean the
outside of the patio heater with a damp cloth. Never use
corrosive or solvent cleaners or immerse in water.
• Any maintenance or repairs including replacing the halogen
tube should only be carried out by a qualified electrician or by a
recommended service center.
Technical specification
• Power supply 220-240V, 50-60Hz
• Wattage max 1500w
• Net weight 3kg
Table of contents
Languages:
Other Schuller Heater manuals

Schuller
Schuller 748261UK Installation guide
Schuller
Schuller HEAT MUSIC 768191UK Installation guide

Schuller
Schuller 753746UK Installation guide

Schuller
Schuller 747158 Installation guide

Schuller
Schuller HEAT VULCAN Installation guide

Schuller
Schuller 747288 Installation guide

Schuller
Schuller 748261 Installation guide

Schuller
Schuller 748261 Installation guide
Popular Heater manuals by other brands

SEELEY INTERNATIONAL
SEELEY INTERNATIONAL Braemar PWF30 owner's manual

Consort
Consort PLSTi100RX Installation & Control Guide

turbineaire
turbineaire TS3E06M installation manual

Charnwood
Charnwood Country 12 Operating and installation instructions

Duux
Duux Twist DXFH01 user manual

Stelpro
Stelpro CWS750 Series user guide