scil Element i+ User manual

User Manual
Immunodiagnostic Analyzer
Element i+
For Veterinary In-Vitro Diagnostic Use Only

Vers.:20220531ENG 2
Introduction
Thank you for purchasing the Element i+™ Immunodiagnostic Analyzer.
The Element i+ Immunodiagnostic Analyzer is a veterinary diagnostic device used to perform
immunological analyses using proprietary Element i+™ Cartridges.
This product is for veterinary use only.
Before using this equipment, please read this manual carefully and follow the precautions for
correct operation.
The Element i+ Immunodiagnostic Analyzer is manufactured for Heska Corporation by MBio
Diagnostics, Inc. (MBio), Boulder, Colorado, USA.
•No part or all of this manual may be reproduced in any form without prior permission.
•The information contained in this manual may be subject to change without prior notice.
•Heska/MBio shall not be liable for malfunctions and damage resulting from installation,
relocation, remodeling, maintenance, and repair done by other than dealers specified by
Heska.
•Heska/MBio shall not be liable for malfunctions and damage of Heska products due to
the use of products of other manufacturers not supplied by Heska.
•Heska/MBio shall not be liable for malfunctions and damage resulting from negligence of
precautions and operating methods contained in this manual.
•Heska/MBio shall not be liable for malfunctions and damage resulting from use under
environmental conditions outside the range of conditions required for proper use of this
product, such as power supply, installation environment, etc. contained in this manual.
•Heska/MBio shall not be liable for malfunctions and damage resulting from natural
disasters such as fires, earthquakes, floods, lightening, etc.

Vers.:20220531ENG 3
Table of Content
Introduction........................................................................................................................ 2
1Safe Usage and Handling Precautions..................................................................... 4
1.1 Precautions before Operating this Equipment........................................................... 4
1.2 Biohazards and Waste ............................................................................................. 4
1.3 Electrical Hazards..................................................................................................... 5
1.4 Declaration of Conformity / Electromagnetic Compatibility (EMC)............................. 5
1.5 Laser Warning.......................................................................................................... 6
1.6 Other Safety Warnings............................................................................................. 6
1.7 Table of Symbols...................................................................................................... 6
2Overview.................................................................................................................. 7
2.1 Components and Labeling........................................................................................ 7
2.2. Specifications.......................................................................................................... 8
2.3. Calibration............................................................................................................... 8
3Transport, Unpacking, and Installation...................................................................... 9
3.1 Packaging ................................................................................................................ 9
3.2 Unpacking ................................................................................................................ 9
3.3
Parts List
................................................................................................................... 9
4Analyzer Operation..................................................................................................10
4.1 Turning the Analyzer Onand Off ..............................................................................10
4.2 MainScreensandControlsontheUserInterface......................................................10
4.3 Adjust Units and Reference Ranges........................................................................11
4.4 ImportaCartridgeType/CalibrationInformation........................................................12
4.5 CartridgeOverview..................................................................................................13
4.6 Running aSample ...................................................................................................13
4.7 Running aTest.........................................................................................................14
4.8 Review Test Results................................................................................................16
5Maintenance and Cleaning......................................................................................17
5.1 Cleaning Outside Surfaces......................................................................................17
5.2 Cleanable Air Filter..................................................................................................17
6Troubleshooting.......................................................................................................18
6.1. Error Handling........................................................................................................18
6.2. Table of Common Error Messages.........................................................................18

Vers.:20220531ENG 4
1 Safe Usage and Handling Precautions
This section contains safety precautions which must be followed for safe operation of the
Element i+ Immunodiagnostic Analyzer (also called Element i+ Analyzer in this manual).
The Element i+ Analyzer is used in conjunction with Element i+ Cartridges. Please refer to
instructions included in this manual and contained in the Quick Steps Guide for test-specific
information.
1.1 Precautions before Operating this Equipment
CAUTION
Before using this equipment, read this Product Manual carefully to ensure correct operation
of the equipment.
CAUTION
Whenever operating this equipment, observe the precautions described in this manual.
Failure to do so may result in injuries, cause property damage, or produce incorrect results.
CAUTION
The Element i+ Analyzer is for veterinary use only. The intended use is to quantify biological
markers in animal serum or plasma samples using Element i+ Cartridges. Do not use the
equipment for other purposes. Please refer to instructions included in this manual and
contained in the Quick Steps Guide.
CAUTION
This equipment is to be operated by personnel appropriately trained for its intended use and
correct operation.
1.2 Biohazards and Waste
Wear appropriate personal protective equipment for the sample type being tested when
using the Element i+ Analyzer.
Used cartridges, tips, and contaminated swabs or cloths used for cleaning equipment are
potentially infectious waste and disposal must follow applicable local, state, or federal
regulations.
When discarding the equipment that may be contaminated with sample, disposal must follow
applicable local, state, or federal regulations.
When handling samples and cleaning the equipment, always follow biohazard procedures
(e.g., wear gloves, lab coat, and eye protection), referring to the sample handling rules of
your facility.

Vers.:20220531ENG 5
1.3 Electrical Hazards
The power supply voltage applied to the equipment is AC100–240 V–1.5 A, 47–63 Hz.
The Element i+ Analyzer is only to be supplied power from the power
supply included in the package. To avoid electrical shock, observe the
following precautions:
•Avoid installation sites where water or other liquids may splash on the equipment.
•Make sure that the equipment is properly grounded to a protective earth lead for
indoor wiring.
•Make sure that all cables have been properly connected.
Plug the power cable into an outlet with a grounding receptacle.
When plugging the cable in or removing it from an outlet, be sure to hold onto the
plug, not just the cable, to prevent damage to the cable.
The equipment is not designed to be user serviceable. Do not remove covers or
other parts to avoid electrical shock or injury from moving parts.
1.4 Declaration of Conformity / Electromagnetic Compatibility
(EMC)
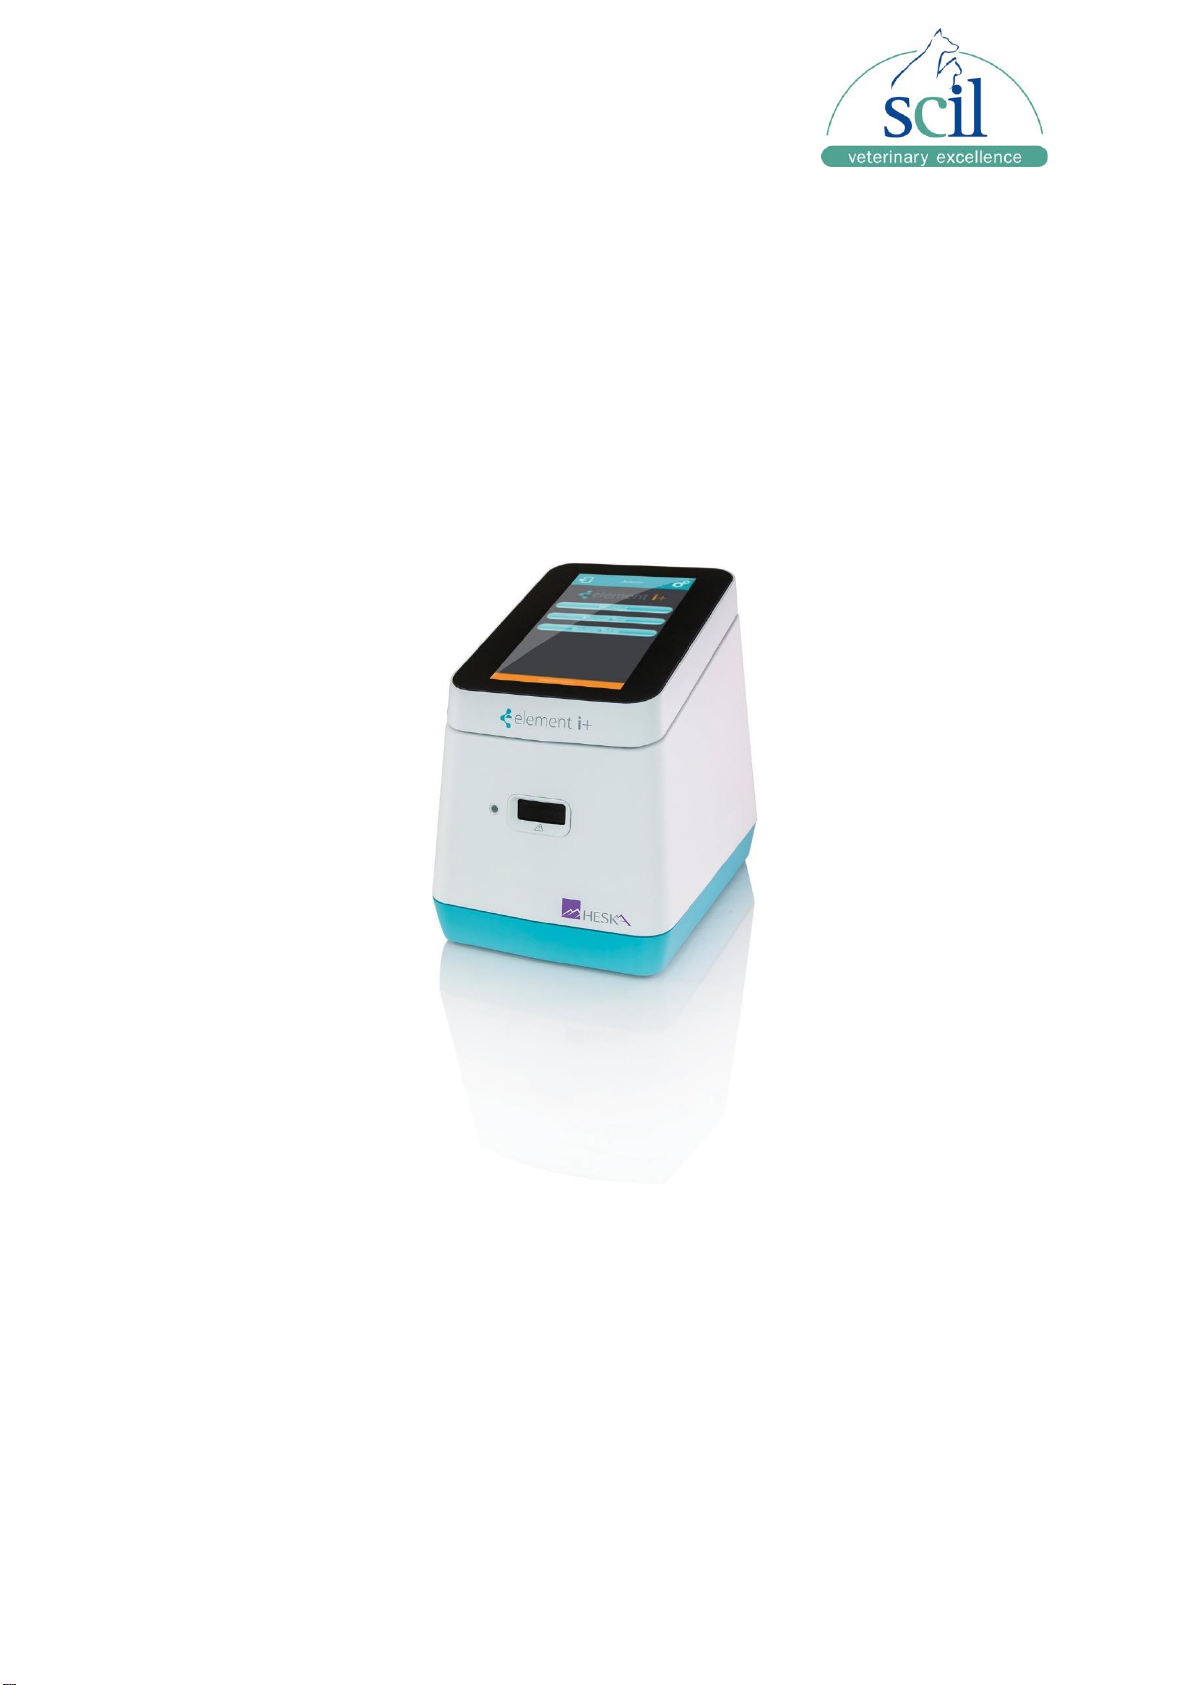
The Element i+ Immunodiagnostic Analyzer complies with the Essential Requirements of the
Low Voltage Directive 2014/35/ EU and with EMC Directive 2014/30/EU. The Analyzer was
tested according to EN 61010–1, UL 61010–1, and to EN 60825–1. The Element i+ Analyzer
complies with Part 15 of FCC regulations and FDA regulations 21 CFR 1040.10 and
1040.11, except for deviations pursuant to Laser Notice No. 50.
NOTE: This equipment has been tested and found to comply with the limits for a Class A
digital device, pursuant to Part 15 of the FCC Rules. These limits are designed to provide
reasonable protection against harmful interference when the equipment is operated in a
commercial environment. This equipment generates, uses, and can radiate radio frequency
energy and, if not installed and used in accordance with the instruction manual, may cause
harmful interference to radio communications. Operation of this equipment in a residential
area is likely to cause harmful interference in which case the user will be required to correct
the interference at his/her own expense.
This device complies with Part 15 of the FCC Rules. Operation is subject to the following two
conditions: (1) this device may not cause harmful interference, and (2) this device must
accept any interference received, including interference that may cause undesired operation.
FCC RF Radiation Exposure Statement: This equipment complies with FCC radiation
exposure limits set forth for an uncontrolled environment. End users must follow the specific
operating instructions for satisfying RF exposure limits. This transmitter must not be co-
located or operating with any other antenna or transmitter.

Vers.:20220531ENG 6
1.5 Laser Warning
The equipment includes an embedded laser. The equipment complies with FDA
performance standards for laser products except for deviations pursuant to Laser Notice No.
50, dated June 24, 2007.
The Element i+ Analyzer is considered a Class 1 laser product per IEC 60825–1: 2007.
Do not open the Element i+ Analyzer. The Element i+ Analyzer has no user serviceable
parts. Any unauthorized opening of the instrument can cause potential hazards, can expose
hazardous laser radiation, and will invalidate warranty claims.
The Element i+ Analyzer is a Class 1 laser device that has the following protective
measures: a light-tight enclosure and a safety interlock which prevents the internal laser
source from emitting should the cartridge slot door be opened when a cartridge is not
present.
If the enclosure is damaged, immediately stop using the analyzer to prevent possible
exposure to hazardous laser radiation.
CAUTION
Use of controls or adjustments or performance of procedures other than those specified
herein may result in hazardous radiation exposure.
1.6 Other Safety Warnings
EXPLOSIVE HAZARD: Do not use flammable and explosive gas around the equipment.
DonotplacefingersintotheElementi+ Analyzercartridgeopening.
Cartridgesaresingleuseonly.Donotreusecartridges.Usedcartridgesshouldbehandled
aswasteanddisposed of according toall local laws andregulations for disposal of waste.
OnlyinsertcartridgessuppliedbyHeskaCorporation.Donotinsertdamagedcartridges
intotheanalyzer.
1.7 Table of Symbols
FCC mark
Recycle
Caution, consult accompanying instructions for safety related information
Consult instructions for proper use
DC electrical power rating
Biological risks
Serial number
Catalog number

Vers.:20220531ENG 7
2 Overview
2.1 Components and Labeling
Front
Analyzer label found
on the bottom of analyzer
Back
Touch screen
Status light
Cartridge
port/door
Carrying
handle
Air filter cover
and filter
Power
button
USB
A2.0
ports
Ethernet
port
Power
cord jack

Vers.:20220531ENG 8
2.2. Specifications
Detection System
Fluorescence Immunoassay
Cartridge
Element i+ compatible
Procedure time
Specific to test cartridge
Instrument electrical power rating
+15 DC/4.65 A max
Wall Power
100–240 V~ —1.5Amax, 47–63 Hz,
Overvoltage Category II
Laser classification
Laser Class 1 (per IEC 60825–1)
Operating temperature
59–86°F (15–30°C) indoors
Operating relative humidity
25–65%, non-condensing
Storage temperature
32–113°F (0 –45°C)
Storage humidity
5–95%, non-condensing
Physical dimensions
6.5 in (W) x 8.75 in (H) x 9 in (L)
165 mm (W) x 222 mm (H) x 229 mm (L)
Weight
5.51 lbs (2.5 kg)
Pollution Degree
2 max
Altitude
Up to 2000 meters
2.3. Calibration
The Element i+ Analyzer is factory calibrated and does not require any further calibration or
verification operations.

Vers.:20220531ENG 9
3 Transport, Unpacking, and Installation
3.1 Packaging
The Element i+ Analyzer ships in a custom-designed box. Transportation of the analyzer
must only be in this protective box.
3.2 Unpacking
•Unpack the Element i+ Analyzer and place on a level, stable surface. Inspect for any
obvious signs of damage. Report any damage immediately.
•Remove protective film from touchscreen if present.
•Before using, allow the analyzer to equilibrate to the surrounding temperature for at least
30 minutes.
3.3
Parts List
The following items are supplied with your Element i+ Analyzer:
•Element i+Analyzer
•Power supply andcord
•Fixed-volume (100 µL)pipettes

Vers.:20220531ENG 10
4 Analyzer Operation
4.1 Turning the Analyzer On and Off
The power toggle button is located on the lower back side of the analyzer. Press and release
the button one time. The indicator light on the front of the analyzer will turn on and go into
“breathing” mode during the boot-up sequence. When initially powered, the analyzer will run
through a series of self-diagnostic checks. When boot-up is complete, the indicator light will
glow steady and the login screen will appear.
The analyzer should be powered down using . If a hard re-start is required, hold the power
button on the back of the analyzer in for 7 seconds.
4.2 Main Screens and Controls on the User Interface
Power
on/off
Checkboxisenabledon all
screenswhenrequired
data
entryiscomplete
Keyboard appears when a
dataentryfieldisselected

Vers.:20220531ENG 11
4.3 Adjust Units and Reference Ranges
•If you want to set the units, you must first go to the settings. Then go to the
Administrator and there you will find the Units button. In this menu you can change
the units as you need them.
•If you want to set the reference areas you must first go to the settings. Then go to the
administrator and there you will find the button reference groups. In this menu you
can change the reference groups of the different species as you need them or even
add them.
ON/OFF Button
Settingsmenu
Use a Worklistto
run a sample
Review previously
run samples
Manually input information
to run sample
Back button
Home button

Vers.:20220531ENG 12
4.4 Import a CartridgeType/Calibration Information
Each lot of Element i+ Cartridges is factory calibrated and has a
unique, lot-specific calibration file that must be loaded into the
analyzer software. Lot-specific calibration data are contained on an
electronic Cartridge Definition File (CDF) written to a USB flash drive
supplied with each cartridge box. The electronic data file will have the
format #####cdf.xml. Cartridges cannot be read on the analyzer until
this file is loaded. Use the following procedure to load the CDF.
1. Insert the provided USB flash drive (Figure 1) with cartridge lot
calibration information into any of the four USB ports on the back of
the analyzer. Figure 2
2. From the Home screen, touch .
3. On the Settings screen, touch IMPORT CARTRIDGE
TYPES/CALIBRATION INFO.
4. The analyzer will detect the cartridge calibration information on the
USB drive.
5. Touch CHECK USB DRIVE to import the calibration information.
The analyzer will import the cartridge calibrations. Do not remove the
USB drive until the screen displays “Completed successfully.” Then
touch the Home icon and remove the USB drive.
Figure 1
Figure 2

Vers.:20220531ENG 13
4.5 Cartridge Overview
The Element i+ Analyzer is designed to run exclusively with test-specific Element i+
Cartridges. Each production lot of cartridges is factory calibrated. Lot-specific calibration data
are contained on an electronic Cartridge Definition File (CDF) written to a USB flash drive
supplied with each cartridge box. Front
Back
AVOID TOUCHING THE CARTRIDGE BOTTOM • THE ANALYZER READS THROUGH
THE BOTTOM
NOTE:
•Use thehandle when manipulating thecartridge.
•Keep the bottom of the cartridge free from fingerprints, smudges, and other
contamination. Fluorescence illumination and imaging are through the clear plastic
component on the bottom of the cartridge.
4.6 Running aSample
This section assumes that you have logged into the analyzer and successfully loaded the
Cartridge Type/Calibration Info for the lot of Element i+ Cartridges you will be using (see
previous sections).
Materials
•Cartridge–Store at35.6–77.0ºF(2–25ºC)
•100µLfixed volume pipette (provided with analyzer)
•Disposable pipette
•Elementi+ AnalyzerwithCartridgeDefinitionFilealreadyloaded
•Sample
Foil-sealedvent
(DONOTALTER)
Sample Inlet
Portcovered
withpull-tab
Write-on
label
QR code for
analyzer
Handle
Fluid
Channel
Lens
DO NOT
TOUCH
Dried
reagent and
stir bar

Vers.:20220531ENG 14
4.7 Running aTest
1. Obtain a serum or lithium heparinized plasma
sample.
2. On the main screen, touch Worklist or Manual
Test. Figure 3
3. In Worklist Mode, confirm that all fields have
correct information and then touch to proceed.
In Manual Mode, enter sample information in the
required fields. Touch to proceed. Figure 4
Figure 3
Figure 4
4. Open the pouch by tearing at the notch.
Carefully remove the cartridge by the handle and
place it on a flat surface. Figures 5 & 6
NOTE:
Do not touch the bottom of the cartridge.
NOTE:
If the cartridge was refrigerated, allow to warm to
room temperature for at least 15 minutes before
opening the pouch.
NOTE:
Cartridge must be used within 1 hour of removal from
pouch.
Figure 5
Figure 6
5. With the cartridge flat on the bench, remove the
pull-tab from the sample inlet port and discard.
Use the cartridge handle to steady the flat
cartridge while removing the pull-tab. Figure 7
NOTE:
Cartridge must be used within 15 minutes of
removing pull-tab.
6. NOTE INSTRUCTIONS FOR T4 ONLY (OTHER TESTS SKIP TO 7.)
Dilute patient sample using supplied Heska T4 Diluent.
a. Use supplied 100 µl fixed volume mini-pipette to aspirate 100 µl of serum or
plasma sample.
b. Flick or tap the Heska T4 Diluent tube to ensure there is no liquid adhering to the
Diluent tube inner cap surface.
c. Dispense the full 100 µl patient sample into the Diluent tube. Ensure proper
mixing by then aspirating and dispensing 5x using the same pipette tip.
d. Aspirate 100 µl of the diluted sample using the mini-pipette and same pipette tip,
insert the pipette tip into the T4 cartridge sample inlet port hole, and dispense the
full amount into the hole. (Skip to 8.)

Vers.:20220531ENG 15
7. Affix a tip to the 100 µL fixed volume mini-pipette. Aspirate 100 µL of
sample, insert the pipette tip into the inlet port hole, and dispense the
full sample amount into the hole. Figure 8
Figure 8
8. Touch
✓
on the Prepare Sample screen to
open the analyzer door. Figure 9. Insert the
cartridge until you feel a click and hear a beep.
Figures 10 & 11
Figure 9
Figure 10
Figure 11
9. The test will run automatically.
A status bar and countdown timer will display on the screen and
the indicator light on the front of the analyzer will blink to indicate
a test is running. Figure 12
NOTE: To cancel during the run, touch X at the upper right of the
screen.
Figure 12

Vers.:20220531ENG 16
10. Upon test completion, patient results will
display on the screen. Touch HOME to exit
results screen. Figure 13
The screen will provide an indication when it is
safe to remove the used cartridge. Figure 14
4.8 Review Test Results
Figure 13
Figure 14
1. Click on the button “Review Tests”
2. Now you can see all your Test results and you can sort them by Patients Name, Owner or
Date.
3. Click to one test you want to review it

Vers.:20220531ENG 17
5 Maintenance and Cleaning
The Elementi+ Analyzer is a maintenance-free instrument and hasnouser serviceable
parts.When encountering analyzer failures or damage, please contact service.
CAUTION
Do not try to open the Analyzer for cleaning or servicing.
5.1 Cleaning Outside Surfaces
Use a soft cloth to clean the Element i+ Analyzer. If required, the analyzer can be cleaned by
wiping with a mild detergent, 70% solution of ethanol or isopropyl alcohol in water, or 10%
bleach solution.
CAUTION
Do not directly spray the Analyzer with cleaner. Apply cleaning solutions to a cloth and then
wipe the instrument.
5.2 Cleanable Air Filter
The air filter on the back of the Analyzer should be cleaned periodically. Remove the snap
cover and then simply pull the foam filter out of its housing. Remove gross contaminants and
clean by running under warm water. Allow the filter to dry before inserting back in the
instrument.

Vers.:20220531ENG 18
6 Troubleshooting
6.1. Error Handling
When an error occurs, a dialog box appears displaying the error message. The table below
describes the warnings and error messages that may be displayed, as well as suggested
actions to take. If you are unable to resolve the problem by following this troubleshooting
guide, please contact you local Technical Support Services.
6.2. Table of Common Error Messages
Error Message
Error Type
Action
The inserted cartridge has already
been run.
Used cartridge.
A cartridge can only be run one
time. Get a new untested cartridge
and re-run the sample.
The inserted cartridge has expired.
Cartridge shelf life
exceeded.
Dispose of expired cartridge and
run sample on a non-expired
cartridge.
The inserted cartridge contains
an invalid barcode.
Did not recognize the
barcode.
Select a new cartridge.
Unable to read the barcode from
the inserted cartridge.
Barcode not read.
Verify that barcode is not damaged
and retry the cartridge. If error
persists, select a new cartridge.
The inserted cartridge is of an
unknown test type.
Cartridge Definition File
not loaded in Analyzer
Software.
Load the Cartridge
Type/Calibration Info for that
specific cartridge lot (see
instructions in this User Manual).
The Cartridge Definition File is
provided on a USB flash drive in
cartridge box or contact your local
Technical Support Services.
Wrong Cartridge Inserted –Do
you wish to proceed?
Cartridge inserted
does not match
requested test.
Update the sample information to
indicate test type matching the
cartridge type.
Calibration information needed.
Instrument has no
record of cartridge
lot information.
Install the corresponding
Cartridge Definition Files for the
cartridge lot being used.
There was an unknown error
processing the cartridge.
General error.
Must run a new cartridge. If the
problem repeats, re-start the
instrument.

Vers.:20220531ENG 19
Error Message
Error Type
Action
Error connecting to hardware.
Internal instrument
communication.
Restart the instrument. If
problem persists, contact
Heska Technical Support
Services.
Unexpected error editing reference
range.
General error.
Confirm reference ranges
are set in the Administrator
settings.
Unexpected error deleting
reference range.
General error.
Confirm reference ranges
are set in the Administrator
settings.
Auto communication failed,
please check connection.
Network not connected.
Verify the network is available
and that the Ethernet cable,
or Wi-Fi is connected and
configured properly.
Table of contents
Other scil Laboratory Equipment manuals