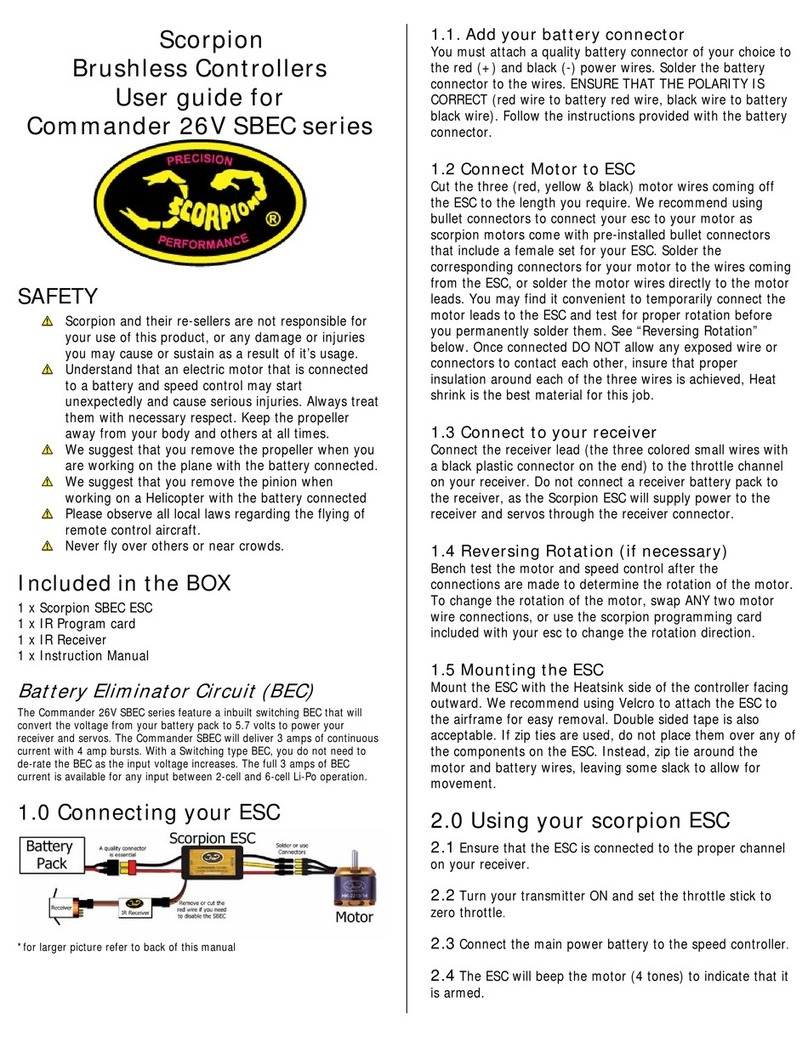
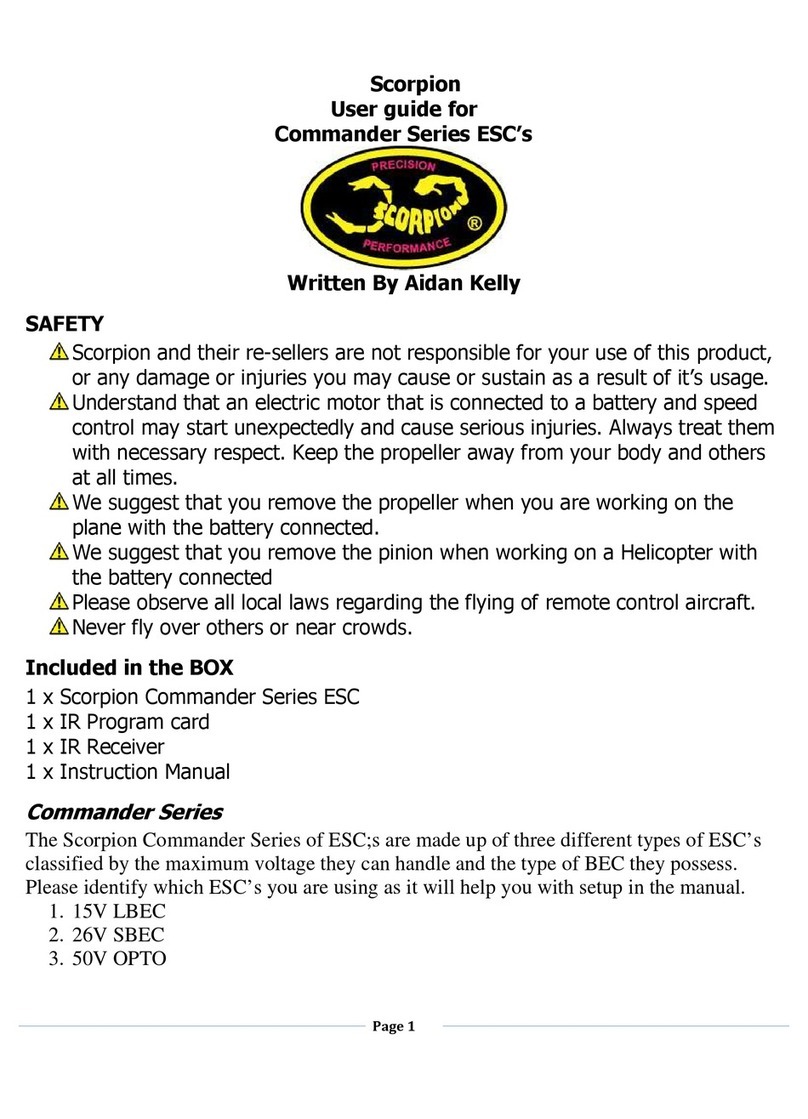
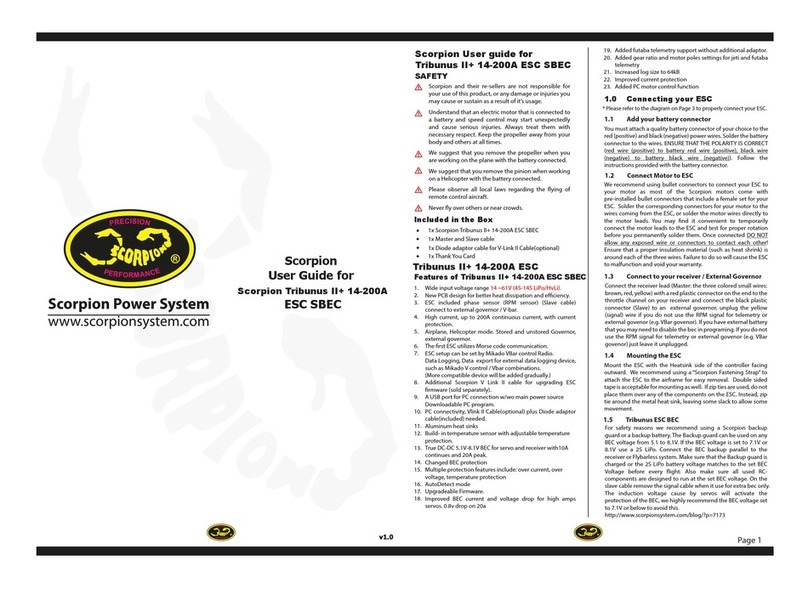
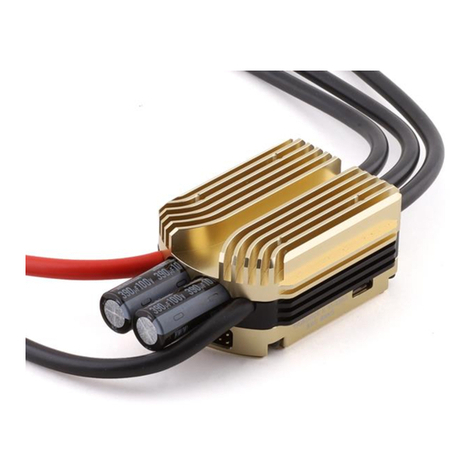
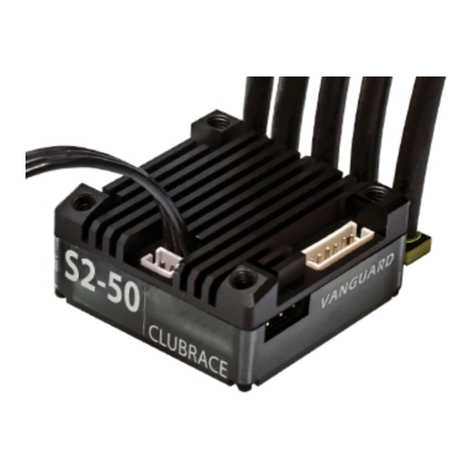
SCORPION Tribunus II 14-200A User manual

Page 1
Scorpion User guide for
Tribunus II 14-200A ESC
(SBEC)
Scorpion and their re-sellers are not responsible for
your use of this product, or any damage or injuries you
may cause or sustain as a result of it’s usage.
Understand that an electric motor that is connected to
a battery and speed control may start unexpectedly
and cause serious injuries. Always treat them with
necessary respect. Keep the propeller away from your
body and others at all times.
We suggest that you remove the propeller when you
are working on the plane with the battery connected.
We suggest that you remove the pinion when working
on a Helicopter with the battery connected.
Please observe all local laws regarding the ying of
remote control aircraft.
Never y over others or near crowds.
SAFETY
Features of Tribunus II 14-200A ESC SBEC
Included in the Box
Tribunus II 14-200A ESC
14S - 200A SBEC
The Scorpion Tribunus II 14-200A is available in SBEC version.
1.
2.
3.
4.
5.
6.
7.
Wide input voltage range 14 ~61V (4S-14S LiPo/HvLi).
ESC included phase sensor (RPM sensor) (Slave cable)
connect to external governor / V-bar.
High current, up to 200A continuous current, with current
protection.
Airplane, Helicopter mode. Stored and unstored Governor,
external governor.
The rst ESC utilizes Morse code communication.
ESC setup can be set by Mikado VBar control Radio.
Data Logging, Data export for external data logging
device, such as Mikado V control / Vbar combinations.
(More compatible device will be added gradually.)
Additional Scorpion V Link II cable for upgrading ESC
rmware (sold separately).
Downloadable PC program and Android apps.
PC connectivity, Android connectivity ( OTG cable needed)
, Vlink II Cable(optional) plus Diode adaptor
cable(included) needed.
8.
9.
10.
Scorpion
User Guide for
Scorpion Tribunus II 14-200A
ESC
(SBEC)
v1.8
1x Scorpion Tribunus II 14-200A ESC (SBEC)
1x Diode adaptor cable for V-Link II Cable(optional)
1x Thank You Card
1x Master and Slave cable
Aluminum heat sinks
Build- in temperature sensor with adjustable temperature
protection
11.
12.
1.0 Connecting your ESC
* Please refer to the diagram on Page 3 to properly connect your ESC.
1.3 Connect to your receiver / External Governor
Connect the receiver lead (Master: the three colored small wires:
brown, red, yellow) with a red plastic connector on the end to the
throttle channel on your receiver and connect the black plastic
connector (Slave) to an external governor, unplug the yellow
(signal) wire if you do not use the RPM signal for telemetry or
external govenor (e.g. VBar govenor). If you have external battery
that you may need to disable the bec in programing. If you do not
use the RPM signal for telemetry or external govenor (e.g. VBar
govenor) just leave it unplugged.
1.1
Add your battery connector
You must attach a quality battery connector of your choice to
the red (positive) and black (negative) power wires. Solder the
battery connector to the wires. ENSURE THAT THE POLARITY IS
CORRECT (red wire (positive) to battery red wire (positive), black
wire (negative) to battery black wire (negative)). Follow the
instructions provided with the battery connector.
1.2 Connect Motor to ESC
We recommend using bullet connectors to connect your ESC to
your motor as most of the Scorpion motors come with
pre-installed bullet connectors that include a female set for your
ESC. Solder the corresponding connectors for your motor to the
wires coming from the ESC, or solder the motor wires directly to
the motor leads. You may nd it convenient to temporarily
connect the motor leads to the ESC and test for proper rotation
before you permanently solder them. Once connected DO NOT
allow any exposed wire or connectors to contact each other!
Ensure that a proper insulation material (such as heat shrink) is
around each of the three wires. Failure to do so will cause the
ESC to malfunction and void your warranty.
1.4 Mounting the ESC
Mount the ESC with the Heatsink side of the controller facing
outward. We recommend using a“Scorpion Fastening Strap” to
attach the ESC to the airframe for easy removal. Double sided
tape is acceptable for mounting as well. If zip ties are used, do
not place them over any of the components on the ESC. Instead,
zip tie around the metal heat sink, leaving some slack to allow
some movement.
1.5 Tribunus ESC BEC
True DC-DC 5.1V-8.3V BEC for servo and receiver with10A
continuous and 20A peak.
Multiple protection features include: over current, over
voltage, temperature protection
AutoDetect mode
Upgradeable Firmware
13.
14.
15.
16.
For safety reasons we recommend using a Scorpion backup
guard or a backup battery. The Backup guard can be used on
any BEC voltage from 5.1 to 8.3V. If the BEC voltage is set to 7.3V
or 8.3V use a 2S LiPo. Connect the BEC backup parallel to the
receiver or Flybarless system. Make sure that the Backup guard
is charged or the 2S LiPo battery voltage matches to the set BEC
Voltage before every ight. Also make sure all used RC-
components are designed to run at the set BEC voltage.
Remove the signal wire of the slave cable when it use for extra
bec only.
The induction voltage cause by servos will activate the
protection of the BEC, we highly recommend the BEC voltage
set to 7.3V or below to avoid this.
http://www.scorpionsystem.com/blog/?p=7173

Ensure that the ESC is connected to the proper channel on
your receiver.
2.2
Ensure that the initial setup has been performed before
using your ESC.
2.1
Turn your transmitter ON and set the throttle stick to zero
throttle.
2.3
The ESC will beep the motor with Morse code when
power up[Power On Sound(POS) ].
Power On Sound - Voltage in Morse code.
To arm the ESC ready for use, you must disconnect the battery,
then move the throttle stick to zero position and reconnect to
power-up.
Always power your radio transmitter before powering up the
receiver and/or the ESC. Some receivers with fail-safe features or
Spektrum receiver units that are not bound on receiver power up
are entirely capable of causing the arming sequence to occur and
command the ESC to driver the motor. Always keep the aircraft
restrained and clear of body parts when the ESC is powered.
If your ESC cannot sense any radio signal it will beep the motor and
ash green on the LED with Morse code.
2.5
Connect the main power battery to the ESC.2.4
3.0 Scorpion Tribunus II ESC
Programming Feature
All Scorpion Tribunus II Series ESC programming features are
available though the use of the PC programming.
Scorpion ESC’s come with default factory settings which are
recommended for most applications. Programming options can
be changed at the discretion of the user.
2.0 Using your Scorpion Tribunus II ESC
Turn on transmitter and receiver, then set throttle to
maximum position be sure that your throttle curve is set
at 0% minimum throttle and 100% at maximum.
Connect the battery to the ESC. After few seconds you will
hear one beep. Now move your throttle to the lowest
position, then you will hear two beeps, and POS Morse
code come from the motor, this mean your calibration is
done. You only need to do this once as throttle range will
be stored in the memory of the speed controller. You can
reset the throttle range by performing steps 5.1 to 5.2
again.
5.1
4.0 Initial Setup
Safe Power up To arm the controller, the throttle must be
held in the “Zero” position (all the way down).
If throttle is not at zero at startup, the ESC will
not provide any power to the motor
regardless of where the throttle stick is
positioned when rst powered up.
Loss of Signal
(fail safe)
The Scorpion ESC will stop the motor as a
safety feature when the throttle signal is lost
or corrupt for 0.5 seconds.
LED* The LED is used for indicate the status of your
Scorpion Tribunus II ESC. It show with Morse
code that can let you know the status of the
ESC
Current Limiting Amp output limit, the output is rated at 10%
over the rated Amp. At approximately 10%
over the rated Amps it will automatically limit
the output to the motor, as long as the motor
is not rated too much over the ESC spec limits,
this safety mechanism will prevent a over
load to the ESC but if you install a motor for
example rated at 100 Amps on a ESC that are
rated for only 60 Amps, this mechanism will
not work properly due to the instant surge of
power demand from the motor, it may
shutdown too early or simply fry the ESC, the
only solution to this is to never use a Motor
that has a rating bigger then the ESC, don’t
even think you can use it if you run the motor
at a slower RPM or load, it will not work and
void your warranty!!
Thermal Protection At set value, the ESC will slowdown the
power output to the motor to the set value
of protection (the on board LED will ash
Morse code T (Temperature Error), after the
ESC has cool down to under set value you
can then throttle up again.
Brake Stops rotation of the motor when the throttle
signal is moved to the lowest position.
Throttle Airplane and Heli modes come
pre-programmed and can be selected by the
user.
Electronic Timing Electronic Timing and drive frequency are
Automatically and dynamically set that may
improve the eciency of the drive system!
You MUST perform throttle range calibration before the rst use
of the ESC, except if you are using external governor mode,
remove propeller/pinion from motor or back o pinion from
main gear while performing initial throttle range calibration.
Low Voltage Cuto You can choose for your ESC to stop or reduce
power when the input battery voltage drops
to a pre-set/programmed cuto voltage.
Page 2
Scorpion Tribunus II 14-200A ESC is programmed using the
1) Adaptor Diode Cable (Included in the box)
2) Scorpion “VLink Cablle II“ (sold separately)
3) OTG (on the go) Cable (Excluded)
Scorpion do not provide OTG (on the go) Cable for
Android Device. OTG cable can be found in local
electronic store.
**
Simple Morse
code Alphabet
6.0 Simple Morse digits
5.0 Throttle Calibration
5.2
Error N = No Throttle signal
Z = Throttle not in Zero position
V = Voltage Error
I = Current Error
P = Power Error
T = Temperature Error
1: Power up,
No Throttle Delay – POS – ERROR N =
-•
POS
Power on Sound , Voltage in Morse code
30.1V = WT.A = Morse code beep
=
•-- - .•-
2: Power up,
Throttle not Zero Delay – POS – ERROR Z =
--••
3: Power up,
Throttle Zero
Position
Delay – POS – No Sound
4: Power up,
Throttle Calibration
Full Throttle
Delay- 1 Beep – Lowest throttle –
2 beeps (conrmed)– POS –
ready to y.
4: Power up,
Voltage Error Delay – POS – ERROR V =
•••-
7.0 ERROR code Morse digits
8.0 Connecting the Scorpion ESC to
Computer / Android Device
Scorpion provides the most advance PC/Android program for setup.
Download Scorpion Tribunus ESC program Installer
with CH340 driver from http://www.scorpionsystem.com/
les/download/ScorpionTribunusProgram.zip, it is available
for Windows XP, Windows 7, Windows 8 and Windows 10.
Unzip it and double click the .ex le to start installation
Double click the “setup.exe”under “CH340 Driver” folder to
install the USB driver.. If you have any problem installing the
and ask for assistance.
Low Voltage cut Low Voltage cut: 14V to 58V
Program cut type from 0% to 100%
Cut off delay 1000ms ~65000ms
Drag Break Available on Airplane only
Protection Temperature, Voltage, Current, Capacity
Airplane mode Available
Rump Accel 100ms~1000ms
Active Free
Wheeling (PWM
mode)
Always on for Helicopter mode,
can be change for Airplane mode
Heli Mode Available
Soft Start Only available on Heli Mode: Fast, Medium, Slow, Custom
Rump Accel Fast, Medium, Slow, Custom
Bail out mode Only available on Heli Mode: Fast, Medium, Slow, Custom
Governor Only Available on Heli mode:Soft, Default, Hard, Custom
FREQ 8 kHz~32 kHz Dynamic Frequency
Rotation yes
Timing Auto Timing
P Gain 0.3~1.8
I Gain 1.5~2.5
Data Logging RPM, Throttle %, Voltage, Current, Temperature
9.0 Tribunus II 14-200A ESC Specification
Model Type
Tribunus II 14-200A ESC
Current rating 200A
LiPo Battery
Size 83.4 x 45 x 27.6mm
BEC Voltage From 5.1V ~8.3V
20A
Resistance 0.55 mΩ x 2
Weight 7.69oz / 218g (without cables)
4s - 14s (14V ~ 61V)
BEC rating
USER GUIDE
Page 3
10.0 How to connect Scorpion
V Link II Cable
• Follow the below diagram to connect the ESC to computer, using the Scorpion V-link II USB Cable ( Optional )
* You need to power up the ESC with minimum 4S battery when congure the ESC with PC or Android apps.
To download the eManual, PC program, & V Link II driver- visit:
http://www.scorpionsystem.com/downloads/
http://www.scorpionsystem.com/les/download/VLinkIICable.pdf
COMPUTER
ANDROID DEVICE
OTG CABLE
V LINK II CABLE
DIODE ADAPTER CABLE
Scorpion V Link II Cable
Receiver
Scorpion Tribunus II 14-200A
ScorpionV Link II Cable
Scorpion V Link II Cable
Master
To Throttle Channel
Slave
To External Governor /
Additional BEC Voltage Wire
Included
Optional
** Please update to the latest rmware before you use this ESC.
SCORPION ESC PC CONNECTION
*Wrong Side

Page 4
ANDROID DEVICE
OTG CABLE/ ADAPTER
V LINK II CABLE
DIODE ADAPTER CABLE
Scorpion Tribunus II 14-200A
ScorpionV Link II Cable
Scorpion V Link II Cable
Master
To Throttle Channel
Slave
To External Governor /
Additional BEC Voltage Wire
Included
Optional
** You can update the latest rmware through this apps.
https://play.google.com/store/apps/details?id=en.scorpion.tribunusapp
The below is the link of Tribunus ESC cogurator apps.
11.0 How to connect Scorpion ESC to Android device via OTG and V Link II Cable
Follow the below diagram to connect the ESC to Android device, using the Scorpion V-link II USB Cable & OTG cable( Optional )
* You need to power up the ESC with minimum 4S battery when congure the ESC with PC or Android apps.
SCORPION ESC AND ANDROID APP
Receiver
*Wrong Side

Page 5
After login it will install the default apps, double click the app which
device is need. For Tribunus II 14-200A you need to launch the Tribunus
congurator.
Prole: you can set your own prole icon, language and measuring.
NAME: Here you can change the name of the ESC
IMPORTANT : Sproto is a new program supported all the Tribunus ESC, after download the program and install, you
need to register an account for rmware update and congure the setting.
http://www.scorpionsystem.com/les/download/SprotoPlatform.install.zip
It will install the default apps. Click Connect to nd the device you connected. IMPORTANT: After making a change on
each page, ensure you click the SAVE button at the top to save your settings before navigating through the various
pages of the setup process.
12.0 PC Software
Click “Connect to device”to
enter device setup page. You
will see which device this
app supported, the manuals,
How-to and user guide at
the below.

Page 6
DEVICE MODE: If you would like to utilize the internal governor in the Tribunus ESC, select “Recalculated Value”for the rst few
ights with internal governor. Select the “Pre-stored value”after your rst few ights. Select “VBAR PID” for VBAR governor. Select
“External PID” for another external governor. Select“Airplane mode” for airplane use.
Default setting:
Device mode: PID with recalculated value. Communication protocol: Vbar.
BEC VOLTAGE: The BEC can be adjusted from 5.1V to 8.1V.
Rotation: Adjusts the motor rotation direction.
MAIN PAGE
MENU
Connect: Click to connect
or refresh the ESC to the PC
Program
Save: Saves current settings
to the ESC
Save cfg: Save current ESC
settings to le
Load cfg: Load ESC settings
from le
Log upd: Loads the log from
the ESC
Log save: Save the log to a
le
Log Load: Loads the log
from a le
Default cfg: Default factory
setting
NOTE: When the user
changes a value in any
dialogue box, the BLUE box
will turn RED. Once the user
clicks “SAVE”, the RED box
will turn BLUE once again to
signal that the value has
been stored to the ESC.
This is the page you can set up all the general setting like device mode selection, bec voltage, rotation direction
and communication protocol.
Communication Protocol: Select“Standard”if using Scorpion Internal Governor or Airplane
Mode.
Select VBar if using the Mikado VBar Control, Select “Jeti Exbus” if using a Jeti Exbus System or
select Unsc Telem if using an Unspecied Telemetry System (Such as JLog or Brain FBL).
12.1 General Setting

Page 7
HELICOPTER This is the page where you set up your Helicopter internal Governor settings.
*Only adjusts Heli Governor settings when the Internal Governor is activated in the previous menu- Device Mode*
HELICOPTER MENU
SOFT START: Adjusts how quickly the main rotor will ramp up (in Seconds). A lower
number will cause the main rotors to spool up faster. A larger number will cause the
main rotors to spool up slower. This only eect from 0% to 30% of the rpm range.
ACCELERATION: Adjusts the acceleration between 1 Headspeed to another. A lower
number will cause the main rotors to spool up faster from one desired headspeed to
another. A larger number will cause the headspeed to change slower. This only eect
from 30% to 100% rpm range.
BAILOUT ACCELERATION: Adjusts how quickly the main rotor will ramp up (in
Seconds) from Autorotation Bailout Mode. Autorotation Bailout mode allows the user
to quickly spool up his blades when desired (for example, if an autorotation does not
go as planned and the user immediately wants his rotor to spool up quickly). A lower
number will cause the main rotors to spool up faster. A larger number will cause the
main rotors to spool up slower.
GOVERNOR: Allows the user to adjust the Governor Gain Settings. It is recommended
to begin with Default rst, then change Gain settings to achieve the desired perfor-
mance.“Soft” gains are pre-set lower than Default and “Hard” gains are pre-set higher
than Default.
GAINS: Adjusts the P, I, and D Gain of the Governor.
SETTING UP AUTOROTATION BAILOUT
***IMPORTANT! Before setting up Autorotation Bailout please remove your pinion, or remove
both your main rotor and tail rotor blades!!!***
Before assign the bailed out switch, you have to calibrate the throttle range to a precise
throttle range.
In your transmitter, assign a switch to Bailed Out. Once assigned to a switch, adjust the Bailed
Out value so that the Throttle % on the radio correlates to 20% (20% - 29% is OK) on the
Scorpion Heli ESC value in the software. Congratulations, you have now activated Autorota-
tion Bailout mode on your Tribunus ESC.
To conrm that you have indeed setup Autorotation Bailout Mode correctly, spool up your
machine to Idle Up 1 or Idle Up 2, then switch to bailed out. Wait 1 or 2 seconds, then click
back to Idle Up. The throttle should quickly come back up to your Idle Up 1/2 Headspeed.
NOTE: If you have ipped your Bailed Out switch and activated Autorotation Bailout
and wish to have your Headspeed come up back slowly (as it should when rst spooling
up), you must rst go to 0% throttle rst, then spool up normally.
12.2 Helicopter mode

Page 8
AIRPLANE This is the page where you set up your Airplane Settings.
*Only adjusts Airplane settings when the Airplane Mode is activated in the previous menu- Device Mode*
AIRPLANE MENU
DRAG BRAKE Adjusts the amount of brake enabled. If 0% is selected, the propeller will
free-wheel in forward ight with the throttle at the 0% position. If 100% is selected,
the propeller will not move in forward ight with the throttle at the 0% position.
THROTTLE ACCELERATION: Adjusts the overall time that it takes for the motor to spool
up from 0% to 100%. For example, a larger aircraft such as a 50CC plane will require a
value of about 500ms. A smaller aircraft with a 1 to 1.5 meter wingspan will require a
smaller value of about 350ms or similar.
PWM MODE: Adjusts the way in which the ESC drives the motor.
Regular: Operates as a standard ESC would without regenerative braking
Complimentary: Actively slows down the motor when throttle is reduced
(best for Multirotors or aircraft that require regenerative braking)
12.3 Airplane mode

Page 9
PROTECTION Firmware List
This is the page where you set up your
ESC Protection Settings. Update the rmware
PROTECTION MENU
CUTOFF DELAY: Adjusts the amount of time that it takes for protection to engage if a lost signal is
detected. Recommended value is 5,000ms.
MINIMUM VOLTAGE: Adjusts the minimum Voltage of the ESC. If the ESC detects the minimum
voltage that is chosen, the ESC will reduce the overall RPM to the Cuto Power % set below.
MAXIMUM TEMPERATURE: Adjusts the maximum temperature of the ESC during ight. If the ESC
detects a temperature that it higher than the Maximum Temperature, the ESC will reduce the
overall RPM to the Cuto Power % set below.
MAXIMUM CURRENT: Adjusts the maximum Amperage of the ESC during ight. If the ESC
detects a amperage that it higher than the Maximum Amperage, the ESC will reduce the overall
RPM to the Cuto Power % set below.
CUTOFF POWER : Adjusts the overall amount of RPM drop for when any of the following
conditions are met: MIN VOLTAGE, MAX TEMPERATURE, MAX CURRENT, BATTERY MAX
CAPACITY. (See below for clarity)
BATTERY MAX CAPACITY: Allows the user to enter a desired amount of battery capacity- which
when met will trigger the BATTERY MAX CAPACITY protection, and then drop the RPM down by
the CUTOFF POWER %. It is very useful to set this instead of a timer to know when your battery
has been drained to a pre-set level.
(See below for clarity)
For example, let’s say a user enters 3.7Ah into BATTERY MAX POWER. When the ESC has detected
that 3.7Ah (or 3,700 milliamp hours) of the battery has been consumed, the ESC will cut the main
power down to the percentage that is entered in CUTOFF POWER. This means, if a pilot is ying
with a headspeed of 2,000 RPM and enters 85% into CUTOFF POWER with 3.7Ah entered in
BATTERY MAX CAPACITY, after 3.7Ah has been consumed, the headspeed will immediately drop
down to 1700 RPM and stay at that headspeed until the pilot lands and shuts down the ESC.
** Do not set the parameter “0” into CUTOFF POWER, BATTERY MAX CAPACITY, MIN VOLTAGE,
MAX TEMPERATURE or MAX AMPERAGE, this will not turn o the protection but conict the
internal setting **
FW List: Firmware update
Select the latest rmware to update the rmware. if it happen rmware corrupted, please unplug
all cables and reconnect, then repower the ESC, now update the rmware again.
After few times it will process the update procedure as normal.
12.4 Protection settings
WARNING! All ESC settings are erased upon Firmware update. Please be sure to save settings before upgrading Firmware.

Page 10
Chart Conguration
12.5 Chart and Configuration
Chart
Chart shows a live view of your ESC. With the ight battery plugged in and the ESC
connected, the user is able to see Throttle, RPM of the Motor, Voltage, Current, CPU
Temperature, MOSFET Temperature, Power, and BEC Voltage of the ESC at any time. This
can be helpful especially when troubleshooting a particular problem.
There has Chart and Table page of the logs.
The Tribunus 06-80A ESC SBEC does not support logging feature.
Conguration
Conguration This allow you to cong the setting like temperature degree, gear
ratio and pole pairs, sound conguration, current sensitivity gain and rpm correc-
tion.
The below feature only available on Firmware V58 or higher.
5D: Enable/Disable the sound.
5E: Can be used to correct factory default calibration value for current measurement
in case of wrong measurement found.
5F: Can be used in "PID with recalculated mode" to correct maximum RPM's
detection.
It allows to set higher or lower maximum RPM's if automatic detection was not
corrent.
5G: Allow you to control the motor when there is no throttle signal input.
5H: Adjust the throttle value, Enable/Disable by 5G.
Also there will display the tooltip when you point at the blue box.

How to DIY your own Telemetry/setup cable for the Tribunus ESCs – Vbar NEO: http://www.scorpionsystem.com/blog/?p=6663
Cables are also available as a VBar Control Accessoire at Mikados onlineshop (no.: 05088 350mm and no.: 05089 500mm)
After connecting the telemetry cable from Tribunus ESC PC port to your telemetry port of the VBar NEO do the following steps:
-Connect your VBar Control to VBar Control manager and download the“Scorpion ESC Support” App
-After that make sure the app is enabled with a “(X)” in your “application enable”menu of your radio.
-Install the latest rmware on your ESC (V52 or higher).
-On V52 or higher “VBar” is the standard communication protocol of your Tribunus ESC, communication to VBar Control is enabled
Page 11
TRIBUNUS ESC AND MIKADO VBAR CONTROL/ VBAR NEO INTEGRATION
13 Tribunus ESC and VBar Control
13.1 Tribunus ESC telemetry/ setup cable for VBar
13.2 Tribunus ESC and VBar Control telemetry preparation before setup
Once the previous steps are done there will be a Scorpion
icon on VBar Control display, then setup of Tribunus ESC
can start using VBar Control radio.
Attention:
The cables from the ESC master and slave both have BEC output when it is enable.
DO NOT plug in the Vbar “SENSOR” port, this will kill the VBar and void the warranty.
The throttle cable only connect to Vbar ESC port, the rpm wire plugs into the RPM port.

Page 12
13.3 Tribunus ESC and VBar Control ESC setup using VBar Govenor mode
TRIBUNUS ESC AND MIKADO VBAR CONTROL/ VBAR NEO INTEGRATION
-select "Edit Heli wizard” and click through the setup to govenor page when using NEO Express
-select "Setup / Governor Mode" panel when using NEO PRO/ PRO Rescue.
You will be directly in Scorpion automatic setup panel.
-afterwards check gear ratio, motor pole and headspeed settings in ESC Setup panel
-for battery management using the “Battery Logbook App” is suggested as well as installing a Battery ID reader and the required App
-after these automatic setup, check all parameters of step 13.5 e.g. motor direction and protection settings to match your usage
-by entering the Govenor Mode panel, the automatic setup will start directly
-after automatic setup is done, choose your BEC voltage and exit this menu
-depending on changes the ESC may restart when leaving the panel

Page 13
TRIBUNUS ESC AND MIKADO VBAR CONTROL/ VBAR NEO INTEGRATION
If you want to use the internal Tribunus ESCs govenor and you was using VBar govenor before please follow these steps
(please remove the blades rst for safety reasons):
13.4 Switching from VBar Govenor Mode to Tribunus govenor with Mikado VBar Control
5) enable Scorpion App for telemetry features
2) restart the ESC (store), ESC will restart
3.1) disable Scorpion App in your VBar Control“application enable”menu
3.2) open model setup/ govenor/ govenor mode and choose “external Gov.”
After these steps a xed trottle value can be set up
in your govenor menu/ ESC output for each ight
bank while using Tribunus ESC internal govenor.
Connect Tribunus Slave cable to“RPM” port of
VBar NEO, set up your motor poles and gear ratio
correctly to show your current headspeed on VBar
control display in ight (step 13.5 gear settings).
Do not forget to install“RPM Telemetry Setup ” app.
1) choose “Gov. with recalc values”in Tribunus ESC settings
4) calibrate throttle endpoints of the ESC:
-open model setup/ setup tools/ ESC setup wizard and choose “other ESC, then go to full negative collective stick position turn o the ESC
-go to full collective stick position on VBar Control
-power up the ESC again, wait few seconds for one beep of the ESC and go to full negative collective stick position
-wait for two beeps and POS Morse code come from the motor, this mean calibration is done and throttle endpoint has been set up correctly, exit the panel

ESC setup panel at Application setup/ Scorpion ESC
Status menu of Tribunus ESC
Temperature warning setup:
Set up a temperature and warning type, by exceeding
this temperature VBar Control will inform about in
ight. This value should be lower than cuto
temperature in “protection limit” setup.
ESC Info: Serial number and rmware version
-choose write logle of ESC data on VBC or not
Gear settings:
Motor Poles and gear ratio only need to set when
using other govenor modes than VBar Govenor.
This value will be set automatic during VBar
govenor conguration.
Scorpion Current:
Real time ESC Values, surely also shown in ight
Scorpion Status:
If there is an error from the ESC the cause will be
shown here.
Page 14
TRIBUNUS ESC AND MIKADO VBAR CONTROL/ VBAR NEO INTEGRATION
13.5 Scorpion Support App functions and features

General Settings:
Set up ESC mode, BEC Voltage and motor direction
in this panel.
If “store”panel is not crossed out, it means that a
parameter changed after last power up of the ESC.
After ESC setup or a change of a parameter, it is
necessary to write the settings to the ESC.
By selecting the “Store”panel and pressing “Store”
the ESC will restart and save all changed
parameters accordingly.
Additionally a round symbol next to the exit button
comes up after changing a parameter.
Page 15
-that's all! - Tribunus ESC are now ready to y!
TRIBUNUS ESC AND MIKADO VBAR CONTROL/ VBAR NEO INTEGRATION
13.5 Scorpion Support App functions and features
Protection Limits: set up all protection limits to
match your usage (step 12.3)
Take note, that the ESC (as well as the BEC) will shut
down for a short time. Sometimes you will notice
a “Warmstart” of the VBar (LED ashing green/
purple, entry into the Eventlog).
ESC Settings:
If there is a panel crossed out, it means that the
settings are not used for the currently choosen ESC
mode set up in “General” panel. In this case “VBar
Govenor Mode” is activated, so there is no access to
Aircraft specic and Tribunus internal Govenor
settings. By changing the ESC mode, the needed
panels will be available accordingly. All parameters
of the PC software explained above are available in
this menus depending on the choosen ESC mode.

14.0 Anti Spark DIY Kit manual
Page 16
ANTI SPARK DIY KIT
Scorpion Anti Spark DIY kit
www.scorpionsystem.com/files/download/AntiSparkDIYkit.pdf
Including parts:
How to install it:
3) solder the of the
PTC Resettable
fuse
to the positive wire
1) remove the old heat shrink
5) modify the plastic tube (shorten it correctly and also cut it as shown in the picture)
6) slide the plastic tube over the leg of
the
PTC Resettable fuse
and use
CA to keep it in position
8) bend the leg of the
PTC Resettable fuse
as
shown in the picture like a “V”, cut the leg
if it's too long
Now connect the negative (-) wire first. Then connect the positive (+) battery wire to the PTC Resettable fuse for a second
and move straight into the positive connector. There will be no spark during connecting your battery to the ESC.
direct QR to online manual
4) apply a heat shrink over the connector to
isolate the other leg from the connector
9) Anti Spark DIY ready to use!
7) apply a heat shrink over it
2) wind one leg of the PTC Resettable
fuse around the positive (+) wire
from your ESC as shown below
1. PCT resettable fuse
2. plastic tube
3. heat shrink
This Anti Spark DIY can be used on 6S- 16S Lipo battery systems
Hope this DIY kit can help you on any spark issue during connecting a battery to an ESC.
heat shrink
plastic tube
PTC Resettable Fuse

Page 17
ANTI SPARK DIY FOR HOUSING CONNECTORS
14.1 Anti Spark DIY for housing connectors
How to install it:
3) solder the leg of the
PTC Resettable
Fuse
to the positive wire
1) -cut the positive (+) wire that goes
from housing connector to the ESC
-solder the female connector as shown
on the housing connector side
5) modify the plastic tube (shorten it correctly
and also cut it as shown in the picture)
6) slide the plastic tube over the leg of the
PTC Resettable Fuse
and use CA to
keep it in position
8) bend the leg of the
PTC Resettable Fuse
as shown in the picture like a “V”,
cut the leg if it's too long
Now disconnect the Anti Spark wire first. After that connect the battery to the housing connector. Then connect the positive (+) cable coming
from the ESC side to the
PTC Resettable Fuse
for a second and move straight into the positive female connector.
There will be no spark during connecting your battery to the ESC.
direct QR to online manual
4) apply a heat shrink over the connector to
isolate the other leg from the connector
10) Anti Spark DIY ready to use!
7) apply a heat shrink over it
2) wind one leg of the
PTC Resettable
Fuse
around the positive (+) wire
as shown below
Required parts:
9) solder the male connector to the ESC
side and apply a heat shrink
1. PTC Resettable Fuse
2. plastic tube
3. heat shrink
4. male and female connector that fit
to your cable size and current
heat shrink
plastic tube
PTC Resettable Fuse
Hope this DIY kit can help you on any spark issue during connecting a battery to an ESC.
www.scorpionsystem.com/files/download/housingConnectorAntiSparkDIY.pdf
This Anti Spark DIY can be used on 6S- 16S Lipo battery systems
Scorpion Anti Spark DIY kit

15.0 Warranty and Service
All Scorpion Tribunus Speed Controller are covered by a 1-Year
manufacturers warranty itemized sales receipt.
During the warranty period Scorpion will repair speed controller
that are found to be defective, providing that it has no signs of
damage or abuse. The user will be responsible for shipping
charges back to an authorized Scorpion Repair Facility, and
Scorpion will pay the return shipping charges. If the damage is
the result of a crash or mis-use, the returned item will be
repaired, but the cost of repairs will be billed to the user. Repairs
will never exceed 50% of the cost of a new speed controller, and
if the speed controller is badly damaged or non-repairable, a
brand new ESC will be oered at 50% discount of the current
retail price for the ESC, plus a nominal shipping charge.
If the speed controller returned is no longer in production,
Scorpion reserves the right to substitute any other speed
controller of equal or better quality. In any event, Scorpion shall
not be responsible for the damage that may result from the
overuse of products, for consequential or special damages, or for
any amount that exceeds the product value. If the motor product
is purchased in clearance section, crash and dent section
from www.scorpionsystem.com and www.scorpion-team.com,
then the items are sold“AS IS”. No refund or warranty policy will
be covered with these products. It is because we do not have
parts anymore to repair or replace. or replacement. Please
obtain an RMA number by submitting a request by email to our
RMA number before sending. The RMA process normally takes
around 3 - 4 weeks.
RMA form can be found and download from
http://www.scorpion-team.com/downloads/
https://www.scorpionsystem.com/les/download/RMA%20For
m%20-%20V2.pdf
Page 18
WARRANTY AND SERVICE
Table of contents
Other SCORPION Controllers manuals

SCORPION
SCORPION Tribunus II+ 14-200A ESC SBEC User manual

SCORPION
SCORPION S2-50 User manual

SCORPION
SCORPION Tribunus II 06-120A ESC SBEC User manual

SCORPION
SCORPION Commander 26V SBEC series User manual

SCORPION
SCORPION Tribunus II 14-300A ESC SBEC User manual

SCORPION
SCORPION 15V LBEC User manual

SCORPION
SCORPION Tribunus II 12-130A User manual
Popular Controllers manuals by other brands

opti-solar
opti-solar SC-SM Series user manual

Zennio
Zennio MAXinBOX66 Technical documentation

Nidec
Nidec Leroy-Somer R150 Installation and Maintenance

oventrop
oventrop Hydromat DP DN 25 technical information

ICP DAS USA
ICP DAS USA TPD-283U-H quick start guide

Armstrong
Armstrong Emech G2 Installation, operation & maintenance manual