manuals.online logo
Brands
  1. Home
  2. •
  3. Brands
  4. •
  5. ScrapBox
  6. •
  7. Indoor Furnishing
  8. •
  9. ScrapBox SIDE TABLE User manual

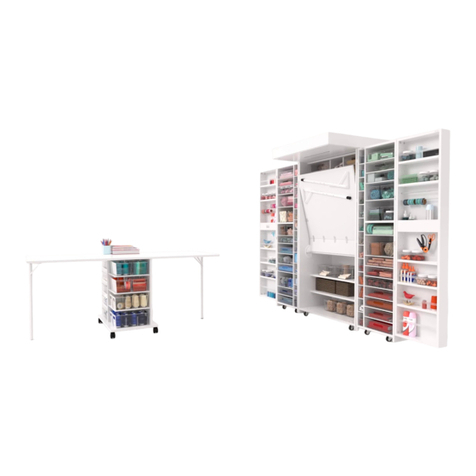
ScrapBox SIDE TABLE User manual

Side Table Installation Instructions Made in the U.S.A.
UPDATED: APRIL 2019
oh happy day
YOU’VE RECEIVED YOUR SIDE TABLE(S)!
You are minutes away from even more room to create! Just a few easy steps and
you’ll be ready to start your next craft project. Installation will be simple and fun.
Should you need any assistance, our customer service team is the friendliest
bunch and would be delighted to help you!
customerservice@theoriginalscrapbox.com
www.theoriginalscrapbox.com
801-226-2686 M-F 9am-5pm MST
Remember to document your experience with photos or video and let us know how
we can further improve the side table accessory. Also, remember to take pictures
of your newly improved craft space. We never get tired of seeing how you create
room for yourself and what you love to do!
The Original ScrapBox Team
2Proprietary, patented product and instructions. Do not copy or distribute.
do you want to sit or
stand while you craft?
maybe both?
This package includes hardware for both sitting and standing height options for
the DreamBox and sitting height for the WorkBox. But be aware there are a few
differences as to how you’ll install the table tracks depending on which furniture
piece you have and which height option you want. Hang onto any extra hardware
in case you want to add tables in the future or upgrade to the DreamBox.
3Proprietary, patented product and instructions. Do not copy or distribute.
WHAT YOU’LL NEED:
Manual Phillips screwdriver
(not included)
A Friend (not included)
If you’re handy with a screwdriver,
you can install your table(s) yourself.
Otherwise, grab a friend!
INCLUDED HARDWARE:
x8 per side table
13mm Euro Screws
(for table tracks) x4 per side table
Plastic Table Tracks
x2
Left & Right Side
center box guide sticker
x2 per side table
Optional Sash Lock
(3/4” screws included)
x1 per side table
Adjustable Table Leg
x4
14mm Washer Screws
(for table legs)
FRONT
LEFT
SIDE
OUTSIDE EDGE
FRONT
RIGHT
SIDE
OUTSIDE EDGE
LH
#19
#24
For the DreamBox: Make room for your Side Table (s) by removing all 13 x 13
shelves and shelf pegs from peg hole #19 through #24 in the left/right box (count
up from the bottom). Also remove any notions-sized shelves and shelf pegs in peg
holes #19 & 24 in the narrow section of the left/right box.
1
For the WorkBox: Make room for your
Side Table (s) by removing all 13 x 13
shelves and shelf pegs from peg hole #18
left/right box (count up from the bottom).
Also remove any notions-sized shelves
and shelf pegs in peg hole #18 in the
narrow section of the left/right box.
1
#19
#24
Jump to page 11 for instructions on installing your WorkBox Side Tables
5Proprietary, patented product and instructions. Do not copy or distribute.
Using a manual Phillips screwdriver, “start” (4) Euro screws into
outer holes of (2) table tracks. Insert screws just enough to
bite the plastic to prepare track for installation.
2
With screws up, position the table tracks over
shelf peg hole #19 on both sides of left/right box.
Use a manual screwdriver to secure tracks.
3
17
16
15
21
22
23
24
20
6Proprietary, patented product and instructions. Do not copy or distribute.
Using a manual Phillips screwdriver, “start” (4) Euro screws into
inner holes of (2) remaining table tracks. Insert screws just
enough to bite the plastic to prepare track for installation.
4
With screws up, position the table tracks over
shelf peg hole #24 on both sides of left/right box.
Use a manual screwdriver to secure tracks.
5
17
16
15
21
22
25
20
7Proprietary, patented product and instructions. Do not copy or distribute.
Install (2) Sash Locks hook side only to the underside of Side
Table using the pre-drilled pilot holes as a guide.
6
Install (1) Side Table Leg to Side Table using (4) table leg
screws into the pre-drilled holes.
7
Side Table
Underside
Side Table
Underside
8Proprietary, patented product and instructions. Do not copy or distribute.
To change side tables to standing height:
1. Release sash locks underneath tables
2. Adjust DreamBox table to standing height
3. Slide side table out of lower tracks
4. Slide side table into upper tracks
5. Extend side table legs to the top hole (standing height)
6. Secure with sash lock
LH
9Proprietary, patented product and instructions. Do not copy or distribute.
LH
FRONT
OUTSIDEEDGE
Apply left/right side guide sticker to Left/Right Corner of the
DreamBox table. Be sure sticker is up against the front
outside edge of the table.
8
Use the provided screws to attach sash lock catch with the
hook near the edge using the sticker as a guide .
9
10 Proprietary, patented product and instructions. Do not copy or distribute.
LH
With Side Table Leg folded out, turn the table over.
Slide left/right side table into tracks until table touches the back panel of the left/right box.
With Center Box table folded down to match the height of the side table, locking the sash
lock to secure table.
10
WorkBox Side Table Installation Instructions
11 Proprietary, patented product and instructions. Do not copy or distribute.
Using a manual Phillips screwdriver, “start” (4) Euro screws into
inner holes of (2) table tracks. Insert screws just enough to
bite the plastic to prepare track for installation.
1
With screws down, position the table tracks over
shelf peg hole #18 on both sides of left box. Use a
manual screwdriver to secure tracks.
2
16
15
14
21
22
23
24
20
12 Proprietary, patented product and instructions. Do not copy or distribute.
Install (1) Sash Locks hook side only to the underside of Side
Table using the pre-drilled pilot holes as a guide.
3
** Hang on to your extra hardware
in case you ever want to update to
a DreamBox in the future.
Left Side Table
Underside
Left Side Table
Underside
Install (1) Side Table Leg to Side Table using (4) table leg
screws into the pre-drilled holes.
4
13 Proprietary, patented product and instructions. Do not copy or distribute.
Apply left/right side guide sticker to UNDERSIDE of the
WorkBox table in the left/right corner. Be sure sticker is up
against the front outside edge of the table.
8
FRONT
OUTSIDE EDGE
underside of
WorkBox Table
FRONT
OUTSIDE EDGE
underside of
WorkBox Table
Use the provided screws to attach sash lock catch with the
hook near the edge using the sticker as a guide .
9
14 Proprietary, patented product and instructions. Do not copy or distribute.
With Side Table Leg folded out, turn the table over.
Slide left/right side table into tracks until table touches the back panel of the left/right box.
With Center Box table folded out, lock the sash lock to secure table.
10
15 Proprietary, patented product and instructions. Do not copy or distribute.
voila!
You’ve done it. Now sit back and enjoy your newly expanded workspace, with
three times as much room to dream and create.
Remember to share pictures of your crafts and craft space with us on Facebook
@ScrapBoxFamily

Other ScrapBox Indoor Furnishing manuals

ScrapBox DreamCart User manual

ScrapBox

ScrapBox DreamCart User manual

ScrapBox WORKBOX 3.0 Side Table User manual

ScrapBox

ScrapBox WORKBOX 3.0 Side Table User manual

ScrapBox HER HOBBYBOX User manual

ScrapBox

ScrapBox HER HOBBYBOX User manual

ScrapBox WorkBox 3.0 User manual

ScrapBox

ScrapBox WorkBox 3.0 User manual

ScrapBox SEW STATION User manual

ScrapBox

ScrapBox SEW STATION User manual

Popular Indoor Furnishing manuals by other brands

Philips 14691-0 Specifications

Philips

Philips 14691-0 Specifications

HENN IEC124-10 Assembly instructions

HENN

HENN IEC124-10 Assembly instructions

Riverside Furniture Belmeade 15832 Assembly instructions

Riverside Furniture

Riverside Furniture Belmeade 15832 Assembly instructions

Habitat Petale 821792 manual

Habitat

Habitat Petale 821792 manual

Quoizel IS-QR3329 quick start guide

Quoizel

Quoizel IS-QR3329 quick start guide

ipdesign ALLROUNDER operating instructions

ipdesign

ipdesign ALLROUNDER operating instructions

MLILY NUP100 owner's manual

MLILY

MLILY NUP100 owner's manual

Belleze 014-HG-52430 owner's manual

Belleze

Belleze 014-HG-52430 owner's manual

Home Decorators Collection MERRYFIELD 419112-V48-DG Assembly instructions

Home Decorators Collection

Home Decorators Collection MERRYFIELD 419112-V48-DG Assembly instructions

Philips H33 datasheet

Philips

Philips H33 datasheet

Poliman Moveis 9202.60 Assembling instructions

Poliman Moveis

Poliman Moveis 9202.60 Assembling instructions

Regalo Easy Step owner's manual

Regalo

Regalo Easy Step owner's manual

Weber Torino 92-AE122 Assembly instructions

Weber

Weber Torino 92-AE122 Assembly instructions

MAJA Möbel 1528 Assembling instructions

MAJA Möbel

MAJA Möbel 1528 Assembling instructions

Royalcraft Malaga 110cm Round Table Assembly instructions

Royalcraft

Royalcraft Malaga 110cm Round Table Assembly instructions

Forever Redwood OCTAGONAL PICNIC TABLE Assembly instructions

Forever Redwood

Forever Redwood OCTAGONAL PICNIC TABLE Assembly instructions

Argos Emberton 934/2501 manual

Argos

Argos Emberton 934/2501 manual

Compel Pivit Perch Assembly instructions

Compel

Compel Pivit Perch Assembly instructions

manuals.online logo
manuals.online logoBrands
  • About & Mission
  • Contact us
  • Privacy Policy
  • Terms and Conditions

Copyright 2025 Manuals.Online. All Rights Reserved.