Sea & Sea DX-860G Specification sheet

122 mm+-2122 mm+-2
165 mm+-2
This manual can guide you to use this camera
with proper operation and correct s etting.
P leas e read it carefully and optimize the
performance in accordance with your
preference.
User Ma nua lUser Ma nua l
XR 4041020
1. :X R 4041020 2. pantone 3. 80P ,
3
2
122 mm+-2122 mm+-2
165 mm+-2
Table Of Contents
Cautions
Do not try to dis ass emble the camera by yourself, which may da mage the camera or cause electric s hock.
Do not fire the flash ina clos e distance (less than 1 meter); it may hurt your eyes .
K eep the camera away from the reach of childrenor animals toprevent them from swallowing the batteries or small accessories.
S top using the camera if any kind of liquidor foreign objectenter the camera. If it happens, power off the camera and contactwith
your dealer for help.
Do not operate this camera withwet hands ; it may cause electric shock.
The camera may be damaged inan environment ofhigh temperature.
T o avoid e lectricity lea ka ge, please remove the ba ttery if the camera is notin us e for a long period.
It is normal that the temperature of the camera body ris es ifthe camera works for a longtime.
Small Tip to Save You Big Headache
A digitalcamera is in a way very similar to a computer. Ifthe digital camera ha ngs itself during
operation, please followthe procedures below and mos t likely the camera canbe re-activated.
1. R emove the battery.
2. R eload the battery.
3. S witch onthe camera.
Cautions ---------------------------------------------------------------------------------- 03
Overall Introduction ------------------------------------------------------------------ 04
Acces sories -------------------------------------------------------------------------- 04
E xternal View ----------------------------------------------------------------------- 05
Icon Introduction
--------------------------------------------------------------- 05
Icon Display
-------------------------------------------------------------------------- 06
Getting Ready -------------------------------------------------------------------------- 07
Turn O n or Off the C amera ---------------------------------------------------- 07
L oading the B a ttery------------------------------------------------------------------ 07
C harging the B attery with the C harger
Ins erting or R emoving a Memory C a rd
------------------------------------------ 08
Attaching the Wrist S trap ------------------------------------------------------ 10
B asic P hotogra phy ------------------------------------------------------------------ 11
Under Image Shooting Mode ( ) ----------------------------------------------- 12
WID E / T E L E B utton----------------------------------------------------------- 12
Macro Mode --------------------------------------------------------------------- 13
F las h Mode ---------------------------------------------------------------------- 13
S elf-timer Mode ----------------------------------------------------------------- 14
Voice Memo Mode ------------------------------------------------------------ 14
E xposure / D elete B utton ----------------------------------------------------- 15
Image S ize S etting ------------------------------------------------------------- 16
Image Quality S etting ---------------------------------------------------------- 16
Metering S etting ---------------------------------------------------------------- 17
S harpnes s S etting -------------------------------------------------------------- 17
E ffect S etting ---------------------------------------------------------------------- 18
White B alance S etting --------------------------------------------------------- 18
P hoto F ra me S e tting ----------------------------------------------------------- 19
Night S cene S etting ----------------------------------------------------------- 20
Histogram ------------------------------------------------------------------------ 20
C ontinuos S hooting S etting ------------------------------------------------------- 21
S E TUP ---------------------------------------------------------------------- 21
Under Image Stabilizing Helper Mode ( ) --------------------------------------- 22
Under Playback Mode ( ) ----------------------------------------------------- 23
P laybac k of a S till Image ------------------------------------------------------ 23
P laybac k of a Movie C lip ------------------------------------------------------ 23
Thumbnail Dis play (S mall Images) ----------------------------------------- 24
E xploring an Image ------------------------------------------------------------- 24
Dis playing Image Information ------------------------------------------------ 25
S tarting a S lide S how --------------------------------------------------------- 25
Printer Connection (PictBridge Mode) ------------------------------------
TV Connection -------------------------------------------------------------------48
PC Connection ------------------------------------------------------------------ 49
SETUP Setting
38
40
39
Under Digital Music Player Mode ( )
41
43
Error Message Table ------------------------------------ ------------------------60
Specifications -------------------------------------------------------------------61
Appendix -------------------------------------------------------------------------62
ISH
------------------------------------------ 10
5
4
122 mm+-2122 mm+-2
165 mm+-2
OK
MENU
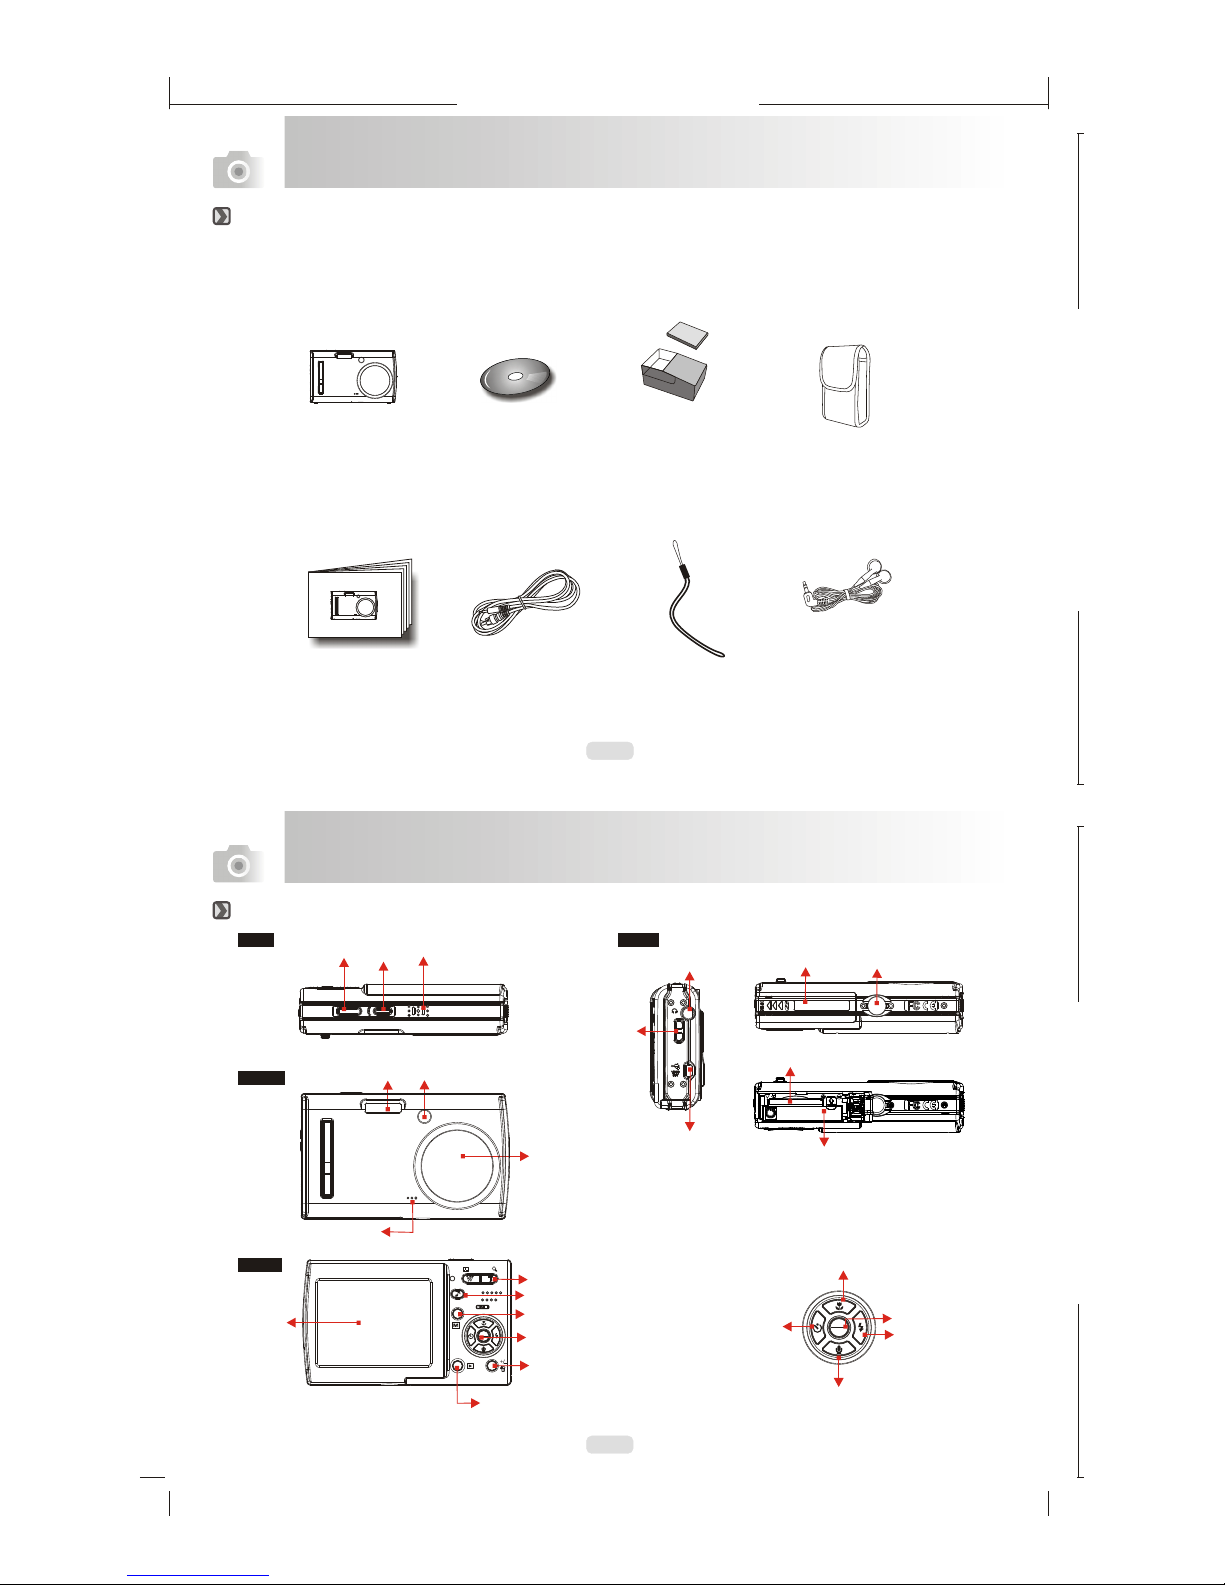
Overall Introduc tion
Digital C a mera C amera Driver B attery & C harger C amera P ouch
& S oftware
User Manual / US B / V ideoC able Wrist S trap E arphone
Quick S tart G uide
Acc es s ories
Overall Introduc tion
S ide
Top
F ront
B ack
E xternal View
F la sh
T F T L C D
Montior K ey F unction
B utton
LE D
Wide / Tele Button
S hutter
B utton S peaker
Lens
P layback
B utton
Mode B utton
S trap
E yelet
P ower
B utton
Microphone
Digital Mus ic P layer B utton
Tripod
S ocket
E xpos ure /
Delete B utton
B attery /
Memory C a rd
C over
E arphone J a ck
US B / Video
C onnector
OK
MENU
Ma cro /lay /
P aus e / Up B utton
F las h / R ight
B utton
V oice Memo / Down B utton
S elf- timer /
Left B utton
O K / Me nu B utton
B attery C ha mber
Memory C a rd S lot

6
7
Icon Introduction
122 mm+-2122 mm+-2
165 mm+-2
Getting Ready
Icon Display
Turn On or Off the Camera
Press down the"POWER" button to turn on thecamera.
Repeat the wayabove to turn off the camera.
Loading the Battery
Battery Status
( )Battery Full
( )Battery Half
Drained
( )Battery Drained
Working Mode
( )Image ModeShooting
( )Night Scene Mode
( )Photo Frame Mode
( )Movie Clip Mode
( )Voice Recording
Mode
1
2
Flash Mode
( )Auto Flash
( )Auto Flash with
Red-eye Reduction
( )Slow Sync
( )Fill-in Flash
( )Flash Off
4
Self-timer
( )10 Seconds
( ) 2 Seconds
( ) Double
2S
5
3
Shooting Status
( )Playback Mode
Memory Card( )
White Balance
( )Auto
( )Daylight
( )Cloudy
( )Fluorescent
( )Tungsten
( )Sunset
( )Custom
11
12
Sharpness
( )Soft
( )Normal
( )Vivid
Quality
( )Super Fine
( )Fine
( )Normal
13
14
( ) Voice Memo
Focus Range
( ) Macro
Metering
( )Spot
( )Multi
6
7
8
18
( )
Zoom Status Indicator
17
Available Shots( 7 )
16
5
7
1
2
4
5
6
8
6M
17
3
10
11
12
13
14
15
16
7
9
Size
15
1. Power offthe camera.
2. Slide outBattery / Memory Card Cover to open it.
3. Following thepolarity indications and load the battery.
4. Close theBattery / Memory Card Cover.
The below symbols on the TFTLCD Monitor are the indication
of the battery status.
( ):Batterypower is full.
( ):Battery power is half drained.Have new battery ready.
( ):Battery power is drained. Replacewith new batter .y
The battery mayrun off if the battery iskept inside the camera
for a longtime without using. Please remove the battery when
the camera isnot in use.
The battery maynot work normally under 0 C or over 40 C .
It's normal thatthe temperature of the camera risesafter
used for along period.
100
ISO
19
1
2
4
9
NOR
( ) Black & White
( ) Normal
( ) Sepia
( ) RGB
EFFECT
RGB
+
Exposure 0
-
( )
10
AUTO
ISO
100
ISO
200
ISO
400
ISO
( ) AUTO adjust
( ) ISO=100
( ) ISO=200
( ) ISO=400
ISO
19
Histogram( )
HISTOGRAM
( )Single
( )Continuous
( )AEB
18
1
( )2816x2112
( )2560x1920
( )2304x1728
( )2048x1536
( )1600x1200
( )3264x2448
(ISH)Image Stabilizing
Helper

122 mm+-2122 mm+-2
165 mm+-2
Getting Ready
Charging The Battery With The Charger
The battery isnot charged when the camera isshipped. Charge the battery before use.
It is recommendedto charge a new battery formore than
4 hours.
It's normal that the temperature ofthe battery and
camera body rises after a periodof time of using.
Charging Procedure
(a) Insert thebattery to the battery slot by the polarity indications.
(b) Connect thecharger to the electrical outlet.
(c) The LEDwill light up in red colorwhen charging.
(d) The chargingis completed when the LED turnsgreen.
(e) Remove thebattery when the charging is completed.
8
9
A message of "Low Light!" appearing on the TFT LCD Monitor is a warning to remind you to go to the Flash Mode and select Auto Flash
or Fill-in flash to get more light sources so as to compose a superior quality image.
In such cases shown as follows, please release the shutter button, then try to re-compose the shot and focus again because the Auto Focus
function may be difficult to use with.
The subject is far away from the photographer or in the dark.
The subject is viewed through a piece of glass or window.
A fast-moving or a flashing subject is passing through.
The subject has a reflection attribute like a mirror, a luminous body, or a lustrous subject.
Do not touch the lens when it is in use.
Getting Ready
6M
14
10
11
122 mm+-2122 mm+-2
165 mm+-2
Formatting a brand new card is stronglymemory
recommended
for first use.
Getting Ready
Getting Ready
Attaching the Wrist Strap
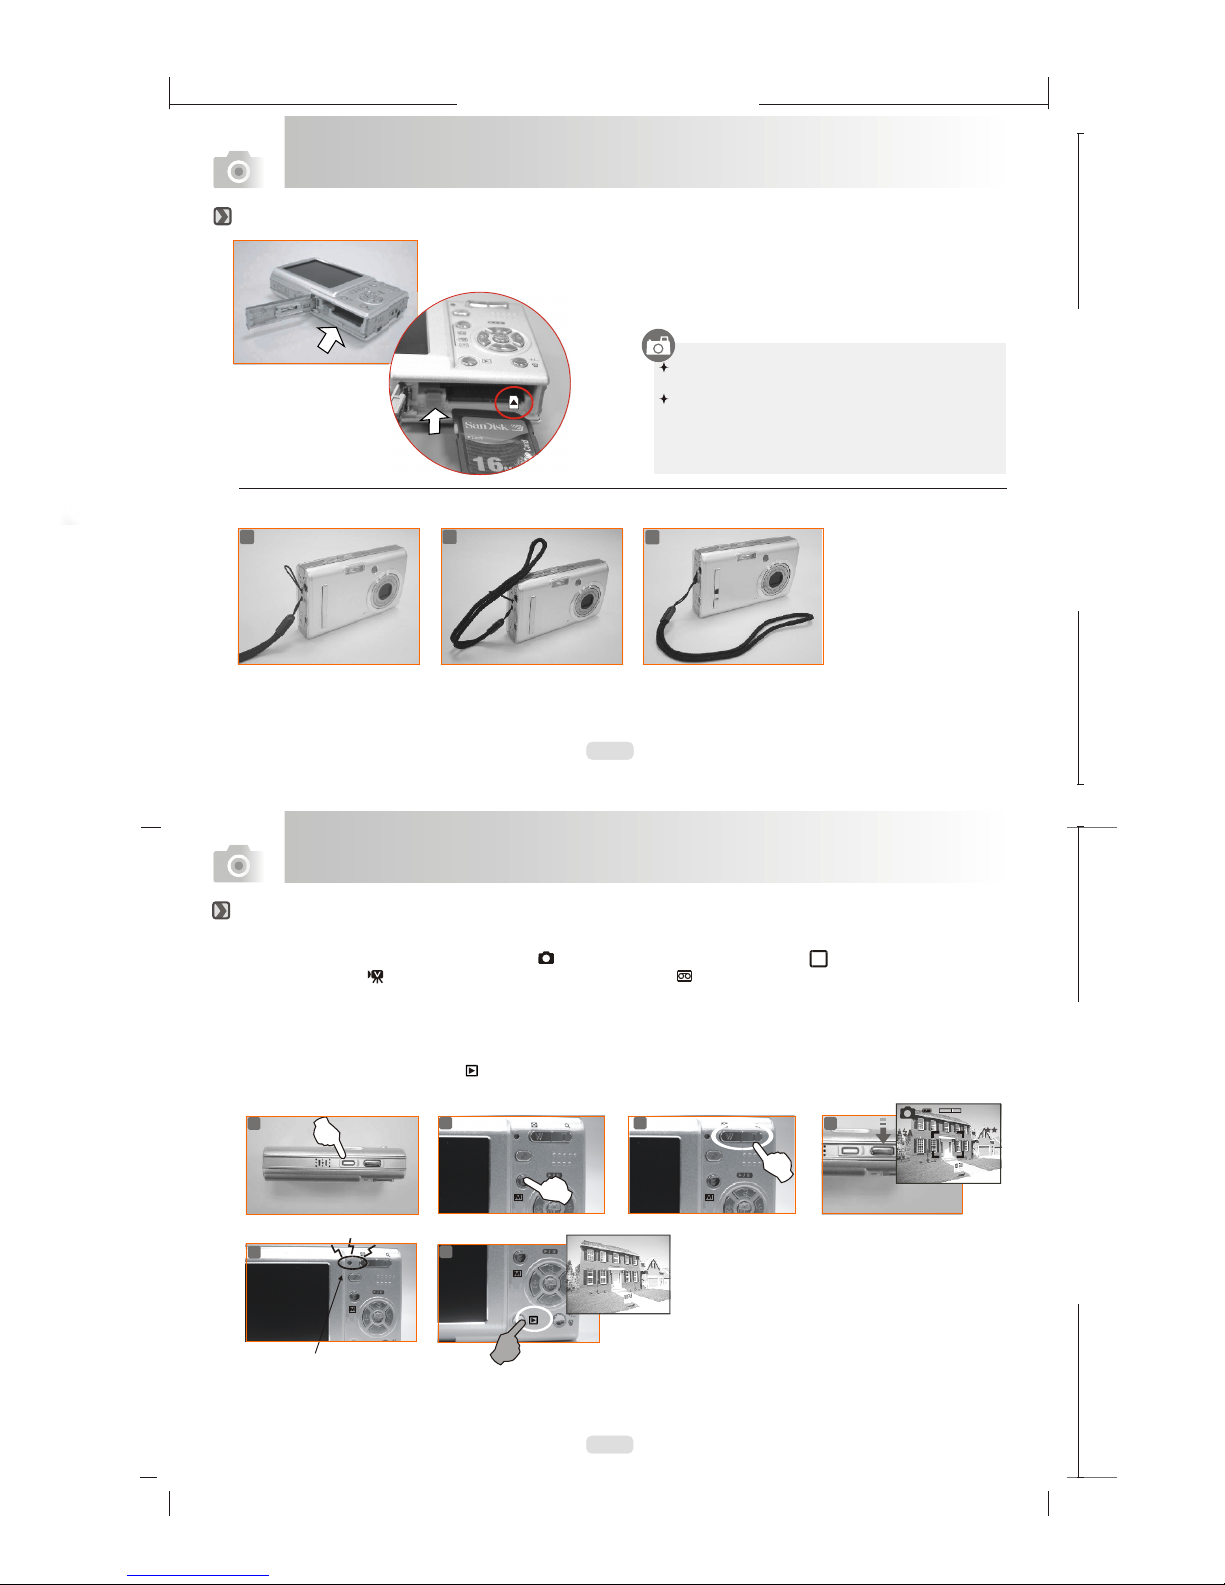
Inserting or Removing a Memory Card
1. Power off the camera.
2. Open the Battery / Memory Card Cover.
3. Insert the memory card into the card slot and press it
down until a click sound happens. (
memory card again to get it out once a click sound happens.)
4. Close the Memory Card Cover.
Please press the
The image(s) can bestored either in built-inflash memory
or in memorycard. When the memory card is inserted, the
images willbe stored in the memory card rather than the
built-in flash memory.On the other hand, the images will be
stored in the built-in flashmemory when a memory card is
not inserted.
Basic Photography
3
2
1
1. Press downthe POWER Button to turn on the camera.
3. Use TELE/WIDEButton to zoom in and zoom out.
4. Press theshutter button half way to do the focusing and then press the shutter button fullydown to capture an image.
5. The LEDIndicator starts blinking right after theShutter Button is released. Once the LED Indicator stopsblinking, you are
ready to take another shot.
Or you canpress Playback Button ( ) to view the imagesor movie clips you just took.
2. Set the Mode button at Image Shooting Mode ( ) forstill image, Image Stabilizing Helper( ) forimage stabilizing,
Movie Clip Mode ( ) formovie recording and Voice Recording Mode( ) forvoice recording.
Blinking
6
4
12
5
100-0021
3
6M
2
14
ISH
Other manuals for DX-860G
1
This manual suits for next models
1
Table of contents
Other Sea & Sea Digital Camera manuals

Sea & Sea
Sea & Sea DX-1G Manual

Sea & Sea
Sea & Sea DX-8000G User manual

Sea & Sea
Sea & Sea MM II-EX User manual

Sea & Sea
Sea & Sea DX-1G User manual

Sea & Sea
Sea & Sea DX-8000G Assembly instructions

Sea & Sea
Sea & Sea 8000G User manual

Sea & Sea
Sea & Sea MM III User manual

Sea & Sea
Sea & Sea MX-10 User manual

Sea & Sea
Sea & Sea MX-5 II User manual

Sea & Sea
Sea & Sea SX-1000TTL User manual


