Seafloor HydroCat 180 User manual

HydroCat™180
User and Technical Manual
Seafloor Systems, Inc

Contents
1Introduction. . . . . . . . . . . . . . . . . . . . . . . . . . . . 1
1.1 SystemOverview ........................................ 1
1.2 TermsAndAcronyms ...................................... 1
1.3 SystemSpecifications....................................... 3
1.4 SystemLimitations........................................ 3
1.4.1 WaterTowing....................................... 4
1.5 Warranty ............................................. 4
1.6 TechnicalSupport ........................................ 5
2 Safety . . . . . . . . . . . . . . . . . . . . . . . . . . . . . . . . 6
2.1 BatterySafety .......................................... 6
2.2 BatteryChargingSafety..................................... 6
2.3 VesselSafety ........................................... 7
3 System Operation . . . . . . . . . . . . . . . . . . . . . . . . . . 8
3.1 HydroCat™180Assembly .................................... 8
3.2 What’sIncluded ......................................... 11
3.3 SystemOverviewDiagram.................................... 13
3.4 HydroCat™180ControlLayout................................. 18
3.5 HydroCat™180EnduranceChart................................ 23
3.6 RemoteControlUnit(RCU) .................................. 23
3.7 BatteryCharging......................................... 25
3.7.1 PontoonCharging .................................... 25
3.7.2 GimbalCharging..................................... 27
3.7.3 Long Range Module Battery Charging . . . . . . . . . . . . . . . . . . . . . . . . . 28
3.8 HydroCat™180PowerOnProcedure.............................. 30
3.9 SonarPoleActuators....................................... 31
3.10 Shoreside Setup Communications . . . . . . . . . . . . . . . . . . . . . . . . . . . . . . . . 31
3.11ManualOperation ........................................ 36
3.12AutonomousOperation ..................................... 36
3.12.1 MissionPlanner ..................................... 36
3.12.2 Hypack .......................................... 40
3.13SmartCastOperation ...................................... 45
3.14 HydroCat™180PowerOffProcedure.............................. 47
3.15Fail-Safe.............................................. 48
3.16 Collision Avoidance Assist (CAA) Operation . . . . . . . . . . . . . . . . . . . . . . . . . 48
3.17TraileringChecklist........................................ 50
4 Frequently Asked Questions (FAQ). . . . . . . . . . . . . . . . . . 52
5 Troubleshooting . . . . . . . . . . . . . . . . . . . . . . . . . . . 52
5.1 AutoNav™Errors......................................... 52
5.2 Fuses................................................ 53
5.2.1 GimbalFuses....................................... 53
5.2.2 PontoonFuses ...................................... 54
5.3 PontoonBatteries ........................................ 55
5.4 PoleActuators .......................................... 56
5.5 ThrusterErrors.......................................... 57
5.6 HydraulicSteering ........................................ 58
5.7 SmartCast............................................. 60
5.8 Collision Avoidance Assist (CAA) . . . . . . . . . . . . . . . . . . . . . . . . . . . . . . . 60
6 Configuring Procedures . . . . . . . . . . . . . . . . . . . . . . . 65
6.1 RCU Receiver Binding Procedure . . . . . . . . . . . . . . . . . . . . . . . . . . . . . . . . 65
6.2 RCUCalibrationProcedure................................... 69
6.3 RCU AutoNav™Calibration................................... 70
6.4 AutoNav™AccelCalibration .................................. 74
6.5 Sonar Pole Actuators Calibration Procedure . . . . . . . . . . . . . . . . . . . . . . . . . . 76
7 Service and Maintenance. . . . . . . . . . . . . . . . . . . . . . . 76
7.1 Maintaining Your Investment . . . . . . . . . . . . . . . . . . . . . . . . . . . . . . . . . . 76

7.2 Storage .............................................. 76
7.3 Service............................................... 77
7.3.1 AnodeReplacement ................................... 77
7.3.2 PropellerReplacement.................................. 77
7.3.3 HydraulicSteering .................................... 77
7.3.4 Purging Hydraulic Steering . . . . . . . . . . . . . . . . . . . . . . . . . . . . . . . 78
7.4 MaintenanceSchedule ...................................... 82
7.4.1 Pre-launchChecklist................................... 82
7.4.2 After Recovery Checklist . . . . . . . . . . . . . . . . . . . . . . . . . . . . . . . . 82
7.4.3 MonthlyChecklist .................................... 82
8 Technical Diagrams . . . . . . . . . . . . . . . . . . . . . . . . . 84
8.1 OffsetDrawing .......................................... 84
8.2 BlockDiagrams.......................................... 85
8.3 ElectricalDiagrams........................................ 92
8.4 MechanicalDiagrams.......................................136
List of Figures
1 TowingHarness.......................................... 4
2 AssemblyOverview........................................ 8
3 GimbalInstallation........................................ 9
4 TopClampInstallation ..................................... 10
5 ShockInstallation ........................................ 10
6 HydroCat™180SystemOverview................................ 13
7 HydroCat™180FrontView ................................... 14
8 HydroCat™180Pontoon..................................... 15
9 HydroCat™180GimbalDeck .................................. 16
10 HydroCat™180Payload..................................... 17
11 ControlLayout .......................................... 18
12 Port Thruster Bulkhead Panel . . . . . . . . . . . . . . . . . . . . . . . . . . . . . . . . . 19
13 Starboard Thruster Bulkhead Panel . . . . . . . . . . . . . . . . . . . . . . . . . . . . . . 20
14 GimbalRearBulkheadPanel .................................. 21
15 GimbalFrontBulkheadPanel.................................. 22
16 HydroCat™180EnduranceChart................................ 23
17 BottomView ........................................... 23
18 RCUFrontView ......................................... 24
19 BackView............................................. 25
20 ChargingConnector-Power................................... 26
21 ChargingConnector-Data ................................... 26
22 NOCOBatteryCharger ..................................... 28
23 CubeBalanceChargerPower .................................. 29
24 Cube Balance Charger Connection . . . . . . . . . . . . . . . . . . . . . . . . . . . . . . . 29
25 KillSwitch ............................................ 30
26 PontoonShutoffSwitch-On .................................. 30
27 ShoresideHardwareSetup.................................... 32
28 Network And Internet Settings . . . . . . . . . . . . . . . . . . . . . . . . . . . . . . . . . 32
29 AdvancedNetworkSettings ................................... 32
30 NetworkAdapters ........................................ 32
31 EthernetProperties ....................................... 33
32 InternetProtocol......................................... 33
33 EthernetSettings......................................... 34
34 TaskbarSearch .......................................... 34
35 RemoteDesktopConnection .................................. 35
36 COMPort............................................. 37
37 PolygonSelect .......................................... 37
38 SimpleGridSelect......................................... 38
39 SimpleGridSettings ....................................... 39
40 DeleteDOCHANGESPEED.................................. 39

41 WriteMission........................................... 39
42 AddMobile............................................ 41
43 AddMavlinkDriver ....................................... 41
44 SetCOMPort .......................................... 42
45 COMTest............................................. 42
46 LineEditor ............................................ 43
47 ReverseEveryOtherLine .................................... 43
48 MavlinkDriverControl ..................................... 44
49 SmartCastGUILayout ..................................... 45
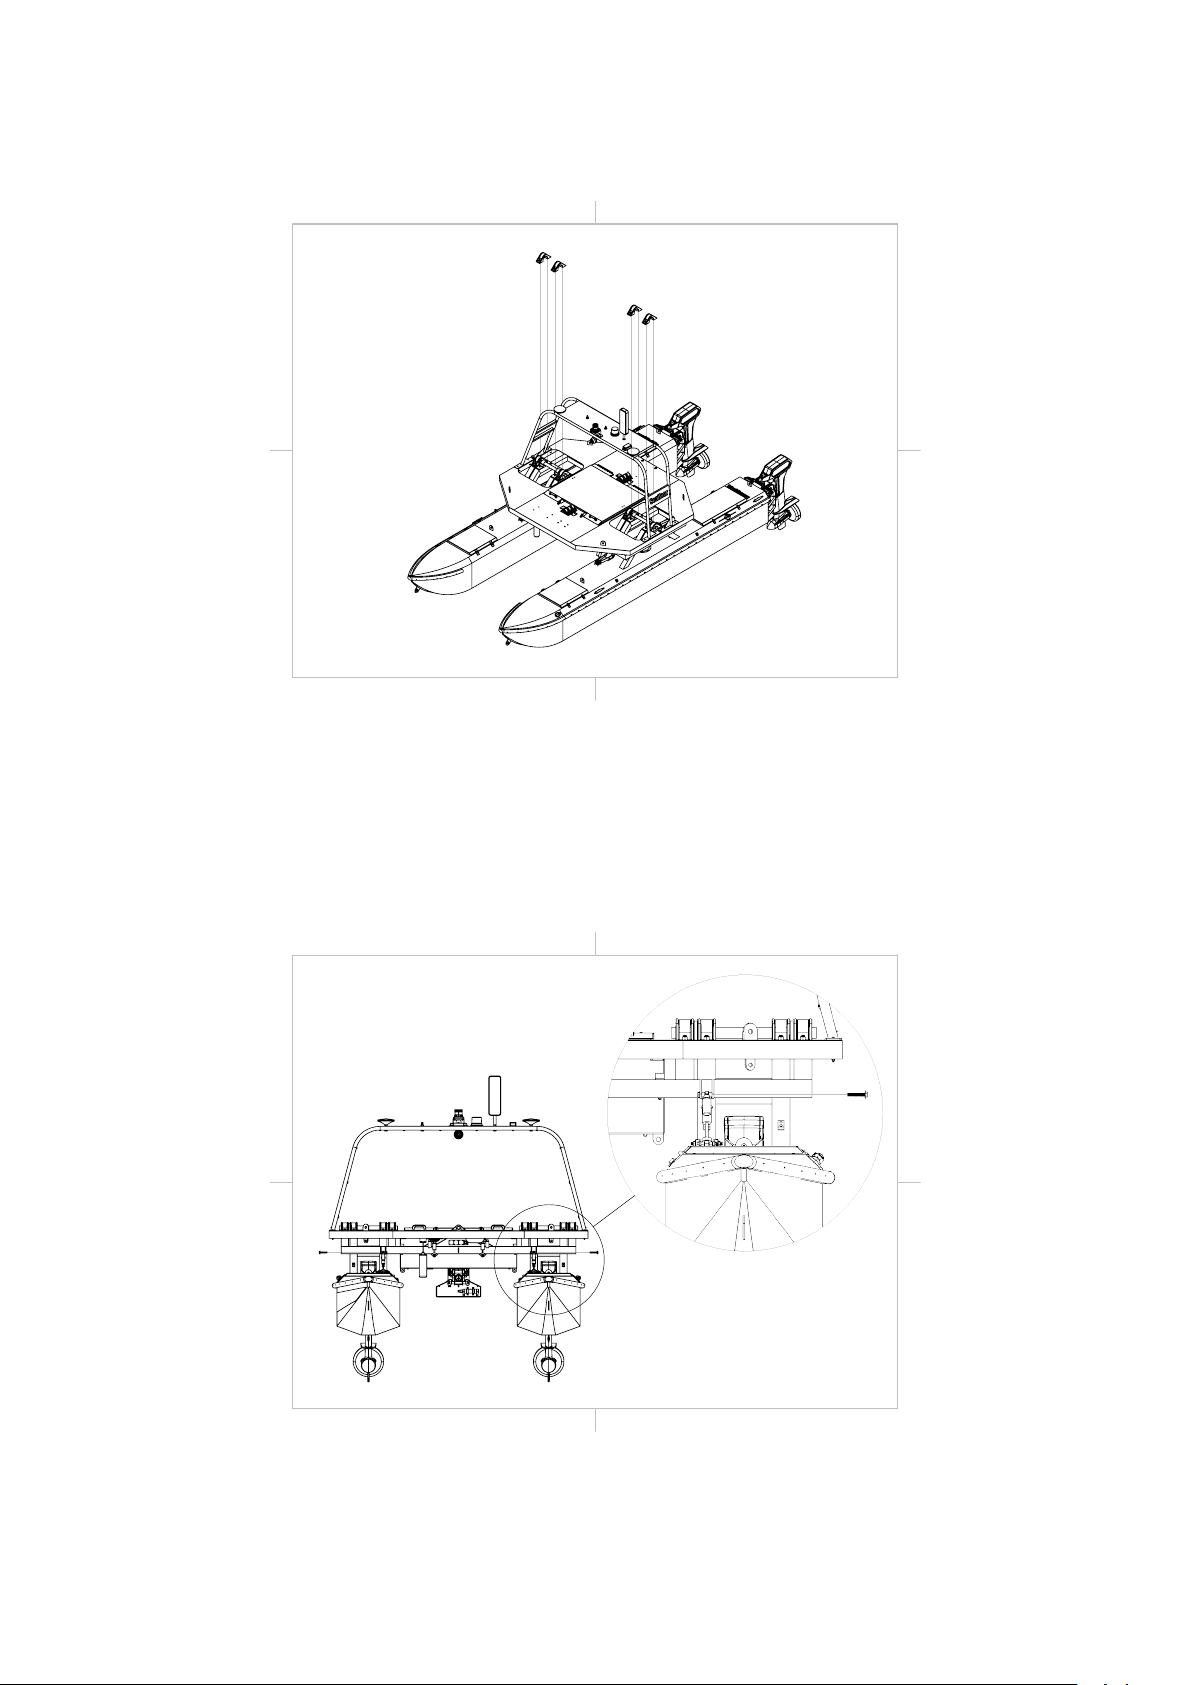
50 PontoonSwitch-Off....................................... 47
51 MonitoringCAAStatus ..................................... 48
52 LaunchingProximityView.................................... 49
53 Different Options To Monitoring Obstacles In Mission Planner . . . . . . . . . . . . . . . 50
54 DistributionFusePanel ..................................... 53
55 InlineFuseLocation ....................................... 54
56 PontoonFusePanelCover.................................... 54
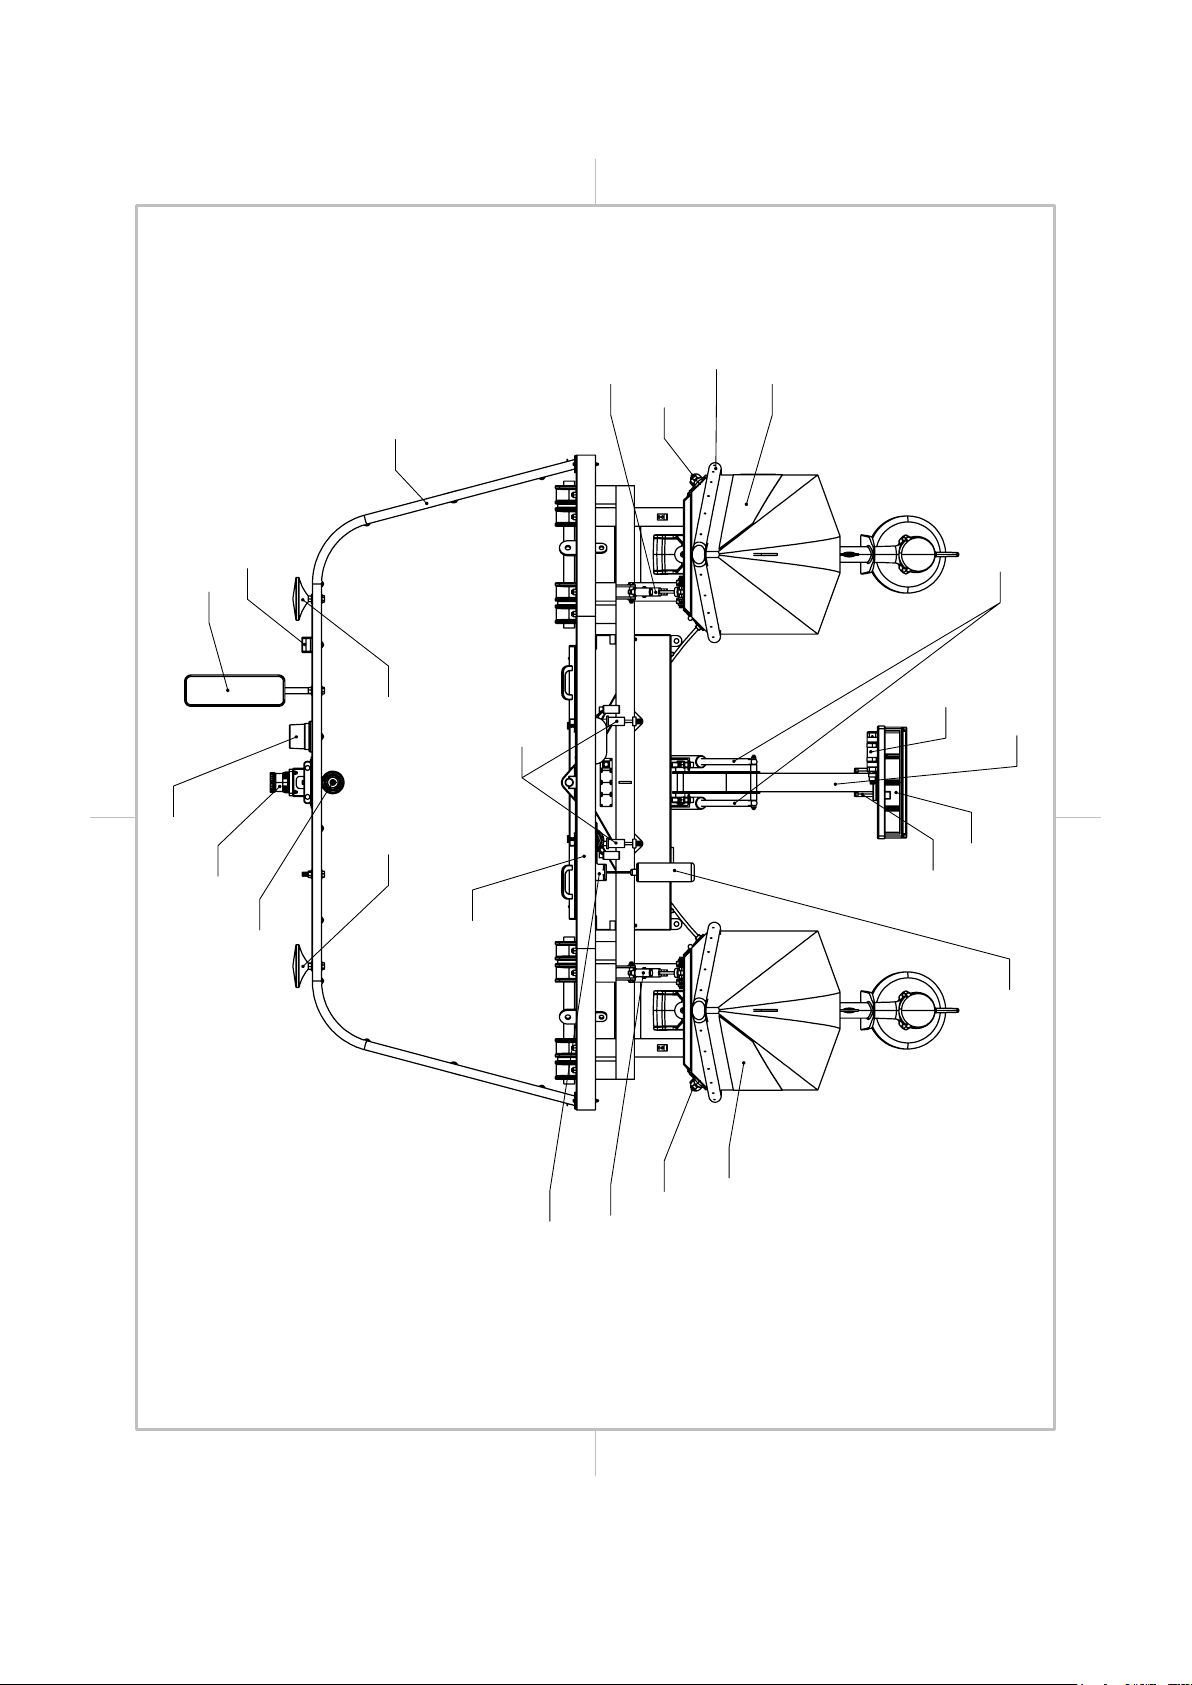
57 ThrusterFuseLocation ..................................... 55
58 NavigationFuseLocation .................................... 55
59 SmartCastFlowDiagram .................................... 60
60 FoxGloveStudio ......................................... 60
61 FoxGloveOpenConnection ................................... 61
62 ConnectingToCAA ....................................... 61
63 Importing A Default Panel Layout For Foxglove Studio . . . . . . . . . . . . . . . . . . . 62
64 LiDAROnlyFoxGlovePanels.................................. 62
65 FullCAAFoxGlovePanels ................................... 63
66 ObstacleDetected ........................................ 64
67 DisablingDistanceViewing ................................... 65
68 RCUModelSelectScreen .................................... 66
69 RCUInternalRF......................................... 66
70 RCU-WaitingToRegister ................................... 66
71 ArcherR8Pro .......................................... 66
72 RCU Binding Screen - SimuRX1/2 Is Only Used For Simulation . . . . . . . . . . . . . . 67
73 RCUBindSuccessful....................................... 67
74 RCUModelSelectScreen .................................... 67
75 RCUExternalRF ........................................ 68
76 RCU-WaitingToRegister ................................... 68
77 R9StabOTA........................................... 68
78 RCU Binding Screen - SimuRX1/2 Is Only Used For Simulation . . . . . . . . . . . . . . 69
79 RCUBindSuccessful....................................... 69
80 MainScreen............................................ 69
81 RCUSettings........................................... 70
82 HardwarePage .......................................... 70
83 StartOfCalibration ....................................... 70
84 SetupTab............................................. 71
85 RadioCalibrationSteps ..................................... 71
86 PopUps.............................................. 72
87 Radio Calibration Verification . . . . . . . . . . . . . . . . . . . . . . . . . . . . . . . . . . 73
88 ClickWhenDone......................................... 73
89 AccelCalibration......................................... 74
90 AccelCalibrationSteps ..................................... 75
91 AccelCalibrationInProcess................................... 75
92 AccelCalibrationComplete ................................... 76
93 Greaselocations ......................................... 78
94 Brass Cap Covering Inlet Fitting . . . . . . . . . . . . . . . . . . . . . . . . . . . . . . . . 79
95 BleederFittingLocations .................................... 80
96 Hold Thruster During Purging Process . . . . . . . . . . . . . . . . . . . . . . . . . . . . . 80
97 Starboard Bleeder Fitting - Open . . . . . . . . . . . . . . . . . . . . . . . . . . . . . . . . 81
98 PortBleederFitting-Open................................... 81

99 HydroCat™180OffsetDiagram................................. 84
100 BlockDiagram .......................................... 85
101 Gimbal Layer 1 Block Electrical Diagram . . . . . . . . . . . . . . . . . . . . . . . . . . . 86
102 Gimbal Layer 2 Block Electrical Diagram . . . . . . . . . . . . . . . . . . . . . . . . . . . 87
103 Gimbal Layer 3 Block Electrical Diagram . . . . . . . . . . . . . . . . . . . . . . . . . . . 88
104 Mast Block Electrical Diagram . . . . . . . . . . . . . . . . . . . . . . . . . . . . . . . . . 89
105 External Connections Block Electrical Diagram . . . . . . . . . . . . . . . . . . . . . . . . 90
106 Pontoon Block Electrical Diagram . . . . . . . . . . . . . . . . . . . . . . . . . . . . . . . 91
107 CableA-AutoNavPower.................................... 92
108 Cable B - AutoNav Propulsion . . . . . . . . . . . . . . . . . . . . . . . . . . . . . . . . . 93
109 CableC-CAA/GPS....................................... 94
110 CableD-InternalSmartCast.................................. 95
111 Cable E - SmartCast Manual Power . . . . . . . . . . . . . . . . . . . . . . . . . . . . . . 96
112 CableF-PCPower ....................................... 97
113 CableG-GPSSplitter ..................................... 98
114 CableH-ActuatorBoxPower ................................. 99
115 Cable J - Actuator Manual Power . . . . . . . . . . . . . . . . . . . . . . . . . . . . . . . 100
116 Cable K - Actuator Manual Data . . . . . . . . . . . . . . . . . . . . . . . . . . . . . . . . 101
117 CableL/M-Actuator ......................................102
118 Cable N - Motor Controller Power . . . . . . . . . . . . . . . . . . . . . . . . . . . . . . . 103
119 CableO/P-Gimbal15Pin...................................104
120 CableQ-CAAPower ......................................105
121 CableR-GimbalBattery....................................106
122 Cable S - Distribution Panel Power . . . . . . . . . . . . . . . . . . . . . . . . . . . . . . . 107
123 CableT-InverterPower ....................................108
124 CableU-PontoonPower ....................................109
125 Cable V/W - Pontoon Voltage Monitor . . . . . . . . . . . . . . . . . . . . . . . . . . . . 110
126 Cable X - Gimbal Voltage Monitor . . . . . . . . . . . . . . . . . . . . . . . . . . . . . . . 111
127 CableY-CoolingFan......................................112
128 CableZ-CoolingFanPower ..................................113
129 CableAA-LiDAR........................................114
130 CableBB-HazardLight ....................................115
131 CableCC-USBCamera ....................................116
132 CableDD-ReceiverBox ....................................117
133 CableEE-KillSwitch......................................118
134 Cable FF - External SmartCast . . . . . . . . . . . . . . . . . . . . . . . . . . . . . . . . . 119
135 CableGG-SmartCast......................................120
136 Cable HH - SmartCast Encoder . . . . . . . . . . . . . . . . . . . . . . . . . . . . . . . . . 121
137 CableJJ-Actuator .......................................122
138 CableKK-Pontoon .......................................123
139 CableLL-Pontoon15Pin ...................................124
140 CableMM-NavigationLight..................................125
141 Cable NN/OO - Navigation Light Power . . . . . . . . . . . . . . . . . . . . . . . . . . . . 126
142 Cable PP/QQ - Pontoon Charging . . . . . . . . . . . . . . . . . . . . . . . . . . . . . . . 127
143 Cable RR/SS - Steering Box Power . . . . . . . . . . . . . . . . . . . . . . . . . . . . . . . 128
144 CableTT-HydraulicPump...................................129
145 Cable UU - Steering Feedback . . . . . . . . . . . . . . . . . . . . . . . . . . . . . . . . . . 130
146 CableVV-PontoonParallel ..................................131
147 Cable WW - Pontoon Main Power . . . . . . . . . . . . . . . . . . . . . . . . . . . . . . . 132
148 Cable XX - Pontoon Distribution . . . . . . . . . . . . . . . . . . . . . . . . . . . . . . . . 133
149 CableYY-Thruster.......................................134
150 CableZZ-PontoonCharger ..................................135
151 SideViewDiagram........................................136
152 FrontViewDiagram .......................................137
153 TopViewDiagram........................................138

List of Tables
3 What’sIncluded ......................................... 12
4 RCUFunctions.......................................... 24
6 Pontoon Charger Technical Data . . . . . . . . . . . . . . . . . . . . . . . . . . . . . . . . 27
8 Gimbal Charger Technical Data . . . . . . . . . . . . . . . . . . . . . . . . . . . . . . . . . 28
10 E4 Cube Balance Charger Technical Data . . . . . . . . . . . . . . . . . . . . . . . . . . . 29
11 SimpleGridSettings ....................................... 38
12 PontoonErrorStatus ...................................... 56
13 Pontoon Errors (Normal Flashing Red) . . . . . . . . . . . . . . . . . . . . . . . . . . . . 56
14 ThrusterErrors.......................................... 58
15 HydraulicSteeringFaults .................................... 59

1 Introduction
1.1 System Overview
Welcome to the Seafloor Systems HydroCat™180 manual. This document provides an overview of the key
features and functionalities of our cutting-edge Uncrewed Survey Vessel (USV) designed for hydrographic
surveying and marine mapping applications. The HydroCat™180 offers advanced hydrographic surveying
capabilities, autonomous operation, flexible payload options, and real-time data viewing. The HydroCat™
180 features a robust hull and propulsion system, a sophisticated navigation and control unit and reliable
communication systems. This manual is for hydrographic surveyors, marine scientists, and technical
personnel involved in underwater mapping and surveying tasks using the HydroCat™180.
1.2 Terms And Acronyms
ANP AutoNav Plus
ASV Autonomous Survey Vessel
Bow Front or forward part of the vessel
CAA Collision Avoidance Assist
ESC Electronic Speed Controller
FAQ Frequently Asked Questions
GND Ground (Voltage)
GNSS Global Navigation Satellite System
GPS Global Position Satellites
HDPE High Density Polyethylene
HLP Hydrolite Plus
HUD Heads Up Display
LED Light Emitting Diode
LiPo Lithium Polymer Battery
Motor Center electronic part of the Thruster
MBES MultiBeam Echosounder
NMEA National Marine Electronics Association
PoE Power over Ethernet
Port Left side of vessel - facing towards bow
Prop Propeller
RCU Remote Control Unit
RCV Remote Controlled Vessel
RDP Remote Desktop Protocol, Remote Desktop Connection
Receiver, RCVR Receiver for the Transmitter
RSSI Received Signal Strength Indicator
RTK Real Time Kinematic
RTL Return to Launch
Rx Receive
SBES Single Beam Echosounder
Servo Thruster Servo Thruster Assembly
SOC State of Charge
Starboard Right side of vessel - facing towards the bow
Stern Rear or aft part of the vessel
SVP Sound Velocity Profiler
SVS Sound Velocity Sensor
Thruster Thruster assembly with prop
Transmitter Transmitter also known as Radio Control Unit
Tx Transmit
USV Uncrewed Survey Vessel
VDC Voltage - Direct Current
VAC Voltage - Alternating Current
1

Information
Information banner is to notify useful information for operator.
Caution
Caution banner is provide important information that if disregarded may result in accidental misuse or
damage to the system.
Important Alert
Important Alert is to provide important information that if disregarded may prove harmful to
personnel or equipment.
2

1.3 System Specifications
Survey Speed 2.5-4 knots (1.3-2m/s)*
Top Speed 9.7 knots (5m/s) Sonar Pole Up
Length 18ft (5.5m)
Width 8.5ft (2.5m)
Draft 2.4ft (0.74m)
Air Draft 7.5ft (2.3m)
Hull Material Corrosion Resistant Aluminum
Hardware 316 Stainless Steel
Weight (Base Boat) 1700lbs (725kg)
Payload 800lbs (365kg)
Trailer Towing Weight 3000lbs (1361kg) (Base Boat and Trailer)
Power 48VDC Drivetrain and 12VDC Payload
Drivetrain Battery Setup Specs based on 3 per pontoon (2 per pontoon default setup)
Battery Endurance 10 hours at Survey Speed
Thruster 2x Electric Outdrives
Steering Hydraulics
Communication Range Line of Sight, Up to 1km (Conditions Dependent)
Remote Control Voltage Range 6-8.5VDC
Remote Control Long Range Battery 2S LiPo
Remote Control Range Line of Sight, Up to 1.2 miles (2km) (Conditions Dependent)
Shore Power Requirements 100-240VAC for PoE
Sea State Below Beaufort Sea State 4
Operating Air Temperature 14 – 113F (-10 – 45C)
Operating Water Temperature 28.4 – 96.8F (-2 – 36C)
*Speed in ideal conditions. Refer to Survey Endurance Chart 3.5.
1.4 System Limitations
To limit potential damage to the HydroCat™180, it is not recommended to use the USV in the following
conditions:
•Colder environments can lead to decreased battery capacity and shorter endurance compared to
what is indicated on the endurance chart. (Refer to 3.5)
•Range outside of 1.2mi (2km) line of sight. (Greater than 1.2mi (2km) with advanced Comms kit)
•Charging: On land only. No equipment leakage circuit interrupter (ELCI) protections for on water
charging.
•Weather Conditions: Do not use USV in adverse weather. Thunderstorms, lightning, hurricanes,
monsoons, extreme heat, strong current, strong winds, heavy rain, etc.
•Collision Avoidance Assist (CAA) - Optional Add On: Limited effectiveness in adverse weather.
Fog, rain heavy spray will affect range. CAA range is 25m in perfect conditions. CAA is a man in
loop system.
3

1.4.1 Water Towing
Caution
Props must be out of the water or held in place. Thrusters do not have hydrogeneration protection.
Caution
If towing is required, keep tow speed below 10 knots (5m/s). Towing faster than 10 knots (5m/s) or too
fast for sea conditions may cause equipment damage, or water to enter, or flooding/swamping/sinking
of HydroCat™180.
16' (4.88 m) minimum
A A
B B
2
2
1
1
Figure 1: Towing Harness
1.5 Warranty
Seafloor Systems, Inc. is committed to upholding the highest standards of quality, reliability, and dura-
bility in its products. We provide a warranty to the original purchaser or purchasing agency, guaranteeing
that each HydroCat™180 will be free from defects in materials or workmanship for a duration of one
year from the date of shipment.
The warranty provided does not cover defects resulting directly or indirectly from misuse, negligence,
accidents, repairs, or alterations conducted outside of our facilities. It also does not cover the utilization
of the HydroCat™180 for purposes other than water measurements, or pairing it with instruments ex-
ceeding a weight of 800lbs (362.9kg).
Seafloor assumes no responsibility for the loss of boats, instruments, damage to property, or any injury
or fatality associated with the utilization of its products or any products that may be included or utilized
in conjunction with Seafloor products. Seafloor’s warranty does not extend to third-party products sold
by Seafloor, which may encompass items such as GPS devices, depth sounders, and other supplementary
equipment.
All warranty-related services are carried out from Seafloor’s facility in El Dorado Hills, California, U.S.A.
4

1.6 Technical Support
Seafloor Systems, Inc. provides comprehensive customer support through both an online support system
and a phone support system during regular business hours. For assistance outside of standard business
hours, support is available by appointment.
If your HydroCat™180 was purchased through an authorized dealer, we kindly request
that you contact your dealer’s designated point of contact for immediate support and
assistance.
To submit a support request, please fill out our support form on our website www.seafloor.com via the
big green button. You may also email us at support@seafloor.com. Please include as much information
as possible:
•Your Name and Company
•Where you purchased the system
•Purchase Order number
•Serial number of the system
•In-depth explanation of the issue
•Any helpful pictures of the issue
Upon submitting your support request through our website or emailing us, a case will be automati-
cally generated in our support system. One of our support representatives will reach out to you to assist
with your inquiry or issue within 48 hours. Please note that this response time does not include weekends.
•Support: www.seafloor.com
•Support Email: support@seafloor.com
•Phone (PST/PDT): +1 530-677-1019 (Business Hours: Monday - Friday, 0700-1530)
–Option 2 for Support
∗Option 1 for USV Support
∗Option 2 for Single Beam Support
∗Option 3 for Multibeam Support
5

2 Safety
2.1 Battery Safety
Please read through these instructions carefully before you operate the HydroCat™180.
Important Alert
Danger to life from electric shock. Contact with uninsulated or damaged parts can result in severe
physical injuries.
•Avoid touching contacts.
•Do not undertake any repair work whatsoever on Power 48-5000 pontoon batteries.
•Never touch scuffed or severed wiring or obviously defective components.
•If you notice a defect, immediately switch off the battery.
•Avoid contact with electrical components in water.
•Prevent mechanical forces from working on the batteries and cables.
•Never charge damaged batteries.
•Do not use the system near flammable gasses, solvents, or vapors.
•Anyone with a cardiac pacemaker must maintain a distance of at least 20in (50cm) from the Power
48-5000 and from the chargers.
•Keep the batteries away from heat sources.
•Do not store flammable objects near the batteries.
•Remove metal jewelery and wristwatches before you start work on batteries or in their vicinity.
•Always put down tools and metal objects without making contact with the batteries.
•When connecting the battery, ensure correct polarity and secure connections.
•Battery terminals must be clean and free of corrosion.
Important Alert
Never open the batteries.
2.2 Battery Charging Safety
Important Alert
Failure to follow any of the instructions and safety warnings contained within this document may
cause irreversible damage to the battery pack.
Information
Due to shipping regulations, batteries are not shipped fully charged. All battery packs should be fully
charged prior to first use.
Pontoon and Gimbal batteries:
•Always use a Torqeedo approved charger specifically designed for lithium ion batteries. Never use
NiCD, NiMH, LiPo chargers to charge lithium ion batteries. (Refer to 3.7)
6

•Do not charge any type of battery on or near any flammable materials including in or near your
vessel.
•Never leave batteries unattended while charging. While batteries are charging they MUST remain
under constant observation so that you may react quickly should any problems arise.
•Ensure proper ventilation when batteries are charging.
RCU Long Range Module Battery (Lithium Polymer (LiPo)):
•LiPo batteries, 2S and greater, feature a separate balancing plug that isolates each cell in a pack
and allows each to be charged and monitored independently. This ensures that all cells charge
equally and discharge at the same rate during use. Never charge a 2S or greater LiPo battery
without connecting the balance lead to the charger. Always balance charge a 2S or greater LiPo
battery.
•Charge each battery pack individually. Never charge battery packs in series. Charging packs in
series may result in improper charger cell recognition, improper charging rate, and overcharging
that may lead to a fire. We recommend using a LiPo balance charge when charging your LiPo
batteries. (Refer to 3.7)
•Always check to make sure that your LiPo charger settings match those listed on the battery pack
label. Refer to the battery label for the proper cell count and 1C charging amperage settings.
2.3 Vessel Safety
Important Alert
Working with electricity in water environments requires utmost caution and adherence to safety protocols.
Here are some important safety guidelines when using the HydroCat™180:
•Electrical Safety: Exercise extreme caution when dealing with electricity in water. Avoid exposed
wires and electrical circuits to prevent electrical shock hazards.
•Propeller (Prop) Safety: Keep body parts away from the thruster inlet and outlet to prevent
injuries.
•Operating Conditions: Avoid operating the thrusters for extended periods outside of the water.
The thrusters rely on water for cooling and operating them dry can result in increased heat build
up and potential damage.
•Environmental Considerations: While the thrusters can handle saltwater and sandy environments,
it’s crucial to avoid sucking debris into the thruster. Steer clear of plants, weeds, and other aquatic
debris to prevent damage.
•Battery Safety: Never leave batteries powered on while the HydroCat™180 is unattended. Always
power off all batteries immediately after use.
Adhering to these safety guidelines is crucial for the safe and effective operation of the HydroCat™
180 and to prevent accidents or damage to the equipment. Always prioritize safety when working with
water-based electrical equipment.
7

3 System Operation
3.1 HydroCat™180 Assembly
A A
B B
2
2
1
1
Figure 2: Assembly Overview
8

Tools Required(Not Supplied):
•QTY 2 - Lifting straps, 2k lbs (907 Kg) limit each, 20ft (6m) length
•QTY 4 - D-Ring shackles
•Ratcheting socket wrench
•22mm Deep socket
•3/4” Socket
•3/4” Open ended wrench
Hardware Required(Supplied):
•Gimbal Bearings:
–QTY 8 - M14 Nyloc
–QTY 8 - M14 Washer
•Pitch Shocks:
–QTY 4 - 1/2-13 x 3” Long Hex Bolt
–QTY 8 - 1/2” ID, 1.25” OD Washers
–QTY 4 - 1/2-13 Thin Nyloc
–QTY 8 - 1/2” Acetal Sleeve Bearing
Assembly:
1. Connect actuator control box power cable(Cable H). (Figure 102)
2. Attach lifting straps in an X pattern to cross the entire gimbal.
•Be mindful that there is enough length in the straps to clear the tower
3. Secure the shackles to the gimbal lifting points(Figure 9) and lifting straps.
4. Spread the pontoons 4’ (1.2m).
5. Lift the gimbal onto pontoons. The pitch axis rod will sit into each rod cradle on the pontoons.
A A
B B
2
2
1
1
Figure 3: Gimbal Installation
9

6. Once the gimbal is in position, install the bearing top clamp.
A A
B B
2
2
1
1
Figure 4: Top Clamp Installation
7. Install the M14 hardware to secure the bearing top clamp. Do not tighten yet.
8. Install shock hardware:
•Installation order: Bolt, Sleeve Bearing, Shock, Sleeve Bearing, Washer, Nyloc.
A A
B B
2
2
1
1
Figure 5: Shock Installation
9. Tighten all recently installed hardware.
10

10. Slip the cold shrink over both pontoon data cables.(Cable KK).
11. Connect the two gimbal to pontoon data cables(Cable KK). (Figure 104
12. Pull cold shrink tab while holding the cold shrink over the connector.
3.2 What’s Included
Item Quantity Description Image*
HydroCat™180 1 HydroCat™180 USV
HydroCat™180
Trailer
(OPTIONAL)
1Fitted for
HydroCat™180
Power 48-10000
Fast Charger 2Chargers for
pontoon batteries
Shoreside Antenna 1
Paired to
HydroCat™180
Antenna
Shoreside PoE 1 To power Shore Side
Antenna
10ft Ethernet
Cable 1
To be used with
Shoreside PoE and
Shoreside Antenna
Remote Control
Unit (RCU) 1Remote Control Unit
for HydroCat™180
USB Charging
Cable 1Charging Cable for
RCU
Long Range
Module 1Used with RCU for
extended range
11

2S Lipo Battery 1 Used with Long
Range Module
LiPo Charger 1 Charger for the 2S
LiPo Battery
AML3 Adapter 1
To adapt the AML3
SVP to work with
the SmartCast
Voltage Monitor 1 To measure the 2S
LiPo voltage
USB Drive 1
Loaded with
software, drivers,
and manuals
DB9 Null Modem 1
Swaps Tx and Rx,
usually orange in
color
DB9 Gender
Changer 1
Male to Male DB9
gender changer,
usually yellow in
color
USB to Serial
Adapter 1
For devices that do
not have a DB9
port
Table 3: What’s Included
*Please note that images provided are for illustrative purposes only and may not precisely represent
the delivered product. Seafloor Systems reserves the right to modify any product at its discretion.
12

3.3 System Overview Diagram
Torqeedo Motors
Hydraulic Steering
GNSS Antennas
CAA System
Main Hatch
Pontoon Stern Hatches
Pontoon Bow Hatches
Bow Dock Cleat
Stern Dock Cleat
Pontoon Power Switch
Wifi Bridge
Motor Bulkhead
Panels
Strobe Light
Reciever Box
Emergency Kill Switch
Round Hatch
Navigation Light
A A
B B
2
2
1
1
Figure 6: HydroCat™180 System Overview
13

Sonar Pole
Sound Velocity Profiler
Tower
GNSS Antennas
CAA System
Wifi Bridge
Sonar Pole Actuators
Sonar
SmartCast
Platform
Port Pontoon
Starboard Pontoon
Bumpers
Roll Shocks
Pitch ShockPitch Shock
Receiver Box
Camera
Strobe Light
IMU
SVS
Navigation LightNavigation Light
A A
B B
2
2
1
1
Figure 7: HydroCat™180 Front View
14
Table of contents
Other Seafloor Marine Equipment manuals

Seafloor
Seafloor HyDrone ASV User manual

Seafloor
Seafloor EchoBoat-240 User manual

Seafloor
Seafloor HydroLite-DFX User manual

Seafloor
Seafloor TriDrone Programming manual

Seafloor
Seafloor AutoNav User manual

Seafloor
Seafloor EchoBoat 160 ASV User manual

Seafloor
Seafloor Sonarmite User manual

Seafloor
Seafloor AutoNav PLUS User manual