manuals.online logo
Brands
  1. Home
  2. •
  3. Brands
  4. •
  5. Sealey
  6. •
  7. Measuring Instrument
  8. •
  9. Sealey VS0563 User manual

Sealey VS0563 User manual

TYRE DEPTH GAUGE - DVSA APPROVED
MODEL NO: VS0563
Thank you for purchasing a Sealey product. Manufactured to a high standard, this product will, if used according to these instructions,
and properly maintained, give you years of trouble free performance.
IMPORTANT: PLEASE READ THESE INSTRUCTIONS CAREFULLY. NOTE THE SAFE OPERATIONAL REQUIREMENTS, WARNINGS & CAUTIONS. USE
THE PRODUCT CORRECTLY AND WITH CARE FOR THE PURPOSE FOR WHICH IT IS INTENDED. FAILURE TO DO SO MAY CAUSE DAMAGE AND/OR
PERSONAL INJURY AND WILL INVALIDATE THE WARRANTY. KEEP THESE INSTRUCTIONS SAFE FOR FUTURE USE.
1. SAFETY
WARNING! Ensure Health and Safety, local authority and general workshop practice regulations are adhered to when using
tools and equipment.
8DO NOT use gauge if damaged.
9Maintain gauge in good and clean condition for best performance.
9Keep the work area clean, uncluttered and ensure there is adequate lighting.
9Keep children and unauthorised persons away from the work area.
8DO NOT use the gauge for any purpose other than for which it is designed.
8DO NOT get gauge wet or use in damp or wet locations, or areas where there is condensation. Keep gauge clean and dry using a dry
cotton cloth only.
8DO NOT dip or submerge the gauge in any type of liquid.
8DO NOT expose gauge to bright sunlight or dust.
8DO NOT disassemble gauge. The gauge must be checked by qualified service personnel only.
8DO NOT apply any voltage to the gauge i.e. with an electric marker pen.
9Take care not to damage or scratch the scale surface.
9The gauge is a precision instrument, treat with care, avoid using force and do not subject to knocks or shocks.
9Use gauge in reasonably constant temperature conditions of approximately 20°C.
9When not in use, turn off and store gauge in a safe, dry, childproof location.
2. INTRODUCTION
Calibrated and DVSA approved for use when testing all classes of vehicle. Hardened and tempered stainless steel gauge. Metric and Imperial
calibration with conversion between the two. Zero reset control allows for comparative measurement. Includes at surface plate for accurate
zeroing of gauge prior to use. Supplied in storage case.
3. SPECIFICATION
Model No:................................................................. VS0563
Range ........................................................... 0-10mm(0-0.4”)
Resolution: ..................................................0.01mm(0.0005”)
Accuracy: ..................................................±0.01mm(0.0005”)
Battery: .................................................... CR2032 (supplied)
4. OPERATION
VS0563 | Issue:7 (H) 26/02/20
Original Language Version
© Jack Sealey Limited
Refer to
Instruction
Manual
Figure 1
Item Description
1 Depth measuring probe
2 LCD Display
3 mm/inch Button
4 Locking screw
5 Base
6 Power “ON/OFF” button
7 Zero set button
8 Battery cover
9 Beam
10 Zero set bar
11 Battery
4.1. ZERO SETTING
Prior to operation, perform a zero setting. To do this place the gauge foot on the zero set bar (fig.1 item 10) and press the probe down
until it is level with the base then press the ‘ZERO’ button, the gauge has been set to zero when the LCD displays ‘0.00’. Note: After
zero setting, the gauge retains this setting until the ‘ZERO button is pressed again or battery is removed.
4.2. PRODUCT USAGE
Switch on the gauge by pressing the ON/OFF button. Place the gauge foot across the tyre tread with the probe tip over the tyre groove.
Press the probe down until it stops moving then read the display. The pressure exerted by the tip of the measuring probe must be uniform
and constant to ensure correct and stable readings. Do not press too hard or incorrect results will be recorded.
5. MAINTENANCE
5.1. BATTERY INSTALLATION/REPLACEMENT
NOTE: The battery should last for one year of continuous use. If the display is blank or the digits are flashing the battery voltage is too
low, replace the battery with a new CR2032 power cell. If the digits do not change when buttons are pressed or probe is moved, remove
the battery for 1 minute to reset the unit. The battery should be removed if the gauge is not to be used for a long period.
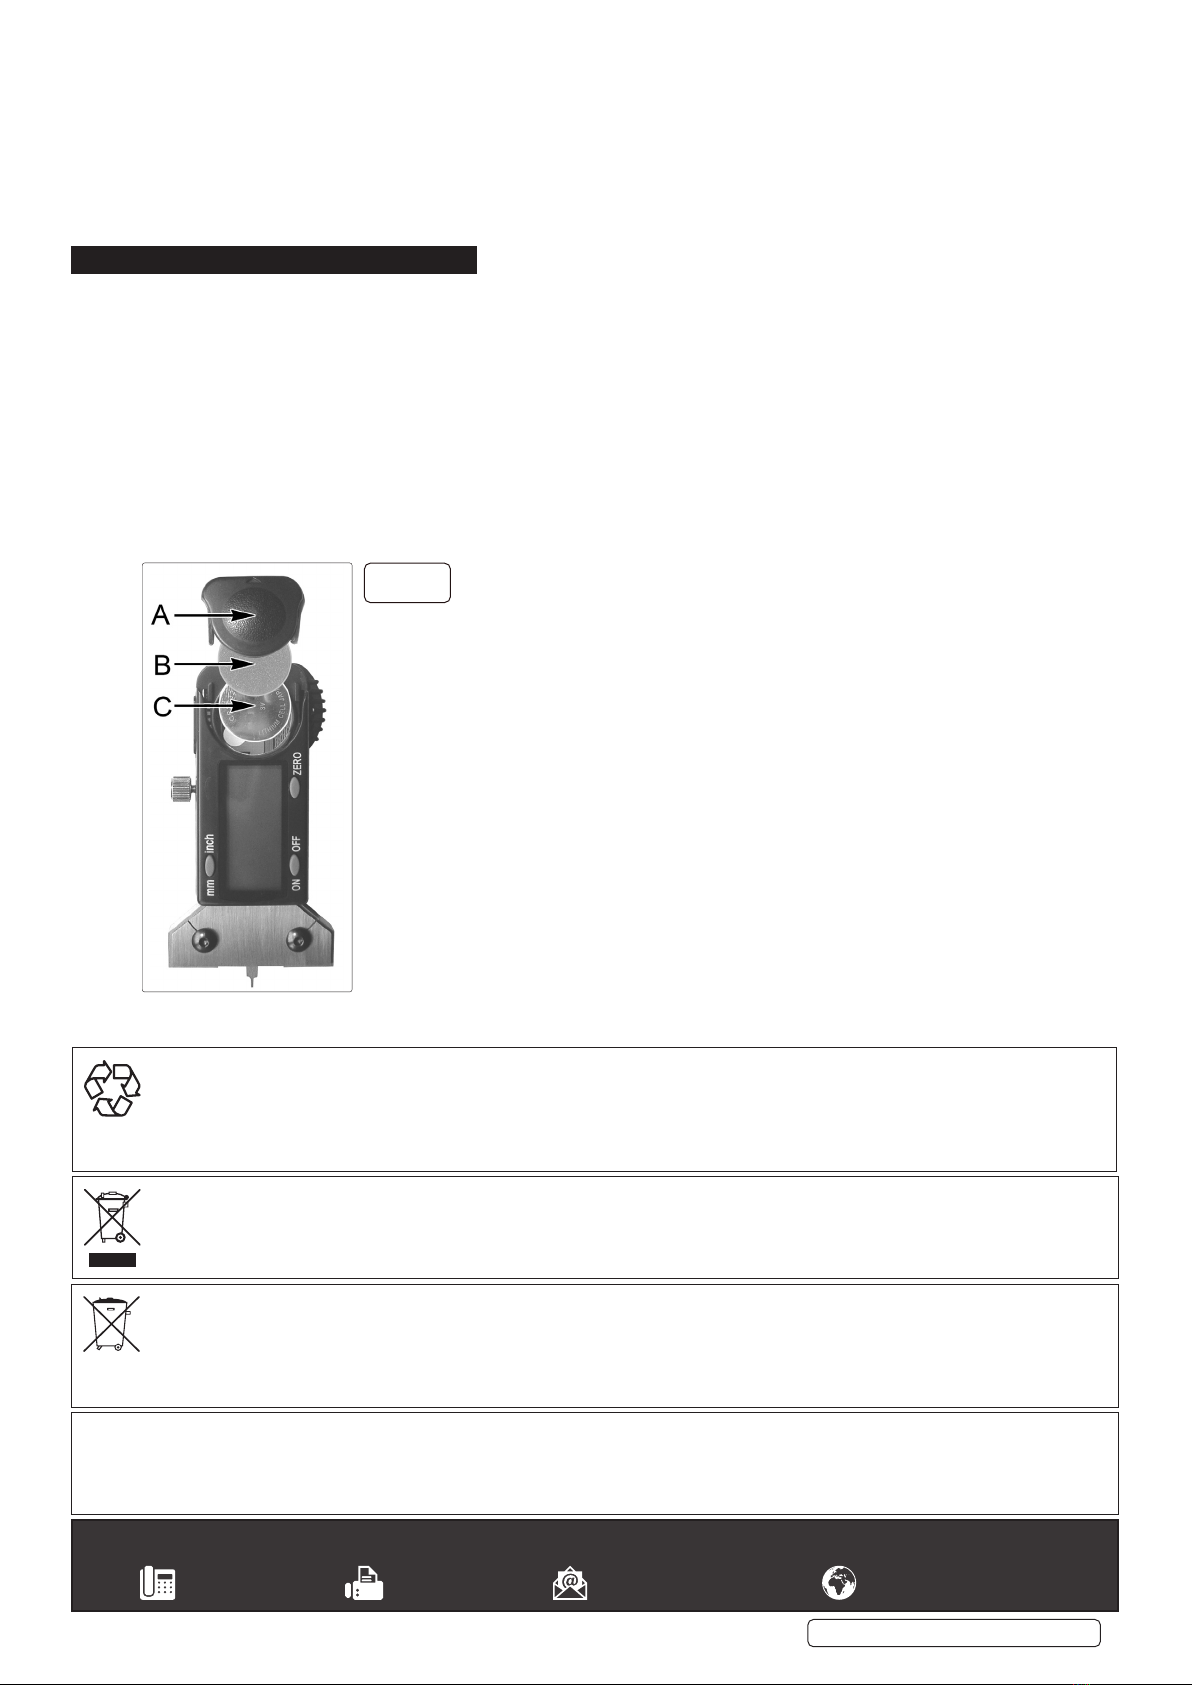
5.1.1. Remove battery cover (fig.2.A) by sliding it backwards and lifting off.
5.1.2. Remove rubber spacer (fig.2.B) and exhausted battery (fig.2.C) and fit replacement with +ve side uppermost. Place the rubber spacer on
top of the battery and press it into the recess. Slide the cover back into place.
Dispose of old battery in a safe and approved manner. If the display fails to alter when the slide is moved, remove the battery, wait at least
1 minute and then refit the battery.
5.2. CALIBRATION
5.2.1. Calibration is valid for 12 months after the packaging is opened.
5.2.2. We do not supply a certificate of calibration the for initial period. We recommend that the unit is returned to us annually for re-calibration.
A test certificate can be issued at this time. For re-calibration quote VS0563CAL
Original Language Version
© Jack Sealey Limited
Sealey Group, Kempson Way, Suffolk Business Park, Bury St Edmunds, Suffolk. IP32 7AR
01284 757500 01284 703534 sales@sealey.co.uk www.sealey.co.uk
ENVIRONMENT PROTECTION
Recycle unwanted materials instead of disposing of them as waste. All tools, accessories and packaging should be sorted, taken to
a recycling centre and disposed of in a manner which is compatible with the environment. When the product becomes completely
unserviceable and requires disposal, drain any fluids (if applicable) into approved containers and dispose of the product and fluids
according to local regulations.
WEEE REGULATIONS
Dispose of this product at the end of its working life in compliance with the EU Directive on Waste Electrical and Electronic Equipment
(WEEE). When the product is no longer required, it must be disposed of in an environmentally protective way. Contact your local solid
waste authority for recycling information.
BATTERY REMOVAL
Refer to section 5.1.
Under the Waste Batteries and Accumulators Regulations 2009, Jack Sealey Ltd are required to inform potential purchasers of products
containing batteries (as defined within these regulations), that they are registered with Valpak’s registered compliance scheme. Jack
Sealey Ltd Batteries Producer Registration Number (BPRN) is BPRN00705.
Note: It is our policy to continually improve products and as such we reserve the right to alter data, specifications and component parts without prior
notice.
Important: No Liability is accepted for incorrect use of this product.
Warranty: Guarantee is 12 months from purchase date, proof of which is required for any claim.
g.2
VS0563 | Issue:7 (H) 26/02/20

Other Sealey Measuring Instrument manuals

Sealey AK9623EV User manual

Sealey

Sealey AK9623EV User manual

Sealey TA200 User manual

Sealey

Sealey TA200 User manual

Sealey AK9636D User manual

Sealey

Sealey AK9636D User manual

Sealey ak4565D User manual

Sealey

Sealey ak4565D User manual

Sealey TA303 User manual

Sealey

Sealey TA303 User manual

Sealey TA200.V2 User manual

Sealey

Sealey TA200.V2 User manual

Sealey TA065 User manual

Sealey

Sealey TA065 User manual

Sealey MM405 User manual

Sealey

Sealey MM405 User manual

Sealey Auto Service Line VS0565 User manual

Sealey

Sealey Auto Service Line VS0565 User manual

Sealey AK9636D.V2 User manual

Sealey

Sealey AK9636D.V2 User manual

Sealey TA320 User manual

Sealey

Sealey TA320 User manual

Sealey VAG VS862 User manual

Sealey

Sealey VAG VS862 User manual

Sealey AUTO SERVICE TA060 User manual

Sealey

Sealey AUTO SERVICE TA060 User manual

Sealey VSE110 User manual

Sealey

Sealey VSE110 User manual

Sealey AK9621EV User manual

Sealey

Sealey AK9621EV User manual

Sealey DBG506D User manual

Sealey

Sealey DBG506D User manual

Sealey AK9991 User manual

Sealey

Sealey AK9991 User manual

Sealey AK9635D.V2 User manual

Sealey

Sealey AK9635D.V2 User manual

Sealey GA45 User manual

Sealey

Sealey GA45 User manual

Sealey TA203.V2 User manual

Sealey

Sealey TA203.V2 User manual

Sealey GA48.V2 User manual

Sealey

Sealey GA48.V2 User manual

Sealey AK9638D User manual

Sealey

Sealey AK9638D User manual

Sealey MS100 User manual

Sealey

Sealey MS100 User manual

Sealey TP956.V2 User manual

Sealey

Sealey TP956.V2 User manual

Popular Measuring Instrument manuals by other brands

VOLTCRAFT UM5/1 200 operating instructions

VOLTCRAFT

VOLTCRAFT UM5/1 200 operating instructions

FILL-RITE 806C Owner's operation & safety manual

FILL-RITE

FILL-RITE 806C Owner's operation & safety manual

Flexim PIOX S502ID Operating	 instruction

Flexim

Flexim PIOX S502ID Operating instruction

METREL VoltScanner MI 2130 user manual

METREL

METREL VoltScanner MI 2130 user manual

SICK Master Data Analyzer operating instructions

SICK

SICK Master Data Analyzer operating instructions

GTC FF310 user manual

GTC

GTC FF310 user manual

Xylem Domo M M-Bus installation manual

Xylem

Xylem Domo M M-Bus installation manual

JENCO 6177M Operation manual

JENCO

JENCO 6177M Operation manual

Chemitec 50 SERIES Technical manual

Chemitec

Chemitec 50 SERIES Technical manual

Akytec ITP14 user guide

Akytec

Akytec ITP14 user guide

Chauvin Arnoux CA 10101E user manual

Chauvin Arnoux

Chauvin Arnoux CA 10101E user manual

luxvision LM 300 user manual

luxvision

luxvision LM 300 user manual

TESTO Saveris instructions

TESTO

TESTO Saveris instructions

Bosche WTS user manual

Bosche

Bosche WTS user manual

Kaiterra Sensedge Mini user manual

Kaiterra

Kaiterra Sensedge Mini user manual

PCE Instruments PCE-CM 40 user manual

PCE Instruments

PCE Instruments PCE-CM 40 user manual

dlb AIJGO-60 instruction manual

dlb

dlb AIJGO-60 instruction manual

ColorLite sd350 user manual

ColorLite

ColorLite sd350 user manual

manuals.online logo
manuals.online logoBrands
  • About & Mission
  • Contact us
  • Privacy Policy
  • Terms and Conditions

Copyright 2025 Manuals.Online. All Rights Reserved.