INSTRUCTIONS FOR
ELECTRONIC DIGITAL HEIGHT GAUGE
Model No: AK9636D
Thank you for purchasing a Sealey product. Manufactured to a high standard this product will, if used according to these instructions and properly
maintained, give you years of trouble free performance.
IMPORTANT
PLEASE READ THESE INSTRUCTIONS CAREFULLY. NOTE THE SAFE OPERATIONAL REQUIREMENTS, WARNINGS, AND
CAUTIONS. USE THIS PRODUCT CORRECTLY AND WITH CARE, FOR THE PURPOSE FOR WHICH IT IS INTENDED. FAILURE TO
DO SO MAY CAUSE DAMAGE AND/OR PERSONAL INJURY AND WILL INVALIDATE THE WARRANTY.
p
p
WARNING! Ensure Health and Safety, local authority and general workshop practice regulations are adhered to when using tools and equipment.
7DO NOT use the gauge if damaged.
3Maintain the gauge in good and clean condition for best and safest performance.
3Keep the work area clean, uncluttered and ensure there is adequate lighting.
3Maintain correct balance and footing. Ensure the floor is not slippery and wear non-slip shoes.
3Remove ill fitting clothing. Remove ties, watches, rings and other loose jewellry. Contain or tie back long hair.
3Keep children and unauthorised persons away from the work area.
1. SAFETY INSTRUCTIONS
2. INTRODUCTION & SPECIFICATION
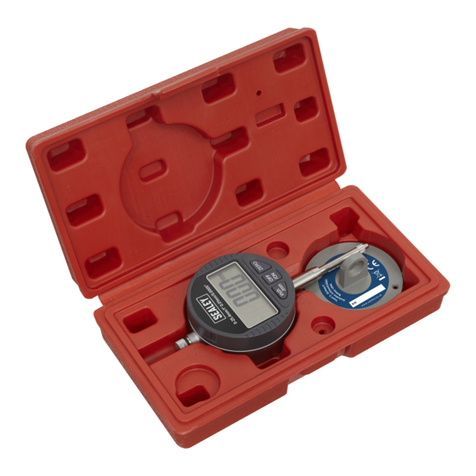
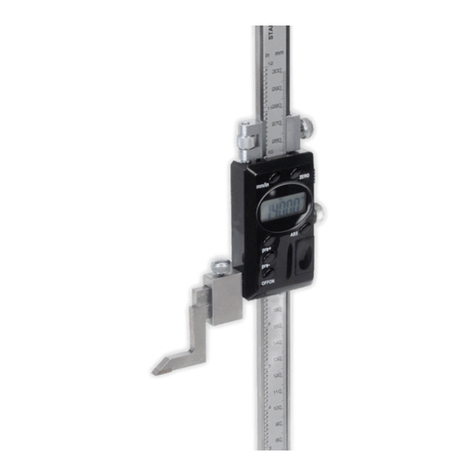
Precision ground base with 6 button electronic gauge. Includes fine adjustment control carriage for accurate use. 6-Digit LCD read-out displays in metric or
imperial. Features absolute and comparative functions. Includes RS232 interface port. Supplied with scriber foot and clamp. Powered by SR44W battery
(included) and supplied with storage case.
Measuring range:0 - 200mm / 0 - 8in 200 - 300 / 8 - 12in
Accuracy:0.03 / 0.0012in 0.04mm / 0.0015in
Resolution:0.01mm / 0.0001in
Repeatability:0.01mm / 0.0005in
1Power switch
2mm / inch selection
3Relative / Absolute
4Zero setting button
5+ preset button
6- preset button
AScale
BBeam
CFine adjustment
DLCD Display
EInterface (serial)
FFastening Screw
GBattery lid
HBase
IScriber
Operating temperature: 0 - 40ºC
Storage temperature: -20 - 70ºC
Max. relative humidity: 80%
3. OPERATION
3.1 Turn the gauge on by pressing the power button (Fig 1 #1).
3.2 Select the desired units of measurement (inch / mm) using the selection button (Fig 1 #2).
3.3 Select Relative or Absolute measuring mode (Fig 1 #3).
Note: Relative measuring mode is used for making comparative measurements e.g. the difference in height between two points/objects.
When Relative measuring is selected, the display will be set to zero. Absolute mode can be reselected at any time, to measure the
actual height of a point/object.
3.4 To set the gauge to absolute zero at any point, press the Zero setting button (Fig 1 #4).
3.5 To set the origin to a value other than zero, use the +/- preset buttons (Fig 1 #5 #6).
3.5.1 To increase the value of the origin, press the zero setting button and + preset button simultaneously. The word set will flash in the display.
To increase the value by 0.01mm or 0.001 press the + preset button once. To increase the value further, keep the + preset button
depressed until the desired value has been set. Press the zero setting button once more to return to measuring mode.
3.5.2 To decrease the value of the origin, repeat step 3.5.1, this time using the - preset button.
3.6 To fit the scriber:
3.6.1 Place the clamp upon the arm extending from the slider.
3.6.2 Slot the scriber into the clamp and tighten.
Arm
Clamp
Scriber
AK9636D - 1 - 110803
Fig 2
