INSTRUCTIONS FOR:
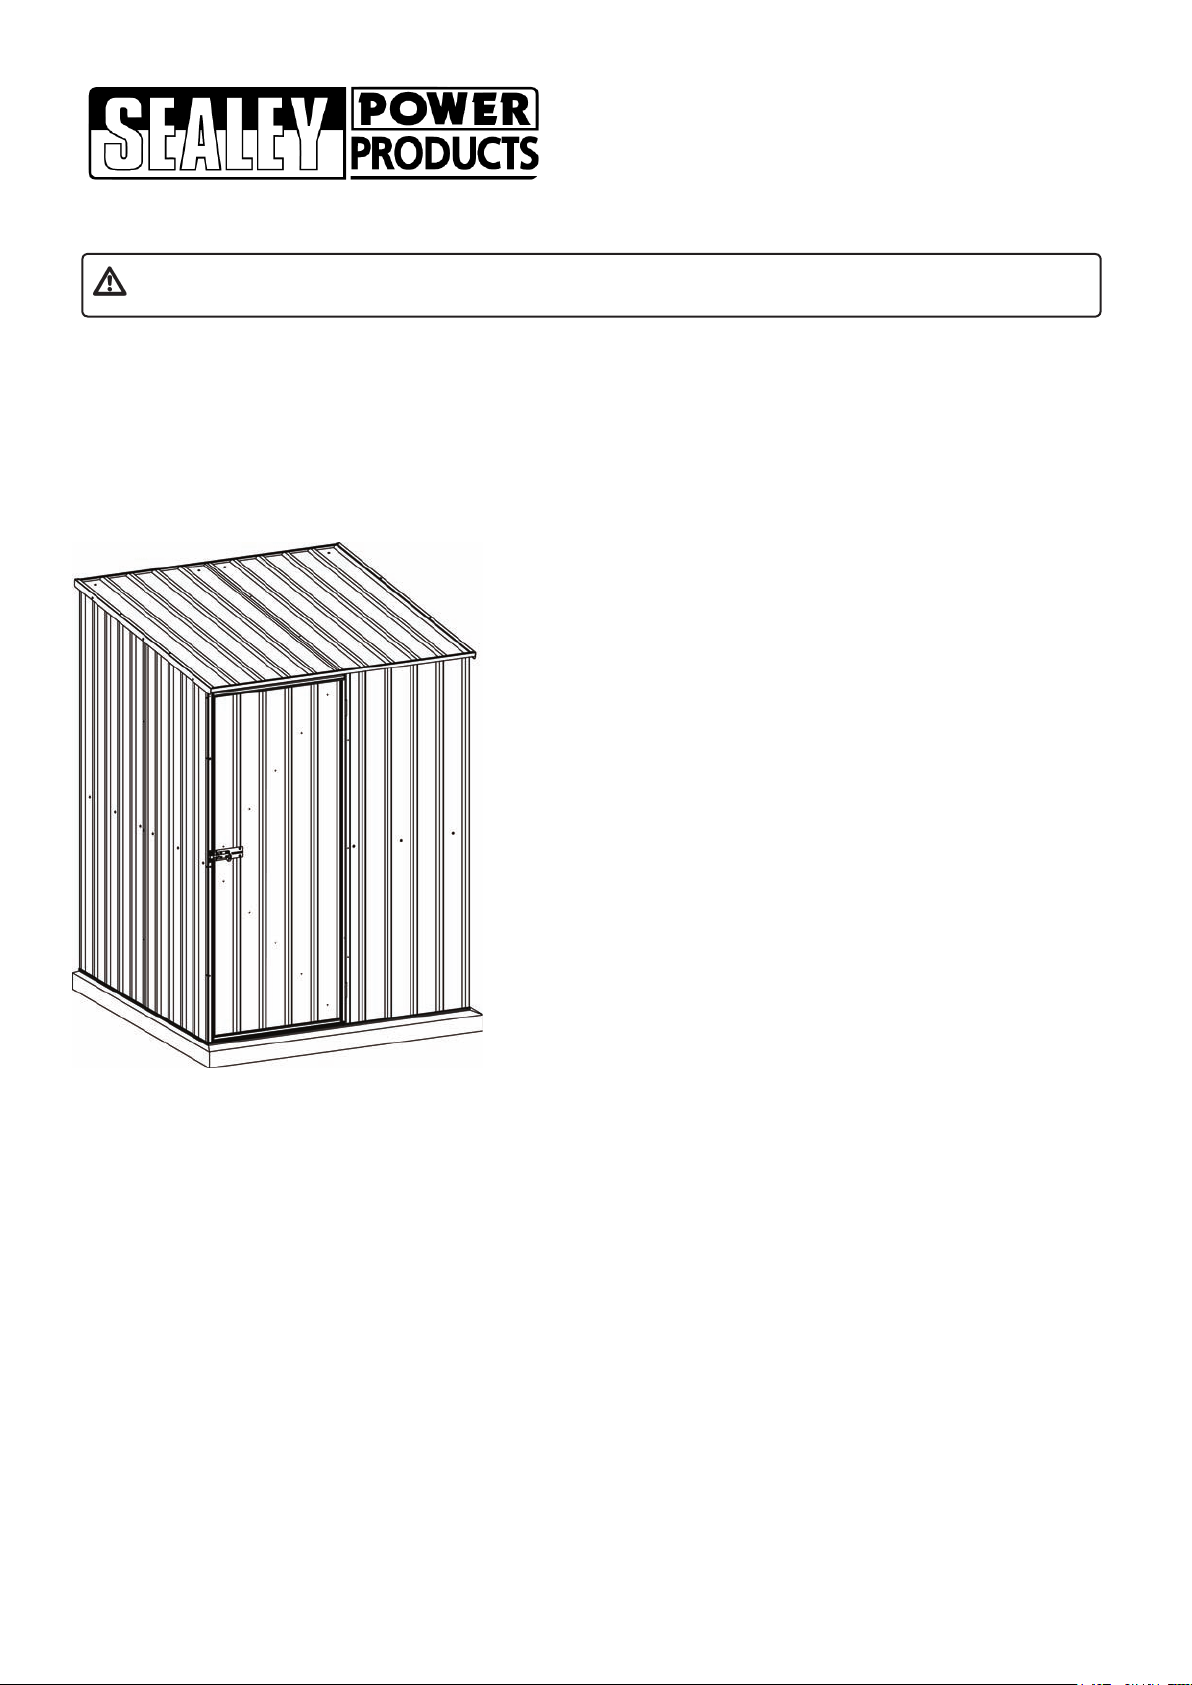
GALVANIZED STEEL SHED
MODEL No: GSS1515
Thank you for purchasing a Sealey product. Manufactured to a high standard this product will, if used according to these instructions
and properly maintained, give you years of trouble free performance.
IMPORTANT: PLEASE READ THESE INSTRUCTIONS CAREFULLY. NOTE THE SAFE OPERATIONAL REQUIREMENTS, WARNINGS AND
CAUTIONS. USE THE PRODUCT CORRECTLY AND WITH CARE FOR THE PURPOSE FOR WHICH IT IS INTENDED. FAILURE TO DO SO MAY
CAUSE DAMAGE AND/OR PERSONAL INJURY AND WILL INVALIDATE THE WARRANTY. PLEASE KEEP INSTRUCTIONS SAFE FOR FUTURE USE.
WARNING! Ensure Health & Safety, local authority, and general workshop practice
regulations are adhered to when building this shed.
Keep the work area clean, uncluttered and ensure there is adequate lighting.
Keep children and unauthorised persons away from the working area.
DO NOT use the shed for any purpose other than that for which it is designed.
Use appropriate safety clothing including eye protection.
Note! The assembly of this product will require assistance.
Before commencing the assembly, we recommend that you read the instructions thoroughly. Your
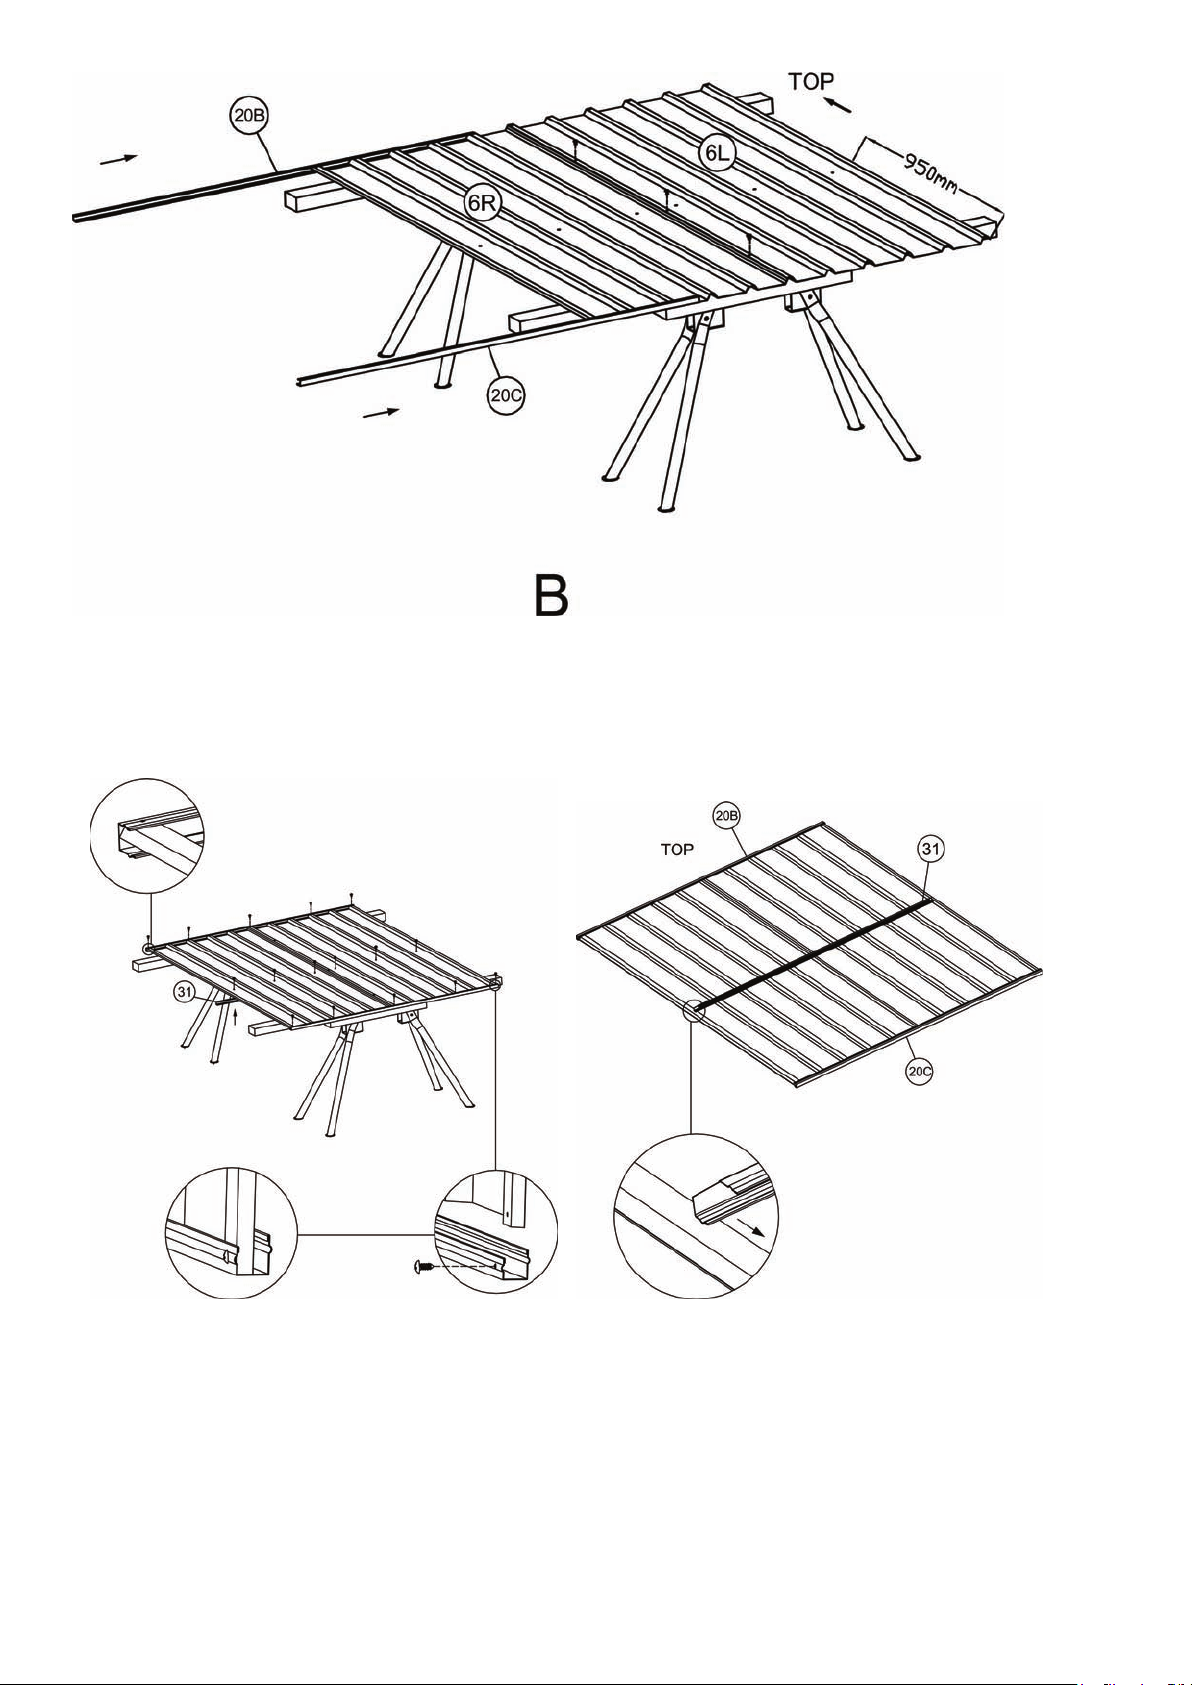
new shed comes with all the holes pre drilled to make for fast easy assembly. We recommend
that you assemble the shed using a trestle table or sawhorses and planks. This will ensure that
you are working off the ground and make it easier for you. Assembly is a two person job and
should not be attempted in windy conditions.
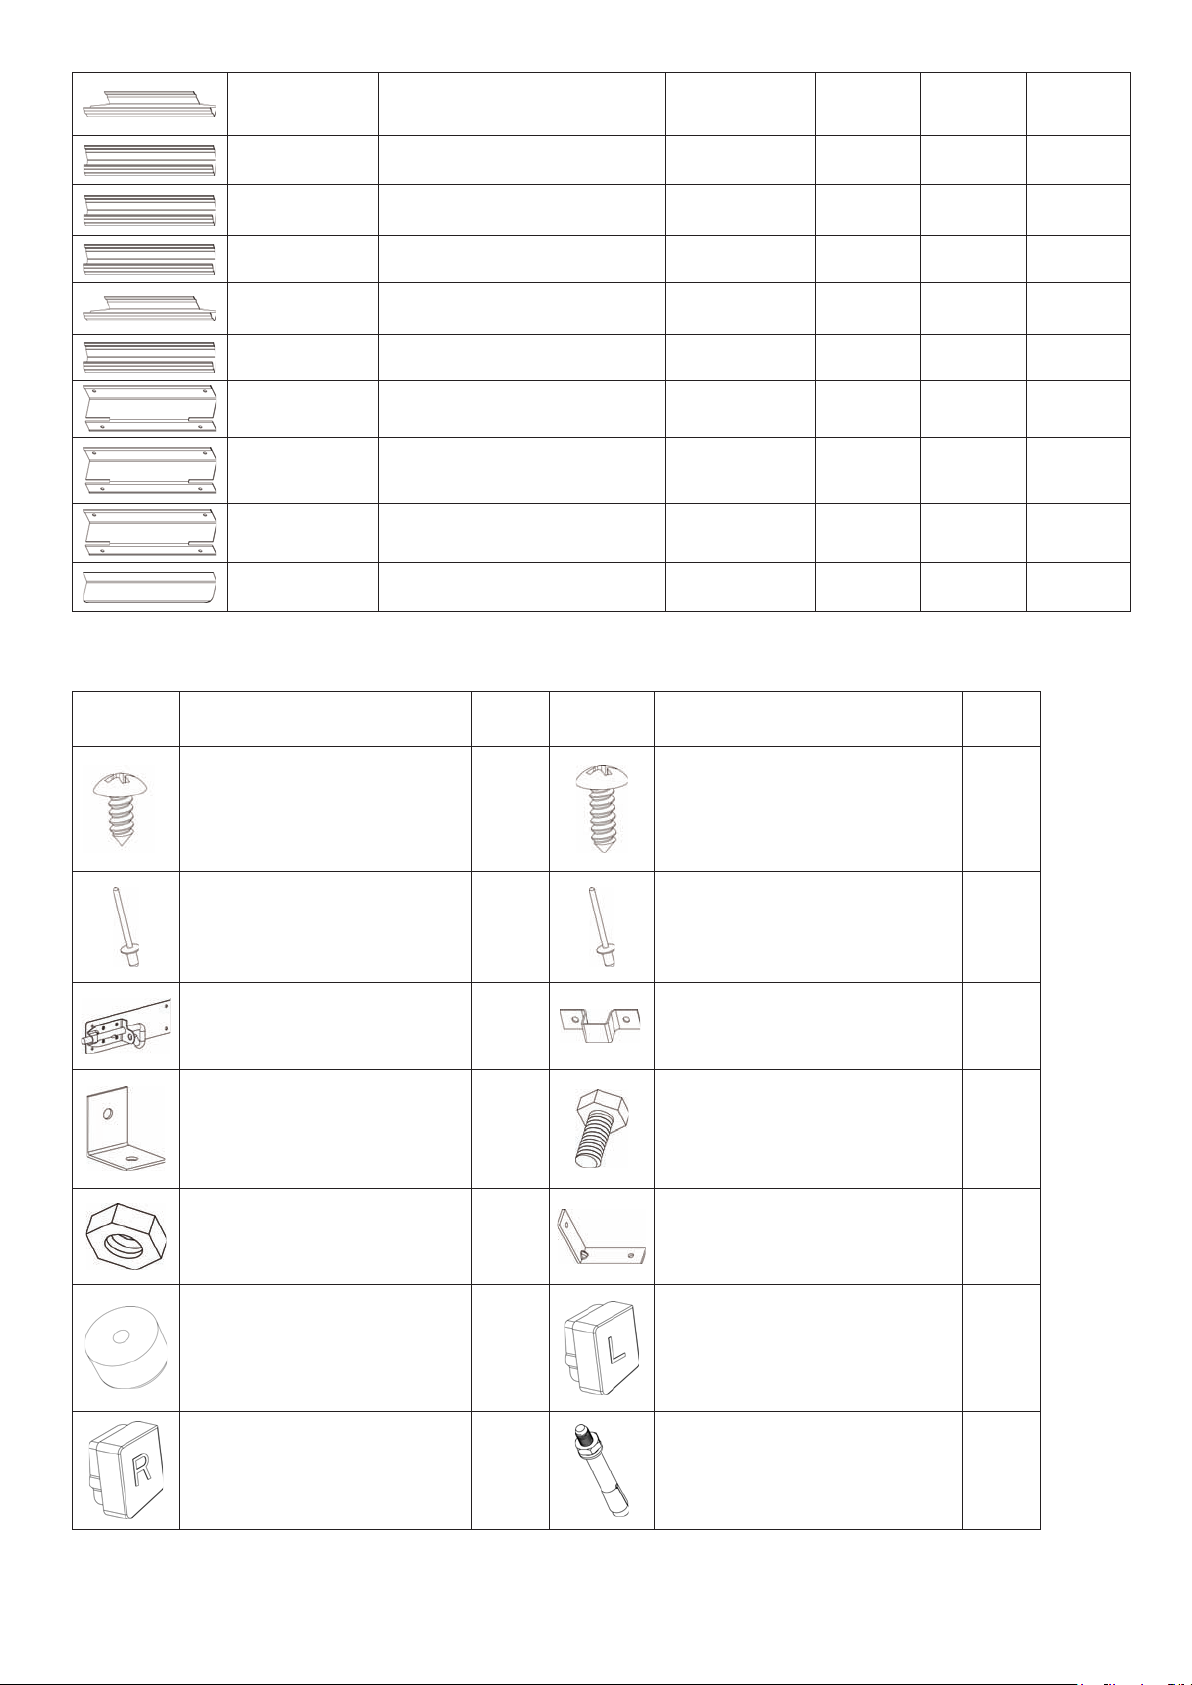
Step 1: Check all parts against the component list.
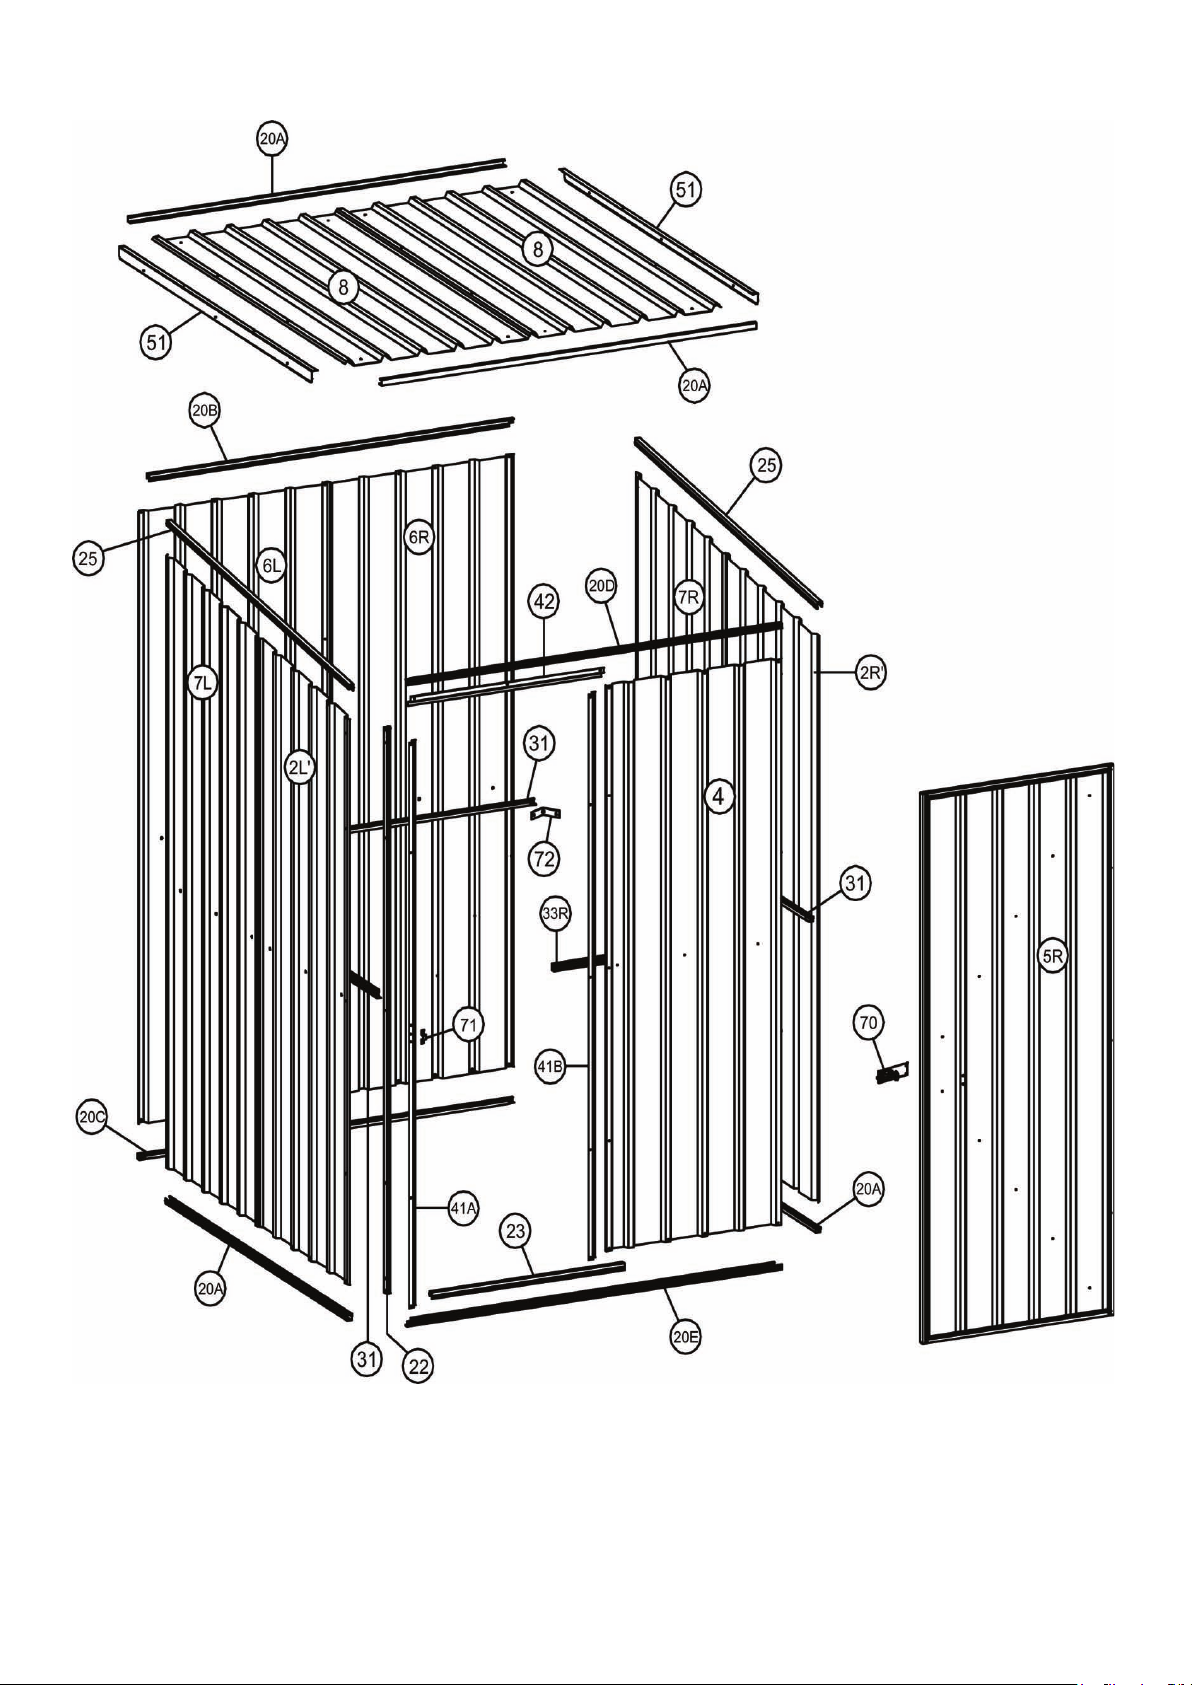
Step 2: Assemble rear wall panels.
Step 3: Assemble side wall panels.
Step 4: Assemble front wall panel.
Step 5: Assemble roof panel.
Step 6: Assemble door.
Step 7: Fit the panels together.
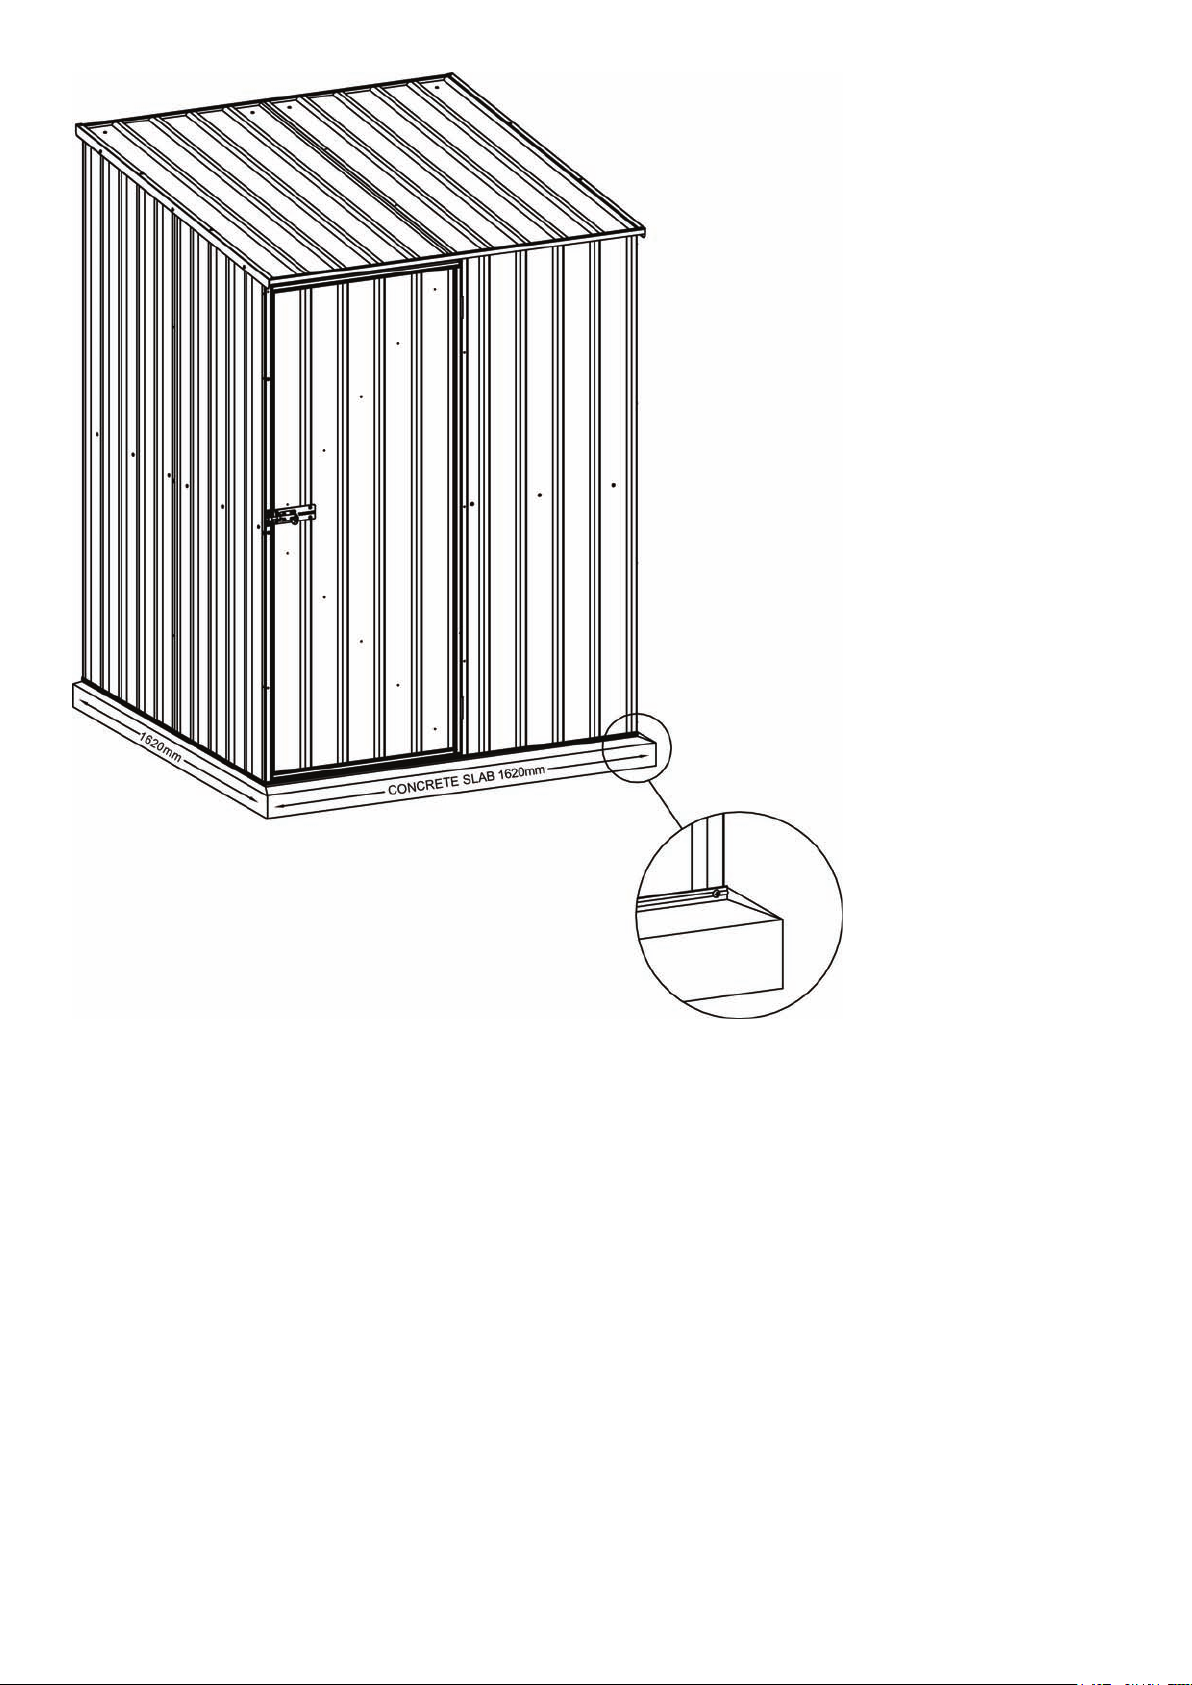
Concrete Slab: It is recommended that your new shed is secured to a concrete slab as per the
specications in this manual.