Sealey ML2 User manual

1. SAFETY INSTRUCTIONS
1.1 GENERAL
Ensure the spotlight is correctly charged before initial use.
WARNING! The lens becomes very hot during operation.
DO NOT cover or block the lens during use.
DO NOT shine directly into eyes.
DO NOT stand the spotlight near any surface or item that may be adversely effected by the heat generated from the lens.
DO NOT allow children to use the spotlight.
DO NOT use if the battery or the spotlight casing is damaged.
DO NOT handle lamp bulb with your fingers. Use a soft lint-free cloth.
Only use the supplied battery and chargers with this spotlight.
When not in use store the spotlight in a safe, dry, childproof location.
1.2 BATTERY SAFETY INSTRUCTIONS
WARNING! Powered by a sealed lead-acid battery which is dangerous if not handled with care to avoid damage, fire, corrosion or
personal injury.
Charge battery prior to first use. The battery pack will have been shipped in a low charge state.
Use only the charger provided to charge the battery.
DO NOT charge battery when room temperature is below 10°C (50°F) or above 40°C (104°F).
DO NOT attempt recharging the battery by means of an engine generator or a DC power source (other than with in-car charger provided).
DO NOT short-circuit the battery by linking both terminals with a metal object, or your fingers etc.
DO NOT store the battery (or spotlight) in locations where the temperature may exceed 40°C (104°F) such as outside sheds, above heaters,
or metal buildings in summer.
WARNING! Dispose of spent battery correctly as it contains acid.
DANGER! DO NOT attempt to dismantle the battery pack.
For safety and environmental reasons DO NOT discard in domestic waste or by burning. ONLY discard or recycle according to local waste
authority regulations.
WARNING! DO NOT allow a leaking battery to come into contact with your skin. If you come into contact with battery fluid take
immediate action:
a) Skin contact: Wash immediately with soap and water.
b) Eye contact: Flush eye immediately with cool, clean running water for at least 15 minutes and seek immediate medical attention.
1.3 ELECTRICAL MAINS POWER SAFETY
ONLY USE THE SUPPLIED CHARGER PLUG (FIG.1.2) FOR CHANGING BATTERY FROM THE MAIN ELECTRICAL POWER SUPPLY.
WARNING! It is the user’s responsibility to read, understand and comply with the following electrical instructions:
You must ensure the risk of electric shock is minimised by the installation of appropriate safety devices. An RCCB (Residual Current Circuit
Breaker) should be incorporated in the main distribution board. We also recommend that an RCD (Residual Current Device) is used with all
electrical products, particularly portable equipment which is plugged into an electrical supply not protected by an RCCB. You must also read
and understand the following instructions concerning electrical safety.
1.3.1 The Electricity At Work Act 1989 requires all portable electrical appliances, if used on business premises, to be tested by a qualified
electrician, using a Portable Appliance Tester (PAT), at least once a year.
1.3.2 The Health & Safety at Work Act 1974 makes owners of electrical appliances responsible for the safe condition of the
appliance, and the safety of the appliance operator. If in any doubt about electrical safety, contact a qualified electrician.
1.3.3 You must ensure that you:
Inspect the charger (fig.1.2) plug, cable and adaptor (C) for wear and damage to ensure items are safe before connecting to the mains
power supply. If worn or damaged DO NOT use.
Check supply circuit is protected against short circuit and overload.
IMPORTANT: Check that the voltage marked on the charger plug is the same as the power supply to be used.
Uncoil the power cable between charger and plug.
DO NOT pull charger power lead, or pull the charger plug from the mains
socket by the power lead.
DO NOT use any other type of mains charger with this product.
DO NOT try to open or dis-assemble the charger plug.
DO NOT use charger plug to charge or power any other electrical item.
DO NOT get charger wet, or use in wet, damp conditions (for indoor use only).
WARNING!NEVER substitute a standard 13Amp 3 pin plug, or any other type
of plug, for the charger plug.
Cable extension reels: If a cable extension reel is used it should be fully
unwound before connection. A cable reel with an RCD fitted is recommended
since any product which is plugged into the cable reel will be protected.
1.4 12V VEHICLE CHARGE ADAPTOR
ONLY USE THE SUPPLIED DC ADAPTOR (fig.1.1) FOR CONNECTING TO
A VEHICLE 12V SOCKET. The adaptor will reduce voltage for 6V charging.
Apply safety instruction 1.3.3 where applicable and read 2.5 for use.
Thank you for purchasing a Sealey Product. Manufactured to a high standard this product will, if used according to these instructions and properly maintained, give you
years of trouble free performance.
IMPORTANT: PLEASE READ THESE INSTRUCTIONS CAREFULLY. NOTE THE SAFE OPERATIONAL REQUIREMENTS, WARNINGS AND CAUTIONS. USE
THIS PRODUCT CORRECTLY AND WITH CARE FOR THE PURPOSE FOR WHICH IT IS INTENDED. FAILURE TO DO SO MAY CAUSE DAMAGE AND/
OR PERSONAL INJURY AND WILL INVALIDATE THE WARRANTY. PLEASE KEEP INSTRUCTIONS SAFE FOR FUTURE USE.
INSTRUCTIONS FOR:
RECHARGEABLE
HALOGEN SPOTLIGHT
MODEL No: ML2
MainsCharger........ML2.C
Car Charger .........ML2.CC
Charger Adaptor ......ML2.CA
Battery Pack .........ML2BP
fig.1
Original Language Version ML2 Issue: 3 - 20/12/11

3.1 CHANGING THE LAMP BULB
3.1.1 Disconnect the battery pack from spotlight and wait until the unit cools before attempting
to open the back.
3.1.2 Remove screws located at the top and bottom of the front rubber cover (fig.2.S).
3.1.3 Remove cover (fig.2.R) and slide the reflective cone out of the assembly.
3.1.4 Pinch the wire clip securing the bulb to release.
3.1.5 Replace the bulb and re-assemble in reverse order.
3.2 CLEANING
Keep the spotlight clean. Do not use abrasives or solvents.
3. MAINTENANCE
2. INTRODUCTION AND OPERATION
2.2 OPERATING
WARNING! Ensure you read, understand and apply safety instructions before use.
IMPORTANT WARRANTY INFORMATION:
the battery pack fitted to this cordless tool is considered to be a consumable item and its
ability to accept charge will reduce over time. We will warranty it against mechanical
and electrical defect for a period of one year - this does not cover fair wear and tear. If the
battery is not properly charged before first use, or regularly conditioned, its capacity will
diminish. Under these circumstances we will not replace the battery pack even if it is less
than one year old.
2.2.1 Charge the battery for 12-14 hours before first use. The battery pack will have been shipped
in a low charge state.
2.2.2 Turn spotlight ON and OFF by the trigger at the top of the handle. To lock the trigger use the
switch situated to the side of the trigger.
DO NOT completely discharge the battery before re-charging as this will shorten battery life.
To test the battery life press the button on the back of the unit. Green indicates the spotlight
is fully charged, red indicates that the battery is low.
2.2.3 There is a map reading LED located on the underside of the lamp unit. To initiate the LED
simply press the button on the rear of the LED unit.
2.3 BATTERY CHARGING
WARNING! Ensure you read, understand and apply safety instructions relating to the
battery and charger before use.
2.4 MAINS POWER CHARGING
2.4.1 Remove battery (fig.1.B) from spotlight by pressing side buttons to release.
2.4.2 Stand the battery on a safe flat surface and place the charger adaptor (fig.1.C) over the
battery connector.
Note: The battery is designed to fit into the charger one way only. This is to ensure that the positive
(+) and negative (-) polarities correspond. Align the + and - polarity marks on the base of the
battery with the + and - marks on the charger, insert the battery and press very slightly
downward to seat the battery firmly into the charging base.
WARNING! DO NOT try to force battery into the base with crossed polarities.
2.4.3 Connect the mains adaptor jack to the battery charger jack inlet. Plug into the mains power
supply and switch on.
The green LED will light up indicating that the power is on. The red LED light indicates that
the battery is correctly in contact with the charger and is charging.
2.4.4 Allow to fully charge for 11-12 hours. The red LED will remain on until the battery is removed
from the charger. The green light will remain until the power source is switched off.
2.4.5 Store the charger in a safe, dry location.
2.5 12V VEHICLE PLUG ADAPTOR
2.5.1 Remove battery (item B) from spotlight by pressing side buttons to release.
2.5.2 Stand the battery on a safe flat surface and place the charger adaptor (fig.1.C) over the battery connector.
Note: The battery is designed to fit into the charger one way only. This is to ensure that the positive (+) and negative (-) polarities
correspond. Align the + and - polarity marks on the base of the battery with the + and - marks on the charger, insert the battery and press
very slightly downward to seat the battery firmly into the charging base.
2.5.3 Plug the 12V vehicle plug adaptor into the charger adaptor inlet, and plug the other end of adaptor into vehicle accesory socket.
2.5.4 The charger LED lights will display as mentioned in 2.4.3. Allow approximately 9 -10 hours for charging.
2.5.5 When fully charged, unplug the adaptor from the vehicle socket and charger unit.
2.5.6 Store the adaptor in a safe, dry location.
Note: Charging the spotlight from a 12 Volt vehicle socket will drain the vehicle battery.
fig.3
2.1 INTRODUCTION
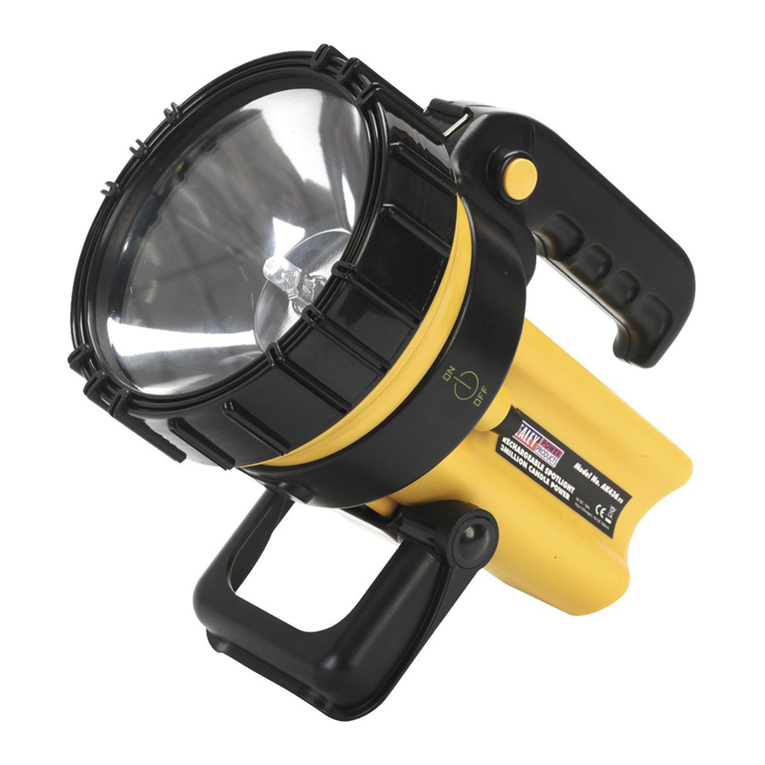
Tough, aluminium bodied spotlight with integral LED map-reading light and heavy duty rubber impact guards. Ø90mm Lens and halogen
bulb produce 2-million candle power of intense white light, suitable for a variety of industrial, domestic and leisure applications. Features
slide dimmer switch, LED battery status display and locking power switch. 6Volt 4Ah battery gives around 25 minutes of continuous
operation. Supplied with in-vehicle charger and mains powered battery charger.
Replacement Bulb................... ML2.01
Mains Charger ......................ML2.C
Car Charger .......................ML2.CC
Charger Adaptor ....................ML2.CA
Battery Pack ........................ML2BP
fig.2
NOTE: It is our policy to continually improve products and as such we reserve the right to alter data, specifications and component parts without prior notice.
IMPORTANT: No liability is accepted for incorrect use of this product.
WARRANTY: Guarantee is 12 months from purchase date, proof of which will be required for any claim.
INFORMATION: For a copy of our latest catalogue and promotions call us on 01284 757525 and leave your full name and address, including postcode.
01284 757500
01284 703534
sales@sealey.co.uk
Sole UK Distributor, Sealey Group,
Kempson Way, Suffolk Business Park,
Bury St. Edmunds, Suffolk,
IP32 7AR
www.sealey.co.uk
Web
email
Original Language Version ML2 Issue: 3 - 20/12/11
PARTS FOR: ML2
Other Sealey Spotlight manuals

Sealey
Sealey AK435.V3 User manual

Sealey
Sealey LED140 User manual

Sealey
Sealey Power Products LED437 User manual

Sealey
Sealey AK437.V2 User manual

Sealey
Sealey LED439 User manual

Sealey
Sealey AK437.V3 User manual

Sealey
Sealey AK437.V2 User manual

Sealey
Sealey LED140 User manual

Sealey
Sealey LED438 User manual

Sealey
Sealey Power Products LED436.V2 User manual
Popular Spotlight manuals by other brands

Robus
Robus TROY RTY1030-01 quick start guide

West Marine
West Marine 17335084 owner's manual

Black & Decker
Black & Decker 3 manual

ETC
ETC Source Four LED Series Assembly guide

as-Schwabe
as-Schwabe 46408 Abbreviated operating instructions

Larson Electronics
Larson Electronics Golight 51494 Instruction guide