manuals.online logo
Brands
  1. Home
  2. •
  3. Brands
  4. •
  5. Sealey
  6. •
  7. Water Pump
  8. •
  9. Sealey WPC100P User manual

Sealey WPC100P User manual

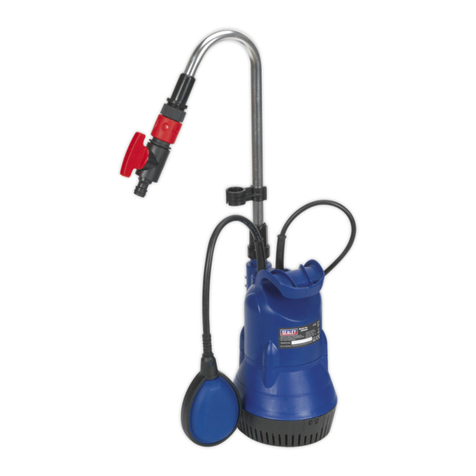
SUBMERSIBLE WATER PUMP AUTOMATIC
100LTR/MIN, 183LTR/MIN, 217LTR/MIN
MODEL NO’S: WPC100P, WPC150P, WPC235P
Thank you for purchasing a Sealey product. Manufactured to a high standard, this product will, if used according to these instructions,
and properly maintained, give you years of trouble free performance.
IMPORTANT: PLEASE READ THESE INSTRUCTIONS CAREFULLY. NOTE THE SAFE OPERATIONAL REQUIREMENTS, WARNINGS & CAUTIONS. USE
THE PRODUCT CORRECTLY AND WITH CARE FOR THE PURPOSE FOR WHICH IT IS INTENDED. FAILURE TO DO SO MAY CAUSE DAMAGE AND/OR
PERSONAL INJURY AND WILL INVALIDATE THE WARRANTY. KEEP THESE INSTRUCTIONS SAFE FOR FUTURE USE.
1. SAFETY
1.1. ELECTRICAL SAFETY
WARNING! It is the user’s responsibility to check the following:
Check all electrical equipment and appliances to ensure that they are safe before using. Inspect power supply leads, plugs and
all electrical connections for wear and damage. Sealey recommend that an RCD (Residual Current Device) is used with all electrical
products. You may obtain an RCD by contacting your local Sealey stockist.
If the pump is used in the course of business duties, it must be maintained in a safe condition and routinely PAT (Portable Appliance
Test) tested.
Electrical safety information, it is important that the following information is read and understood.
1.1.1. Ensure that the insulation on all cables and on the appliance is safe before connecting it to the power supply.
1.1.2. Regularly inspect power supply cables and plugs for wear or damage and check all connections to ensure that they are secure.
1.1.3. IMPORTANT: Ensure that the voltage rating on the appliance suits the power supply to be used and that the plug is tted with the
correct fuse - see fuse rating in these instructions.
8DO NOT pull or carry the appliance by the power cable.
8DO NOT pull the plug from the socket by the cable.
8DO NOT use worn or damaged cables, plugs or connectors. Ensure that any faulty item is repaired or replaced immediately by a
qualied electrician.
1.1.4. This product is tted with a BS1363/A 13 Amp 3 pin plug.
If the cable or plug is damaged during use, switch the electricity supply and remove from use.
Ensure that repairs are carried out by a qualied electrician.
Replace a damaged plug with a BS1363/A 13 Amp 3 pin plug. If in doubt contact a qualied electrician.
a) Connect the GREEN/YELLOW earth wire to the earth terminal ‘E’.
b) Connect the BROWN live wire to the live terminal ‘L’.
c) Connect the BLUE neutral wire to the neutral terminal ‘N’.
Ensure that the cable outer sheath extends inside the cable restraint and that the restraint is tight.
Sealey recommend that repairs are carried out by a qualied electrician.
1.2. GENERAL SAFETY
WARNING! Pump must be used in accordance with Health & Safety, government, local authority, and
water authority rules and regulations.
9Familiarise yourself with application and limitations, as well as the specific potential hazards peculiar to
the pump.
WARNING! Disconnect the pump from the mains power before changing accessories, servicing or performing any maintenance.
9Maintain the pump in good condition (use an authorised service agent). Keep the pump clean.
9Replace or repair damaged parts. Use genuine parts only. Unauthorised parts may be dangerous and will invalidate the warranty.
9If the bottom of the water container is covered with sludge, sand, gravel or mud etc, suspend the pump or place it on a raised base to
operate above the solid matter. Sand and such substances will reduce working life of pump, and invalidate your warranty.
9In swimming pools, fish ponds, etc, ensure location is clear of people and animals, including removal of fish from pond.
NOTE: this pump is not designed for continuous use in a fish pond or similar water feature or display.
8DO NOT operate the pump if any parts are damaged or missing as this may cause failure and/or possible personal injury.
8DO NOT use the pump for any purpose other than for that which it is designed.
8DO NOT use to pump, chemicals, fuels, salt water, explosive, corrosive, inflammable or health-hazardous substances, dangerous liquids
or faecal matter.
8DO NOT insert hands into the mouth of the pump as this could lead to injury.
8DO NOT use to pump septic tanks or settling pits. DO NOT pump any liquids other than water.
8DO NOT use with liquids containing abrasive materials (e.g. sand) or containing mixtures of dirt, sand, mud or clay.
8DO NOT operate the pump out of water. The pump pick up area must be completely submerged during operation.
8DO NOT exceed the maximum submersible depth - see specifications.
8DO NOT operate the pump during freezing temperatures. DO NOT leave the pump in water that may freeze.
8DO NOT pump liquids over 35° C in temperature.
8DO NOT use for pumping sea water or inflammable, corrosive, explosive or dangerous liquids.
8DO NOT carry the pump by its electrical cable, or outlet pipe. Use the handle only.
8DO NOT touch the mains plug with wet hands.
WPC100P, WPC150P, WPC235P| Issue 2 (3) 26/03/19
Original Language Version
© Jack Sealey Limited
Recommended fuse ratings:
WPC100P = 5Amp
WPC150P & WPC235P
= 13Amp
Refer to
instruction
manual
8DO NOT kink, crush, drag or drive over the mains cable and protect it from sharp edges oil and heat.
8DO NOT use extension cables.
9Always disconnect from the mains supply before attempting any maintenance etc.
9When not in use switch off pump and remove plug from power supply. Rinse pump, drain out any water and store in a frost free, safe
location.
WARNING! DO NOT allow uncontrolled discharge of contaminated water which would pollute the environment.
2. INTRODUCTION
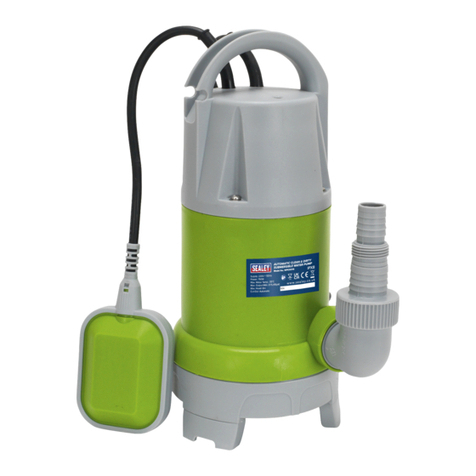
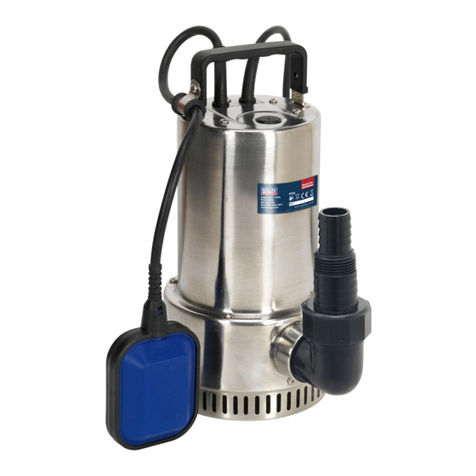
Manufactured from heavy-duty corrosion resistant materials with polypropylene motor case and base cover. Fitted with an automatic cut-out,
which can be set at multiple heights using an innovative cable xed mounting bracket. Minimum water depth of just 5mm. Designed for clean
water although these pumps will accept small particles up to 5mm. Suitable for the effective drainage of cellars, sinks, cisterns, baths and the
general transfer of water.
3. SPECIFICATION
4. INSTALLATION
4.1. Attach a sufciently long and strong rope to the handle
before rst use. The pump is submerged into the liquid
on this holding rope and can also be carried with it as
well as the handle.
NOTE: DO NOT suspend unit by the power cable.
NOTE: With continuous use of the pump, the condition
of the rope must be regularly checked as it can decay
and break over time.
4.2. CONNECT PRESSURE PIPE
4.2.1. For occasional use, use a suitable water hose.
4.2.2. The use of rigid pipes with a non return valve is
recommended for use at a xed location. This prevents
return ow of liquid when switching off.
4.2.3. Screw the pressure line onto the pressure connection.
4.2.4. All threaded connections must be sealed with thread
sealing tape.
4.2.5. When using a hose, screw a suitable hose adaptor onto
the pressure connection. Push the hose rmly onto the
hose adaptor and secure with a hose clamp.
4.3. INSTALLATION
4.3.1. The pump needs an area of at least 50cm x 50cm (the oat switch must be able to move freely so that it functions properly.
4.3.2. The pump can be submerged under water to the submerged operating depth of 7metres.
4.3.3. Install the pump so that the suction openings cannot be blocked by foreign bodies (place the appliance on a rm, even base if
necessary.
4.3.4. Ensure that the pump is stable.
8DO NOT lift the pump with the cable or the pressure hose as these are not designed for the tensile stress from the weight of the pump.
4.3.5. Submerge the pump at an angle into the liquid to be delivered, so that no air pocket forms on the underside of the appliance. Suction
would be prevented by this. Once the pump is submerged, it can be righted again.
4.3.6. Leave the pump at the bottom of the liquid container. Use a strong rope attached to the carrying handle of the pump for lowering.
4.3.7. Tighten the end of the rope rmly after lowering.
4.3.8. The pump can also be operated whilst suspended on a rope.
NOTE: For operation whilst suspended on the rope, DO NOT operate without the pressure hose. Avoid the pump twisting round its
longitudional axis.
5. OPERATION
5.3.1. Connect the pump to mains supply.
WARNING! The oat switch must be able to move so that the submersible pump cannot run dry, doing so would cause damage to the
unit.
5.3.2. The oat switch can be set at different heights by afxing it to a different slot on the unit’s body, see picture above.
Original Language Version
© Jack Sealey Limited
Model no WPC100P WPC150P WPC235P
Cut out Automatic Automatic Automatic
Outlet OD 32mm 32mm 38mm
Maximum output/min 100ltr (22gal) 183ltr (40gal) 217ltr (48gal)
Maximum output/hr 6000ltr (1320gal) 11000ltr (2420gal) 13000ltr (2860gal)
Maximum head 6mtr 8.5mtr 8.5mtr
Maximum water depth 7mtr 7mtr 7mtr
Minimum water depth 5mm 5mm 5mm
Maximum particle size 5mm 5mm 5mm
Motor power 250W 550W 750W
Supply 230V 230V 230V
Weight 4.09kg 4.98kg 5.02kg
WPC100P, WPC150P, WPC235P| Issue 2 (3) 26/03/19
6. MAINTENANCE
6.1. BEFORE EVERY USE:
• check casing and cables for damage
• check oat switch for damage - lift and shake the switch to check the free movement of the contained metal balls.
6.2. AFTER EVERY USE:
• clean the appliance: rinse with clean water, remove stubborn contamination with a brush and detergent. Submerge the pump in a
container with clean water and switch on for a short time to rinse the inside of the pump. Clean the suction area, see below.
6.3. CLEANING THE SUCTION AREA
6.3.1. Clean all accessible parts of the inside of the casing. Remove bres which have wound round the rotor shaft by opening the
pressure connection. Remove stubborn contamination with a brush and detergent.
NOTE: Before using the pump again, rst ‘soak’ it so that any possible dirt residues DO NOT block the pump.
7. STORAGE
7.1. If there is a risk of frost, dismantle the pump and accessories, clean and store them in a place protected from frost.
8. TROUBLESHOOTING
Fault Cause Solution
Pump does not run. No mains voltage? Check cables, plug, socket and fuse.
Motor overheats due to:
- liquid temperature too high
- pump blocked by foreign bodies
Eliminate the cause of the overheating of the liquid (max.
temperature of liquid able to be pumped is 35°C).
Clear the suction area.
Residual current circuit breaker (RCCB)
triggered.
Activate RCCB.
Contact qualied electrician if RCCB triggers again.
Motor defective. Contact Sealey service.
Pump runs but does not pump. Suction openings blocked. Rectify blockage.
Pump draws in air. Keep the pump at an angle while submerging.
Switch the pump on and off several times in order to expel
air.
Pump blocked by foreign bodies. Clean the pump suction area.
Delivery rate low. Delivery height too great. Comply with specications (8m max. head)
Pressure line diameter too small. Use pressure line with larger diameter.
Pressure line blocked. Rectify blockage.
Suction openings blocked. Clean suction opening.
Pressure line kinked. Straighten pressure line.
Pressure line leaks. Seal pressure line, tighten threaded connections
Pump runs very loudly. Pump draws in air. Ensure there is sufcient liquid present.
Keep the pump at an angle while submerging.
Original Language Version
© Jack Sealey Limited WPC100P, WPC150P, WPC235P| Issue 2 (3) 26/03/19
Sealey Group, Kempson Way, Suffolk Business Park, Bury St Edmunds, Suffolk. IP32 7AR
01284 757500 01284 703534 sales@sealey.co.uk www.sealey.co.uk
Note: It is our policy to continually improve products and as such we reserve the right to alter data, specifications and component parts without prior
notice.
Important: No Liability is accepted for incorrect use of this product.
Warranty: Guarantee is 12 months from purchase date, proof of which is required for any claim.
ENVIRONMENT PROTECTION
Recycle unwanted materials instead of disposing of them as waste. All tools, accessories and packaging should be sorted, taken to
a recycling centre and disposed of in a manner which is compatible with the environment. When the product becomes completely
unserviceable and requires disposal, drain any fluids (if applicable) into approved containers and dispose of the product and fluids
according to local regulations.
WEEE REGULATIONS
Dispose of this product at the end of its working life in compliance with the EU Directive on Waste Electrical and Electronic Equipment
(WEEE). When the product is no longer required, it must be disposed of in an environmentally protective way. Contact your local solid
waste authority for recycling information.

This manual suits for next models

2

Other Sealey Water Pump manuals

Sealey RE83/840.V2 User manual

Sealey

Sealey RE83/840.V2 User manual

Sealey PW12CC User manual

Sealey

Sealey PW12CC User manual

Sealey WPP1750S User manual

Sealey

Sealey WPP1750S User manual

Sealey wpd133a User manual

Sealey

Sealey wpd133a User manual

Sealey AK452X.V4 User manual

Sealey

Sealey AK452X.V4 User manual

Sealey SWP30 User manual

Sealey

Sealey SWP30 User manual

Sealey WPD235A.V2 User manual

Sealey

Sealey WPD235A.V2 User manual

Sealey Power PRODUCTS TP96.V2 User manual

Sealey

Sealey Power PRODUCTS TP96.V2 User manual

Sealey TP955.V2 User manual

Sealey

Sealey TP955.V2 User manual

Sealey WPD415.V2 User manual

Sealey

Sealey WPD415.V2 User manual

Sealey AK450DP User manual

Sealey

Sealey AK450DP User manual

Sealey TP6818 User manual

Sealey

Sealey TP6818 User manual

Sealey WPC100 User manual

Sealey

Sealey WPC100 User manual

Sealey TP99.V3 User manual

Sealey

Sealey TP99.V3 User manual

Sealey TP80 User manual

Sealey

Sealey TP80 User manual

Sealey RE83/840.V2 User manual

Sealey

Sealey RE83/840.V2 User manual

Sealey AK4560D.V2 User manual

Sealey

Sealey AK4560D.V2 User manual

Sealey WPP3000S User manual

Sealey

Sealey WPP3000S User manual

Sealey TP80 User manual

Sealey

Sealey TP80 User manual

Sealey TP9424 User manual

Sealey

Sealey TP9424 User manual

Sealey TP98 User manual

Sealey

Sealey TP98 User manual

Sealey AK456 User manual

Sealey

Sealey AK456 User manual

Sealey TP9312 User manual

Sealey

Sealey TP9312 User manual

Sealey TP97 User manual

Sealey

Sealey TP97 User manual

Popular Water Pump manuals by other brands

Sunny pumps Sunny Air Pump instruction manual

Sunny pumps

Sunny pumps Sunny Air Pump instruction manual

Zoeller N153 owner's manual

Zoeller

Zoeller N153 owner's manual

Danfoss APP 21-43 Disassembling and assembling instructions

Danfoss

Danfoss APP 21-43 Disassembling and assembling instructions

Comfort Home IDS Series Installation and operating instructions

Comfort Home

Comfort Home IDS Series Installation and operating instructions

Pentair STA-RITE PRO-Source Plus PSP19S-T02SA-25PSI owner's manual

Pentair

Pentair STA-RITE PRO-Source Plus PSP19S-T02SA-25PSI owner's manual

Blue Angel 50CJW Operating instructions and parts manual

Blue Angel

Blue Angel 50CJW Operating instructions and parts manual

Blue-White FLEXFLO A3 Series operating manual

Blue-White

Blue-White FLEXFLO A3 Series operating manual

Pfeiffer Vacuum TPH 2101 U P manual

Pfeiffer Vacuum

Pfeiffer Vacuum TPH 2101 U P manual

Oase AquaMax Eco Expert 20000 instructions

Oase

Oase AquaMax Eco Expert 20000 instructions

Sprague S-216-J Series Operation and maintenance manual

Sprague

Sprague S-216-J Series Operation and maintenance manual

Flint & Walling CJ103 Series owner's guide

Flint & Walling

Flint & Walling CJ103 Series owner's guide

Agilent Technologies InfinityLab LC Series user manual

Agilent Technologies

Agilent Technologies InfinityLab LC Series user manual

Calpeda MXS 3 Original operating instructions

Calpeda

Calpeda MXS 3 Original operating instructions

Fristam Pumpen FP Series Operator's manual

Fristam Pumpen

Fristam Pumpen FP Series Operator's manual

TriboTec SAO 3P1 instruction manual

TriboTec

TriboTec SAO 3P1 instruction manual

SANICONDENS Best Flat 190 Operating & installation manual
SANICONDENS

SANICONDENS Best Flat 190 Operating & installation manual

Baoding Shenchen YZ35 manual

Baoding Shenchen

Baoding Shenchen YZ35 manual

GPI G8 owner's manual

GPI

GPI G8 owner's manual

manuals.online logo
manuals.online logoBrands
  • About & Mission
  • Contact us
  • Privacy Policy
  • Terms and Conditions

Copyright 2025 Manuals.Online. All Rights Reserved.