manuals.online logo
Brands
  1. Home
  2. •
  3. Brands
  4. •
  5. Sears
  6. •
  7. Water Pump
  8. •
  9. Sears 390.269150 User manual

Sears 390.269150 User manual

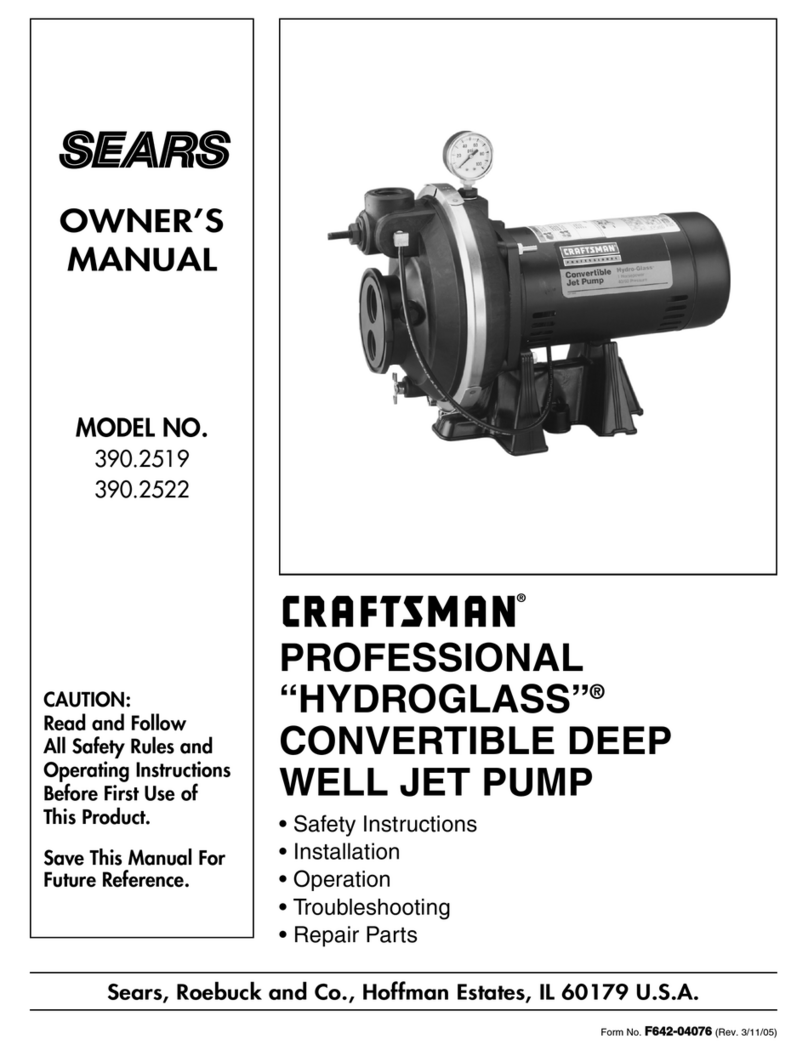
OWNER’S
MANUAL
MODEL NO.
390.269150
CAUTION:
Read and Follow
All Safety Rules and
Operating Instructions
Before First Use of
This Product.
Save This Manual For
Future Reference.
Sears, Roebuck and Co., Hoffman Estates, IL 60179 U.S.A.
• Safety Instructions
• Installation
• Operation
• Maintenace
• Repair Parts
PRINTED IN U.S.A.
PORTABLE
UTILITY PUMP
Form No. F642-9305 (Rev. 9/21/95)
Model No. 390.269150
629 0194
512 0194
Pump out a flooded basement.
Empty a clogged sink or tub.
2
CONTENTS
INTRODUCTION/WARRANTY..........................................2
SAFETY ...............................................................................2
INSTALLATION................................................................3-4
OPERATION........................................................................4
MAINTENANCE ...............................................................4-5
PARTS .................................................................................5
INTRODUCTION
Please read our instructions before you install and use your
new pump; this will help you obtain full value and good ser-
vicefromit. Itwillalso helpyouavoid needlessservicecosts
that result from causes we cannot control and cannot cover
in our warranty.
READ AND FOLLOW
SAFETY INSTRUCTIONS!
Carefully read and follow all safety instructions in
this manual or on pump.
This is the safety alert symbol. When you see this
symbol on your pump or in this manual, look for one of the
following signal words and be alert to the potential for per-
sonal injury!
warns about hazards that will cause serious
personal injury, death or major property damage if ignored.
warnsabouthazards thatwill or can causese-
rious personal injury, death or major property damage if ig-
nored.
warns about hazards that will or can cause
minor personal injury or property damage if ignored.
The word NOTICE indicates special instructions which are
important but not related to hazards.
1. To avoid risk of serious bodily injury and property dam-
age, read safety instructions carefully before installing
pump.
2. Follow local and/or national plumbing and electrical
codes when installing pump.
INSPECTION
This pump was thoroughly inspected, tested, and packaged
before shipment. Report any damage immediately to the
store where it was purchased.
INSTALLATION
1. Locatepumpas closeaspossible towaterbeing pumped.
Pump must be less than 10 feet (3m) above reservoir and
less than 25 feet (7.6m) to one side of reservoir.
2. To help priming, pour contents of one mineral oil packet
(suppliedwithpump)ininletport.Ifpackets are allgone,
cooking oil may be substituted.
3. Mount pump solidly on a stable platform.
NOTICE: Protect motor from rain or washdown; it is en-
closed but not waterproof.
4. Make sure washer in inlet fitting is clean and in good con-
dition. If this joint leaks air, pump will not operate.
5. Install strainer to protect pump from large solids.
6. Attach inlet and discharge hoses to pump. Minimum di-
ameter of inlet hose is 1/2"(12.7mm). Be sure inlet hose
is airtight and that both hoses are free of kinks and re-
strictions.
7. When pumping from a well or stream, place suction end
of inlet hose a few inches above the bottom to prevent
the pump from sucking sand, silt or pebbles.
FULL ONE YEAR WARRANTY ON SEARS PORTABLE UTILITY PUMP
During the first year after the date of purchase, Sears will repair or replace this pump, free of charge, if defective in materials or
workmanship.
This warranty does not cover repairs on replacement parts necessary because of abuse or negligence including failure to in-
stall, adjust and operate this pump according to the instructions in the owner’s manual.
LIMITATION OF LIABILITY
SEARSWILLNOTBELIABLEFORLOSSORDAMAGETO PROPERTY OR ANY INCIDENTAL ORCONSEQUENTIALLOSS
OR EXPENSE FROM PROPERTY DAMAGE DUE DIRECTLY OR INDIRECTLY FROM THE USE OF THIS PRODUCT.
Some states do not allow the exclusion or limitation of incidental or consequential damages, so the above limitation or exclu-
sion may not apply to you.
WARRANTY SERVICE IS AVAILABLE BY SIMPLY CONTACTING THE NEAREST SEARS SERVICE CENTER/DEPART-
MENT IN THE UNITED STATES of AMERICA.
For service outside the U.S.A., contact your local Sears Service Center or store.
This warranty gives you specific legal rights, and you may also have other rights which vary from state to state.
Sears, Roebuck and Co., Dept. 817 WA, Hoffman Estates, IL 60179
INSTALLATION / OPERATION / MAINTENANCE
8. Plugmotor cordinto a3-wire grounded 115 volt A.C. out-
let 60 Hz., protected by a 15 amp fuse.
Use this pump only on 115 volt circuit.
Pump is equipped with an approved 3-
conductor cord and 3-prong, grounding-
type plug. To reduce the risk of electric
shock, be certain that it is connected to a properly
grounded, grounding-type receptacle.
Where a 2-prong wall receptacle is encountered, it must be
replaced with a properly grounded 3-prong receptacle in-
stalled in accordance with the National Electrical Code and
local codes and ordinances.
NOTICE: Pump depends on water being pumped for lubri-
cation. DO NOT RUN PUMP DRY!
9.Pumpshould primewithin30 seconds.If not,disconnect
motor and do the following:
a. Disconnect inlet hose at pump. Pour contents of an-
other mineral oil packet into inlet port.
b.Check washers in inlet hose and make sure inlet line is
airtight.
c. Make sure inlet and discharge line are free of kinks and
restrictions.
d. Make sure pump is less than 10' (3m) above and 25'
(7.6m) to one side of water source.
10.On older pumps that do not prime within 30 seconds,
check step 9 above. If pump still fails to prime, do the fol-
lowing:
a. If impeller is worn, replace it.
b.If pump head is internally worn, replace it.
NOTICE: When using the Puddle Gulper, inspect washer in
garden hose fitting to be sure it is in good condition. Attach
Puddle Gulper to end of inlet line and place at lowest point
of area to be pumped. Be sure connections are air tight.
Puddle Gulper requires at least 1/8" (3.2mm) minimum
water depth to prime.
OPERATION
NOTICE: Do not run pump dry. Pump depends on water
being pumped for lubrication. If pump does not prime in
less than 30 seconds, recheck installation and plumbing.
Pump water only with this pump.
Pumpwilldeliver 285gallons(1079L) perhour(4.75 gallons
(18L) per minute) when discharge is not restricted. As dis-
charge is shut off and discharge pressure increases, capacity
will drop off. Pump is UL listed up to 28' of head or 12 psi
(8.5M or 82 kPa) discharge pressure.
Motor will heat when operated continuously. Motor case
temperature may reach 180° to 190°F (82° to 88°C) during
normal continuous operation.
Risk of burns from motor case during
normal operation. Do not touch motor when it is operat-
ing or when it is hot. Plug motor cord into 3-wire grounded
115 volt A.C. outlet 60 Hz.
Pump is designed to pump water at room temperature only.
Pump water only with this pump!
MAINTENANCE INSTRUCTIONS
Hazardous voltage. Can shock, burn, or
cause death. Unplug pump before servicing.
BRUSH REPLACEMENT
Replace brushes after 150-200 hours of motor operation.
Check brush condition if motor shows signs of running
slowly or erratically after pump has been in service for a pe-
riod of time.
NOTICE: Brushes are spring loaded. Hold on to covers,
brushes, etc., so that nothing gets lost.
1.Unscrew brush covers on sides of motor. Slide brush
springs and brushes out of motor.
2.Slide new brushes into motor. Brush must slide into
square-cut hole in motor; make sure that curve on brush
end matches curve of commutator (see Figure 1).
3.Replace brush covers. Do not overtighten.
Hazardous
voltage
3
Brush
must enter
square hole.
596 1293 To armature curve
Match brush curve
Figure 1 – Brush Replacement
MAINTENANCE
PUMP OVERHAUL
Step 1 (Figure 2)
A. Remove 4 body screws (Key 1), cover (Key 2), front
wearplate (Key 3), O-Ring (Key 4), and Impeller (Key 5).
B. Clean out inside of pump body.
Step 2 (Figure 3)
A. Remove back wearplate (Key 7) and set aside .
B. If seal is leaking, remove 2 body bolts (Key 6) and pump
body (Key 8, Figure 4).
Step 3 (Figure 4)
A. Remove seal retainer (Key 10) with screwdriver and re-
move seal (Key 9). Install the new seal with lip facing to-
wardimpellersideofpumpbody.Pressseal retainer (Key
10) squarely and firmly into seal bore of body.
B. Check motor shaft for wear under seal area. If grooved or
worn, replace motor.
Step 4 (Figure 5)
A. Attach pump body (Key 8) to motor with 2 body bolts
(Key 6).
B. Installinner wearplate(Key 7) in body bore with unworn
surface toward impeller.
Step 5 (Figure 6)
A. Lightly grease inside of pump housing to ease installation
of impeller (Key 5).
B. Lineup flaton motorshaft withflat inside impeller insert.
C. Push impeller into pump body using clockwise twist to
bend impeller blades in direction of motor rotation.
Step 6 (Figure 7)
A. Install O-Ring (Key 4), front wearplate (Key 3). and cover
(Key No. 2). If front wearplate is worn, reverse plate so
unworn side faces the impeller.
B.Tighten the4 bodyscrews (Key 1), moderately and evenly
atfirst;whenallscrewsaresnug,retighten to fastencover
firmly. Do not overtighten.
4
123 4 598 1293
Replace seal
if leaking.
Remove
wear plate
if worn.
599 1293
65
7 8 9 10 11
Replace motor if
shaft is worn.
601 1293
Figure 2 – Disassembly
Figure 3 – Remove wear plate and set aside.
Figure 4 – Replace motor if shaft is worn.
Install wear plate
with smooth
side out.
5
4
Lightly grease
housing bore with
lithium-based grease
and install impeller. 606 1293
123 607 1293
Figure 5 – Install wear plate.
Figure 6 – Install impeller.
Figure 7 – Reassemble pump.
REPAIR PARTS
5
Typical uses for the Utility Pump:
Pump out a flooded basement.
Empty a clogged sink or tub.
Repair Parts List
•Not Illustrated
Performance
629 0194
512 0194
1 2 3 4 5 6 7 8 9 10 11 610 1293
Key Part
No. Description Qty Part No.
1 #8x5/8 Philister Head Screw 4 SC0004-81
2 End Cover 1 RP0004945
3 Wear Plate - Square 1 RP0004946
4 O-Ring 1 U9-239
5 Impeller 1 RP0001077
6 10-32x1-3/4 Philister Head Screw 2 SC0004-92
7 Wear Plate – Elipse 1 RP0004944
8 Pump Body 1 RP4943-21
9 U Cup Seal 1 16FA019-4
10 Retainer 1 RE00034-9
11 Slinger 1 RP0001616
12 Motor 1 M0015-115
• Brush Kit 1 PKG 201
• Mineral Oil Packet 3 U97-108
• Puddle Gulper 1 RP000349S
• Owner’s Manual 1 F642-9305
Discharge Height in Feet Above Pumping Level
Model 3 10 15 20 30 40
390.269150 5.5 5.0 4.6 4.0 2.5 1.0
}GPM
To Order Parts, Call
Sears Product Service, 1-800-366-7278
6
7
For the repair or replacement parts you need
Call 7 am - 7 pm, 7 days a week
1-800-366-PART
(1-800-366-7278)
For in-home major brand repair service
Call 24 hours a day, 7 days a week
1-800-4-REPAIR
(1-800-473-7247)
For the location of a
Sears Repair Service Center in your area
Call 24 hours a day, 7 days a week
1-800-488-1222
For information on purchasing a Sears
Maintenance Agreement or to inquire
about an existing Agreement
call 9 am - 5 pm, Monday-Saturday
1-800-827-6655
MAINTENANCE
AGREEMENT
America's Repair Specialists
REPAIR SERVICES
America's Repair Specialists
REPAIR SERVICES
America's Repair Specialists
REPAIR SERVICES
OWNER’S
MANUAL
Model No.
390.269150
The model number of
your Portable Utility
Pump will be found on
the pump label.
When requesting service
or ordering parts, always
give the following
information:
• Product Type
• Model Number
• Part Number
• Part Description
Sears, Roebuck and Co., Hoffman Estates, IL 60179 U.S.A.
PORTABLE
UTILTY PUMP

Other Sears Water Pump manuals

Sears 390.304550 User manual

Sears

Sears 390.304550 User manual

Sears 572.826151 User manual

Sears

Sears 572.826151 User manual

Sears Pro-Form R-930 User manual

Sears

Sears Pro-Form R-930 User manual

Sears CRAFTSMAN 390.260292 User manual

Sears

Sears CRAFTSMAN 390.260292 User manual

Sears CRAFTSMAN 390.260293 User manual

Sears

Sears CRAFTSMAN 390.260293 User manual

Sears CRAFTSMAN HYDROGLASS 390.251981 User manual

Sears

Sears CRAFTSMAN HYDROGLASS 390.251981 User manual

Sears 390.250252 User manual

Sears

Sears 390.250252 User manual

Sears CRAFTSMAN 390.303301 User manual

Sears

Sears CRAFTSMAN 390.303301 User manual

Sears 390.260291 User manual

Sears

Sears 390.260291 User manual

Sears Craftsman 390.269451 User manual

Sears

Sears Craftsman 390.269451 User manual

Sears Craftsman 390.284021 User manual

Sears

Sears Craftsman 390.284021 User manual

Sears CRAFTSMAN HYDROGLASS 390.2514 User manual

Sears

Sears CRAFTSMAN HYDROGLASS 390.2514 User manual

Sears HYDRO-GLASS 390.250290 User manual

Sears

Sears HYDRO-GLASS 390.250290 User manual

Sears CRAFTSMAN 390.306061 User manual

Sears

Sears CRAFTSMAN 390.306061 User manual

Sears HYDRO-GLASS 390.262501 User manual

Sears

Sears HYDRO-GLASS 390.262501 User manual

Sears CRAFTMAN PROFESSIONAL HYDROGLASS 390.2519 User manual

Sears

Sears CRAFTMAN PROFESSIONAL HYDROGLASS 390.2519 User manual

Sears 390.305000 User manual

Sears

Sears 390.305000 User manual

Sears 390.304551 User manual

Sears

Sears 390.304551 User manual

Sears 390.250251 User manual

Sears

Sears 390.250251 User manual

Sears HYDRO-GLASS 390.262452 User manual

Sears

Sears HYDRO-GLASS 390.262452 User manual

Sears 390.303300 User manual

Sears

Sears 390.303300 User manual

Sears 390.304692 User manual

Sears

Sears 390.304692 User manual

Sears 390.120600 User manual

Sears

Sears 390.120600 User manual

Sears 572.826140 User manual

Sears

Sears 572.826140 User manual

Popular Water Pump manuals by other brands

Liberty Pumps 404 instruction manual

Liberty Pumps

Liberty Pumps 404 instruction manual

STAR Water Systems UTHALC instructions

STAR Water Systems

STAR Water Systems UTHALC instructions

Bestway PowerTouch owner's manual

Bestway

Bestway PowerTouch owner's manual

Fieldmann FVC 7005-EC manual

Fieldmann

Fieldmann FVC 7005-EC manual

Regulus LK 810 TermoMat 2.0 G ECO instruction manual

Regulus

Regulus LK 810 TermoMat 2.0 G ECO instruction manual

Emerson PENBERTHY GL Installation, operation and maintenance instructions

Emerson

Emerson PENBERTHY GL Installation, operation and maintenance instructions

Pfeiffer Vacuum OKTA 8000 G ATEX operating instructions

Pfeiffer Vacuum

Pfeiffer Vacuum OKTA 8000 G ATEX operating instructions

Champion Power Equipment C44020 Owner's Manual and Operating Instructions

Champion Power Equipment

Champion Power Equipment C44020 Owner's Manual and Operating Instructions

Wacker Neuson PT 2 Operator's manual

Wacker Neuson

Wacker Neuson PT 2 Operator's manual

BUSCH COBRA DS 2610 E Installation and maintenance instructions

BUSCH

BUSCH COBRA DS 2610 E Installation and maintenance instructions

Vito Agro VIGP800 instruction manual

Vito Agro

Vito Agro VIGP800 instruction manual

KNF FK 1100 installation instructions

KNF

KNF FK 1100 installation instructions

Graco Husky 307 Instructions-parts list

Graco

Graco Husky 307 Instructions-parts list

Tuthill C2E Installation and service instructions

Tuthill

Tuthill C2E Installation and service instructions

Edwards XDS100B instruction manual

Edwards

Edwards XDS100B instruction manual

GORMAN-RUPP PUMPS 83B2-B Installation, operation, and maintenance manual with parts list

GORMAN-RUPP PUMPS

GORMAN-RUPP PUMPS 83B2-B Installation, operation, and maintenance manual with parts list

Regulus CSE TV ZV G70 3/4F Installation and operation manual

Regulus

Regulus CSE TV ZV G70 3/4F Installation and operation manual

Argos HT-303 manual

Argos

Argos HT-303 manual

manuals.online logo
manuals.online logoBrands
  • About & Mission
  • Contact us
  • Privacy Policy
  • Terms and Conditions

Copyright 2025 Manuals.Online. All Rights Reserved.