manuals.online logo
Brands
  1. Home
  2. •
  3. Brands
  4. •
  5. Sears
  6. •
  7. Water Pump
  8. •
  9. Sears CRAFTSMAN 390.269152 User manual

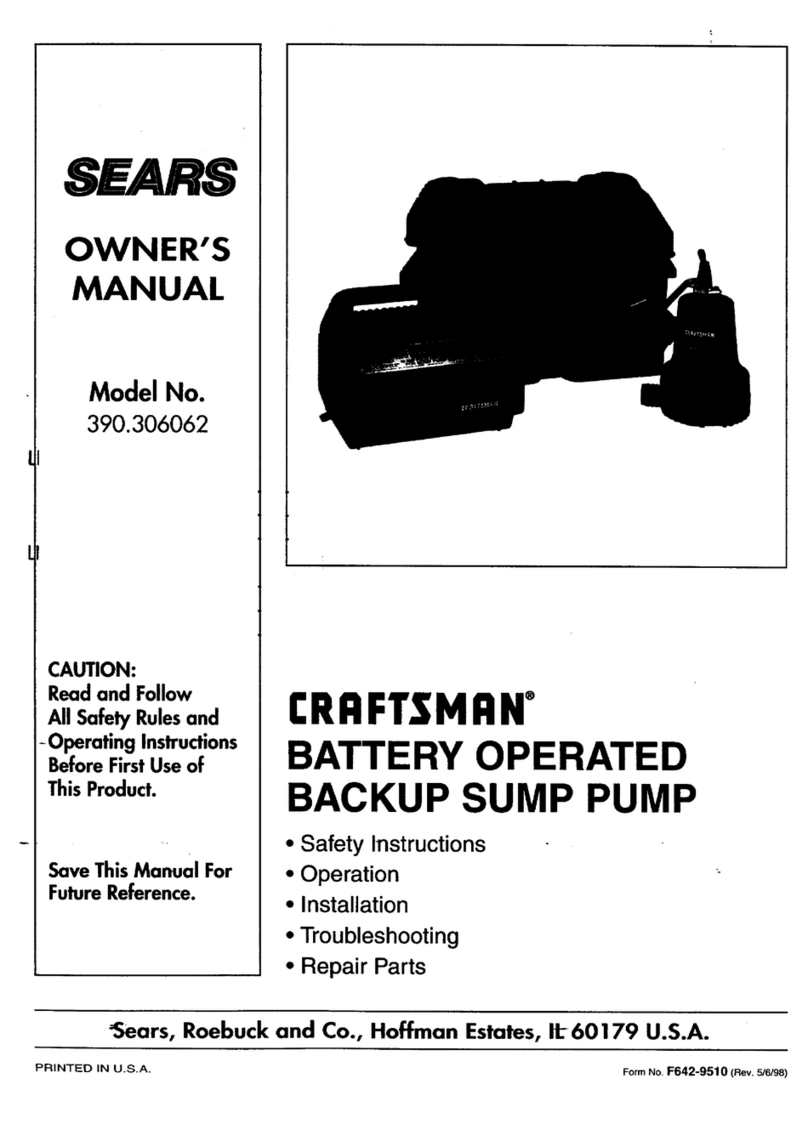
Sears CRAFTSMAN 390.269152 User manual

OWNER’S
MANUAL
MODEL NO.
390.269152
CAUTION:
Read and Follow
All Safety Rules and
Operating Instructions
Before First Use of
This Product.
Save This Manual For
Future Reference.
Sears, Roebuck and Co., Hoffman Estates, IL 60179 U.S.A.
• Safety Instructions
• Installation
• Operation
• Maintenace
• Repair Parts
PRINTED IN U.S.A.
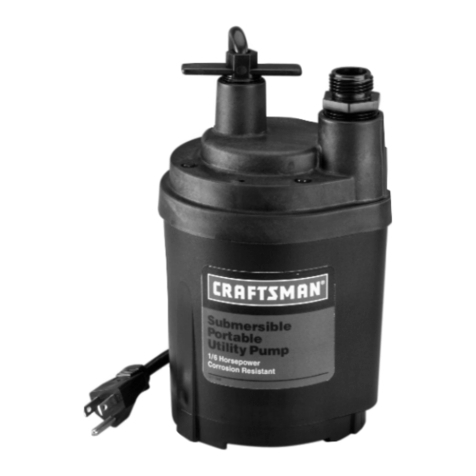
PORTABLE UTILITY PUMP
®
Form No. F642-05001 (4/22/05)
629 0405
IN
OUT
512 0405
IN
OUT
Pump out a flooded basement.
Empty a clogged sink or tub.
2
CONTENTS
INTRODUCTION/WARRANTY .........................................2
SAFETY..............................................................................2
INSTALLATION...............................................................3-4
OPERATION ......................................................................4
MAINTENANCE ..............................................................4-5
PARTS................................................................................5
INTRODUCTION
Please read our instructions before you install and use your
new pump; this will help you obtain full value and good ser-
vice from it. It will also help you avoid needless service costs
that result from causes we cannot control and cannot cover
in our warranty.
READ AND FOLLOW
SAFETY INSTRUCTIONS!
Carefully read and follow all safety instructions in
this manual or on pump.
This is the safety alert symbol. When you see this
symbol on your pump or in this manual, look for one of the
following signal words and be alert to the potential for per-
sonal injury!
warns about hazards that will cause serious
personal injury, death or major property damage if ignored.
warns about hazards that will or can cause se-
rious personal injury, death or major property damage if
ignored.
warns about hazards that will or can cause
minor personal injury or property damage if ignored.
The word NOTICE indicates special instructions which are
important but not related to hazards.
1. To avoid risk of serious bodily injury and property dam-
age, read safety instructions carefully before installing
pump.
2. Follow local and/or national plumbing and electrical
codes when installing pump.
Use this pump only on a 115 volt circuit.
Pump is equipped with an approved
3-conductor cord and 3-prong, grounding-
type plug. To reduce the risk of electric shock, con-
nect it to a properly grounded, grounding-type
receptacle.
Do not operate the pump continuouisly at a discharge
pressure of more than 12 psi (83 kPa) or discharge lift of
more than 28’ (8.5 M), as the motor will exceed the nor-
mal safe operating temperature and may heat to 180° -
190° F (82° C - 88° C).
INSPECTION
This pump was thoroughly inspected, tested, and packaged
before shipment. Report any damage immediately to the
store where it was purchased.
Hazardous
voltage
Discharge Height in Feet Above Pumping Level
Model 3 10 15 20 30 40
390.269152 5.5 5.0 4.6 4.0 2.5 1.0
}GPM
PERFORMANCE
ONE YEAR FULL WARRANTY
Provided that it is installed and operated according to the owner’s manual instructions, if this pump fails due to a
defect in material or workmanship within one year from the date of purchase, it will be replaced or repaired free
of charge.
Warranty service is available by returning this product to place of purchase for replacement, or by calling
1-800-4-MY-HOME®to arrange for repair.
This warranty is VOID if this pump is used for commercial or rental purposes.
Sears is not liable for loss or damage to property, nor for any incidental or consequential loss or expense from
property damage, that results directly or indirectly from the use of this product.
This warranty gives you specific legal rights, and you may also have other rights which vary from state to state.
Sears Roebuck and Co., Dept. 817WA, Hoffman Estates, IL 60179
INSTALLATION
OIL THE PUMP
Oil the pump with 1/2 tablespoon food grade mineral or veg-
etable oil with each use. Pour the oil in the ‘IN’ port. Three
1/2 tablespoon oil packets are included.
NOTICE: The pump depends on the liquid being pumped
for lubrication.
DO NOT RUN THE PUMP DRY!
If the pump does not start to move water in 30 seconds or
less, recheck the installation and plumbing.
Mount the pump solidly on a stable platform.
USE 1/2” HOSE (or larger)
Use a reinforced hose on the inlet. The pump should be less
than 10’ above and less than 25’ to one side of the water
source. Make the outlet hose as short as possible - 25’ or less.
Check the washer in the inlet fitting to make sure it is air-
tight. If this joint leaks air, the pump will not operate.
KEEP THE HOSES AS
STRAIGHT AS POSSIBLE
To reduce friction, do not coil or kink the hoses. When
pumping from a well or stream, raise the inlet hose a few
inches off the bottom to avoid sucking in sand, silt or peb-
bles (which can disable the impeller). Install a strainer or the
Pud-L-Scoop(tm) to protect the pump from large solids .
NOTICE: Attach the Pud-L-Scoop(tm) to the end of the inlet
line and place it in at least 1/2” of water at the lowest point
to be pumped. Be sure all connections are air tight.
INLET HOSE GOES IN THE WATER;
OUTLET HOSE STAYS OUT OF THE
WATER. MOTOR MUST STAY DRY
Make sure all inlet connections are tight (no air leaks) and
the inlet hose is in the water. Make sure the end of the out-
let hose is not under water. If the outlet is under water, the
pump may not work.
Plug the cord into a 3-wire, 115 volt, 60 Hz, grounded A.C.
outlet.
You should get water in 30 seconds or less. If not, add more
oil and repeat the process. If your pump does not prime on
the second try, check the impeller and the inside of the
pump head for wear. Replace as needed.
3
IN
IN
Oil
4836 0205
Do Not Run Pump Dry!
STEP 1
No kinks! No Coils!
Straight
Hose!
4838 0205
STEP 3
IN
Water IN
Water OUT
Outlet Hose
Plug in pump to start it.
NOTE: If you don’t get water in
30 seconds or less, add more oil
and repeat the process.
See Step 1.
Inlet Hose
STEP 4
IN
OUT
1/2" or Larger
Outlet Hose
4837A 0205
Water OUT
Water IN
1/2" or Larger
Reinforced
Inlet Hose
STEP 2
INSTALLATION / MAINTENANCE
In rare cases you may need to prime the pump. To prime it,
fill the suction hose with water, put it back in the water
source, and start the pump.
The motor must have air circulation around it for proper
cooling. This pump will lift water 12’; trying to lift water
more than 12’ can cause the motor to run hot. The motor
has a thermal overload which will stop it if it gets too hot. If
the motor stops, allow it to cool for 30 minutes before try-
ing to start it again.
UNPLUG THE PUMP
Unplug the pump before all the water is completely gone.
Do not run pump dry!
PERFORMANCE
The pump will deliver 350 gallons/1325 liters per hour with
an unrestricted discharge line. If the discharge line is re-
stricted or raised and the pressure on the pump outlet port
increases, it will pump less water.
NOTICE: This pump’s motor has brushes. Inspect the
brushes frequently; replace them if they’re worn.
Risk of burns from motor case during
normal operation. Do not touch motor when it is operat-
ing or when it is hot. Plug motor cord into 3-wire grounded
115 volt A.C. outlet 60 Hz.
Risk of fire or explosion if used to pump
flammable liquids or if used in explosive atmo-
spheres. Pump is designed to pump water at temperatures
between 32°-77° F (0°-25° C) only. Pump water only with
this pump!
MAINTENANCE INSTRUCTIONS
Hazardous voltage. Can shock, burn, or
cause death. Unplug pump before servicing.
BRUSH REPLACEMENT
Replace brushes after 150-200 hours of motor operation.
Check brush condition if motor shows signs of running
slowly or erratically after pump has been in service for a pe-
riod of time.
NOTICE: Brushes are spring loaded. Hold on to covers,
brushes, etc., so that nothing gets lost.
1.Unscrew brush covers on sides of motor. Slide brush
springs and brushes out of motor.
2.Slide new brushes into motor. Brush must slide into
square-cut hole in motor; make sure that curve on brush
end matches curve of armature (see Figure 1).
3.Replace brush covers. Do not overtighten.
4
Unplug
STEP 5
Brush
must enter
square hole.
To armature curve
Match brush curve
Figure 1 – Brush Replacement
MAINTENANCE
PUMP DISASSEMBLY
1. Remove the two face screws, front wear plate and the
O-Ring.
2. Remove the pump end from the motor.
3. Remove the metal insert and impeller.
4. Remove the shaft seal. This may need to be pushed out
from the backside.
PUMP ASSEMBLY
1. Install the seal by pressing it into the recess.
2. Apply a little lithium-based grease to the inside bore of the
metal insert. To insert the impeller into the metal insert:
• Press down on the impeller to bend a couple vanes on
top to the left (counter-clockwise).
• Slide the impeller into the metal insert.
• Make sure the impeller is completely and evenly seated.
5
123
Figure 2 – Remove Face Plate
Figure 5 – Seal Removal
Figure 6 – Seal Installation
Impeller
Metal Insert
Figure 7 – Insert and Impeller Installation
Figure 3 – Removing Pump End
Impeller
Metal Insert
Figure 4 – Removing Insert
MAINTENANCE
3. Align the motor shaft so the flat section on the shaft is
lined up with the flat area on the inside of the impeller.
Slide the pump end with the insert and impeller onto the
motor shaft.
4. Insert the O-Ring and cover plate. Make certain that the
O-Ring remains seated in the groove.
5. Secure the assembly with the two cover screws. Tighten
these evenly, but do not over-tighten the screws.
Typical uses for the Utility Pump:
Pump out a flooded basement.
Empty a clogged sink or tub.
6
629 0405
IN
OUT
IN
OUT
Figure 8 – Install Pump End
Figure 9 - Install Cover Plate
REPAIR PARTS
7
Brush must enter
square hole.
Match brush curve
to armature curve
123456 7 89 10
Key Part
No. Description Qty. Part No.
1 #10-32x1-3/4 Phillips Pan Head Screw 4 †
2 Front Wear Plate 1 C3-201SS
3 O-Ring 1 U9-239
4 Impeller 1 RP0001077
5 Impeller Cavity Insert 1 U97-146
6 U Cup Seal 1 16FA019-4
7 Pump Body 1 C76-69P
8 Slinger 1 RP0001616
9 Motor 1 M0015-115
10 Brush Kit 1 PKG 201
• Pud-L-Scoop™ 1 SA35
To Order Parts, Call
Sears Product Service, 1-800-366-7278
• Not illustrated.
† Standard hardware item; purchase locally.
® Registered Trademark / TM Trademark / SM Service Mark of Sears, Roebuck and Co.
® Marca Registrada / TM Marca de Fábrica / SM Marca de Servicio de Sears, Roebuck and Co.
MC Marque de commerce / MD Marque déposée de Sears, Roebuck and Co. © Sears, Roebuck and Co.
Get it fixed, at your home or ours!
Your Home
For repair – in your home –of all major brand appliances,
lawn and garden equipment, or heating and cooling systems,
no matter who made it, no matter who sold it!
For the replacement parts, accessories and
owner’s manuals that you need to do-it-yourself.
For Sears professional installation of home appliances
and items like garage door openers and water heaters.
1-800-4-MY-HOME®(1-800-469-4663)
Call anytime, day or night (U.S.A. and Canada)
www.sears.com www.sears.ca
Our Home
For repair of carry-in items like vacuums, lawn equipment,
and electronics, call or go on-line for the location of your nearest
Sears Parts & Repair Center.
1-800-488-1222
Call anytime, day or night (U.S.A. only)
www.sears.com
To purchase a protection agreement (U.S.A.)
or maintenance agreement (Canada) on a product serviced by Sears:
1-800-827-6655 (U.S.A.) 1-800-361-6665 (Canada)
Para pedir servicio de reparación
a domicilio, y para ordenar piezas:
1-888-SU-HOGARSM
(1-888-784-6427)
Au Canada pour service en français:
1-800-LE-FOYERMC
(1-800-533-6937)
www.sears.ca

Other Sears Water Pump manuals

Sears 390.269150 User manual

Sears

Sears 390.269150 User manual

Sears CRAFTMAN PROFESSIONAL HYDROGLASS 390.2519 User manual

Sears

Sears CRAFTMAN PROFESSIONAL HYDROGLASS 390.2519 User manual

Sears CRAFTSMAN 390.2505 User manual

Sears

Sears CRAFTSMAN 390.2505 User manual

Sears 390.304551 User manual

Sears

Sears 390.304551 User manual

Sears 390.260251 User manual

Sears

Sears 390.260251 User manual

Sears 390.262451 User manual

Sears

Sears 390.262451 User manual

Sears CRAFTSMAN 572.826121 User manual

Sears

Sears CRAFTSMAN 572.826121 User manual

Sears Pro-Form R-930 User manual

Sears

Sears Pro-Form R-930 User manual

Sears CRAFTSMAN 390.260293 User manual

Sears

Sears CRAFTSMAN 390.260293 User manual

Sears 390.253250 User manual

Sears

Sears 390.253250 User manual

Sears 390.250252 User manual

Sears

Sears 390.250252 User manual

Sears Craftsman 390.304051 User manual

Sears

Sears Craftsman 390.304051 User manual

Sears CRAFTSMAN HYDROGLASS 390.251981 User manual

Sears

Sears CRAFTSMAN HYDROGLASS 390.251981 User manual

Sears Craftsman 390.269451 User manual

Sears

Sears Craftsman 390.269451 User manual

Sears 390.284020 User manual

Sears

Sears 390.284020 User manual

Sears Craftsman 390.307060 User manual

Sears

Sears Craftsman 390.307060 User manual

Sears 572.826140 User manual

Sears

Sears 572.826140 User manual

Sears HYDRO-GLASS 390.262501 User manual

Sears

Sears HYDRO-GLASS 390.262501 User manual

Sears CRAFTSMAN HYDROGLASS 390.2622 User manual

Sears

Sears CRAFTSMAN HYDROGLASS 390.2622 User manual

Sears CRAFTSMAN 390.260292 User manual

Sears

Sears CRAFTSMAN 390.260292 User manual

Sears CRAFTSMAN 390.262453 User manual

Sears

Sears CRAFTSMAN 390.262453 User manual

Sears Craftsman 390.303302 User manual

Sears

Sears Craftsman 390.303302 User manual

Sears 572.826151 User manual

Sears

Sears 572.826151 User manual

Sears Craftsman 390.305001 User manual

Sears

Sears Craftsman 390.305001 User manual

Popular Water Pump manuals by other brands

tefen Mix Rite E-300 user guide

tefen

tefen Mix Rite E-300 user guide

pumpeng CorroTuff CT Series Operation & service manual

pumpeng

pumpeng CorroTuff CT Series Operation & service manual

FLOJET 4305-144 instruction manual

FLOJET

FLOJET 4305-144 instruction manual

LEYBOLD SCREWLINE SP 630 F operating instructions

LEYBOLD

LEYBOLD SCREWLINE SP 630 F operating instructions

Meec tools 731111 operating instructions

Meec tools

Meec tools 731111 operating instructions

Becker U 5.71 operating instructions

Becker

Becker U 5.71 operating instructions

Seko TEKNA EVO TPG installation manual

Seko

Seko TEKNA EVO TPG installation manual

Ingersoll-Rand ARO 612729 Operator's manual

Ingersoll-Rand

Ingersoll-Rand ARO 612729 Operator's manual

Grundfos Unilift AP12 Installation and operating instructions

Grundfos

Grundfos Unilift AP12 Installation and operating instructions

Larzep HBM Series Operating and maintenance instructions

Larzep

Larzep HBM Series Operating and maintenance instructions

Ingersoll-Rand 66M150-XXX-C Operator's manual

Ingersoll-Rand

Ingersoll-Rand 66M150-XXX-C Operator's manual

hillvert HT-ROBSON-JP600CP user manual

hillvert

hillvert HT-ROBSON-JP600CP user manual

Franklin Electric Turf Boss owner's manual

Franklin Electric

Franklin Electric Turf Boss owner's manual

Emec K PLUS operating instructions

Emec

Emec K PLUS operating instructions

Pontec PondoClear Island 3000 operating instructions

Pontec

Pontec PondoClear Island 3000 operating instructions

Grindex 8125.230 Milli Installation, operation and maintenance

Grindex

Grindex 8125.230 Milli Installation, operation and maintenance

SKC 224-44XRM operating instructions

SKC

SKC 224-44XRM operating instructions

Timco Tools Dual 18V Operation manual

Timco Tools

Timco Tools Dual 18V Operation manual

manuals.online logo
manuals.online logoBrands
  • About & Mission
  • Contact us
  • Privacy Policy
  • Terms and Conditions

Copyright 2025 Manuals.Online. All Rights Reserved.