Secura KP1-36N2 User manual

www.thesecura.com
Model: KP1-36N2
U S E R M A N U A L
Electric Wine Opener
Color: Silver
SN: 4LU7

Congratulations on being the proud owner of your new Secura
product. We believe in manufacturing only the highest quality kitchen,
home and personal care products for our customers. We are a U.S.-
based manufacturer and all our products meet strict standards for
manufacturing, safety and performance.
We also believe in providing the best customer service and support
in the industry. That is why we offer a 1 year warranty on this product
that ensures your satisfaction - so you can enjoy it for years to come.
If you have questions or need assistance, please email
CustomerCare@thesecura.com. For fastest response, please include
product name and model #, proof of original purchase, complete
contact information, and detailed information about the issue,
including pictures when applicable.
Your feedback and suggestions are also important to us, so please
The Secura Team
Welcome to the Secura Family!

Copyright 2015-2023 Secura, Inc. All rights reserved.
The material in this publication is protected under International and
Federal Copyright Laws and Treaties, and as such, any unauthorized
reprint or use of this material is strictly prohibited.
No part of this book may be reproduced or transmitted in any form
without the written permission of the author, except for the inclusion
of brief quotations in a review.
Reproduction or translation of any part of this work without the
permission of the copyright holder is against the law.

IMPORTANT SAFEGUARDS
PARTS DESCRIPTION
OPERATING INSTRUCTIONS
CLEANING YOUR ELECTRIC WINE OPENER
DISPOSAL
CONTACT
MANUFACTURER’S LIMITED WARRANTY
1
3
4
5
6
6
7
TABLE OF CONTENTS

1
IMPORTANT SAFEGUARDS
When using electrical appliances, basic safety precautions should always be followed including
the following:
READ ALL INSTRUCTIONS BEFORE USE
1. Do not operate electric Wine Opener with a damaged cord or plug, after the appliance
malfunctions or if it is dropped or damaged in any manner. Contact Customer Service Center for
examination, repair or electrical or mechanical adjustment.
2. To protect against risk of electrical shock, do not put the electric Wine Opener in water or other
liquid. This may cause personal injury and/or damage to the product.
3. To protect against re, do not operate the unit in the presence of explosive and/or ammable
fumes.
4. Do not use the electric Wine Opener for other than intent use.
5. This product is intended for normal domestic household use only.
6. When using or recharging the electric Wine Opener, keep your workspace clean and free from
potential hazards.
7. For indoor use only. Do not expose the electric Wine Opener or charging unit to rain or other
extreme conditions.
8. Never force the electric Wine Opener onto a bottle or attempt to speed up the mechanism.
The electric Wine Opener will work best when it is operated at its natural speed.
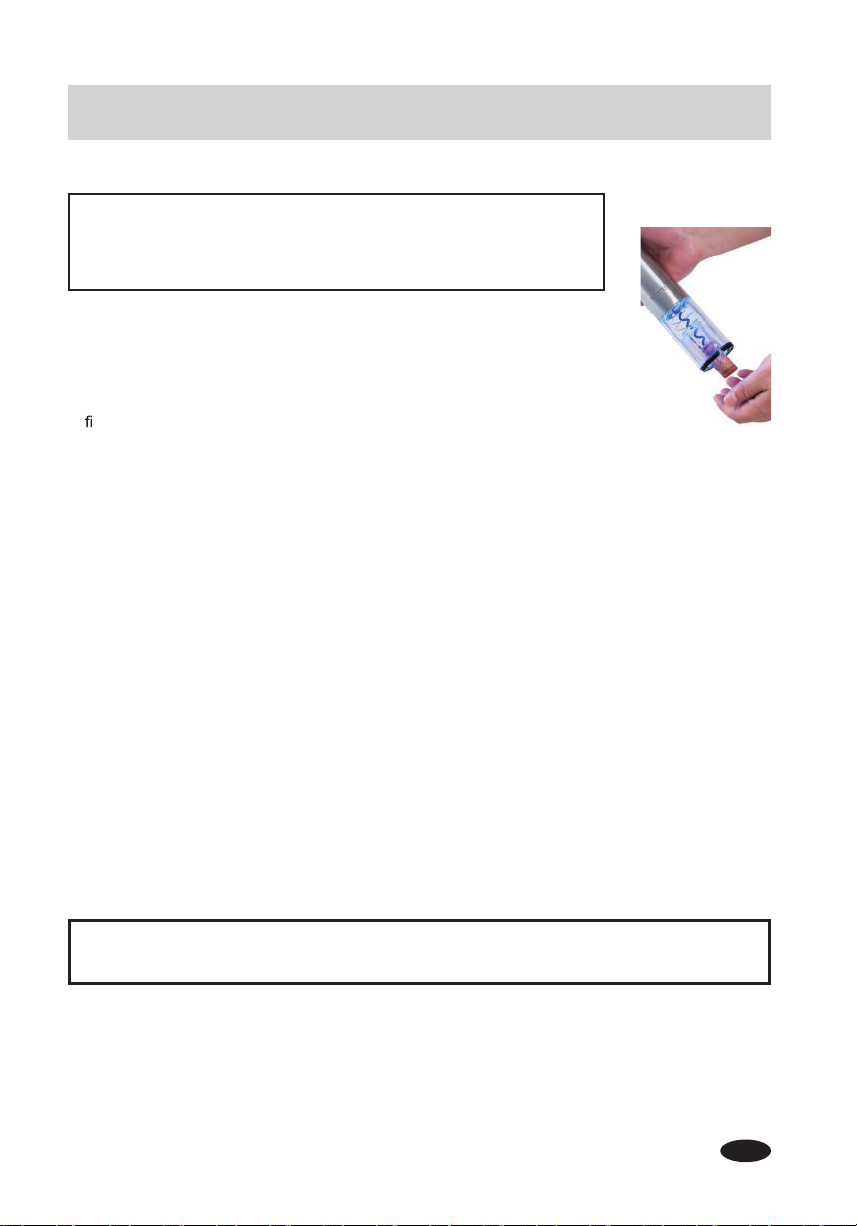
9. Do not touch or adjust the electric Wine Opener's mechanism or the corkscrew spiral. Only hold
the electric Wine Opener by its stainless steel housing.
10. Do not let cord hang over edge of table or countertop, or touch hot surfaces including the stove.
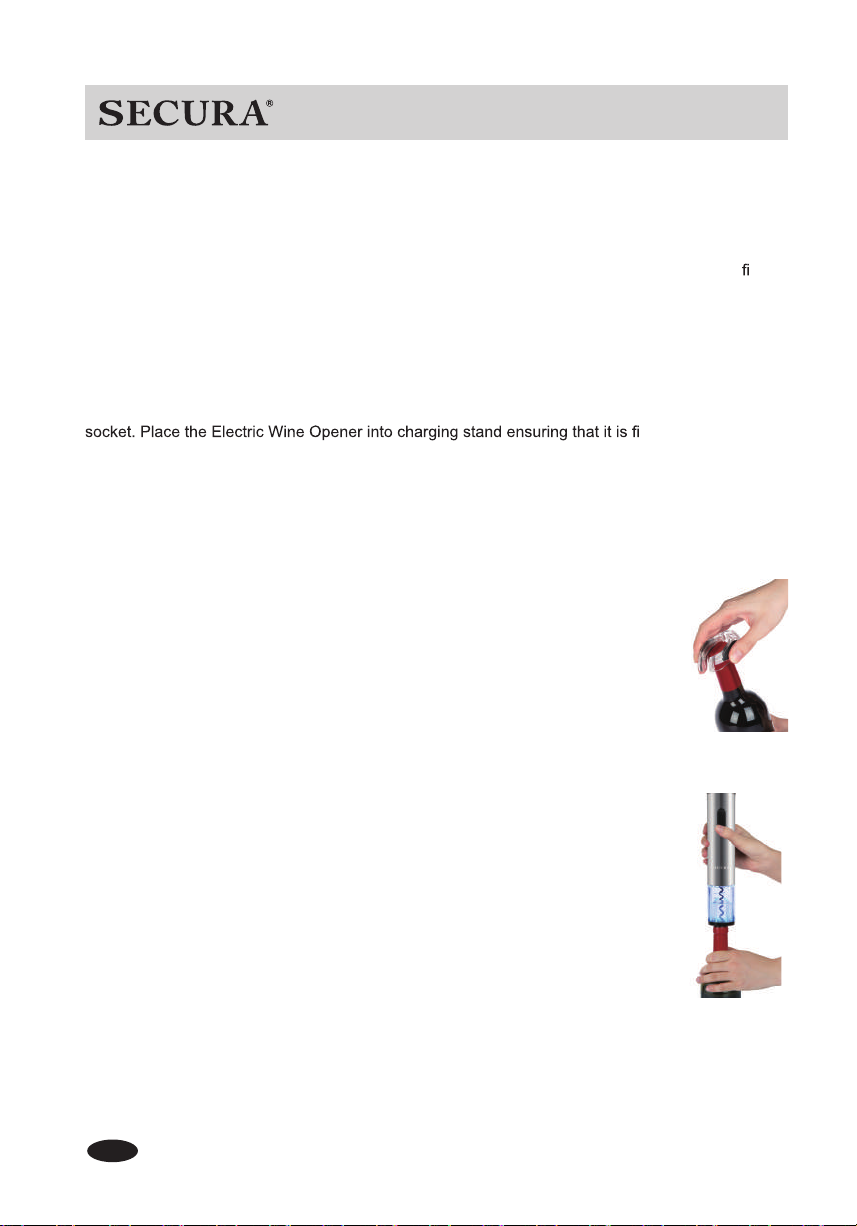
11. Only recharge the electric Wine Opener using the charging stand and power cord supplied.
12. Remove the plug from the socket by holding and pulling the connector. Never pull on the cord.
13. Do not attempt to open bottles if the switch is not working correctly.
14. Do not attempt to open the Electric Wine Opener or the charging stand. It has no serviceable
parts.
To reduce the risk of re, injury or electrical shock along
with extending the life of your electrical appliances,
please read and follow all of the information in this
manual before using and save it for future reference.
Copyright 2015-2023 Secura Inc. All rights reserved. www.thesecura.com
Electric Wine Opener

2Copyright 2015-2023 Secura Inc. All rights reserved. www.thesecura.com
CAUTION
1. Corkscrew is sharp. Handle carefully. Keep hands and utensils out of the
container while operating to prevent the possibility of severe personal injury and
/or damage to the product or property.
2. Do NOT use the Wine Opener when the battery is low.
Always follow basic safety precautions when
using any electrical products, especially
when children are present.
FOR HOUSEHOLD USE ONLY
SAVE THESE INSTRUCTIONS

3
1. Up/Down Switch
2. LED Light
3. Charging Stand
4. Electric Wine Opener
5. Foil Cutter
6. Adapter: Type A electrical plug, receptacle compatible
with plug type A
* The appearance of the adapter may vary slightly.
The picture is for reference only.
PARTS DESCRIPTION
1
2
3
4
5
6
Copyright 2015-2023 Secura Inc. All rights reserved. www.thesecura.com
Electric Wine Opener

4
Operate Your Electric Wine Opener
The Electric Wine Opener is operated by one single switch. The switch
has two functions. Press the "Down" switch to remove a cork from a
bottle. After you have removed the cork from the bottle, press the "Up"
switch to release a cork from the mechanism.
Before remove the cork you must remove any foil from the bottle using the
foil cutter provided. (see Fig.1)
1. Place the Electric Wine Opener on top of the wine bottle making sure
that it remains as upright as possible at all times. If you hold the Electric
Wine Opener at an angle to the bottle it will not remove the cork properly.
(Fig 2)
OPERATING INSTRUCTIONS
Figure 1
Figure 2
We recommend that you charge your electric Wine Opener for 8 hours before using it for the rst
time. (NI-MH battery).
Please follow the instructions below for recharging your Electric Wine Opener:
Copyright 2015-2023 Secura Inc. All rights reserved. www.thesecura.com
Recharging your Electric Wine Opener
Plug one end of the adapter cord into the base of the charging stand and the other end into a main
rmly in position and
that it is fully engaged with the recharging connection. You will notice that the LED light illuminates.
It will take approximately 6-8 hours to recharge your electric Wine Opener. When your Electric Wine
Opener is fully recharged it can be used to open approximately 30 bottles.
2. Hold the wine bottle securely with one hand so it does not spin. With the
The corkscrew spiral will turn in a clockwise direction and enter the cork,
then gradually remove it from the bottle. When the Electric Wine Opener
mechanism has stopped the cork has been fully removed from the bottle.
(Fig 2)
other hand, press the "Down" switch to begin removing the cork.

5
3. Lift the Electric Wine Opener away from the bottle. To remove the cork
from the mechanism, simply press the "Up" switch. The spiral will turn in
a counterclockwise direction and release the cork. (Fig 3)
4. Always return the Electric Wine Opener to the charging stand when
nished with it. This will protect the mechanism while it is not in use.
Figure 3
Note:
It has been noted that the Electric Wine Opener may experience problems with a small percentage
of plastic/synthetic corks and undersized corks, if in this case the cork should be removed manually.
Helpful tip:
When the battery is low, the opener may stop halfway before the cork is completely removed from
the bottle, press the "Up" switch to release the cork. Wine opener must be recharged before
using.
WARNING: Never force the Electric Wine Opener onto a bottle or
attempt to speed up the mechanism. The electric Wine Opener will
work best when it is operated at its natural speed.
Electric Wine Opener should be wiped clean with a damp cloth or sponge and then wiped
dry. NEVER immerse Electric Wine Opener in water. DO NOT place Electric Wine Opener in
dishwasher.
CLEANING YOUR ELECTRIC WINE OPENER
CAUTION: Corkscrew spiral is sharp. Handle carefully.
Copyright 2015-2023 Secura Inc. All rights reserved. www.thesecura.com
Electric Wine Opener

6
If you have any questions or concerns not addressed in this user manual, please contact our
Customer Service Department at 888-792-2360 (North America) or email us at CustomerCare@
thesecura.com.
Please read the operating instructions before using this product.
Please keep the original box and packaging materials in the event that service is required.
CONTACT
DISPOSAL
When this appliance has reached the end of its life, please dispose of the unit properly.
This and other electrical appliances contain valuable materials that can be recycled.
Electronic waste may be harmful to our environment if not disposed of properly.
We ask that you follow your governing agency's rules and regulations when disposing of electronic
appliances. Please nd an authorized recycling facility near you.
Copyright 2015-2023 Secura Inc. All rights reserved. www.thesecura.com

Manufacturer’s Limited Warranty
The Manufacturer of this product warrants to the original purchaser of this product
that this product will be free from defects in material and workmanship under normal
use and service for 1 year from date of purchase. Manufacturer will, at its option,
repair or replace with a new or refurbished product. Providing a replacement product
does not renew or extend the warranty period from the original date of purchase.
The Manufacturer reserves the right, before having any obligation under this limited
warranty, to inspect the product, and all costs of shipping the product for inspection and
warranty service shall be borne solely by the purchaser.
For the fastest processing of a warranty claim, the Purchaser should e-mail
original purchase, complete contact information, and detailed information about the
issue, including pictures when applicable.
The manufacturer’s limited warranty is valid only in accordance with the following
conditions:
1. The product is purchased directly from manufacturer or an authorized reseller or
distributor.
2. Only the original purchaser is covered by this warranty. This warranty is not
transferable.
3. Product is for personal use only. This warranty is void if the product is used in a
commercial or institutional establishment.
4. This warranty does not cover normal wear and tear or damage caused by misuse,
.
5. Purchaser must present acceptable proof of purchase for the product.
6.
which vary from state to state.
Secura, Inc.
Lake Forest, California
7
Copyright 2015-2023 Secura Inc. All rights reserved. www.thesecura.com

Secura Bestsellers
www.thesecura.com
All information current at time of printing. NA-EN-010523
For the fastest processing of a warranty claim, the owner should
proof of original purchase, complete contact information,
and detailed information about the issue, including pictures when applicable.
Duxtop Professional
Stainless Steel Cookware
Duxtop 1800W LCD
Induction Cooktop
Duxtop Portable 1800W
Induction Cooktop
Secura 1800W Electric
Deep Fryer
Secura Electronic
Visual Timer
Secura Mechanical
Visual Timer
Secura Automatic
Soap Dispenser
Secura Electric
Wine Opener
Secura French Press
Coffee Maker
Secura Detachable Milk
Frother Upgraded
Secura Electric Coffee
and Spice Grinder
Secura, Inc.
888-792-2360 (North America)
Lake Forest, California
Designed in California
Secura 4-in-1 Electric
Milk Frother
Table of contents
Other Secura Kitchen Appliance manuals

Secura
Secura WP-200 User manual

Secura
Secura F280R User manual

Secura
Secura S-189 User manual

Secura
Secura WA-6SPD User manual

Secura
Secura MMF-003 User manual

Secura
Secura F280R User manual

Secura
Secura F280R User manual

Secura
Secura MMF-003B User manual

Secura
Secura MMF-003 User manual

Secura
Secura MMF-020 User manual
Popular Kitchen Appliance manuals by other brands

Holstein Housewares
Holstein Housewares HM-09104V-BU manual

Ninja
Ninja AMZ493BRN owner's guide

Bella
Bella Snow Cone Maker Instruction manual & recipe guide

Rommelsbacher
Rommelsbacher MR instruction manual

NEFF
NEFF C17DR00.0 User manual and installation instructions

Compatible Brands
Compatible Brands CB24WINEDUAL owner's manual