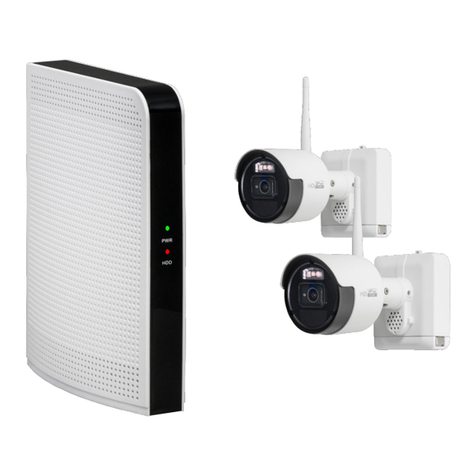
SecureCom Video V-4408D User manual

INSTALLATION GUIDE
SecureCom Video V-4408D 8-Channel NVR
(Network Video Recorder)
Description
The SecureCom Video V-4408D 8-Channel NVR (Network Video Recorder) connected to a
residential and commercial security system gives the user a powerful security tool. NVR
provides 1 TB of storage for 24/7 local recording. Installation of the NVR is quick and easy.
Attach a monitor, mouse, and power cord and the NVR is ready to use. To activate your NVR
and cameras, log in to dealeradmin.securecomwireless.com with an active dealer account.
Compatibility
• SecureCom Video Cameras
• ONVIF Compliant cameras - (See www.onvif.org for a listing of ONVIF compliant
cameras, Version 2.4 or higher.)
Included Components
• SecureCom Video V-4408D 8-Channel NVR
• 12V Power Supply
• 3-Button USB Mouse
• Network Cable
Installing the NVR
The NVR is designed for convenient plug-and-play installation. A maximum of eight IP
cameras can connect to the NVR.
Once the NVR powers up, SecureCom Video cameras
will connect to the NVR automatically. See Adding IP Cameras for more information. Wired
cameras may be connected to any of the LAN ports prior to powering up the NVR.
When installing an NVR at a site with existing SecureCom Video cameras, follow these steps:
1. Delete the cameras from the Dealer Admin Site.
2. Power down the cameras. Then, power them back up.
3. Power up the NVR to automatically add the cameras.
Connecting the NVR
Connect cameras, switches, and user interface devices to the ports in the back of the NVR.
See Figure 2.
LAN1, LAN2, and LAN3
Up to three wired cameras can be connected directly to the NVR using the LAN ports
(yellow). Connect a network switch to a LAN port to add more wired cameras.
WAN
Plug one end of the included network cable into the NVR WAN port (blue). Plug the other end
into the network LAN/WAN connection.
USB
Plug the included 3-button mouse into the USB port in the back of the NVR. Connect a USB to the NVR to allow a
mouse, keyboard, ash drive, or external hard drive to connect to the NVR.
HDMI
Plug one end of an HDMI cable to the NVR. Plug the other end of the HDMI cable to a TV or monitor.
Power
Plug the power cord of the NVR into an electrical outlet that is not controlled by a
wall switch.
Adding IP Cameras
1. Install and add power for up to eight SecureCom Video or ONVIF compliant IP cameras in desired locations.
2. The NVR will automatically begin to search for and add all factory defaulted SecureCom
Video and supported third-party IP cameras. All other compatible ONVIF-compliant cameras
residing on the customer’s LAN may be added manually through the Dealer Admin Site.
Front View Rear View
POWER
WAN
LAN3
LAN2
LAN1
Figure 1: NVR Front
View
Front View Rear View
POWER
WAN
LAN3
LAN2
LAN1
Figure 2: NVR
Rear View

SecureCom Video NVR Installation Guide
2
Adding the NVR to the System
1. Log in to the dealeradmin.securecomwireless.com web site and choose the
customer and system that you would like to add the NVR to by clicking on the
system account number. This opens the system details screen.
Note: Video must be enabled in Adding a System before cameras may be
added. If there is not a check mark next to Video, then click on Edit at the
bottom of the window and place a check mark
next to Video and then click Save.
2. Click Add NVR/Converter button to add the NVR. See Figure 3.
3. Enter the Serial Number from the bottom of the NVR.
Click Next. “Attempting to Connect” will display in the
bottom corner of the Add New NVR/Converter window.
4. Once the NVR is found, the NVR Name is set as the serial
number and can be changed. See Figure 4. Change the
Time Zone to ensure the accurate date and time stamp
appears on video clips. If you live in an area that observes
Daylight Savings, click Observe Daylight Savings Time to
toggle on or off. The NVR Username and Password elds
are used to create a local operator account for viewing pre-
recorded video locally via an HDMI video device. Follow these
guidelines when creating a username and password:
• 8 - 16 alphanumeric digits (no symbols)
• Include two of the following: capital letter, lowercase
letter, or number
• Do not use the word “admin” for a username
• Do not use the word “password” for a password
• The username and password can not match
Note: Only one username and password can be created.
5. Click Save.
Customizing the Cameras
The Dealer Admin Site will retrieve information on
all cameras that have been auto-added to the NVR.
By default, all cameras are given a generic name.
The camera names can be changed to describe their
location. See Figure 5.
Click in the Camera Name box to change the names
of each camera. Record on Alarm toggles on or off
recording by each camera when there is an alarm on
the associated system.
Record Clips options are as follows:
• Always Record Motion
• Never Record Motion
• Record Motion When Armed
• Record Motion During Schedule
— Add/Edit Schedule button displays when
this choice is selected. Click to create a
schedule to record clips.
All camera recording options record clips to the
SecureCom Wireless servers where 250 MB of space is
available. The 8-Channel NVR has a recording capacity of 1 TB.
Figure 3: Add NVR/Converter
Figure 4: Change NVR Name and Daylight
Savings time
Figure 5: Customizing the Cameras

NVR Installation Guide Digital Monitoring Products
3
Adding ONVIF Cameras
Click on the Add ONVIF Camera button to add a camera to
the NVR that does not connect wirelessly or is wired from the
customer’s LAN. If the camera is a SecureCom Video Camera,
click the SecureCom Video Camera toggle. The User Name and
Password is already programmed into a SecureCom Video Camera.
See Figure 6. You will need the following information to add the
camera to the Dealer Admin Site:
• Name - You create the name, such as the location of the
camera
• IP Address of the camera on the customer’s LAN
• Port Number the camera communicates through
• Camera Type
• User Name and Password stored in the camera (if not a
SecureCom Video Camera)
The 8-Channel NVR set up in dealeradmin.securecomwireless.com is now complete. Live viewing of all cameras
displays on the monitor connected to the NVR. To view recording options on the NVR, you must log into the NVR
using the username and password created when adding the NVR to the system in the Dealer Admin Site. For more
information see the 8-Channel NVR User Guide (LT-1461).
Figure 6: Adding a New ONVIF Camera

800-641-4282
INTRUSION • FIRE • ACCESS • NETWORKS
www.dmp.com 2500 North Partnership Boulevard
Designed, Engineered and
Manufactured in Springfield Missouri Springeld, Missouri 65803-8877
LT-1419 © 2016 Digital Monitoring Products, Inc.
16525
FCC Information
FCC compliance: Please take attention that changes or modication not expressly approved by the party responsible for
compliance could void the user’s authority to operate the equipment.
Note: This product has been tested and found to comply with the limits for a Class B digital device, pursuant to Part 15
of the FCC Rules. These limits are designed to provide reasonable protection against harmful interference in a residential
installation. This product generates, uses, and can radiate radio frequency energy and, if not installed and used in
accordance with the instruction, may cause harmful interference to radio communications. If this product does cause
harmful interference to radio or television reception, which can be determined by turning the equipment off and on, the
user is encouraged to try to correct the interference by one or more of the following measures:
- Reorient or relocate the receiving antenna.
- Increase the separation between the equipment and receiver.
- Connect the equipment into an outlet on a circuit different than that to which the receiver
is connected.
- Consult the dealer or an experienced radio/TV technician for help.
This equipment should be installed and operated with a minimum distance 20cm between the radiator and your body.
Specications
Temperature Range: 0°C to 40°C
32°F to 104°F
Humidity Range: 10% to 90%
Dimensions: 6.2”H x 3.4”W x 3.4”D
Compatible
DMP V-4010B-1 Indoor/Outdoor Bullet Camera
DMP V-4020C-1 Indoor Cube PIR Camera
DMP V-4030PT-1 HD IP Motorized Indoor Camera
DMP V-4050D-1 Indoor/Outdoor Fixed Dome Infrared
Camera
Table of contents
Popular Network Hardware manuals by other brands

Milestone Systems
Milestone Systems Husky M20 2017 R1 Hardware and service guide

ALIBI
ALIBI ALI-NVR3308P Quick setup guide

Magnescale
Magnescale MG80-EI operating manual

Wisstar
Wisstar WP-N6508-E2 user manual

2N
2N stargate How to set

Moxa Technologies
Moxa Technologies MiiNePort E3 Series Quick installation guide

Siemens
Siemens SANTIS-ab user manual

Allied Telesis
Allied Telesis AT-SBx81CFC400 installation guide

Nakanishi
Nakanishi COMBOX-NET.EIP Operation manual

ZyXEL Communications
ZyXEL Communications ZYWALL OTPV2 - SUPPORT NOTE V1 Support notes

D-Link
D-Link SharePort DIR-825 Quick installation guide

Viking
Viking TR-1 Application note