SecureSpot STATEMENT Operation manual

1
INSTALLATION & USER GUIDE
THE “STATEMENT”
BOLLARD
Proud to be Australia’s
only supplier for this model

3
GETTING TO KNOW YOUR BOLLARD
ACCESSORIES INCLUDED:
RECHARGEABLE BATTERY,
WALL CHARGER, 3 X KEYS, 2
X REMOTE CONTROLS

4
1. Bollard Arm | 2. Protective Cover |
3. Reflective Cover | 4. Alarm |
5. Battery | 6. Circuit Board | 7. Drive Shaft | 8. Reset & Driving
Units | 9. Arm Rotators

5
DESCRIPTION
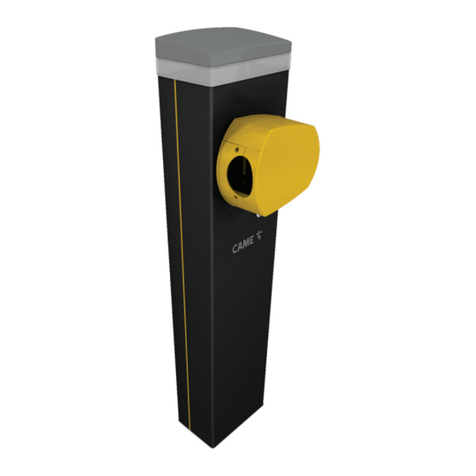
Our “Statement” automatic remote-control bollard
is one of the tallest fold-down bollards on the
market. It stands at 530mm high, which is over half a
metre tall! Its’sleek rounded shape makes for a
bollard that looks good and protects your car space
with authority.
WHAT’S IN THE BOX
•1 x Statement Bollard
•2 x Remote Controls
•3 x Keys
•1 x Rechargeable Lead Acid Battery
•1 x Wall Charger
•3 x Dynabolts
•2 x Washers

6
DIMENSIONS & SPECIFICATIONS
RATED VOLTAGE
DC6V
WORKING CURRENT
3.5A
ENVIRONMENT TEMPERATURE
-5 C - 55 C
RAIN / FLOODING CAPACITY
15MM
RUNNING TIME TO RAISE /
LOWER
6S
REMOTE CONTROL RANGE
<15M
BOX WEIGHT
13.1KG
BOX DIMENSIONS
63 X 63 X 14CM
BOLLARD WEIGHT
8KG
DIMENSIONS –RAISED (MM)
530H X 560W X 400D
DIMENSIONS –LOWERED
(MM)
80H X 560W X 560D

7
FUNCTION & FEATURES
PRESSURE RESISTANCE
The Statement bollard can withstand 500kg rolling
compact when lowered
MANUAL OPERATION
When the battery loses charge, or failure happens,
you can gently and slowly raise or lower the yellow
arm manually.
WATERTIGHT SEAL
The Statement bollard is guarded against rain
water completely, and flooding up to 15mm.
ALARM
When the Statement bollard has received any
external force whilst in the raised [locked] position,
a 100db warning alarm will sound to warn before
raising back up

8
INSTALLATION GUIDE
CONCRETE INSTALL
YOU’LL NEED:
•8mm Drill Bit
•8mm Dynabolts x 3 (supplied)
•Washers x 2 (supplied)
STEP BY STEP GUIDE:
1.Carefully remove bollard from box and
2.place bollard in car space. The bollard should
be central to the car space and the front of it
should be 1-1.2m in.
3.Remove the bollard cover.
4.Using the holes on the base plate as a guide,
drill 3 holes into the ground. If you hit any
underground cabling, simply reposition bollard
slightly.
5.Put 1 washer under each side of the silver base
plate, at the front.
6.Put dynabolts in all 3 holes and slowly tighten
with drill.
7.Connect battery and replace bollard cover,
ensuring it’s locked properly.
8.Test –ensure bollard goes up and down
properly.
9.Pack up tools ensuring you haven’t left anything
behind and clean area.

9
ASPHALT INSTALL
YOU’LL NEED:
•10mm Drill Bit
•10mm Plugs x 3
•8mm Screws x 3
•Washers x 3
STEP BY STEP GUIDE:
1.Carefully remove bollard from box and place
bollard in car space. The bollard should be
central to the car space and the front of it
should be 1-1.2m in.
2.Remove the bollard cover.
3.Using the holes on the base plate as a guide,
drill 3 holes into the ground. If you hit any
underground cabling, simply reposition bollard
slightly.
4.Move bollard aside and hammer plugs into the
holes.
5.Replace bollard over the plugs
6.Put washers on screws and slowly tighten with
drill.
7.Connect battery and replace bollard cover,
ensuring it’s locked properly.
8.Test –ensure bollard goes up and down
properly.
9.Pack up tools ensuring you haven’t left anything
behind and clean area.

10
OPERATION
If you chose to have your bollard installed by a
SecureSpot technician, your bollard will be setup for
you, ready to use.
Point your remote control in the direction of your bollard
and press the left “lock” button to raise your bollard into
the upright position, to secure your car spot.
To unlock, point your remote control in the direction of
your bollard and press the right “unlock” button to lower
your bollard to the ground, to then park in your car spot.
Your remote controls’ range is up to 15 metres.
REMEMBER TO SLIDE THE COVER OVER THE BUTTONS WHEN NOT
IN USE, TO PROTECT THEM FROM ACCIDENTALLY BEING PRESSED.
MAINTENANCE
Set a reminder in your calendar to recharge your
bollards’ battery approximately every 10-12 weeks.
At that time, it is also recommended that you give your
bollard a wipe down with a cloth, and clear any dust or
debris from the area.

11
CHARGING THE BATTERY
To remove your bollard battery for charging, you can follow
these simple steps:
1. Raise the bollard in the upright position. You can do this using
your remote control, or if your battery is completely
depleted, you can manually raise your bollard, ensuring you
do so very gently and slowly.
2. Use your key to unlock the bollard base and carefully
remove and put aside.
3. Unplug the battery from the bollards’ connection.
4. Using the provided wall charger, plug the battery into the
connection, and the charger into a power point.
PLEASE FOLLOW THESE SAFETY GUIDELINES
•Check battery and cords for any signs of damage prior to
charging. If damaged, do not charge.
•Ensure the battery is connected to the correct charger
provided.
•Plug the wall charger directly into a wall socket, not through
an extension cord or power board.
•For a full charge, the battery requires a minimum of 6, to a
maximum of 8 hours charging time.
•LED indicators on the chargers may not be accurate in some
cases, so always go by charging time, rather than waiting for
the light to turn green.
BATTERIES THAT ARE LEFT LONGER THAN 8 HOURS ON CHARGE RISK
BOTH THE BATTERY & CHARGER BURNING OUT AND IN EXTREME CASES
MAY POSE A FIRE DANGER.
CHARGING SHOULD BE SUPERVISED, BE NO LONGER THAN 8 HOURS, AND
NOT LEFT ON CHARGE OVERNIGHT.

12
WARRANTY
At SecureSpot, we offer a 12 Month Warranty for bollards installed by us
and a limited 3-month warranty for bollards that are being self-installed by
clients.
Warranty includes parts or products only and does not include labour
which may include call out fees and technicians’ time on site.
For all automatic bollards including Statement, Solar, Smart & Smart Solar
models, warranty is for the motor function of the bollard only, and is valid
from the day of installation for 12 months.
We do not offer a warranty on accessories however if you have purchased
an accessory that has not been damaged and is not functioning correctly,
at SecureSpots’ total discretion, we will replace your accessory within 3
months of purchase. Postage costs may apply.
IMPORTANT INFORMATION
Warranty becomes void effective immediately if faults or damage is
caused by using an incompatible battery, circuit board or remote control
not supplied by SecureSpot, or if the battery has not been charged using a
compatible wall charger as supplied by SecureSpot.
Warranty becomes void effective immediately if damage is caused by
utilising an incompatible key.
Warranty does not cover: accidental or meaningful damage to the bollard
by a vehicle or person, vandalism, or storm damage such as hail or
excessive flooding.
You can view the full terms and conditions on our website.
This manual suits for next models
1
Table of contents
Popular Control System manuals by other brands

Aybey Elektronik
Aybey Elektronik ALC Series user manual

Mitsubishi Heavy Industries
Mitsubishi Heavy Industries Smart M-Air Setup Quick Guide

Crystal Vision
Crystal Vision CoCo104 user manual
Espa
Espa Evopool SilenPlus instruction manual
HESCH
HESCH HE 5422 operating instructions

SVAB
SVAB Quantum user manual


