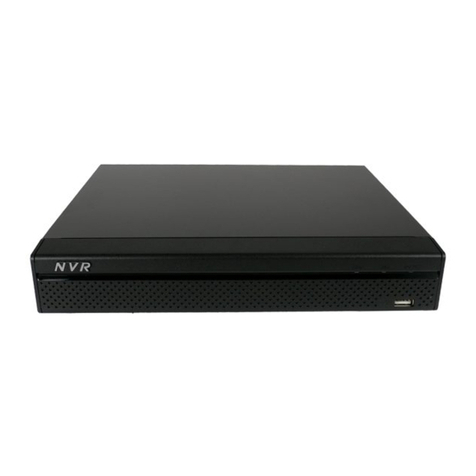
Security Camera King PENDVR-EL8M4K User manual

PENDVR-EL8M4K
ELITE SERIES

Table of Contents
1FEATURES AND SPECIFICATIONS
1.1 Overview
1.2 Features
1.3 Specifications
2OVERVIEW AND CONTROLS
2.1 Front Panel
2.2 Rear Panel
2.3 Connection Sample
2.4 Remote Control
2.5 Mouse Control
2.6 Virtual Keyboard & Front Panel
2.6.1 Virtual Keyboard
2.6.2 Front Panel
3INSTALLATION AND CONNECTIONS
3.1 Check Unpacked DVR
3.2 About Front Panel and Rear Panel
3.3 HDD Installation

vi
3.3.7 Rack Installation
3.4 Connecting Power Supply
3.5 Connecting Video Input and Output Devices
3.5.1 Connecting Video Input
3.5.2 Connecting Video Output
3.6 Connecting Audio Input & Output, Bidirectional Audio
3.6.1 Audio Input
3.6.2 Audio Output
3.7 Alarm Input and Output Connection
3.7.1 Alarm Input and Output Details
3.7.2 Alarm Input Port
3.7.3 Alarm Output Port
3.8 RS485
3.9 Other Interfaces
4OVERVIEW OF NAVIGATION AND CONTROLS
4.1 Initial Settings
4.1.1 Boot up
4.1.2 Device Initialization
4.1.3 Reset Password
4.1.4 Quick Settings
4.2 Preview
4.2.1 Preview Window
4.2.2 Preview Control
4.3 Right-Click Menu
4.3.1 Window Switch
4.3.2 Previous Screen/Next Screen

vii
4.3.3 PTZ Control
4.3.4 Auto Focus
4.3.5 Color
4.3.6 Display
4.3.7 Face Search
4.3.8 Search
4.3.9 Record Control
4.3.10 Alarm Output
4.3.11 Remote Device
4.3.12 Video Matrix
4.3.13 Main menu
4.4 Navigation Bar
4.4.1 Main Menu
4.4.2 Output Screen
4.4.3 Previous/Next Screen
4.4.4 Tour
4.4.5 Favorites
4.4.6 Channel
4.4.7 PTZ
4.4.8 Color
4.4.9 Search
4.4.10 Alarm Status
4.4.11 Channel Info
4.4.12 Registration
4.4.13 Network
4.4.14 HDD Manager
4.4.15 USB Manager
4.5 USB Device Auto Pop-up
4.6 Main Menu
4.7 Operation
4.7.1 Search
4.7.2 Human Face Search
4.7.3 Backup
4.7.4 Shut Down
4.8 Information
4.8.1 System Info

viii
4.8.2 Event
4.8.3 Network
4.8.4 Log
4.9 Setting
4.9.1 Camera
4.9.2 Network
4.9.3 Event
4.9.4 Storage
4.9.5 System
5WEB OPERATION
5.1 Network Connection
5.2 Device Initialization
5.3 Login
5.4 Reset Password
5.5 LAN Mode
5.6 Real-time Monitor
5.6.1 Fisheye de-warp
5.7 PTZ
5.8 Image/Relay-out
5.8.1 Image
5.8.2 Relay output
5.9 WAN Login
5.10 Setup
5.10.1 Camera
5.10.2 Network

ix
5.10.3 Event
5.10.4 Storage
5.10.5 Setting
5.11 Information
5.11.1 Version
5.11.2 Log
5.11.3 Online User
5.11.4 HDD
5.12 Playback
5.12.1 Search Record
5.12.2 Fisheye Playback De-Warp
5.12.3 File List
5.12.4 Playback
5.12.5 Download
5.12.6 Load more
5.13 Face Search
5.14 Alarm
5.15 Log out
5.16 Un-install Web Control
6SMARTPSS
7FAQ
APPENDIX AHDD CAPACITY CALCULATION
APPENDIX B COMPATIBLE BACKUP DEVICES
Appendix B-1 Compatible USB list

x
Appendix B-2 Compatible SD Card list
Appendix B-3 Compatible Portable HDD list
Appendix B-4 Compatible USB DVD List
Appendix B-5 Compatible SATA DVD List
Appendix B-6 Compatible SATA HDD List
APPENDIX C COMPATIBLE CD/DVD BURNER LIST
APPENDIX D COMPATIBLE DISPLAYER LIST
APPENDIX E COMPATIBLE SWITCHER
APPENDIX FCOMPATIBLE WIRELESS MOUSE LIST
APPENDIX G EARTHING

xi
Welcome
Thank you for purchasing our HDCVI DVR!
This user’s manual is designed to be a reference tool for the installation and operation of
your system.
Here you can find information about this series standalone DVR features and functions, as
well as a detailed menu tree.
Before installation and operation please read the following safeguards and warnings
carefully!

xii
Cybersecurity Recommendations
Mandatory actions to be taken towards cybersecurity
1. Change Passwords and Use Strong Passwords:
The number one reason systems get “hacked” is due to having weak or default passwords.
It is recommended to change default passwords immediately and choose a strong
password whenever possible. A strong password should be made up of at least 8
characters and a combination of special characters, numbers, and upper and lower case
letters.
2. Update Firmware
As is standard procedure in the tech-industry, we recommend keeping NVR, DVR, and IP
camera firmware up-to-date to ensure the system is current with the latest security
patches and fixes.
“Nice to have” recommendations to improve your network security
1. Change Passwords Regularly
Regularly change the credentials to your devices to help ensure that only authorized users
are able to access the system.
2. Change Default HTTP and TCP Ports:
● Change default HTTP and TCP ports for systems. These are the two ports used to
communicate and to view video feeds remotely.
● These ports can be changed to any set of numbers between 1025-65535. Avoiding the
default ports reduces the risk of outsiders being able to guess which ports you are using.
3. Enable HTTPS/SSL:
Set up an SSL Certificate to enable HTTPS. This will encrypt all communication between
your devices and recorder.
4. Enable IP Filter:
Enabling your IP filter will prevent everyone, except those with specified IP addresses,

xiii
from accessing the system.
5. Change ONVIF Password:
On older IP Camera firmware, the ONVIF password does not change when you change
the system’s credentials. You will need to either update the camera’s firmware to the latest
revision or manually change the ONVIF password.
6. Forward Only Ports You Need:
● Only forward the HTTP and TCP ports that you need to use. Do not forward a huge
range of numbers to the device. Do not DMZ the device's IP address.
● You do not need to forward any ports for individual cameras if they are all connected to a
recorder on site; just the NVR is needed.
7. Disable Auto-Login on SmartPSS:
Those using SmartPSS to view their system and on a computer that is used by multiple
people should disable auto-login. This adds a layer of security to prevent users without the
appropriate credentials from accessing the system.
8. Use a Different Username and Password for SmartPSS:
In the event that your social media, bank, email, etc. account is compromised, you would
not want someone collecting those passwords and trying them out on your video
surveillance system. Using a different username and password for your security system
will make it more difficult for someone to guess their way into your system.
9. Limit Features of Guest Accounts:
If your system is set up for multiple users, ensure that each user only has rights to
features and functions they need to use to perform their job.
10. UPnP:
●UPnP will automatically try to forward ports in your router or modem. Normally this
would be a good thing. However, if your system automatically forwards the ports and you
leave the credentials defaulted, you may end up with unwanted visitors.
● If you manually forwarded the HTTP and TCP ports in your router/modem, this feature
should be turned off regardless. Disabling UPnP is recommended when the function is not
used in real applications.
11. SNMP:
Disable SNMP if you are not using it. If you are using SNMP, you should do so only
temporarily, for tracing and testing purposes only.
12. Multicast:
Multicast is used to share video streams between two recorders. Currently there are no
xiv
known issues involving Multicast, but if you are not using this feature, deactivation can
enhance your network security.
13. Check the Log:
If you suspect that someone has gained unauthorized access to your system, you can
check the system log. The system log will show you which IP addresses were used to
login to your system and what was accessed.
14. Physically Lock Down the Device:
Ideally, you want to prevent any unauthorized physical access to your system. The best
way to achieve this is to install the recorder in a lockbox, locking server rack, or in a room
that is behind a lock and key.
15. Connect IP Cameras to the PoE Ports on the Back of an NVR:
Cameras connected to the PoE ports on the back of an NVR are isolated from the outside
world and cannot be accessed directly.
16. Isolate NVR and IP Camera Network
The network your NVR and IP camera resides on should not be the same network as your
public computer network. This will prevent any visitors or unwanted guests from getting
access to the same network the security system needs in order to function properly.

xv
Important Safeguards and Warnings
1.Electrical safety
All installation and operation here should conform to your local electrical safety codes.
The product must be grounded to reduce the risk of electric shock.
An apparatus with CLASS I construction shall be connected to a MAINS socket outlet with
a protective earthing connection.
We assume no liability or responsibility for all the fires or electrical shock caused by
improper handling or installation.
2.Transportation security
Heavy stress, violent vibration or water splash are not allowed during transportation,
storage and installation.
3.Installation
Keep upwards. Handle with care.
Do not apply power to the DVR before completing installation.
Do not place objects on the DVR.
4.Qualified engineers needed
All the examination and repair work should be done by the qualified service engineers.
We are not liable for any problems caused by unauthorized modifications or attempted
repair.
5.Environment
The DVR should be installed in a cool, dry place away from direct sunlight, inflammable,
explosive substances and etc.
6. Accessories
Be sure to use all the accessories recommended by manufacturer.
Before installation, please open the package and check all the components are included.
Contact your local retailer ASAP if something is broken in your package.
7. Lithium battery
Improper battery use may result in fire, explosion, or personal injury!
When replace the battery, please make sure you are using the same model!
RISK OF EXPLOSION IF BATTERY IS REPLACED BY AN INCORRECT TYPE.

xvi
DISPOSE OF USED BATTERIES ACCORDING TO THE INSTRUCTIONS.
Safety Instruction
Icon
Note
DANGER
Indicates a hazard with a high level of risk, which if not avoided, will
result in death or serious injury.
WARNING
Indicates a potentially hazardous situation, which if not avoided,
could result in device damage, data loss, performance degradation,
or unexpected results.
CAUTION
Indicates a potentially hazardous situation, which if not avoided,
could result in device damage, data loss, performance degradation,
or unexpected results.
Anti-static
Indicates it is the static sensitive device.
Electric shock
risk
Indicates presence of dangerous high voltage. There is a risk of
electric shock to persons.
High power
laser radiation risk
Indicates presence of high power laser radiation.
Tips
It is intended to help you to fix a problem or save your time.
Note
Provides additional information to emphasize or supplement
important points of the main text.

1
1FEATURES AND SPECIFICATIONS
1.1 Overview
The standalone series DVR is an excellent digital monitor product designed for security
field.
It adopts embedded Linux OS to maintain reliable operation. Popular H.264 compression
algorithm and G.711 audio compression technology realize high quality, low bit stream.
Unique frame by frame play function is suitable for detailed analysis. It has various
functions such as record, playback, monitor at the same time and can guarantee audio
video synchronization. This series product has advanced technology and strong network
data transmission function.
This series device adopts embedded design to achieve high security and reliability. It can
work in the local end, and at the same time, when connecting it to the professional
surveillance software (PSS), it can connect to the security network to realize strong
network and remote monitor function.
This series product can be widely used in various areas such as banking,
telecommunication, electric power, interrogation, transportation, intelligent resident zone,
factory, warehouse, resources, and water conservancy.
1.2 Features
This series product has the following features:
Real-time surveillance
Support VGA port and HDMI port. Realize the surveillance through displayer. Support
HDMI, VGA, and TV output at the same time.
Storage function
Special data format to guarantee data security and can remove the risk of the vicious data
modification. Support digital watermark.
Compression format
Support multiple-channel audio and video. An independent hardware decodes the audio
and video signal from each channel to maintain video and audio synchronization.
Backup function
Support backup operation via USB port (such as U disk, portable HDD, burner)
Client-end user can download the file to local HDD to backup via network.
Record & playback function

Support each channel real-time record independently, and at the same time it can support
search, forward play, network monitor, record search, download and etc.
Support various playback modes: slow play, fast play, backward play and frame by frame
play.
Support time title overlay so that you can view event accurate occurred time
Support customized zoom function during the preview.
Network operation
Support network remote real-time monitor, remote record search and remote PTZ control.
Alarm activation function
Several relay alarm outputs to realize alarm activation and on-site light control.
The alarm input port and output has the protection circuit to guarantee device safety.
Communication port
RS485 port can realize alarm input and PTZ control.
RS232 port can connect to keyboard to realize central control, and can also connect to PC
COM to upgrade system and realize maintenance, and matrix control.
Standard Ethernet port can realize network access function.
The dual-network port has the multiple-access, fault-tolerance, load-balance setup mode.
PTZ control
Support PTZ decoder via RS485.
Intelligent operation
Mouse operation function
In the menu, support copy and paste setup function
UPnP (Universal Plug and Play)
Establish mapping connection between LAN and WAN via UPnP protocol.

Slight function differences may be found due to different series.
1.3 Specifications
Technical Specificaon
System
Main Processor Embedded Processor
Operating System Embedded LINUX
Video and Audio
Analog Camera Input
HDCVI Camera
AHD Camera
TVI Camera
CVBS Camera
IP Camera Input
Audio In/Out
Two-way Talk
8/16 Channel, BNC
4K, 4MP, 1080P@25/30fps, 720P@50/60fps, 720P@25/30fps
5MP, 4MP, 3MP, 1080P@25/30, 720P@25/30fps
5MP, 3MP, 1080P@25/30, 720P@25/30fps
PAL/NTSC
8+4/16+8 Channel, each channel up to 8MP
1/1, RCA
Reuse audio in/out, RCA
Recording
Compression H.264+/H.264
Resolution 4K, 5MP, 4MP, 3MP, 1080P, 720P, 960H, D1, CIF, QCIF
Record Rate
Main stream: 4K(1~7fps); 5MP(1~12fps); 4MP/3MP(1~15fps);
1080P/720P/960H/D1/CIF/QCIF (1~25/30fps)
Sub steram:960H(1~15fps);
D1/CIF/QCIF(1~25/30fps)
Bit Rate 1Kbps ~ 6144Kbps Per Channel
Record Mode
Manual, Schedule (Regular, Continuous), MD (Video
detection: Motion Detection, Video Loss, Tampering), Alarm,
Stop
Record Interval 1 ~ 60 min (default: 60 min), Pre-record: 1 ~ 30 sec, Post-
record: 10 ~ 300 sec
Display
Interface 1 HDMI, 1 VGA
Resolution
HDMI:3840×2160, 2560×1440, 1920×1080, 1280×1024,
1280×720, 1024×768
VGA: 1920×1080, 1280×1024, 1280×720, 1024×768
Multi-screen Display
When IP extension mode not enabled:
8CH: 1/4/8/9
16CH: 1/4/8/9/16
When IP extension mode enabled:
8CH: 1/4/8/9/16
16CH: 1/4/8/9/16/25
OSD Camera title, Time, Video loss, Camera lock, Motion
detection, Recording
Network
Interface 1 RJ-45 Port (1000M)
Network Function
HTTP, TCP/IP, IPv4/IPv6, UPnP, RTSP, UDP, SMTP, NTP, DHCP,
DNS, IP Filter, PPPoE,DDNS, FTP, Alarm Server,P2P, IP Search
(Support Dahua IP camera, DVR, NVS, etc.)
Max. User Access
Smart Phone
Interoperability
128 users
iPhone, iPad, Android
ONVIF 2.42, CGI Conformant
Video Detecon and Alarm
Trigger Events Recording, PTZ, Tour, Video Push, Email, FTP, Snapshot, Buzzer
and Screen Tips
Motion Detection, MD Zones: 396 (22 × 18), Video
Loss,Tampering and Diagnosis
N/A
N/A
Video Detection
Alarm input
Relay Output
Playback and Backup
Playback 8CH: 1/4/9
16CH: 1/4/9/16
Search Mode Time /Date, Alarm, MD and Exact Search (accurate to second)
Playback Function
Play, Pause, Stop, Rewind, Fast play, Slow Play, Next File,
Previous File, Next Camera, Previous Camera, Full Screen,
Repeat, Shuffle, Backup Selection, Digital Zoom
Backup Mode USB Device/Network
Storage
Internal HDD
eSATA
2 SATA Ports, up to 8TB capacity for each disk
N/A
Auxiliary Interface
USB
RS232
RS485
2USB Ports (1 USB 2.0 , 1 USB 3.0)
N/A
1 Port, for PTZ Control
Electrical
Power Supply
Power Consumption
8CH:DC12V/4A
16CH:DC12V/5A
<15W (Without HDD)
Construcon
Dimensions
Net Weight
Gross Weight
Installation
1U, 375mm×287mm×53mm (14.8" x 11.3" x 2.1")
2.35kg (5.2 lb) (without HDD)
3.2kg (7.05lb)
Desktop installation
Environmental
Operating Conditions
Storage Conditions
-10°C ~ +55°C (+14°F ~ +131°F), 0~ 90% RH
-20°C ~ +70°C (-4°F ~ +158°F) , 0~ 90% RH
Third-party Support
Third-party Support
Dahua, Arecont Vision, AXIS, Bosch, Brickcom, Canon, CP Plus,
Dynacolor, Honeywell, Panasonic, Pelco, Samsung, Sanyo,
Sony, Videotec, Vivotek, and more
Cerficaons
Certifications
FCC: Part 15 Subpart B
CE: CE-LVD: EN 60950-1/IEC 60950-1
CE-EMC: EN 61000-3-2, EN 61000-3-3, EN 55032, EN 50130,
EN 55024
UL: UL 60950-1

The front panel is shown as below. See Figure 2-6.
Figure 2-6
Please refer to the following sheet for front panel button information.
Icon
Name
Function
STATUS
Status indicator light
The blue light is on when the device is working
properly.
HDD
HDD status indicator
light
The blue light is on when the HDD is malfunction.
NET
Network status indicator
light
The blue light is on when the network connection is
abnormal.
POWER
Power status indicator light
The blue light is on when the power connection is
OK.
USB2.0 port
Connect to peripheral USB 2.0 storage device,
mouse, burner and etc.

218
Please refer to the following sheet for detailed information.
SN Icon Name Function
1 VIDEO IN Video input
port
Connect to analog camera, video input signal.
2 AUDIO IN Audio input
port
Connect to microphone and etc to input signal.
3 HDMI High definition
media
interface
High definition audio and video signal output port. It
transmits the same video signal as that of the VGA/TV or
different video signal from that of the VGA/TV(support
customized setup).
Support mouse operation.
4 Network port 1000M Ethernet port
5 VGA VGA VGA video output port
6 Power switch Power on/off button.
7 GND Power switch Power on/off button.
8 AUDIO OUT Audio output
port
Connect to sound box and etc to output audio signal.
9 A RS485
communicatio
n port
RS485_A port. It is the cable A. You can connect to the
control devices such as speed dome PTZ.
B RS485_B.It is the cable B. You can connect to the control
devices such as speed dome PTZ.
10 USB3.0 port Connect to mouse, USB storage media, USB-burner and
etc.
11 Power socket Power input port

247
2.3 Connection Sample

253
Figure 2-99
SN Name Function
1 Power button Click it to boot up or shut down the device.
2 Address Click it to input device number, so that you can control it.
3 Forward Various forward speeds and normal speed playback.
4 Slow play Multiple slow play speeds or normal playback.
5 Next record In playback mode, playback the next video.
6 Previous record In playback mode, playback the previous video.
7 Play/Pause In pause mode, click this button to realize normal playback.
In normal playback click this button to pause playback.
In real-time monitor mode, click this button to enter video
search menu.
8 Reverse/pause Reverse playback pause mode, click this button to realize
normal playback.
In reverse playback click this button to pause playback.
9 Esc. Go back to previous menu or cancel current operation (close
upper interface or control)
10 Record Start or stop record manually
In record interface, working with the direction buttons to
select the record channel.
Click this button for at least 1.5 seconds, system can go to
the Manual Record interface.
2.4 Remote Control
The remote control interface is shown as in Figure 2-99.
Please note remote control is not our standard accessory and it is not included in the
accessory bag.
Table of contents
Other Security Camera King DVR manuals

Security Camera King
Security Camera King NVR-ELE8M-4KS User manual

Security Camera King
Security Camera King HD-CVI Mini Series User manual

Security Camera King
Security Camera King D6000 Series User manual

Security Camera King
Security Camera King ELITE SERIES User manual

Security Camera King
Security Camera King ME-1080-V2 User manual

Security Camera King
Security Camera King DVR-CVIC32960C-DH User manual

Security Camera King
Security Camera King NVR-ELHS-64-4K-DH User manual

Security Camera King
Security Camera King DVR-CVI8240M User manual

Security Camera King
Security Camera King PENDVR-EL16M4K User manual

Security Camera King
Security Camera King DVR-CVI8240M User manual