Seedburo 9000AG Service manual

Seedburo Equipment Company | 9000AG Manual Revision 1.0
1
Seedburo Model 9000AG Computer Grain Scale
Operating and Service Manual

Seedburo Equipment Company | 9000AG Manual Revision 1.0
2
Seedburo Model 9000AG Operating and Service Manual
Cover Sheet ……………………………………………………………………………..…. 1
Table of Contents ……………………………………………………………………….... 2
Section 1 Introduction & Unpacking and Setup ……………………………….. 3
Section 2 USER INTERFACE………………………………………………..….. 5
Section 3 Scale Operation ……………………………………………………….. 6
Section 4 Programming the 9000AG parameters……………………………….. 7
Section 5 User Setup Parameters ….…………………………………….……… 8
Section 6 Calibrating the 9000AG ………………………………………………. 11
Section 7 Printer Modes… ……………………………………………………..… 12
Section 8 Error Messages …………………………………………………..…… 13
Section 9 Troubleshooting …………………………………………………….…. 14
Section 10 9000AG Technical Specifications ……………………………………. 15
Seedburo Equipment Company | 9000AG Manual Revision 1.0
3
Section 1
Introduction:
Congratulations on your purchase of the Seedburo Model 9000AG Grain Scale. The model 9000AG
is a rugged stainless steel scale with the latest microprocessor and scale technology. The model
9000AG is in being tested to National Type Evaluation Program standards. The certificate is pending.
Therefore this scale can be used in Legal for Trade applications.
Some of the major features of the scale are:
Rugged stainless steel enclosure
Power switch with computer type removable power cord.
DB9 Rs232 printer Port
Test Weight in Lb./Bu. / Kg./hl.
Dockage Calculation in % Foreign Material or % Grain
NTEP Legal for Trade
Rugged Printed Circuit board substrate user interface with tactile feedback switches.
Parameter setup via front panel
Calibration access via Front Panel
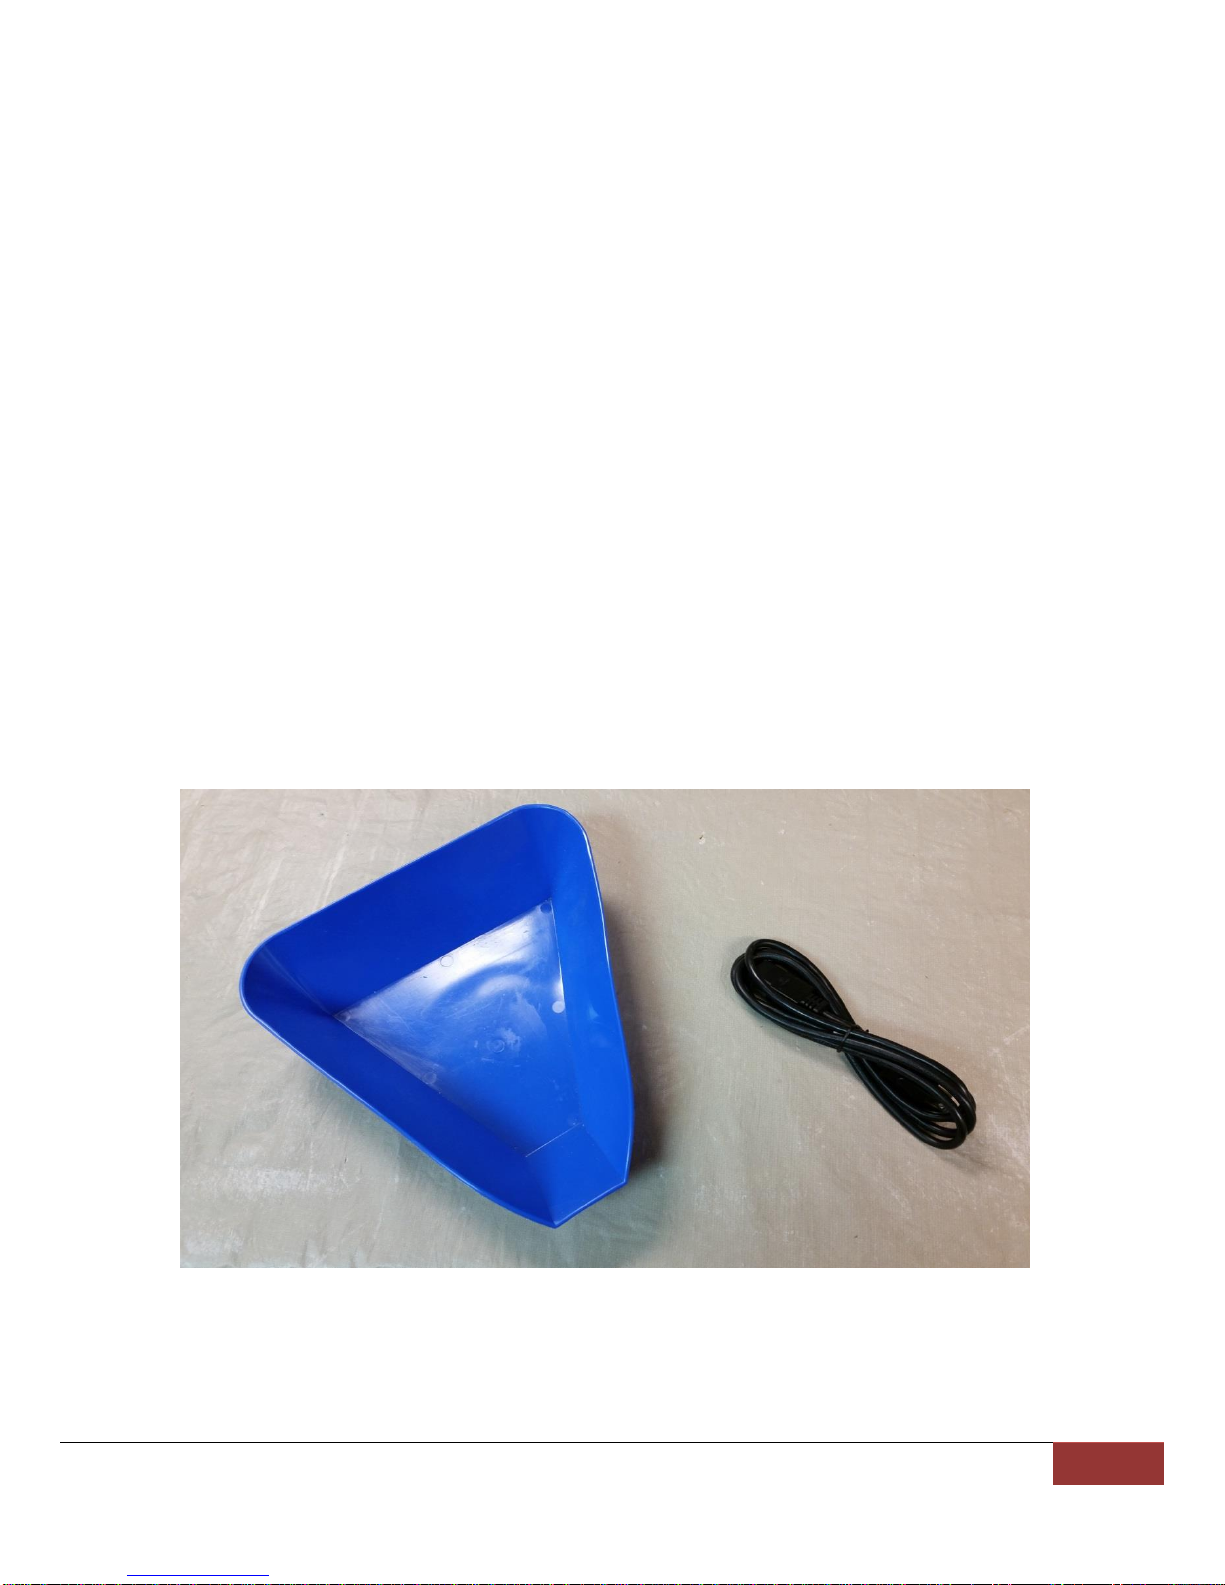
Unpacking and SETUP:
Check that the following items are in the Box:
Power Cord
Plastic Tray
Calibration Certificate (not shown)

Seedburo Equipment Company | 9000AG Manual Revision 1.0
4
Setup:
Remove the platter from the scale.
Locate the Bubble level.
Use the adjustable feet to get the bubble in the center of the circle. See picture below.
Make sure platter pins are aligned with the screws. Wiggle platter side to side it should be
secure.
Locate the power cord and plug it into the back of the scale. UNIT IS CONFIGURED FOR
115VAC 60HZ. DO NOT PLUG IN 230VAC or unit will be damaged.
You are now ready to use the scale. Use switch on back panel to power the scale on.
NOTE: To meet the NTEP specifications and to get the best performance from
your scale a stable surface free of vibration and wind is required
Level the Scale using the adjustable feet. Bubble should be inside circle.
Below picture of back panel connectors and power switch.

Seedburo Equipment Company | 9000AG Manual Revision 1.0
5
Seedburo Model 9000AG Operating and Service Manual
Section 2
INDICATOR LED LIGHTS:
STABLE: This light indicates when the scale is in motion (LED off) or is stable (LED on). When
placing a weight on the scale the LED should turn off until the weight reading stops
changing (thus stable) than the LED will Illuminate. LED should Illuminate when at
zero also.
NOTE: For the scale to function properly, example.. ZERO, PRINT,MEM, % etc…
the SCALE MUST BE STABLE. Vibration and wind may cause instability.
9: This light when illuminated indicates the number on the scale is measured in grams.
9000AG USER INTERFACE:
ZERO /CLEAR: This switch allows the USER to Zero the scale reading. When you press and HOLD
the switch it will zero the stored weight in Memory.
MEM: This switch allows the USER to store a weight in memory so the User can perform a
dockage test. See page 4 for dockage test procedure.
%: This switch will perform a percentage reading by dividing the Memory/current weight.
This % can be displayed as %dockage or %good product. See PCr parameter on
page 5.
Lb/Bu: This switch will allow the user to measure weight in Lb/Bu (pounds/bushel).
Kg/Hl: This switch will allow the user to measure weight in Kg/Hl (Kilo grams/Hectoliter).
g: This switch will change the weight reading back to grams.
9000AG User Interface

Seedburo Equipment Company | 9000AG Manual Revision 1.0
6
Section 3
Scale Operation:
Weighing:
1. Press Zero to zero the scale. If using the plastic pan provided or any other container
place it on the scale than Zero the scale.
2. Place item to be weighed on platter or in holding device if applicable.
3. Read the weight when the “STABLE” LED illuminates.
Note 1: For best weighing performance let the scale warm up 30 minutes before
use. It is OK to leave the scale on.
Dockage Percent:
1. Place container on scale and Press Zero to zero the scale. Wait until “STABLE” Indicator
is illuminated.
2. Fill the container to the desired weight.
3. When “STABLE” LED illuminates select the “MEM” switch to store the weight in memory.
4. Screen or filter foreign material and place on the platter.
5. Select the % switch to display percent. Note 1,2
NOTE 1: Display can read % foreign material or % good product by changing the
PCr parameter. See sections 5 and 6.
NOTE 2: Select the “g”switch to return to weigh mode. Clear memory by holding
“MEM”until the display flashes the stored number than “ZERO”.
CLEAR will appear on the display.
Grain Test Weight: Quart Cup *Note 1
1. Place quart cup container on scale and Press Zero to zero the scale. Wait until
“STABLE” Indicator is illuminated.
2. Fill the cup with Grain.
3. When “STABLE” LED illuminates select the “lb/bu” switch to display grain in pounds per
bushel or “kg/hl” for kilograms per hectoliter.
NOTE 1: Grain Test can also be setup to use LITER and PINT cups. You must
change the Chr parameter to the proper setting for the correct result.
See Sections 5 and 6.
Theory of Operation:
The 9000AG grain scale can weigh a maximum of 2,000 grams. The resolution is 10000 divisions
which means the smallest increment is .2 grams. When calibrated the unit is accurate within +/- 2
divisions. The 9000AG has passed an extensive checklist of tests as prescribed in the HANDBOOK
44 document issued by the National Institute of Science and Technology. The 9000AG has passed
these tests to become NTEP (National Type Evaluation Program) certified.
The displayed resolution of the percentage, Lb/Bu and Kg/Hl are displayed to the nearest 1/100 (.01)
The 9000AG uses a linear power supply capable of input voltages from 104VAC to 127VAC. Nominal
AC voltage is 115VAC with .31 amps of current for 36 Watts.

Seedburo Equipment Company | 9000AG Manual Revision 1.0
7
Section 4
Parameter and Calibration mode Access (Setup mode)
The Model 9000AG parameters will change the operation of the scale. The parameters are accessed
either by removing the cover and selecting the CAL Switch located on the printed circuit board
mounted to the base of the scale. The other method is by holding down the PRINT and the hidden
switch located behind the Seedburo Logo.
The first parameter seen when in the Setup Mode is CAL 0. Please refer to Section 6 for using this
parameter. For now we will pass this parameter.
Selecting a Parameter:
The parameters are selected by pressing the gswitch to go forward in the list and the PRINT to go
backward in the list. A complete list of parameters can be seen on the following page.
Note: Think of the gswitch as a forward arrow or an Enter switch.
Changing a Parameter:
Each parameter has at least two different options that can be selected. To change a value for a
selected parameter you must:
1. Press the Zero switch. Each time pressed the display will change value. The display will
continue cycling through each parameter.
2. Once the selection is set to the desired value it will be saved temporarily by selecting the g
switch.
3. However it will not be saved permanently until you cycle through the parameters by using the
gswitch until the display reads SAVE.
4. Change the value to Yby pressing ZERO
5. Select gto save and exit the parameters.
Legal for trade mode:
The 9000AG scale can be configured to operate in USA and CANADA Legal for Trade Modes. This is
done by selecting the oP parameter and changing it from the default setting of STD to 44 or CAn.
Some parameters are disabled when in the Legal for Trade modes USA “44”and Canada “CAn”. All
parameters are available in the Operating mode of “Std”. The values that are disabled are marked
with an asterisk (*) in the Tables below. (in 44 mode AZt can be 0 or 0.5, mma is 1 and SUO ON)
The 9000AG comes set from the factory with the parameters marked in BOLD (see tables below).
You can default the parameters back to these setting anytime by selecting the dft parameter. Than
using the Zero switch to change the dft parameter from No to YES. Than select the gswitch to
default the scale.
NOTE: The parameter changes will be lost if you do not perform steps 3, 4 and 5 above.
Audit Counters:
When entering the Setup mode there will be displayed the audit counters. Each time a change is
made the counters will increment. There are two counters one will increment for each time a
parameter is changed the other will increment each time the scale completes a calibration.

Seedburo Equipment Company | 9000AG Manual Revision 1.0
8
Section 5
Parameters in order of occurrence (BOLD values are the defaults):
Calibration Parameter
CAL
Zero Calibration Mode
0
Press ZERO switch on user interface to perform the Zero calibration of the scale. Display
will count down and automatically go to CAL FS unless an error occurs.
Note: The CAL 0 function will automatically adjust the offset and gain to
compensate for dead load and span. The scale must be level and on a solid surface.
Excessive vibration and/or wind may cause the scale not to be able to perform this function.
CAL
Span Calibration Mode
Will only appear upon successful completion of the CAL 0 function above.
FS
Set 2,000 grams on the platter. Press ZERO switch on user interface to perform the
SPAN calibration of the scale. Display will count down and automatically go to operating
mode unless an error occurs.
Digital Filter Parameter:
Avg
Averaging mode calculates the number of samples to average before displaying a
weight. Display updates 10 times per second.
0
1 reading. No Average in this mode.
1
Circular Auto averaging, 1 reading averaged
2
Circular Auto averaging, 2 readings averaged
4
Circular Auto averaging, 4 readings averaged
8
Circular Auto averaging, 8 readings averaged
16
Circular Auto averaging, 16 readings averaged
Auto Zero Tracking:
AZt
Automatic Zero Tracking Range
Small weights within the specified number of divisions are automatically zeroed.
oFF
Zero tracking is off.
0.5
Zero tracking to within 0.5 divisions.
1.0*
Zero tracking to within 1.0 divisions.
2.0*
Zero tracking to within 2.0 divisions.
3.0*
Zero tracking to within 3.0 divisions.
Auto Zero Tracking:
mmA*
Motion Aperature *
Determines how many divisions consecutive readings must change before the scale is
considered in motion. (Stable LED will turn off when in motion)
1
1 division change will cause the scale to enter into motion
2
2 division change will cause the scale to enter into motion
3
3 division change will cause the scale to enter into motion
5
5 division change will cause the scale to enter into motion
*Note: The Legal for Trade modes(Op parameter equals 44 or CAn) will disable the * values.

Seedburo Equipment Company | 9000AG Manual Revision 1.0
9
Parameters in order of occurrence (BOLD values are the defaults):
Serial Data Output Parameter
d.o
Data Output mode (see page 12 for a detailed explanation of print modes)
t.o.d
Transmit on Demand. Scale will print when the PRINT switch is pressed.
C.P.
Continuous Print. Prints when display is updated
A.P.1
Auto Print 1 Print once only when stable indicator is on.
A.P.2
Auto Print 2 Print once only when stable indicator is on. Scale must return to zero before
it can print again.
Start Up Zero Parameter
SUO*
Start Up Zero Mode
Controls the startup zero status.
On
Zeroes the scale on the first stable reading on power up
CL0
Loads the calibration zero reference
Pb0*
Loads the last pushbutton zero
Operating Mode Parameter:
oP
Operating mode select the mode the scale is operating in. The standard mode is the
default and enables all the available parameters. The Legal for trade mode disable
parameters marked with an *.
Std
All functions and parameters are enabled
44
Meets legal for Trade NTEP criteria as specified in NIST Handbook 44
CAn
+/-1.9% Zero Range. Canadian Weights and Measures compliant.
RS232 Printer Output Baud Rate Parameter:
Br
Baud Rate
Determines the baud rate of the RS232 Printer output of the scale this must match the
printer you are using in order to Print correctly
12
1200 baud (bits per second)
24
2400 baud (bits per second)
48
4800 baud (bits per second)
96
9600 baud (bits per second)
14.4
14400 baud (bits per second)
28.8
28800 baud (bits per second)
Commodity holder Parameter:
Chr
Type of Commodity Holder
Determines size of Cup used when calculating Test Weight.
qC
Quart Cup
LC
Liter Cup
PC
Pint Cup
*Note: The Legal for Trade modes(Op parameter equals 44 or CAn) will disable the * values.

Seedburo Equipment Company | 9000AG Manual Revision 1.0
10
Parameters in order of occurrence (BOLD values are the defaults):
Percent Calculation Parameter
PCr
Percent mode defines the way the Dockage is displayed.
SPt
Standard –Displays a percent value based on the formula current weight divided
by memory value. example 200g/2000g=10% dockage
rPt
Reciprocal –Displays percent value based on (memory weight- current weight) divided
by memory weight. example (2000g-200g)/2000g=90% good product
Percent Mode Parameter
PCd
Percent mode defines the method of how the % calculation is displayed
ACt
Active mode continuously updates the display
Frn
Frozen mode calculates the % only when the % switch is pressed.
SAVE Parameter:
SAVE
SAVE mode allows the user to permanently save the changes made to the parameters
N
Do not exit and Save. Continue to next parameter.
Y
Exit Setup mode and SAVE changes. The scale will return to the weighing mode once
the gswitch is pressed.
Default Scale to factory parameter settings:
dft
Default scale parameters
N
Do not default parameters. Continue to next parameter.
Y
Default Parameters to factory defaults. All default values are in BOLD text.
Analog to Digital Counts:
xxxxxx
Displays Analog to Digital Data
Press g to exit raw counts
Load Cell mv output:
xxxxxx
Displays Internal Load Cell voltage
Press g to exit voltage reading

Seedburo Equipment Company | 9000AG Manual Revision 1.0
11
Section 6
Entering Calibrations and Parameter setup Mode:
The Calibration and Parameter Setup Mode can be entered by two different ways.
1) The Front Panel CAL Access Feature
To enter the calibration mode while the scale is powered up HOLD the hidden switch
behind the SEEDBURO Logo, now press the PRINT switch once.
At this point, the display will show the audit counters followed by the first menu parameter
CAL 0.
2) The CAL switch is a momentary push button located in the center of main Printed Circuit
board. The CAL switch can be accessed by removing the meter’s top cover.
After the push button has been pressed, the display will show the audit counters
followed by the first menu parameter CAL 0.
CALIBRATING THE 9000AG:
To calibrate your Seedburo Model 9000AG, you will need a set of precision test weights,
Class "Q" or better. This set consists of 2-2000g weights. Seedburo has these weight
sets available for purchase. Do not use test weights of lower accuracy than Class "Q" -
Scale calibration will not be correct, as it is dependent upon the accuracy of the test
weights used.
Before proceeding with calibration, be sure that the scale is level, stable, and away from
wind currents and vibration. Use the bubble level below the platter and the adjustable feet.
Note: Excessive vibration or wind currents can cause the count down cycle to
restart. This can cause errors in calibration. It is imperative that calibration
be done in an area free from vibration and wind currents.
1. Enter Calibration mode, wait until CAL 0 appears on the display.
2. Remove commodity holder or any weight from the scale platter and wait for about 10
seconds. Press ZERO and wait for the display to count down from 7 to 0. If the calibration
zero was in range, the display will return with CAL FS.
3. To complete the calibration process, place 2,000 grams weight on the platter and
press ZERO, wait for the display to count down to 0. If the span calibration was in
range, the display will return with weigh mode if successful.
4. If the display returns with a CAL 0, repeat
5. steps 2 and 3.
NOTE: If an error message appears Refer to the Troubleshooting section for additional information.

Seedburo Equipment Company | 9000AG Manual Revision 1.0
12
Section 7
Printer Modes:
The Model 8800SS offers four different print control modes. These modes dictate when
printer data is sent.
Transmit on demand (tod):
In this mode, scale data is transmitted whenever the PRINT button is pressed, or a print
request is received from the serial port. The scale must be stable and the scale value
must be valid before the data is printed.
Continuous print (CP):
In continuous print, data is transmitted each time the scale has a reading ready.
Readings which occur when the scale is in motion are called out by the abbreviation
"MOT." following the data.
Auto Print 1 (AP1):
Auto Print 1 transmits the first scale reading after the scale leaves motion. The reading
must be stable and must be a valid reading before it can be sent.
Auto Print 2 (AP2):
Like Auto Print 1, Auto Print 2 transmits the first scale reading following the scale
leaving motion. In Auto Print 2, no further readings will be sent until the scale returns to
displayed zero. The reading must be stable and must be a valid reading before it can be

Seedburo Equipment Company | 9000AG Manual Revision 1.0
13
Section 8
Error Messages:
Error:
Explanation:
Ldn9 0
Loading Zero
The scale will always compare the zero calibration point against the zero on power up. This
message will appear if the scale zero is not stable (could be from wind or vibration) or if there is
an instability problem with the load cell.
0 Ovr
Zero Over
You can zero a maximum of 3% of capacity .
Remove all dead load from the scale (pans/seeds etc..) Make sure platter is centered on the pins
of the weighing mechanism. Power on scale.
If it is still in 0 Ovr than you must enter the calibration menu and re-calibrate the scale.
0 Undr
Zero Under
This message will appear if the initial zero is 100 grams or more below the CAL zero point.
Err EEp
Error EEPROM memory is corrupted. Default scale parameters and re-calibrate scale. If
problem persists than you need to replace the main printed circuit board and re-calibrate scale.
Udr Ld
Under Load
Under load message will appear when the scale is 100 grams or less than the CAL zero point.
Our Ld
Over Load
Overload message will appear when the scale weight is 103% over initial zero or displayed zero,
whichever comes first.
Seedburo Equipment Company | 9000AG Manual Revision 1.0
14
Section 9
Troubleshooting:
Problem:
Check:
Will not power up. Blank screen.
Remove Power CORD from scale!
Remove the 6 screws holding the top enclosure to the base.
Check the Fuse located in the rear of the scale next to the
power switch. If blown replace with .25 amp time-delay fuse.
Next check if the display cable has become unplugged.
Sometimes if the scale is dropped or shipped a violent shock
may dis-lodge the connector from the printed circuit board.
Display stuck on LDG 0.
Zero is not stable
Remove all dead load from the scale (pans/seeds etc..) Make
sure platter is centered on the pins of the weighing
mechanism. Make sure there is not an excessive vibration on
the surface the scale is sitting on. Make sure scale is level.
Make sure the scale is not in direct line with a fan or vent
excessive wind could cause this message to appear.
If it is still in LDG 0 than you must enter the calibration menu
and re-calibrate the scale.
Display has 0 Undr
This means the scale is shifted in a negative direction. Add
dead load to scale. Make sure platter is centered on the
weighing mechanism Pins. If error continues, re-calibrate
the scale.
Display has 0 Ovr
Dead load exceeds 200 grams from zero point. Remove dead
load from scale(pan, grain, weights). If the error continues you
may have to re-calibrate the scale.
Display has udr Ld
This indicates the scale is in a severe under load condition.
Make sure platter is centered on the weighing mechanism
Pins. If error continues, re-calibrate the scale. If you cannot
calibrate replace load cell.
Display has Our Ld
The scale is 103% over initial zero or displayed zero,
whichever comes first. Remove weight from scale. If you
cannot get 2,000 grams to weigh without this meassage yo
must re-calibrate the scale. If you cannot calibrate replace
load cell.
Display Updating too slow
Try reducing filtering. Default is AVG 8. The smaller the
number the faster the update but the less stable the reading.
Scale is Unstable digits constantly
moving
Try Increasing AVG parameter to AVG 16. Shield scale from
wind currents. Place scale on solid table free from vibration.
Make sure scale is level.

Seedburo Equipment Company | 9000AG Manual Revision 1.0
15
Section 10
9000AG Specifications and RS232 Pin out
Specifications:
Resolution:
10,000 divisions , count by .2g
Capacity:
0 to 2000 grams
Load Cell Capacity
3KG
Displayed Units
G, Kg/Hl, Lb/Bu, %
Printer Interface
DB9 connector, Bi-directional RS232
Controls
ZERO, g , kg/Hl, Lb/Bu, PRINT
Power Requirements
Nominal 115 Volts AC(VAC), Range 108 VAC to
122 VAC, Current draw .25 amps
DB9 RS232 connections
Pin 1
No Connection
Pin 2
Transmit TXD
Pin 3
Receive RXD
Pin 4
No Connection
Pin 5
Ground
Pin 6
No Connection
Pin 7
No Connection
Pin 8
No Connection
Pin 9
No Connection
Table of contents


