SeeEyes SC-IPC0708HU User manual

Release Version 1.1
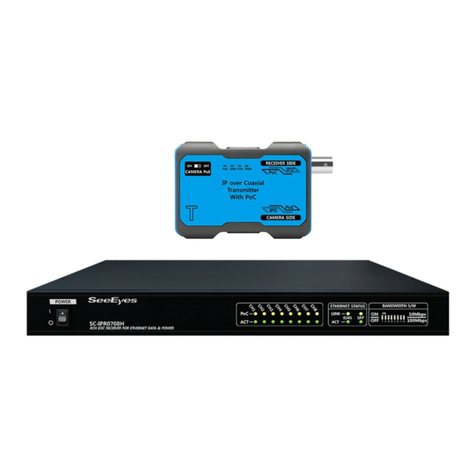
8-channel EoU Transmission kit with built-in PoE Switch HUB
SC-IPC0708HU
User Manual
RECEIVER
TRANSMITTER

Release Version 1.1
1
Precaution and Safety Guidelines
The content of this guideline is intended to protect user safety and prevent property damage.
Please read these operating instructions carefully and use the device properly.
Warning (If you do not keep any of the below guidelines, you may get
seriously injured or cause somebody’s death.)
■Be sure to install the product after unplugging power cord. Also, do not use many power plugs at the
same time.
- It may cause abnormal heat, fire and electric shock.
■Do not leave the device in a place where water will fall or splash. Also, do not place anything with
water on it, such as a vase of flowers.
- A malfunction or fire may result if liquid gets inside the device
■Do not bend the power cord by excessive force. Make sure the power cord is not crushed by heavy
things.
- It may cause fire.
■Do not open the lid arbitrarily as this device has high voltage part inside. Never disassemble, repair or
modify it.
- Abnormal work could result in fire, electric shock, and injury.
■Do not install this product in places with high humidity, dust, or soot.
- It may cause electric shock and fire.
■Do not tug at the power cord section or unplug the power plug with wet hands. If the power cord is
loose, do not plug in.
- There may be a risk of fire and electric shock.
■Always keep the location clean and dust-free during or after installing the device. When cleaning the
device, be sure to wipe it with a dry towel and do not use water, thinner, or organic solvents.
- It may cause malfunction or fire
■Keep the device in a cool place where doesn’t let direct sunlight. Keep it at a proper temperature and
avoid heating appliances like candle or heater. Also, keep the equipment or tools away from places where
people come and go.
- There is a risk of damage to the surface of the device and a risk of failure, electric shock or fire.
■Pay attention to possible hazards in the workplace, such as wet floor, ungrounded power extension
cables, old power cords and a lack of safety earth. Consult your place of purchase or professional if
problems arise.
- It may cause fire and electric shock.
■Keep the back of the product more than 15 cm and the sides more than 5 cm from the wall. Installing
the product too close to the wall may bend, compress too much, or break the cable as various external
input / output connectors such as power cords protrude from the back of the product.
- It may cause fire, electric shock and personal injury.
■Concerning the input voltage for operating this device, a voltage range must be within 10%
of rated voltage. Also, do not use a heat source such as a hair dryer, iron and refrigerator to the
same power unit.
- It may cause abnormal heat, fire and electric shock.
■When thunder or lightning strikes, please pay attention to the safety and unplug the power
cord.

Release Version 1.1
2
Caution (Failure to follow any of the following guidelines could result in
personal injury or property damage.)
■Avoid installing near strong magnetic fields or radio waves and wireless devices such as radio or TV.
- Install in a place that is free from magnetic, radio, or excessive vibration.
■Proper ambient temperature and humidity are recommended.
- Avoid extremely high temperatures (above 50°C) or low (below -10°C), and humid conditions.
■Do not place heavy items on the product or let foreign substances enter inside the device.
- It may cause failure.
■Install the device in a well-ventilated place and avoid direct sunlight or heating devices.
■Install in a flat and stable place. Do not use an upright or inclined position.
- It may not work properly or it may be dangerous due to the device falling.
■Strong shock or vibration may cause device failure. Be careful when using the device.
- Install the device in a location free from strong vibration.
■If you notice any unusual noise or smell, unplug the power supply immediately and contact the place of
purchase or service center.
- There may be a risk of fire and electric shock.
■Rotate the air properly in the system operating room and secure the cover of the main body.
- It may be the cause of failure by environmental factors.
■Contact the service center and have them checked regularly to keep the system working.
- We are not responsible for any damage caused by carelessness of the user.
■Make sure the power cord is plugged into a grounded electrical outlet.
- There is a risk of electrical shock and personal injury.
■Place the power plug in a location that is easy to operate.
- If a product fault has occurred, the power plug must be pulled out in order to switch off the device
completely. The power switch on the main housing does not completely cut off the power supply.
■When this device is used near devices that generate strong radio waves, such as Radio devices
(TRANCEIVER, walkie-talkie, etc.), repeaters, etc. this can affect the video signal and abnormalities such as
noise or cracks appear on the device. Do not use it, as this may cause the device to malfunction.
■Please be careful not to change the cable connection.
■When installing the product on a rack, be sure to install it separately from the equipment installed
above and below.
-If there is no space for heat to be released between the products, equipment failure may occur due to heat
saturation.
-The life of the product may be shortened due to an increase in the internal temperature of the product.
■UTP(Unshielded Twisted Pair) Cable is for indoor use only. Use a STP(Shield Twisted Pair) Cable which is
shielded for outdoor use.
■Transmission distance may vary depending on the type of UTP cable.
■Refer to this user guide for any issues and enquiries. If you need professional assistance, please contact
the place of purchase or our service center.
■Class A equipment (commercial broadcasting and communication equipment)
-This device is a business grade electromagnetic wave device (Class A). The seller or user is advised to take
note of this, and the device is not intended for household use
■Insulate the part where the cable connects to the connector so that the metal part is not exposed.

Release Version 1.1
3
1. Introduction
1-1. summary
This product is composed of transmitter, a 1-channel power superimposed IP transmission device,
and 8-channel receiver with Switch HUB function.
Using an existing UTP cable, it transmits power to the transmitter and IP camera with one UTP cable,
and at the same time receives the IP camera signal and transmits multi-channel IP camera data to
NVR 1Port. It can also shorten the construction period and reduce the construction cost.
When using CAT.5e cable, network data can be transmitted up to 800m (when 10Mbps is set), so it
can compensate for the shortcomings of the short transmission distance of Ethernet equipment using
the existing UTP cable.
1-2. Product Features
•Overlapping power and network data via 1 UTP cable
•Long-distance transmission of Network Data via 1 UTP cable
※Transmission distance: 10Mbps setting → 800m / 100Mbps setting → 500m (based on CAT.5e)
•Built-in 10/100Mbps control switch to optimize transmission bandwidth by distance
•8-channel receiver with Switching HUB function
- RJ-45, SFP port provided (Choose 1)
•Safe power transmission with automatic line diagnosis function
•PoE ON/OFF switch mounted on transmitter
•Reduces installation costs by utilizing existing UTP cable lines
•PoE function (overlapping power) is installed, so there is no need to install power lines, so
installation cost and construction period are reduced
•MULTICAST support
•Built-in surge protection circuit
2. Product Components
Receiver
POWER CORD
User's Manual
Bracket /SCREW Set
Transmitter
RJ-45 CABLE(8EA)
Mounting BRACKET(8EA)

Release Version 1.1
4
3. Name and function of each part
3-1. Receiver
①POWER : Power ON/OFF Switch
②1~8channel Status LED: Power status of each channel and Link/Act. information display.
Name
State
State Description
PoC
light on
Successful power input status of each channel
flashing
Transmitter side power supply error of each channel
(short circuit, disconnection, overcurrent)
lights out
No power input for each channel
LINK/ACT
flashing
Successful connection status with the transmitter of
each channel
lights out
No connection with the transmitter of each channel
③UpLink Status LED: NVR's Link and Act information display.
ETHERNET STATUS
Name
Satus Description
LINK
Lit: Ethernet connection status successful
Off: Ethernet not connected
ACT
Blinking: Ethernet data is present
Off: No Ethernet data
④Transmission distance extension switch (Bandwidth) :100Mbps, 10Mbps setting switch.
•You can change the transmission distance for each channel by turning ON↔OFF switches
1~8. ※The factory default setting is 100 Mbps.
SWITCH
Transmission distance
ON
10Mbps
Maximum Transmission distance based on CAT.5e. : 800m
OFF(Default)
100Mbps
Maximum Transmission distance based on CAT.5e: 500m
⑤RJ-45 LINK from TRANSMITTER: Transmitter connection terminal (RJ-45 8 ports).
⑥Program update port (manufacturer only): Product update terminal.
⑦NVR SIDE: Connection terminal for NVR or Network device (RJ-45 1Port).
⑧SFP: Connection terminal with NVR or Network device using optical module.
⑨AC INLET: AC power input terminal.
※Only one of the NVR SIDE RJ45 and SFP ports can be used.
⑤
⑥
①
⑦
②
⑧
③
④
⑨

Release Version 1.1
5
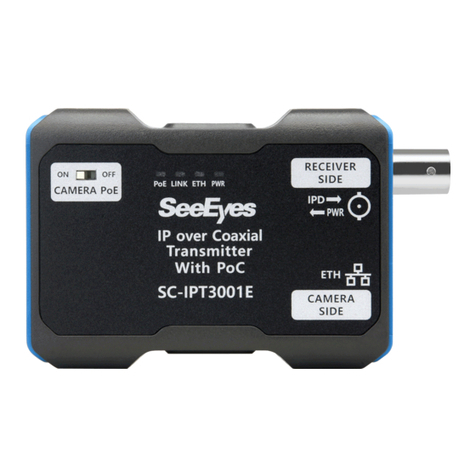
3-2. Transmitter
①CAMERA PoE: Switch for setting the power supply of the IP PoE camera.
※When connecting an IP PoE camera, set the CAMERA PoE switch to ON.
※When the product is shipped, the PoE switch is set to PoE ON.
※If you connect an IP camera that does not support PoE, set the CAMERA PoE switch to OFF.
②Status LED
Name
color
Status Description
PWR
Red
Lights up: power input is successful
Off: No power input
ETH
Green
Blinking: Successful Ethernet connection
Off: Ethernet not connected
LINK
Green
Lit: Successful connection with the receiver
Off: Not connected to the receiver
PoE
Red
Lit: Successful PoE input to IP camera
Off: No PoE to the IP camera
Blinking: IP camera power supply error (short circuit,
disconnection, overcurrent)
③RECEIVER SIDE: Receiver connection and video output terminal.
④CAMERA SIDE: IP camera connector.
※Precautions
Power is supplied with the UTP cable, so be sure to connect only to the dedicated product.
Otherwise, the product may be damaged or destroyed. When the product is booted, the LEDs turn
on sequentially and then operate.
①
③
②
④

Release Version 1.1
6
4. CABLE PIN Array (10/100, Mode B)
Number
Color
10/100
Mode B
T568A
T568B
1
white + green
white + orange
Rx+
2
green
Orange
Rx-
3
white + orange
white + green
Tx+
4
blue
blue
DC+
5
white + blue
white + blue
DC+
6
Orange
green
Tx-
7
white + brown
white + brown
DC-
8
Brown
Brown
DC-
5. Product configuration example

Release Version 1.1
7
6. Power supply table (Actual value)
※The cables in the table above are based on Cat.5e made by LS.
※Cable transmission distance may vary depending on specifications such as camera and NVR.
※When using the PoE function of the transmitter, the transmission distance may vary depending on
the camera type.
In particular, use a dedicated camera power supply for IP PTZ cameras that use a lot of power or
cameras that use a lot of IR LEDs. It is also recommended that the cable distance between the
camera and the transmitter is less than 1m.
※For transmissions over 500 m, check the power consumption of the camera and supply the camera
with the external power supply of the camera (set the CAMERA PoE switch on the transmitter to OFF).
7. Product installation notes
※It is not recommended when products are in contact or connected to each other.
※If the product is powered by PoE, it is recommended to ground the camera after checking the
video.
※When using a surge protector, it is recommended that the cable distance between the camera and
the transmitter is a maximum of 50 m.
※The use of a LAN cable extension (coupler) leads to signal attenuation. The use of multiple
advanced gender links is not recommended.
Transmission
distance(Cat.5e)
Bandwidth
48V SMPS
Loop
Resistance

Release Version 1.1
8
8. Product specification
Model name
Transmitter
Power input
PoE (Power input from Receiver via PoE)
Power output
Midspan PoE support (Type B only, PoE Switch On/Off
available)
Bandwidth
100Mbps Full Duplex
Connection
port
RJ-45 (TIA/EIA568B
Type)
RJ-45 (TIA/EIA568B Type)
RJ-45 (TIA/EIA568B
Type)
RJ-45 (TIA/EIA568B Type)
Camera PoE Switch
Slide switch : PoE power on/off selector switch
Operating Temperature /
Operating Humidity
-10°C ~ +50°C / 0 ~ 80%
Material / Weight
ABS flame retardant / 52g
Dimensions
76(W) x 55(H) x 24(D)mm
Model name
Receiver
Maximum transmission distance
(based on CAT.5e)
CAT.5e 100Mbps: 500m, 50Mbps: 600m transmission
CAT.5e 10Mbps: 800m transmission
Power output
PoE (DC 48V)
Bandwidth
100Mbps Full Duplex
Power input
AC 100 ~ 240V
Power output
MAX.12W for each channel (@DC 48V)
Power consumption
220V MAX: 127W (8 channels, 12W output)
Connection
port
NVR Port
(choose one)
RJ-45 x 1(1Giga)
SFP x 1(1Giga)
TX Side
RJ-45 x 8
Bandwidth selector switch
10M / 100M
Operating Temperature /
Operating Humidity
-10°C ~ +50°C / 0 ~ 80%
Material / Weight
Steel / 3.6kg
Dimensions
430(W) x 44(H) x 300(D) mm

Release Version 1.1
9
9. Troubleshooting
Symptom
Identification method
No Power.
<Transmitter>
•Check if the receiver's PoE LED is on and the transmitter's PWR
LED is on.
•Check the UTP cable connection.
<Receiver>
•Check the AC power cable.
•Check that the power switch is ON.
•Check if the PoE LED is operating normally.
No Video.
•Check whether the LINK LED on the product lights up and the
ETH LED flashes.
•Check whether the transmission distance exceeds the
recommended transmission distance.
•Check that the NETWORK CABLE is arranged correctly.
•If you are using the PoE function of the transmitter, check that the
PoE LED is lit. If it's turned off, set the PoE switch to ON..
No PoE supply
•Check the transmitter's PoE switch.
•Check that the PoE LED on the transmitter is RED.
•Check that the NETWORK CABLE is arranged correctly.
•Make sure that your IP CAMERA is PoE capable.
The NETWORK
connection is
abnormal.
•Check that the NETWORK CABLE is arranged correctly.
•Check the area for radio devices or devices that generate strong
radio waves.
•Check whether the network configuration is designed correctly.
The video status is
not stable
•Check the NETWORK cable connection.
•Check the mutual compatibility between the NVR and the camera.
•Check the camera's performance status.

Release Version 1.1
10
10. Warranty Certificate
This product has passed thorough quality control and test, and if this gets broken during
normal use, we provide the two-year warranty service.
Model No.
Serial No.
Distributor
Date you purchased
Place you purchased
Warranty Period
Two (2) year from the date of purchase
Purchaser
Name
Address
•Please check this warranty indication first.
•Please contact your distributor after checking out any defect in the products.
•The standard for repairing, replacement or reimbursement follows Customer.
•Warranty content any defect under normal use within the warranty service period we give
you free repair service according to the warranty certificate.
•We charge you with the fee of parts and service despite of free warranty service period.
Any breakage made without care such as:
- Breakdown due to natural disasters (lightning, fire, flood, tsunami, etc.)
- When disassembled or repaired by the user
- When connecting power other than rated power.
- When you want to reassemble for full system or replace parts within warranty
service period.
- When unauthorized person modified or made damage on the product trying to
repair it.
- Failure due to careless handling of the user
- When replacing consumables
- Lightning strike.
•Please note that we don’t support the breakage after warranty service period expired. If
the customer wants to get it repaired, we charge them with the fee.
•The specification is subject to change without prior notice for quality improvement.
Table of contents
Other SeeEyes Microphone System manuals


