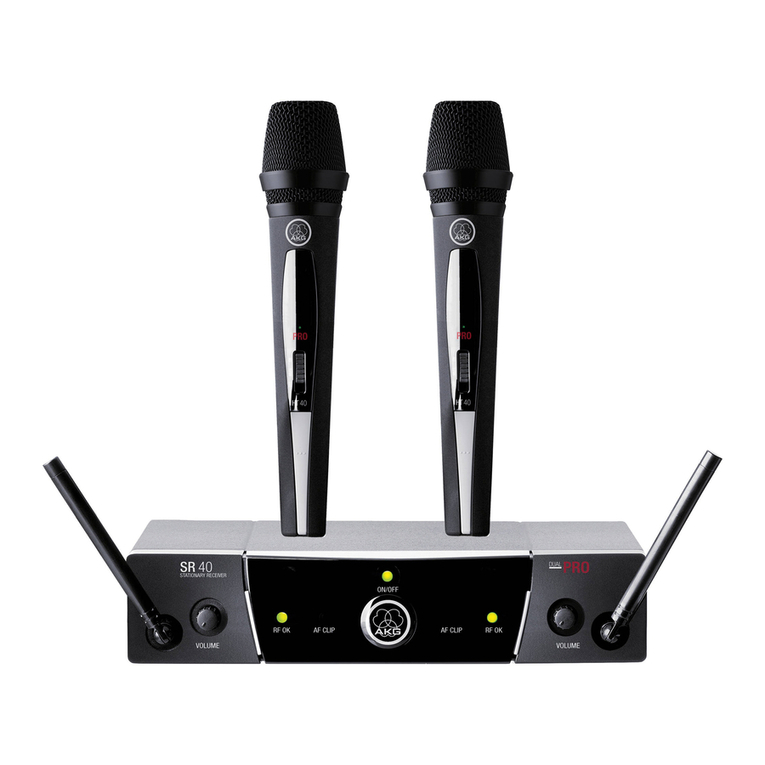
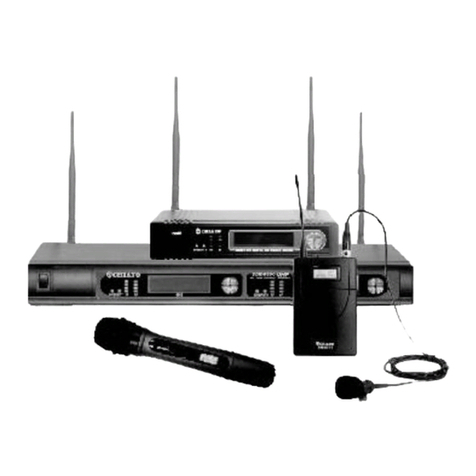
AKG WMS40 microtools User manual

- WICHTIGE INFORMATION -
Bitte beachten Sie, dass die Funktionsweise der Kontroll-LED der Sender GB 40, MP 40 und SO 40 wie
folgt geändert wurde:
Die zweifarbige Kontroll-LED zeigt den Ladezustand der Batterie bzw. des Akkus an.
•Wenn Sie den Sender einschalten und die Batterie/der Akku ausreichend geladen ist, leuchtet die Kontroll-
LED kurz rot auf und leuchtet konstant grün weiter.
•Solange die Kontroll-LED konstant grün leuchtet, ist die Batterie/der Akku in Ordnung.
•Wenn die Kontroll-LED konstant rot zu leuchten beginnt, ist die Batterie in ca. 60 Minuten, der Akku in ca.
30 Minuten erschöpft. Tauschen Sie die Batterie aus bzw. laden Sie den Akku auf.
Diese Änderung betrifft Kapitel 2.5 Bedienelemente und Kapitel 3.1 Batterie einlegen/austauschen und
testen.
- IMPORTANT INFORMATION -
Please note that the function of the status LEDs on the GB 40, MP 40, and SO 40 transmitters has been
changed.
The status bicolor LED indicates the current battery charge level.
•On switching power to the transmitter ON, the status LED will illuminate red for a moment and be lit green
constantly to indicate the battery is properly charged.
•As long as the status LED is lit green, the battery is OK.
•The status LED will be lit red constantly to indicate the battery will be dead in about 60 minutes if you are
using a dry battery, or in 30 minutes if you are using a rechargeable type. Replace or recharge the battery.
Never try to recharge dry batteries: they may explode!
This information replaces the corresponding passages in section 2.5 Controls and section
3.1 Inserting/Replacing and Testing the Battery.
- INFORMATION IMPORTANTE -
Le mode de fonctionnement des LED témoins des émetteurs GB 40, MP 40 et SO 40 a été modifié
comme suit :
La LED bicolore indique l’état de charge de la pile ou de l’accu.
•Lorsque vous mettez l’émetteur sous tension et que la charge de la pile/de l’accu est suffisante, la LED jette
une lueur rouge puis s’allume de façon constante sur vert.
•Tant que la LED reste sur vert la pile / l’accu est en bon état.
•Lorsque la LED s’allume de façon constante sur rouge, vous n’avez plus qu’une autonomie de 60 minutes
pour la pile, 30 minutes pour l’accu. Vous devez alors remplacer la pile ou recharger l’accu.
Cette modification concerne le point 2.5 Eléments de commande et le point 3.1 Mise en place / rem-
placement et essai de la pile.
GB 40guitar bug MP40micropen SO 40snapon
WMS40
microtools
BITTE LESEN! - READ ME! - A LIRE ATTENTIVEMENT ! -
ATTENZIONE! - ¡SE RUEGA LEER! - LEIA POR FAVOR!
GB 40guitar bug MP40micropen SO 40snapon
WMS40
microtools
GB 40guitar bug MP40micropen SO 40snapon
WMS40
microtools
- INFORMAZIONE IMPORTANTE -
MODIFICA LED: Tenete presente che il modo di funzionamento del LED di controllo dei trasmettitori
GB 40, MP 40 e SO 40 è stato modificato come segue:
Il LED di controllo a due colori indica lo stato di carica della batteria rispettivamente dell’accumulatore.
•Se inserite il trasmettitore e la batteria/l’accumulatore è sufficientemente carico/a, il LED di controllo si
accende brevemente di rosso e rimane acceso costantemente di verde.
•Fin quando il LED di controllo rimane acceso costantemente di verde, la batteria/l’accumulatore è in buono
stato funzionale.
•Se il LED di controllo rimane acceso costantemente di rosso, la batteria si esaurirà entro 60 minuti circa, ris-
pettivamente l’accumulatore si esaurirà entro 30 minuti circa. Sostituite la batteria rispettivamente ricaricate
l’accumulatore.
Questa modifica riguarda il capitolo 2.5 "Elementi di comando" e il capitolo 3.1 "Come inserire/sosti-
tuire e testare la batteria".
GB 40guitar bug MP40micropen SO 40snapon
WMS40
microtools
- INFORMACION IMPORTANTE -
Sírvase tener presente que el modo de funcionamiento de los emisores GB 40, MP 40 y SO 40 ha sido
modificado como sigue:
El LED de control bicolor indica el estado de carga de la pila o del acumulador, respectivamente.
•Si al encender el emisor la pila/el acumulador está bien cargada/o, el LED de control se ilumina brevemente
de rojo y luego sigue iluminado constantemente de verde.
•Mientras el LED de control esté iluminado constantemente de verde, la pila/el acumulador está en orden.
•Si el LED de control empieza a iluminarse constantemente de rojo, estarán agotados la pila en aprox.
60 minutos y el acumulador en aprox. 30 minutos. Cambie la pila o cargue el acumulador.
Esta modificación se refiere al Capítulo 2.5 Elementos de mando y al Capítulo 3.1 Colocar/cambiar y
ensayar la pila.
GB 40guitar bug MP40micropen SO 40snapon
WMS40
microtools
- INFORMAÇÃO IMPORTANTE -
Repare que as funcionalidades dos LEDs de controle dos emissores GB 40, MP 40 e SO 40 foram modi-
ficadas da seguinte forma:
O LED de controle bicolor indica o estado de carga das pilhas ou dos acumuladores.
•Quando ligar o emissor e a pilha/o acumulador estiver suficientemente carregado, o LED de controle
acenderá brevemente em cor vermelha e continuará a brilhar constantemente em cor verde.
•Enquanto o LED de controle permanece aceso em cor verde, a pilha/o acumulador está em ordem.
•Se o LED de controle começar a brilhar constantemente em cor vermelha, a pilha estará esgotada dentro
de ca. 60 minutos, e o acumulador dentro de ca. 30 minutos. Substitua a pilha ou carregue o acumulador.
Estas alterações referem-se ao capítulo 2.5 Elementos de controle e ao capítulo 3.1 Colocar/trocar a
pilha e testá-la.
GB 40guitar bug MP40micropen SO 40snapon
WMS40
microtools
Bedienungshinweise . . . . . . . . . . . . . . . . . . S. 2
Bitte vor Inbetriebnahme des Gerätes lesen!
User Instructions . . . . . . . . . . . . . . . . . . . . p. 10
Please read the manual before using the equipment!
Mode d’emploi . . . . . . . . . . . . . . . . . . . . . . p. 18
Veuillez lire cette notice avant d’utiliser le système!
Istruzioni per l’uso . . . . . . . . . . . . . . . . . . . p. 26
Prima di utilizzare l’apparecchio, leggere il manuale!
Modo de empleo . . . . . . . . . . . . . . . . . . . . p. 34
Antes de utilizar el equipo, sírvase leer el manual!
Instruções de uso . . . . . . . . . . . . . . . . . . . p. 42
S.f.f. leia este manual antes de usar o equipamen
to!
WMS40
microtools
AKG.WIRELESS WIRELESS
MICROPHONE
SYSTEM
MP40 micropen

1 Sicherheit und
Umwelt
1.1 Sicherheit
1. Setzen Sie das Gerät nicht direkter
Sonneneinstrahlung, starker Staub-
und Feuchtigkeitseinwirkung, Regen,
Vibrationen oder Schlägen aus.
1.2 Umwelt
1. Entsorgen Sie verbrauchte Batterien
und Akkus immer gemäß den jeweils
geltenden Entsorgungsvorschriften.
Werfen Sie Batterien oder Akkus
weder ins Feuer (Explosionsgefahr)
noch in den Restmüll.
2. Wenn Sie das Gerät verschrotten, ent-
fernen Sie die Batterien bzw. Akkus,
trennen Sie Gehäuse, Elektronik und
Kabel und entsorgen Sie alle
Komponenten gemäß den dafür gelten-
den Entsorgungsvorschriften.
2 Beschreibung
2.1 Einleitung
Vielen Dank, dass Sie sich für ein
Produkt aus dem Hause AKG entschie-
den haben. Bitte lesen Sie die
Bedienungsanleitung aufmerksam
durch, bevor Sie das Gerät benützen,
und bewahren Sie die Bedienungs-
anleitung sorgfältig auf, damit Sie jeder-
zeit nachschlagen können. Wir wün-
schen Ihnen viel Spaß und Erfolg!
2.2 Lieferumfang
Kontrollieren Sie bitte, ob die Ver-
packung alle oben angeführten Teile ent-
hält. Falls etwas fehlt, wenden Sie sich
bitte an Ihren AKG-Händler.
2.3 Empfohlenes Zubehör
Ladestation CU 40
2.4 Beschreibung
Der MP 40
micropen
ist ein
Miniatursender mit abnehmbarem
Kondensatormikrofon C 407 mit kugel-
förmiger Richtcharakteristik. Der Sender
wurde speziell für Sprachübertragung in
Verbindung mit den Empfängern des
Systems WMS 40 von AKG entwickelt.
Der MP 40
micropen
arbeitet auf einer
fixen, quarzstabilisierten Trägerfrequenz
im UHF-Trägerfrequenzbereich von 710
bis 865 MHz und ist mit einer im
Gehäuse integrierten Dipol-Antenne
ausgestattet.
2
1 Sender
MP 40
micropen
1 Kordel 1 Ersatz-
clip,
schwarz
1 Batterie
Größe
AAA

In einem Fach am oberen Ende des
Senders ist das Mikrofon untergebracht.
Das Mikrofon ist mit einer Befestigungs-
klammer ausgestattet und über ein ca.
20 cm langes Kabel mit dem Sender
verbunden. Sie können das Mikrofon
daher vom Sender abnehmen und an
der Kleidung anklemmen.
Der Clip an der Rückseite des Senders
ermöglicht Ihnen, den Sender z.B. an der
Hemdtasche zu fixieren. Die Farbe des
Clips entspricht der Trägerfrequenz des
Senders. Sie können den Clip aber auch
gegen den mitgelieferten schwarzen
Ersatzclip austauschen.
Mittels der mitgelieferten Kordel können
Sie sich den Sender auch umhängen.
2.5 Bedienelemente (siehe Abb. 1)
1 ON/MUTE/OFF: Dieser Schiebe-
schalter hat drei Stellungen:
ON: Die Spannungsversorgung für
den Sender ist eingeschaltet.
M: Das vom Mikrofon kommende
Audiosignal ist stummgeschaltet,
Spannungsversorgung und HF-
Trägerfrequenz bleiben jedoch einge-
schaltet. Dadurch wird der
Empfänger trotz abgeschaltetem
Mikrofon nicht durch andere Sender
gestört.
OFF: Die Spannungsversorgung für
den Sender ist ausgeschaltet.
2 Kontroll-LED: Diese LED zeigt den
Ladezustand der Batterie an.
LED leuchtet beim Einschalten kurz
auf und erlischt wieder: Batterie in
Ordnung.
LED leuchtet konstant: Batterie in ca.
60 Minuten erschöpft.
3 Eingangspegelregler: Stellt die
Empfindlichkeit des Audioeingangs
ein.
4 Batteriefach für 1 Stk. 1,5 V-Batterie
Größe AAA (mitgeliefert).
5 Ladekontakte zum Aufladen eines
3
Abb. 1: Bedienelemente MP 40

Akkus im Batteriefach mit Hilfe der
optionalen Ladestation CU 40.
6 Halteclip zur Befestigung des
Senders in der Hemdtasche oder
Brusttasche eines Sakkos.
Die Farbe des Halteclips zeigt die
Trägerfrequenz des Senders an:
Frequenz Farbe
US54: 710.400 MHz rotbraun
US58: 734.600 MHz purpur
KR3: 745.650 MHz mintgrün
KR4: 750.900 MHz dunkelgrau
EU62: 802.525 MHz bordeauxrot
EU63: 812.800 MHz gelb
SP1: 848.750 MHz himmelblau
SP2: 851.750 MHz gelbgrün
UK69A: 854.900 MHz violett
UK69B: 858.200 MHz grün
ISM1: 863.100 MHz melonengelb
ISM2: 864.375 MHz grau
7 Mikrofon
8 Kabelfachdeckel: Im Kabelfach unter
dem Kabelfachdeckel befindet sich
das ca. 20 cm lange Mikrofonkabel.
3 Inbetriebnahme
3.1 Batterie einlegen/
austauschen und testen
Siehe Abb. 2:
1. Drücken Sie den Schnapphaken am
Batteriefachdeckel (1) nach unten.
2. Ziehen Sie den Batteriefachdeckel (1)
nach unten vom Sender ab.
3. Wenn sich eine leere oder defekte
Batterie im Batteriefach befindet,
nehmen Sie diese heraus.
4. Legen Sie die mitgelieferte bzw. neue
Batterie (2) wie in Abb. 2 gezeigt in
das Batteriefach ein.
4
Abb. 2: Batterie einlegen
Wichtig: Der Schaumstoffpolster an der
Innenseite des Batteriefachdeckels
(1) fixiert die Batterie in ihrer Position.
Entfernen Sie den Schaumstoff-
polster nicht, da die Batterie anson-
sten nicht richtig im Batteriefach
fixiert ist und Klappergeräusche ver-
ursachen kann.

5. Stellen Sie den ON/MUTE/OFF-
Schalter (3) auf ON.
Die Kontroll-LED (
4)
blitzt kurz auf. Wenn
die Batterie in gutem Zustand ist, erlischt
die Kontroll-LED (
4)
wieder.
Wenn die Kontroll-LED (
4)
zu leuchten
beginnt, ist die Batterie in ca. 60 Minuten
erschöpft. Tauschen Sie die Batterie
möglichst bald gegen eine frische aus.
Wenn die Kontroll-LED (
4)
nicht auf-
blitzt, ist die Batterie erschöpft.
Legen Sie eine neue Batterie ein.
6. Schieben Sie den Batteriefach-
deckel (1) gegen die Pfeilrichtung auf
den Sender, bis der Batteriefach-
deckel (1) einrastet.
3.2 Betrieb mit Akku (siehe Abb. 3)
Sie können den Sender anstelle einer
normalen Baterie auch mit einem 1,5 V-
Akku betreiben. Wir empfehlen NiMH-
Akkus des Typs SANYO HR-4U
(650 mAh) oder Panasonic Rechargeable
PRO+ (550 mAh).
Zum Aufladen des Akkus brauchen Sie
nur den Sender (1) wie in Abb. 3 gezeigt
in die optionale Ladestation CU 40 (2) zu
stellen.
Nähere Hinweise dazu finden Sie in der
Bedienungsanleitung der Ladestation
CU 40.
4 Anwendung
4.1 Sender befestigen
(Siehe Abb. 4)
Stecken sie den Sender (1) mit dem
Halteclip (2) nach aussen so in die Hemd-
tasche oder äussere Brusttasche des
5
Abb. 3: Akku aufladen mit optionaler
Ladestation CU 40
Abb. 4: Sender befestigen

Sakkos, dass das Mikrofon (3) nach oben
zeigt.
Wenn keine geeignete Tasche zur Ver-
fügung steht, hängen Sie die mitgelieferte
Kordel (4) in den Halteclip (2) ein und legen
Sie die Kordel (4) um den Nacken.
4.2 Pegel einstellen (siehe Abb. 1)
1. Kontrollieren Sie, ob der Empfänger
mit demselben Farbcode gekenn-
zeichnet ist wie der Sender.
2. Drehen Sie den Eingangspregelregler
(3) am Sender mit einem kleinen
Schraubenzieher bis zur Mitte zwi-
schen linkem und rechtem Anschlag
auf.
3. Schalten Sie den Sender ein, indem
Sie den ON/MUTE/OFF-Schalter (1)
auf ON stellen.
4. Schalten Sie den Empfänger und die
Audioanlage ein.
5. Sprechen Sie einige Sätze mit Ihrer
normalen Stimme.
6. Sollte Ihre Stimme in den Laut-
sprechern verzerrt klingen, drehen
Sie den Eingangspegelregler (3) soweit
gegen den Uhrzeigersinn zurück, bis
Sie keine Verzerrung mehr hören.
Sollte Ihre Stimme in den Laut-
sprechern zu leise klingen, drehen
Sie den Eingangspegelregler (3) im
Uhrzeigersinn auf. Falls die
Lautsprecher infolge akustischer
Rückkopplung zu pfeifen beginnen,
drehen Sie den Eingangspegelregler
(3) sofort wieder zurück, bis das
Pfeifen aufhört.
4.3 Mikrofon abnehmen (siehe Abb. 5)
Falls bereits bei geringer Lautstärke
Rückkopplungen auftreten, können Sie
das Mikrofon vom Sender abnehmen
und näher am Mund positionieren. Damit
reduzieren Sie die Gefahr akustischer
Rückkopplungen.
6
Abb. 5: Mikrofon abnehmen
1. 3.
4.
5./6./7.
2a.
2b.

1. Entriegeln und nehmen Sie den
Kabelfachdeckel (1) ab.
2. Setzen Sie den Fingernagel am
Mikrofonkörper an und ziehen Sie
das Mikrofon (3) aus dem Mikrofon-
fach heraus.
3. Ziehen Sie das Mikrofon (3) vom
Sender weg.
4. Setzen Sie den Kabelfachdeckel (1)
wieder auf das Kabelfach auf und
drücken Sie ihn bis zum Einrasten
hinunter.
5. Stecken Sie den Sender in die Hemd-
oder äussere Brusttasche oder hängen
Sie ihn mit der Kordel um den Nacken.
6. Klemmen Sie das Mikrofon (3) an der
Knopfleiste oder am Kragen mög-
lichst nahe beim Mund des
Sprechers an.
7. Drehen Sie das Mirofon (3) so, dass
es zum Mund des Sprechers zeigt.
4.4 Mikofon am Sender montieren
Siehe Abb. 6:
1. Entriegeln und nehmen Sie den
Kabelfachdeckel (1) ab.
2. Ziehen Sie mit dem Kabelfachdeckel
(1) das Mikrofonkabel (2) soweit nach
unten, bis das Mikrofon (3) auf dem
Mikrofonfach (4) liegt.
3. Drehen Sie die Mikrofonklammer (5)
parallel zum Mikrofon (3).
4. Drücken Sie das Mikrofon (3) in das
Mikrofonfach (4), bis das Mikrofon (3)
einrastet.
5. Verstauen Sie das Mikrofonkabel (2)
im Kabelfach und setzen Sie den
Kabelfachdeckel (1) wieder auf das
Kabelfach auf.
4.5 Sender als Handmikrofon
Sie können den Sender auch, z.B. bei
Interviews, wie ein normales Mikrofon in
der Hand halten.
7
Abb. 6: Mikrofon montieren
1.
3.
4.
5.
2a. 2b.

Sprechen Sie aus einem Abstand von
ca. 30 cm in das Mikrofon.
4.6 Halteclip austauschen (Abb. 7)
Falls der farbige Halteclip zu auffällig
wirkt, können Sie ihn durch den mitgelie-
ferten schwarzen Halteclip ersetzen:
1. Hebeln Sie den Halteclip (1) mit
einem Schraubenzieher vorne vom
Sender (2) ab.
2. Drücken Sie auf den Halteclip (1) und
ziehen Sie den Halteclip (1) nach unten
(Pfeilrichtung) vom Sender (2) ab.
3. Hängen Sie den Haken (3) am
schwarzen Ersatzhalteclip in die Aus-
nehmung (4) am Sender (2) ein.
4. Drücken Sie das gebogene Ende des
Ersatzhalteclips gegen den Sender
(2), bis der Ersatzhalteclip einrastet.
4.7 Fehlerbehebung
Hinweise zur Fehlerbehebung finden
Sie in der Bedienungsanleitung des
Empfängers.
5 Reinigung
Reinigen Sie das Gehäuse des
Senders mit einem mit Wasser
befeuchteten Tuch.
8
Abb. 7: Halteclip austauschen
1.
2.
3.
4.

9
6 Technische Daten
Trägerfrequenz 710 - 865 MHz
Modulation FM
Audioübertragungsbandbreite 40 - 20.000 Hz
Frequenzstabilität (-10°C bis +50°C) ±15 kHz
Nennhub 15 kHz (SP1, SP2: 13,5 kHz)
Klirrfaktor bei 1 kHz typ. 0,8%
Kompander integriert
Signal/Rauschabstand typ. 103 dB(A)
HF-Ausgangsleistung typ. 5 mW
Stromaufnahme typ. 75 mA
Spannungsversorgung 1 x 1,5 V-Batterie Größe AAA
Betriebszeit >10 h (Batterie), >5 h (Akku)
Audio-Eingangspegel für Nennhub 300 mV/1 kHz
Abmessungen (BxTxH) 20 x 25 x 145 mm
Gewicht 36 g
Dieses Produkt entspricht den Normen EN60065:1998, EN301 489-9 v.1.1.1
(09-2000) und EN300 422-2 v.1.1.1(07-2000).

FCC Statement
This equipment has been tested and
found to comply with the limits for a Class
B digital device, pursuant to Parts 74, 15,
and 90 of the FCC Rules. These limits are
designed to provide reasonable protec-
tion against harmful interference in a resi-
dential installation. This equipment gene-
rates, uses, and can radiate radio fre-
quency energy and, if not installed and
used in accordance with the instructions,
may cause harmful interference to radio
communications. However, there is no
guarantee that interference will not occur
in a particular installation. If this equip-
ment does cause harmful interference to
radio or television reception, which can
be determined by turning the equipment
off and on, the user is encouraged to try
to correct the interference by one or more
of the following measures:
• Reorient or relocate the receiving
antenna.
• Increase the separation between the
equipment and the receiver.
• Connect the equipment into an outlet
on a circuit different from that to
which the receiver is connected.
• Consult the dealer or an experienced
radio/TV technician for help.
Shielded cables and I/O cords must be
used for this equipment to comply with
the relevant FCC regulations.
Changes or modifications not expressly
approved in writing by AKG Acoustics
may void the user’s authority to operate
this equipment.
This device complies with Part 15 of the
FCC Rules. Operation is subject to the
following two conditions: (1) this device
may not cause harmful interference, and
(2) this device must accept any inter-
ference received, including interference
that may cause undesired operation.
1 Safety and
Environment
1.1 Safety
1. Do not expose the equipment to
direct sunlight, excessive dust, moi-
sture, rain, mechanical vibrations, or
shock.
1.2 Environment
1. Be sure to dispose of used batteries
as required by local waste disposal
rules. Never throw batteries into a fire
(risk of explosion) or garbage bin.
2. When scrapping the equipment,
remove the batteries, separate the
case, circuit boards, and cables, and
dispose of all components in accord-
ance with local waste disposal rules.
10

2 Description
2.1 Introduction
Dear Customer:
Thank you for purchasing an AKG
product. This Manual contains important
instructions for setting up and operating
your equipment. Please take a few
minutes to read the instructions below
carefully before operating the equip-
ment. Please keep the Manual for future
reference. Have fun and impress your
audience!
2.2 Unpacking
Check that the package contains all the
parts listed above. If anything is missing,
please contact your AKG dealer.
2.3 Optional Accessories
CU 40 charger
2.4 Description
The MP 40
micropen
is a miniature
transmitter with a detachable C 407
omnidirectional condenser microphone.
The transmitter has been specifically
designed for speech reinforcement use
in conjunction with WMS 40 Series
receivers from AKG.
The MP 40
micropen
operates on a
single fixed, quartz stabilized carrier fre-
quency in the 710 MHz to 865 MHz UHF
band and uses a dipole antenna
integrated in the transmitter body.
The microphone is nested in a compart-
ment at the upper end of the transmitter.
The microphone is fitted with a fixing
clamp and connected to the transmitter
by a cable approx. 8 inches (20 cm) long.
You can detach the microphone from the
transmitter and clamp the microphone to
the talker's clothes.
The pen-style clip on the rear of the
transmitter allows you to secure the
transmitter, e.g., in a shirt pocket. The
color of the clip indicates the carrier fre-
quency of your transmitter. You can
replace the color code clip with the sup-
plied black replacement clip.
The supplied necklace cord allows you
to wear the transmitter around your
neck.
2.5 Controls (Refer to fig. 1)
1 ON/MUTE/OFF: This slide switch
provides three positions:
ON: Power to the transmitter is on.
11
1 MP 40
micropen
1 neck-
lace cord
1 replace-
ment clip
(black)
1 AAA
size
bat
tery

M: The signal delivered by the micro-
phone is muted while power and the
RF carrier frequency remain on. This
prevents the receiver from respond-
ing to interference from other trans-
mitters.
OFF: Power to the transmitter is off.
2 Status LED: Indicates battery status.
LED flashes momentarily upon swit-
ching ON and extinguishes: battery is
OK.
LED lights constantly: battery will be
dead in about 60 minutes.
3 Input Gain: This rotary pot sets the
sensitivity of the transmitter’s audio
section.
4 Battery compartment for one 1.5-V
AAA size battery (supplied).
5 Charging contacts for charging a
rechargeable battery inside the bat-
tery compartment using the optional
CU 40 charger.
6 Clip for securing the transmitter
inside a shirt pocket or in an outside
breast pocket of a jacket.
The color of the clip indicates the car-
rier frequency of your transmitter:
Frequency Color
US54: 710.400 MHz reddish brown
US58: 734.600 MHz purple
KR3: 745.650 MHz mint green
KR4: 750.900 MHz dark gray
EU62: 802.525 MHz Bordeaux red
EU63: 812.800 MHz yellow
SP1: 848.750 MHz light blue
SP2: 851.750 MHz yellowish green
UK69A: 854.900 MHz violet
UK69B: 858.200 MHz green
ISM1: 863.100 MHz melon yellow
ISM2: 864.375 MHz gray
7 Microphone
8 Cable compartment lid: The cable
compartment beneath the lid holds
the microphone cable (approx.
8 inches/20 cm long).
12
Fig. 1: MP 40 controls.

3 Setting Up
3.1 Inserting/Replacing and
Testing the Battery
Refer to fig. 2:
1. Depress the snap hook on the battery
compartment lid (1).
2. Pull the battery compartment lid (1)
down to remove it from the transmitter.
3. If there is a dead or defective battery
inside the battery compartment,
remove the battery.
4. Insert the supplied or new battery (2)
into the battery compartment as
shown in fig. 2.
5. Set the ON/MUTE/OFF switch (3) to ON.
The status LED (4) will flash momentar-
ily. If the battery is in good condition,
the status LED (4) will extinguish.
If the status LED (4) lights constantly
the battery will be dead within about
60 minutes. Replace the battery with
a new one as soon as possible.
If the status LED (4) fails to flash
momentarily the battery is dead.
Insert a new battery.
6. Slide the battery compartment lid (1)
onto the transmitter against the
direction of the arrow to the point that
the lid (1) will click shut.
3.2 Using Rechargeable Batteries
Refer to fig. 3:
Instead of dry batteries, you can also
use a 1.5-V rechargeable battery to
power the transmitter. We recommend
SANYO HR-4U (650 mAh) or Panasonic
Rechargeable PRO+ (550 mAh) NiMH
rechargeable batteries.
13
Important: The foam pad on the inside
of the battery compartment lid (1)
holds the battery in place. Do not
remove the foam pad. If you do, the
battery will not be held in place prop-
erly and may cause a rattling noise.
Fig. 2: Inserting the battery.

To charge the battery, insert the trans-
mitter (1) into the optional CU 40 charger
(2) as shown in fig. 3.
For details, refer to the CU 40 charger
manual.
4 Operating Notes
4.1 Attaching the
Transmitter
Refer to fig. 4:
Slide the transmitter (1) into a shirt
pocket or an outside breast pocket of
the talker's jacket, making sure the clip
(2) will be on the outside of the pocket
and the microphone (3) will point
upward.
If no suitable pocket is available, slip the
supplied necklace cord (4) under the clip
(2) and place the necklace cord (4)
around the talker's neck.
4.2 Setting Levels (Refer to fig. 1)
1. Check that the receiver is marked
with the same color code as the
transmitter.
2. Use a small screwdriver to turn the
input gain control (3) on the trans-
mitter to a position halfway between
the left and right stops.
3. Set the ON/MUTE/OFF switch (1) to ON
to switch power to the transmitter on.
4. Switch power to your sound system
or amplifier on.
5. Speak a few sentences in your
normal voice.
14
Fig. 3: Using the CU 40 optional charger.
Fig. 4: Attaching the transmitter.

6. If your voice sounds distorted on the
loudspeakers turn the input gain con-
trol (3) down CCW to the point that
you will hear no more distortion.
If your voice sounds too quiet on the
loudspeakers, turn the input gain
control (3) up CW. If the loudspeakers
start howling due to acoustic feed-
back, immediately turn the input gain
control (3) back down to the point
that the howling will stop.
4.3 Detaching the Microphone
Refer to fig. 5):
If feedback occurs even at low volume
levels, you can detach the microphone
from the transmitter and position it
closer to the talker's mouth to reduce
the risk of acoustic feedback.
1. Unlock and remove the cable com-
partment lid (1).
2. Place your fingernail against the
microphone body and pull the micro-
phone (3) out of the microphone
compartment.
3. Pull the microphone (3) away from
the transmitter.
4. Replace the cable compartment lid (1)
on the cable compartment and press
the lid (1) down to make it snap shut.
5. Put the transmitter in the shirt pocket
or outside breast pocket or hang it
around the talker's neck with the
necklace cord.
6. Clamp the microphone (3) on the sel-
vage or the collar as close as
possible to the talker's mouth.
7. Turn the microphone (3) to aim it at
the talker's mouth.
4.4 Mounting the Microphone on
the Transmitter
Refer to fig. 6:
1. Unlock and remove the cable com-
partment lid (1).
15
Fig. 5: Detaching the microphone.
1. 3.
4.
5./6./7.
2a.
2b.

2. Use the cable compartment lid (1) to
pull the microphone cable (2) down to
the point that the microphone (3) will
rest against the microphone com-
partment (4).
3. Set the microphone clamp (5) parallel
to the microphone (3).
4. Press the microphone (3) into the
microphone compartment (4) to the
point that the microphone (3) snaps
into place.
5. Stow the microphone cable (2) in the
cable compartment and replace the
cable compartment lid (1) on the
cable compartment.
4.5 Handheld Use
For interviews and similar applications,
you can hold the transmitter in your
hand like a normal microphone.
Talk into the microphone from approx.
1 foot (30 cm) away.
4.6 Replacing the Clip (Fig. 7)
If the color code clip looks too garish
you can replace it with the supplied
black clip.
1. Use a screwdriver to lever the clip (1)
away from the front end of the trans-
mitter (2).
16
Fig. 6: Mounting the microphone.
Fig. 7: Replacing the Clip
1.
3.
4.
5.
2a. 2b.
1.
2.
3.
4.

2. Press down on the clip (1) and pull
the clip (1) away from the transmitter
(2) in the direction of the arrow.
3. Nest the hook (3) on the black
replacement clip into the matching
opening (4) in the transmitter (2).
4. Press the bent end of the replace-
ment clip against the transmitter (2)
to make it snap into place.
4.7 Troubleshooting
For troubleshooting hints, refer to your
receiver manual.
5 Cleaning
To clean the transmitter case,
use a soft cloth moistened with
water.
17
6 Specifications
Carrier frequency range 710 to 865 MHz
Modulation FM
Audio bandwidth 40 to 20,000 Hz
Frequency stability (-10°C to +50°C) ±15 kHz
Rated deviation 15 kHz (SP1, SP2: 13.5 kHz)
T.H.D. at 1 kHz typ. 0.8%
Compander integrated
Signal/noise ratio typ. 103 dB(A)
RF output typ. 5 mW
Current consumption typ. 75 mA
Power requirement single 1.5-V AAA size battery
Battery life >10 hours (dry battery)
>5 hours (rechargeable battery)
Audio input level for rated deviation 300 mV/1 kHz
Size (WxDxH) 20 x 25 x 145 mm (0.8 x 1 x 5.7 in.)
Net weight 36 g (1.3 oz.)
This product complies with the following standards: EN60065:1998, EN301 489-9
v.1.1.1(09-2000), and EN300 422-2 v.1.1.1(07-2000).

1 Sécurité et
écologie
1.1. Sécurité
1. Ne placez jamais l’appareil à un
endroit où il risque d’être exposé
directement au soleil, à une atmos-
phère poussiéreuse, à l’humidité, à la
pluie, aux vibrations ou aux secous-
ses.
1.2. Ecologie
1. Conformez-vous aux règlements en
vigueur pour la mise au rebut des
piles usées. Ne mettez jamais des
piles ni au feu (risque d’explosion) ni
aux ordures ménagères.
2. Si vous mettez l'appareil à la ferraille,
enlevez les piles ou les accus, sépa-
rez le boîtier, l'électronique et les
câbles et éliminez les différents élé-
ments conformément aux règlements
en vigueur.
2 Description
2.1 Introduction
Nous vous remercions d’avoir
choisi un produit AKG.
Pour profiter au maximum des avanta-
ges que vous offre le WMS 40, lisez très
attentivement ce mode d’emploi avant
la mise en service de l’appareil.
Conservez soigneusement le mode
d’emploi pour pouvoir le consulter lors-
que vous vous posez des questions.
Nous vous souhaitons beaucoup de
succès.
2.2. Equipement fourni
Contrôlez si le carton contient bien tous
les éléments énumérés ci-dessus. Si ce
n’est pas le cas, veuillez contacter votre
distributeur AKG.
2.3 Accessoires optionnels
Chargeur CU 40
2.4 Description
Le MP 40
micropen
est un émetteur
miniature équipé du microphone élec-
trostatique C 407 omnidirectif. Cet
émetteur a été conçu spécialement pour
la transmission de la parole en liaison
avec les récepteurs AKG de la gamme
WMS 40.
Le MP 40
micropen
qui fonctionne sur
une porteuse fixe, stabilisée par quartz,
dans la gamme de fréquences UHF de
710 à 865 MHz, possède une antenne
dipôle intégrée dans le boîtier.
18
1
émetteur
MP 40
micropen
1 corde-
lière
1
clip de
rechange,
noir
1 pile
dimension
AAA
This manual suits for next models
3
Table of contents
Languages:
Other AKG Microphone System manuals