manuals.online logo
Brands
  1. Home
  2. •
  3. Brands
  4. •
  5. Sennheiser
  6. •
  7. Microphone System
  8. •
  9. Sennheiser evolutionwireless G3 Supplement

Sennheiser evolutionwireless G3 Supplement

G3
Shortguide
2 evolution G3 shortguide • 2009
Congratulations with your new evolution wireless G3 microphone set
The purpose of this quick-guide is to help all new users - especially non-technicians - to get an easy start using wireless
equipment. This guide has no intension to cover all details of the wide range of operating facilities of the G3 system. If you
want to learn more about the system please refer to the manual enclosed in the delivery box, or check www.sennheisernordic.
com for more details. (http://www.sennheiser.com/flash/animiated-manuals/ew100G3/start_us.html also includes helpful
animated instruction films).
Below you will find a brief general instruction about the most important ideas and facilities. The G3 system is making
everything easier than ever. It is possible to put rather big systems into operation in a hurry.
The new G3 series
Sennheiser’s evolution wireless G3 system consists of three series: 100, 300 and 500. Even though the series are rather
different you will find that the basic operating concept is very much the same for all series.
The elements of the G3 system can be mixed with parts from all series; however, it will be wise for the non-technician to stick
to only one series. The reason is that the 100 series has a limited range of operating facilities compared to the 300 and then
again the 300 will not match the application level of the 500 series.
The 100 and 300 series include only complete box sets (e.g. EW 112 G3, EW 365 G3 etc. always include one transmitter and
one receiver in the box). The 500 includes separate parts in order to compose tailored setups for flexible use on stage or for
heavy professional use.
A 100 or 300 box will include one receiver, one transmitter and various accessories: the written manual (store this together
with the equipment), mains unit (NT2), brackets for stacking or 19”rack mounting, two antennas for the receiver and batteries
(AA - for both hand- and BodyPack transmitters). Sets with BodyPack transmitter also include either a clip-on microphone or a
headset microphone or a cable for guitar. Sets with handheld microphone include a clamp to mount on stand.
evolution G3 shortguide
evolution G3 shortguide • 2009 3
Getting started
This part will take you through basic use of BodyPack- and handheld microphone sets from the 100 series. Please use 10
minutes of your time to read this quick guide. Since the operating concept for all series basically is very similar, this guide can
also be used if you want to set up wireless equipment in the 300 and 500 series.
Setting up the G3 EM 100 receiver
Wireless systems must basically include two parts: a receiver and a transmitter. To begin let us take a look at the receiver,
which is essential for the G3 100 system. If you manage correctly to set up the receiver, the job is almost over. The rest is very
simple.
Connect the receiver to your sound reinforcement system1. using XLR (the big round socket with 3 pins) or ¼” (6.3
mm) jack socket on the receiver back side. If you can choose freely we recommend that you use the XLR socket.
Mount the 2 antennas in the shiny antenna input2. BNC* sockets. ANT I and ANT II are marked on the back side of
the receiver.
This is a bayonet socket and must be turned until stop. Please note, that this job can be a little hard (especially if the
system is brand new) challenging the strengths of your fingers. When mounted, the antennas can be bend and turned
to point vertically upwards. It will be even better to align the antennas in a V-shape.
Connect the mains unit3. (NT2 – the one in the little white paper box) to the receivers DC IN socket on the back -
fasten it - and plug the mains unit into the wall socket (230 V).
Now look at the front of the receiver. The display might light up, but if not,4. press the big black button (esc). The
receiver is now ready for use.
The display contains a lot of information. We recommend that you acquire at least a brief understanding of the
display readout. The display shows:
The currently used receiving frequency (if you turn on the receiver for the first time, the display will show•
782.100 MHz).
Also the currently used frequency bank and channel number is shown (first time turned on this will be Bank 1•
channel 1, shown as “1.1” just above the frequency (read more below).
The letter “P” situated just below the frequency means that a facility called “Pilot tone evaluation” is activated.•
Below to the right a battery icon is shown, informing you of the status of the transmitter battery. The more•
small squares inside the icon, the more power (=operating time) left in the battery. When the icon is flashing, it
will be wise to change the batteries NOW! (Two fresh batteries e.g. Alkaline AA will give you approx. 8 hours of
transmission). Please note that the battery icon will only appear after the transmitter has been turned on.
evolution G3 shortguide
4 evolution G3 shortguide • 2009
The little locker icon indicates that lock mode is activated, meaning that you cannot change any of the receiver’s•
parameters. The lock-icon, however, is not activated first time you turn on the receiver, meaning no icon shown at
this time.
Two BAR graphs – RF* and AF* - are situated at the left side of the display. They will tell you about the power•
level of the received radio and sound signal. Please note that if no transmitter has been turned on the
display will show “Mute”, and you will see no deflection on any of the BAR graphs (the numbers and
figures are displayed orange on a black background).
Last but not least the display will show either “• I” or “II” (top left) depending on which antenna
the receiver is using at the present time. G3 receivers for rack-mount all use the diversity receiving
principle.
4 additional buttons are situated on the receiver front side: SET, arrows (up and down) and SYNC. When pushed,
the SET button will access the receiver main operating menu (the standard display will change). By pressing
the arrow buttons you can circle between different facilities. Choose one by pressing SET again and change the
parameters by using the arrow buttons once more. When the change has been made, you can end and store the
change by pressing SET one last time. The display will show “STORED”. To get back to start, press esc (ON/OFF)
briefly and return to the standard display.
(Receivers from the 300 and 500 series are designed with a push-turn-knob next to the ecs button. One push on
this knob will equal one push on the 100 series SET button, and turns clock- and counterclockwise equal the arrow
buttons up and down).
Note that if you get lost in the many menus and adjustments, you will always be able to “get out” and return to
the standard display (the one you started up with) by pressing the ecs button briefly.
Now that the receiver is powered up, let us look at the transmitter.
The transmitter
The other important half of the wireless set is the transmitter. This is either a BodyPack or a handheld transmitter
in the shape of a handheld microphone.
The transmitter – BodyPack
To bring the BodyPack into operation do as follows:
Insert batteries:1.
You can access the battery compartment by pressing in the two
catches on both sides of the black cover. Open it and insert the two
AA batteries – please observe that batteries must have same polarity
orientation (“+” pointing in the same direction). Close the cover.
Connect the clip-on microphone:2.
The microphone cable is equipped with a 3.5 mm mini-jack plug.
Insert the plug in the little hole situated on top of the transmitter.
Fasten the coupling ring by screwing it clockwise down. It need to be
tight, but don’t use all your strengths here (it only needs to sit tight).
Turn on the transmitter:3.
When the battery cower is opened you have access to all the
transmitter operating buttons. Hold down ON/OFF for a couple of
seconds until the display light up and the little red ON light shows to
the right of the display. (Don’t let the “LOW BAT” text confuse you, this
only means that when the red light is flashing, it is time to change the
batteries).
evolution G3 shortguide
evolution G3 shortguide • 2009 5
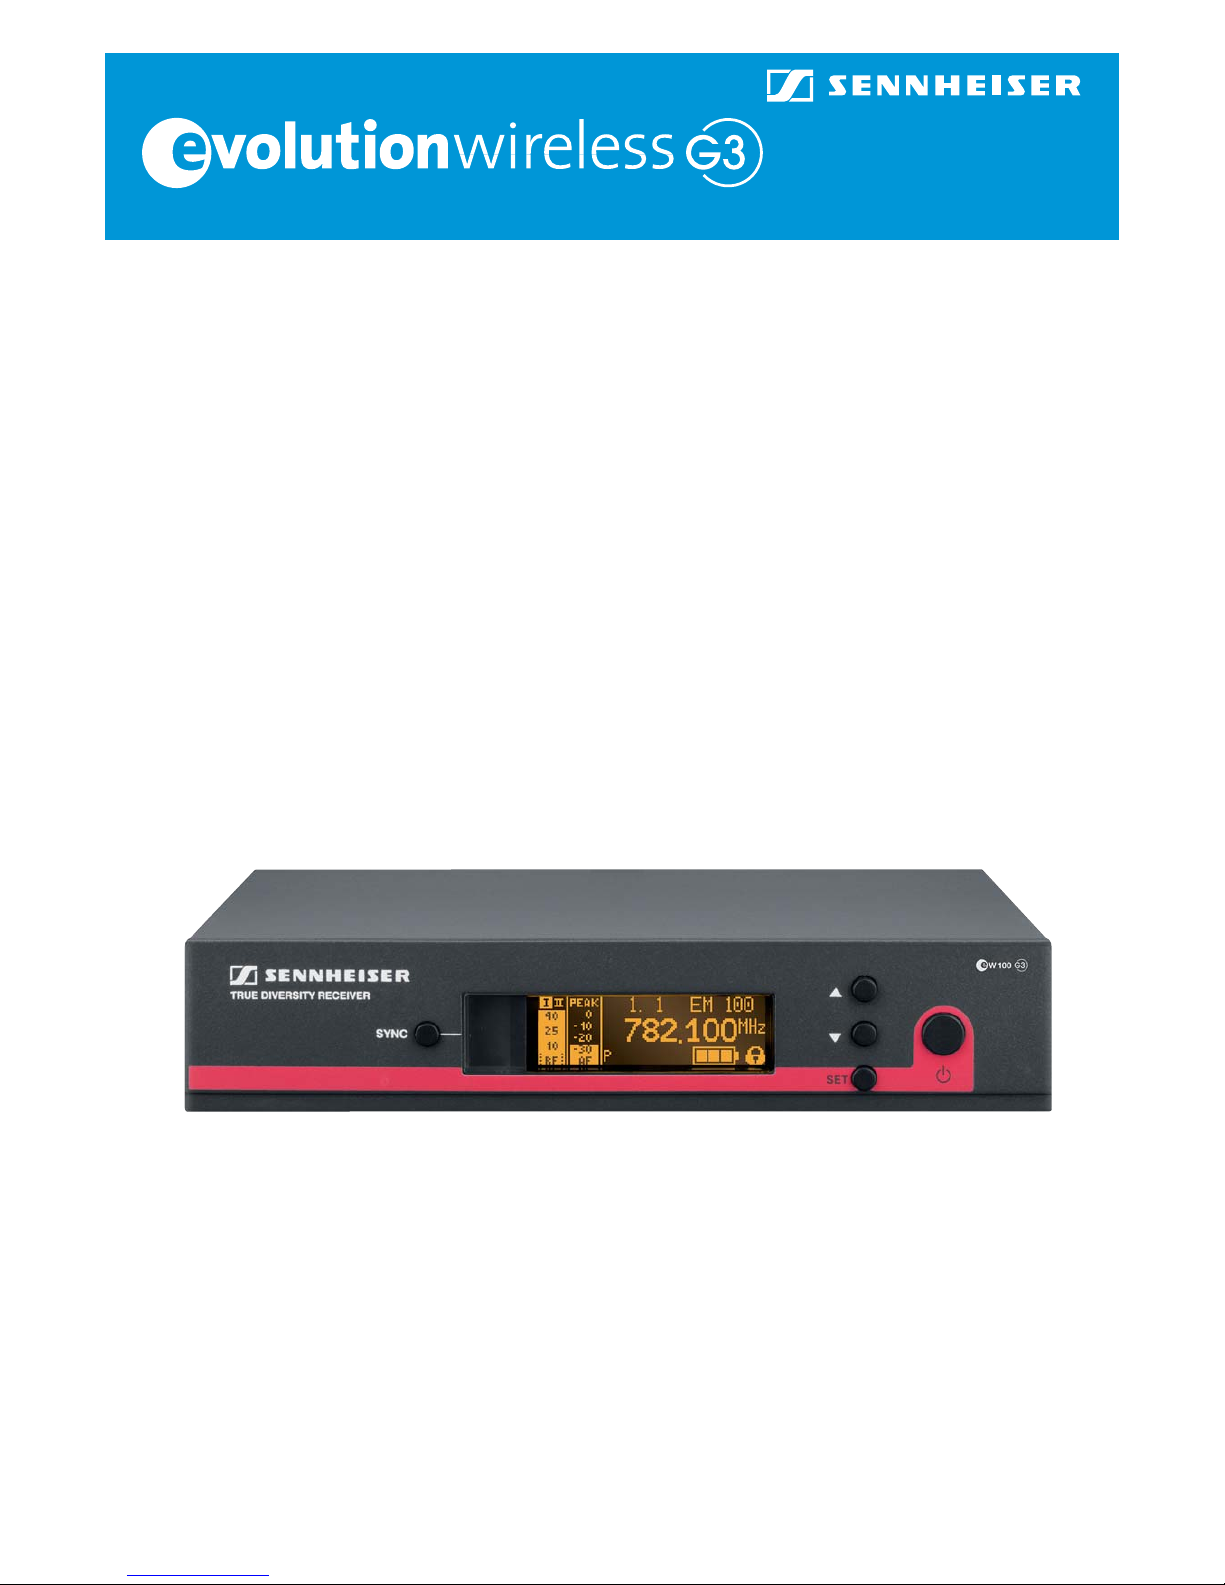
The standard display is showing the transmitter’s present status. Frequency is 782.100 MHz, if you turn on the transmitter for
the first time. Battery status is illustrated by a small battery icon to the right (3 tiny squares means batteries are full) and “P”
means that a facility called “Pilot tone evaluation” is activated.
The transmitter is now turned on and transmitting a signal. The receiver will receive this signal if both displays are showing
782.100 MHz. Check this by looking at the receiver standard display. The two BAR graphs AF and RF will deflect. Hopefully RF
will show a full deflection (the whole graph is white/orange and showing black numbers up to 40). If you say something into
the microphone, the receiver AF graph will deflect, and if you look at the transmitter display, the AF graph (left) will deflect as
well in exactly the same way as the receiver. The battery icon is now showing on the receiver display. By looking at the receiver
display an operator will be able to determine how much battery power, the transmitter has left.
If the receiver is connected to a sound reinforcement system you will also be able to hear the sound from the microphone.
Adjust the microphone input sensitivity of the transmitter
Actually you are ready now; however, two more things need to be adjusted correctly in order to obtain maximum reliability
and sound quality: We recommend you to change frequency on both transmitter and receiver (more on this below) and to
adjust the sensitivity of the transmitter audio input.
The audio input is adjusted to match the sound level spoken, sung or played into the microphone. Factory setting is made to
suit normal use, however, if you want to make certain that the level is OK or you want to change the parameters for whatever
reason, you can test and change the transmitter sensitivity level by proceeding as follows:
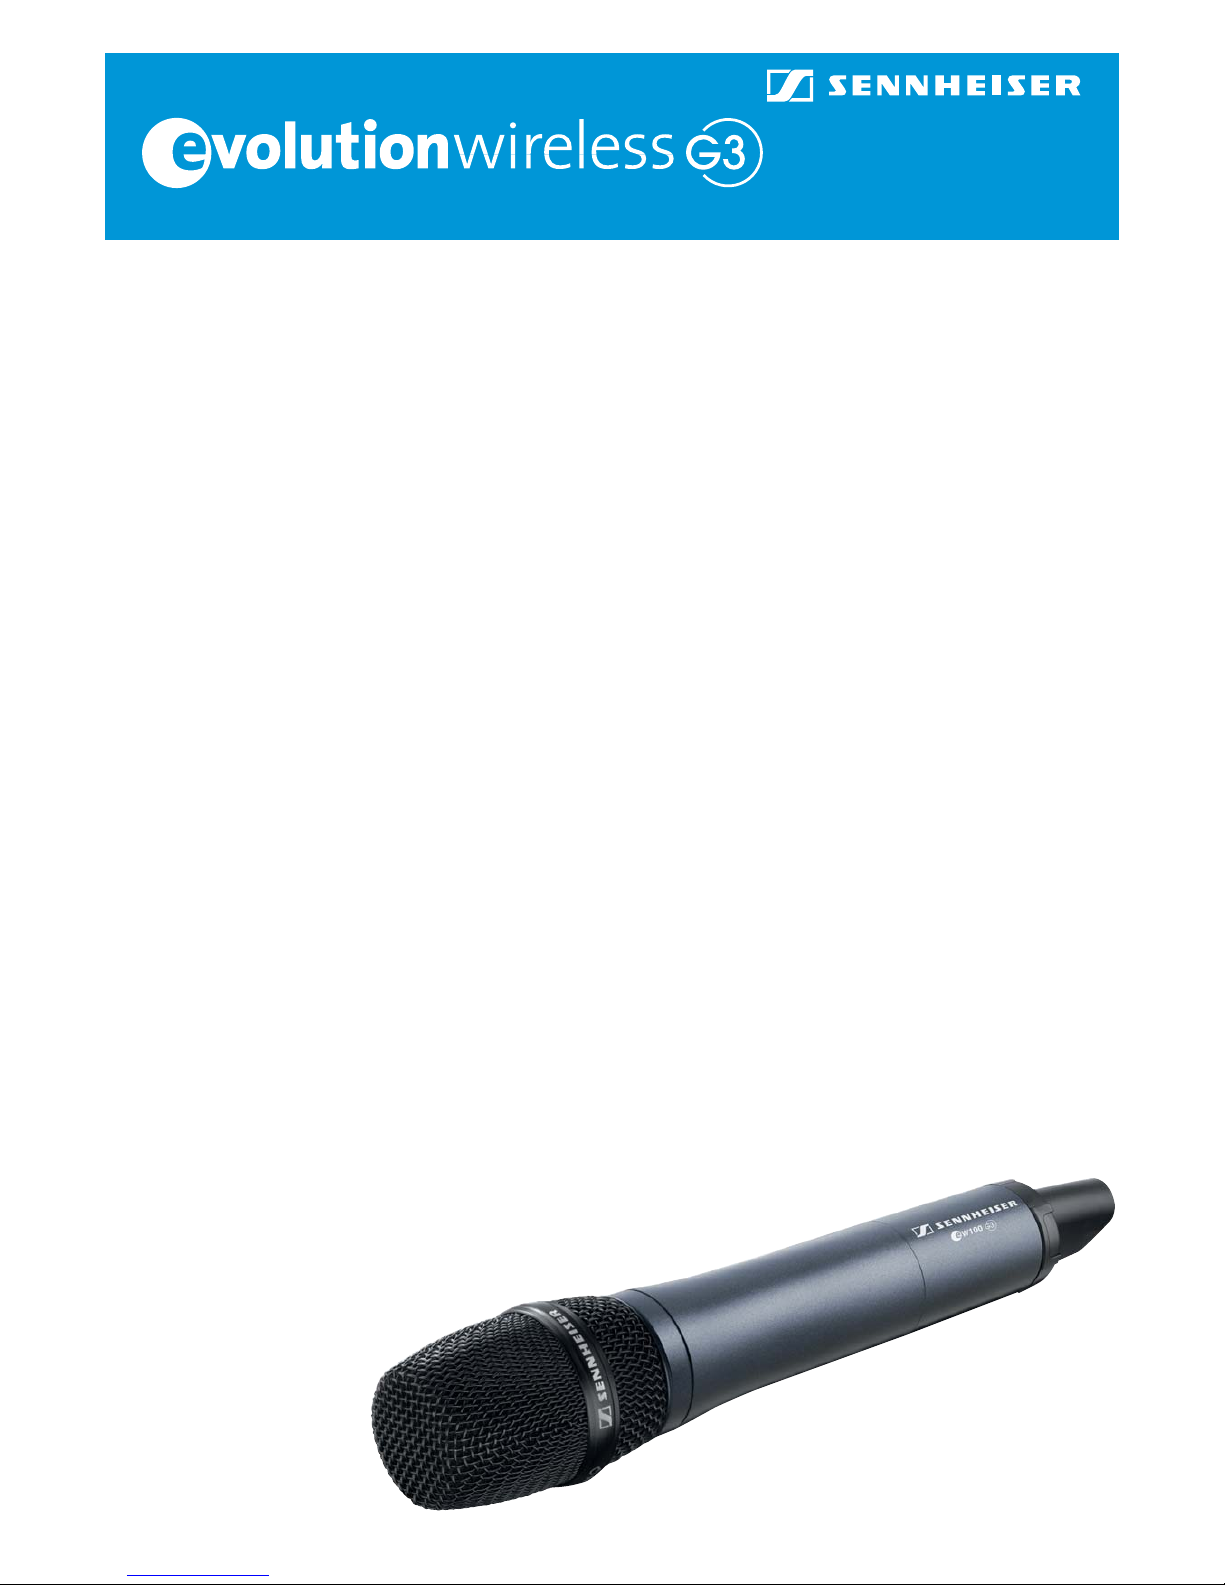
Attach the microphone to clothing by use of the enclosed clip1.
The best position will be at mid-chest of the speaker, as close to the mouth (or sound source) as possible (max. 20 cm
from the mouth). Be careful, the ME 2 is an omnidirectional microphone and sensitive to sound from all sides - easy
to place. The ME 4 is a cardioid capsule and only sensitive to sound coming from the front. ME 4 must carefully be
pointing towards the mouth (or sound source).
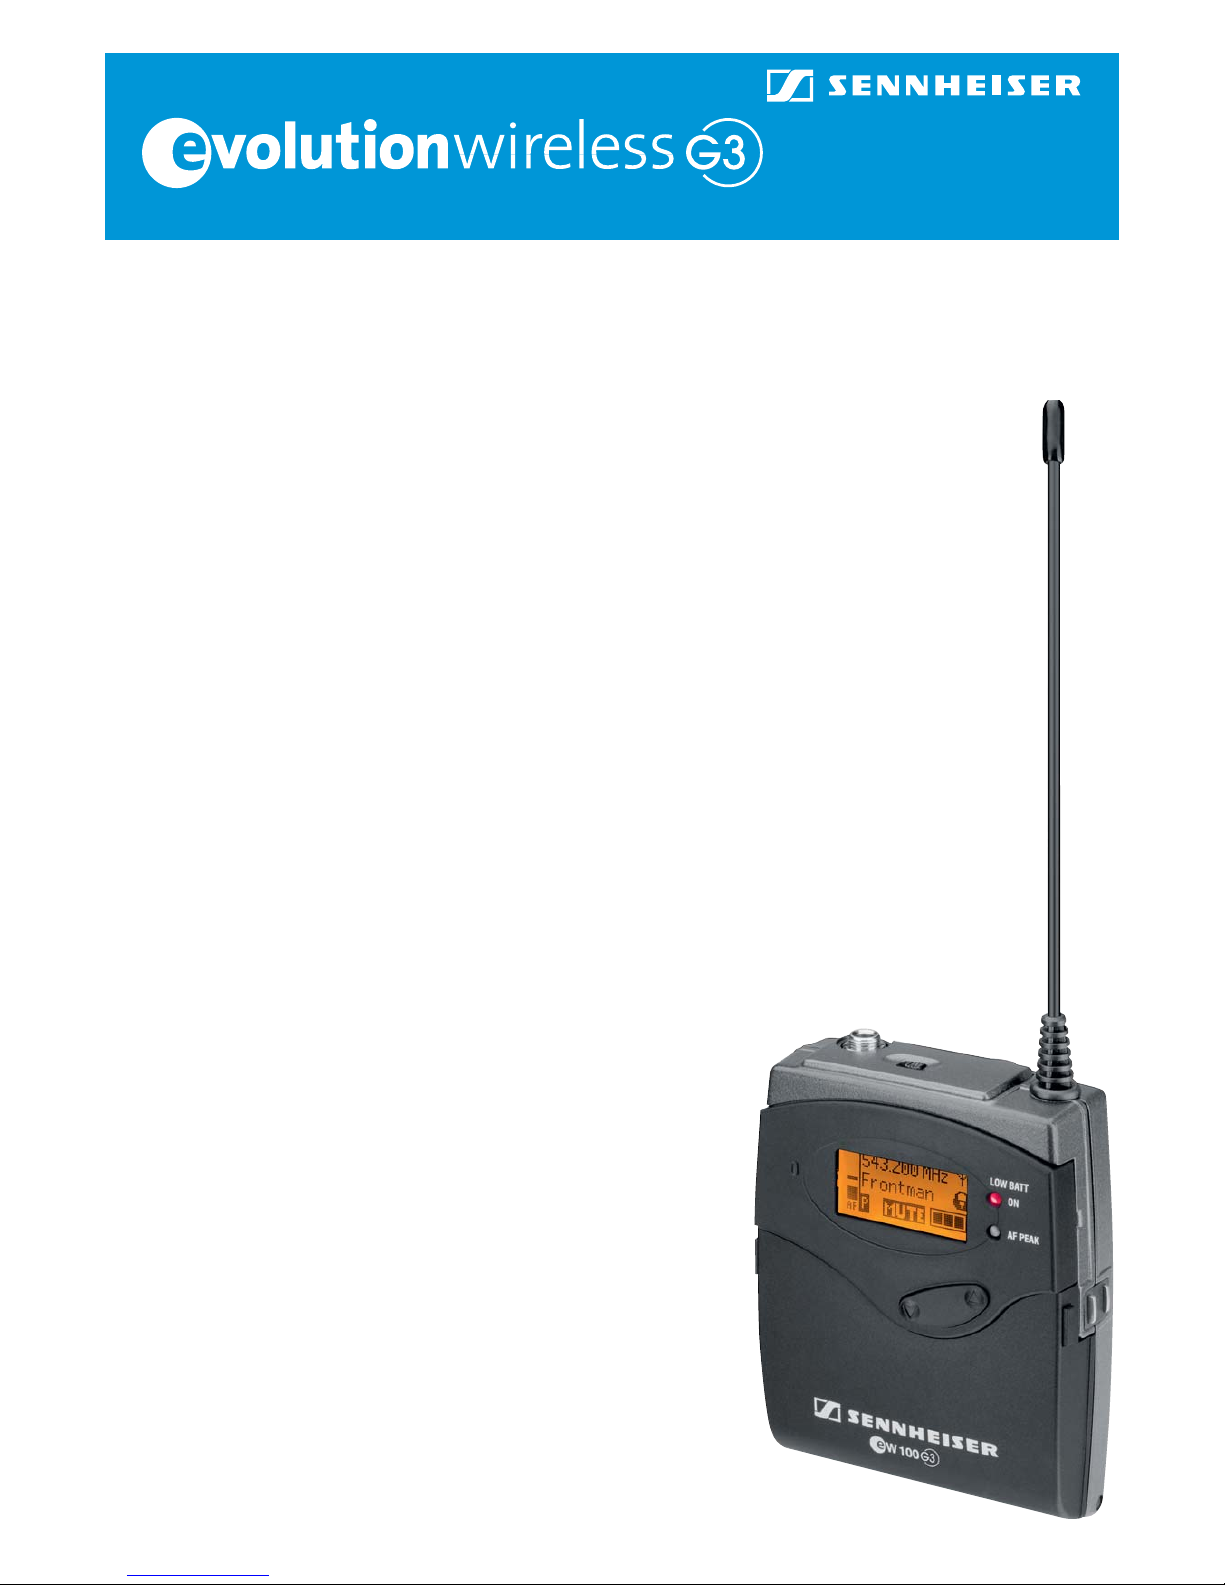
Hold the BodyPack high (eye level) in one hand, so that you will be able to operate the buttons. Avoid bending down2.
your head, as this will bring your mouth closer to the microphone in a position you will not be using, when you are
talking to your audience – and the test will then not give you the result you are looking for.
Press SET3. .
You will enter the transmitter operating main menu. You might be in luck that the menu will show “Sensitivity”, but if
not, repeatedly press the UP or DOWN button until “Sensitivity” appears on the display. (If you get lost press ON/OFF
briefly and start over).
Press SET4. again to enter the Sensitivity menu
If you are doing this for the first time, the level will be set to “-30 dB”, which is usable for a wide range of purposes.
You can, however, make changes by pressing the arrow buttons. Every time you press, you will change the level in
3 dB steps. The higher the negative number is, the less sensitive or “deaf” you will make the transmitter input. The
factory setting is -30 dB, usable for e.g. singing,
-20 or -15 is normally good for a speaker. The smaller negative number you choose, or the closer you get to “0”, the
more sensitive you will make the input. Avoid using “0” (only suitable for extremely weak sound sources).
Press the UP5. arrow while speaking in a normal voice and say e.g. “One – two” (S, T or P sounds are very suitable for
tests like this). You are making the transmitter more sensitive every time you push UP. Observe when the small yellow
AF PEAK lamp lights up. This indicates that you have set transmitter sensitivity too high.
Press the DOWN arrow6. once or twice and then press SET. The display will show “Stored”, and the adjustment change
is now stored in the transmitter.
evolution G3 shortguide
6 evolution G3 shortguide • 2009
The yellow lamp lights up only when the sound level is getting too high and causes distortion. This results in ugly and
noisy sound with low speech intelligibility. It is OK for the lamp to blink occasionally, but not all the time. If it goes
on blinking press SET twice and arrow DOWN once or twice until the lamp stops blinking. Press SET to store the last
change. The idea is to set the audio input level as sensitive as possible without causing the yellow PEAK light to blink.
This will give you the best sound quality.
To end the session7. press ON/OFF button briefly to return to the standard display.
Try to speak again and see the AF graph moving up and down. It must deflect into the upper half - or third - when you
speak.
The transmitter is turned off by holding down the ON/OFF button a few seconds, until the display shows “OFF”, and8.
the red ON light disappear.
The transmitter – the hand microphone
Insert batteries:1.
Open the battery compartment by unscrewing the lower 1/3 part of the radio microphone body. Turn it
counterclockwise. It will now be possible gently to draw the two parts apart and reveal the battery compartment.
Open the cover and insert the two AA batteries – please observe that batteries must have same polarity direction
(“+” pointing in the same direction). Close the cover and push the microphone body together again. Screw the lower
and upper part together, making the microphone look the same as when you started.
You have access to all operation buttons from the bottom end of the microphone.
Turn on the radio hand microphone:2.
Hold down the red button for a few seconds until the display – on the side of the microphone body - lights up. (When
any button is touched the display will light up for 20 sec. and then fade out). A red ON light opposite the ON button is
now showing. When the red light – after approx. 8 hours of use – starts to blink, it is time to change batteries.
The start or standard display is showing the transmitter’s present status. Frequency is 782.100 MHz if you turn on
the transmitter for the first time. Battery status is illustrated by a small battery icon to the right (3 tiny squares mean
batteries are full) and “P” means that a facility called “Pilot tone evaluation” is activated.
The transmitter is now turned on and transmitting a signal. The receiver will receive this signal if both displays are
showing 782.100 MHz. Check this by looking at the receiver standard display. The two BAR graphs AF and RF will
deflect. Hopefully RF will show a full deflection (the whole graph is white/orange and showing black numbers up
to 40). If you say something in the microphone, the other graph - the AF graph - will deflect. If you shortly after
saying something in the microphone, turn the hand held transmitter and look at the display on the side of the body,
you will on the AF graph (left) see a trace of the deflection (peak hold) on the display. The receiver battery icon is
now showing on the receiver display. By looking at the receiver display an operator will be able to
determine how much battery power the transmitter has left.
If the receiver is connected to a sound
reinforcement system, you will
also be able to hear the
sound coming from the
microphone.
evolution G3 shortguide
evolution G3 shortguide • 2009 7
Next to the display - just above the transmitter antenna - is a small wheel. This wheel is used to change and
adjust levels and the parameters of the transmitter. Please note that the microphone is suited with a protection
ring (available in different colours) to avoid changes caused by non-intentionally pressing the control buttons.
If necessary turn the ring to uncover the wheel, making changes possible.
Adjust the microphone input sensitivity of the transmitter
You are actually ready now; however, two more things need to be adjusted correctly in order to obtain maximum reliability and
sound quality: We recommend you to change frequency on both transmitter and receiver (more on this below) and to adjust
the sensitivity of the transmitter audio input to fit the actual use of the microphone.
The audio input must be adjusted to match the sound level spoken, sung or played into the microphone. Factory setting is
made to suit normal use, however, if you want to make certain that the level is OK or you want to change the parameters for
whatever reason, you can test and change the transmitter sensitivity level by proceeding as follows:
The display at the side of the microphone body shows an AF BAR graph to the left. This indicates the level of sound that you
speak or sing into the microphone.
Hold the microphone in your left hand, be certain that you can see the display and touch the control wheel by the right1.
hand thumb.
Gently press the wheel into the body2. , as if it was a button (it works similar to the SET button on the BodyPack
transmitter).
You have now entered the operating main menu of the transmitter. You might be in luck that the menu will show
“Sensitivity”, but if not, repeatedly turn the wheel clock or counterclockwise until “Sensitivity” appears on the display.
(If you get lost press ON/OFF briefly and start over).
Press the wheel into the body3. (SET) again to enter the Sensitivity menu.
If you are doing this for the first time, the factory setting of level will be “-18 dB”, which is usable for a wide range of
purposes.
You can, however, make changes by turning the wheel (UP/DOWN). Every time you turn you will adjust the level in 64.
dB steps. The higher negative number, the less sensitive or “deaf” you will make the microphone. Every person has his
own personal sound level when singing or speaking. Try -30 dB for singing if you have a powerful voice, and change it
again if this will not be enough. You can go down to -48 dB. This, however, is normally used for powerful instrumental
sounds. -18 or -12 will often work fine for a speaker or gentle singing.
Bear in mind that the distance from the mouth to the microphone head is of decisive importance. It is important that
the microphone is constantly kept in the same distance to the mouth (or other sound source). Avoid using “0” (only
suitable for extremely weak sound sources).
The easiest way for you to adjust the sensitivity level might be when the transmitter is connected to the receiver. You
are then able to look at the receiver display’s AF level. Say or sing something into the microphone and look at the AF
BAR graph. Turn the wheel up or down until the AF BAR graph has an almost full deflection or stay in the upper 1/3.
evolution G3 shortguide
8 evolution G3 shortguide • 2009
Press the wheel into the body5. (SET) to store the change. Display is showing “Stored”.
Briefly press the red button6. to get back to the standard display.
When you want to turn off the transmitter,7. hold down the red button a few seconds until the display shows “OFF”
and the red ON light goes off.
Setting up one system – adjust the frequency
The legal rules regarding radio transmission in the Nordic countries are negotiated right now. Changes might come. For now
and in near future it will only be legal to transmit in the frequency area of 800-820 MHz (Please note that Sweden has other
specific rules).
This means that 782.100 MHz, the frequency setting of receiver and transmitter when you turn them on for the first time,
is outside the legal range. We recommend you to change the setting and transmit in the legal frequency range. To do this
adjustment and to select a frequency from a frequency bank, we start by setting up the receiver. Proceed as follows:
Turn on the receiver by pressing the esc-button1.
Press2. SET
Press the arrow buttons3. – several times if necessary – until the display shows “Frequency Preset”
Press4. SET
You have now entered the receiver operating main menu and will be able to change Bank and select a frequency from
the standard setup.
First we concentrate on Bank setting (the first number):
Press the arrow buttons5. until the display shows 2or 3
These Banks only contain frequencies in the legal range 800 - 820 MHz.
Press6. SET to select a frequency
Select “Frequency 1”7. from the setup
Press SET8. and the display will show “Stored”
Briefly press esc,9. and you will return to the standard display, now showing that the receiver is programmed to receive
on the frequency 800.100 MHz
Turn on a transmitter10. (BodyPack or handheld transmitter)
Press the ”sync11. button” on the receiver. The display will show ”sync”
Place the transmitter 5-10 cm in front of the receiver.12. The two displays must face each other. If you use a BodyPack
transmitter please always open the battery cover (this will uncover the infrared eye – no need for this when using a
handheld microphone).
The receiver is now communicating with the transmitter and synchronizing the settings to e.g. the BodyPack. The process lasts
for a few seconds and the receiver ends the process by showing a checkmark on the display. Transmitter and receiver are now
using the same frequency setting. The receiver RF BAR graph shows a deflection.
It might happen that the synchronization is incomplete. The receiver does not receive or understand all the transferred data.
An “X” will appear on the receiver display after 30 seconds. You will have to run the synchronization process again (item 11-
12).
evolution G3 shortguide
evolution G3 shortguide • 2009 9
Bring several sets into operation
First a brief introduction to the subject: intermodulation.
One set of transmitter and receiver (one channel) will seldom cause you any problems. If you never use more than one channel
you can stop reading here. However, if you need to operate more than one channel at the same time, you must pay attention
to the problems related to intermodulation.
Two or more radio signals together are generating several other signals, sometime disturbing your radio transmission with
noise and distortion. The more transmitters you turn on, the more complex and disturbing the problems of intermodulation
will become.
However, evolution wireless G3 has an outstanding ability to handle this problem and make operating wireless systems easy
for you. Furthermore, the G3 systems are pre-programmed by Sennheiser making 20 different wireless bank setups (= groups
of frequencies) available to you, all ready to use.
Transmitters and receivers have 20 frequency banks respectively. Each of the channels in the frequency banks has been
factory-preset to a fixed frequency. The frequency presets within one frequency bank are intermodulation-free.
One bank is a group of frequencies designed to work together free of intermodulation problems. When using several sets
simultaneously it is very important only to choose frequencies from the same bank. For use in Nordic countries we recommend
bank 2 or 3 (800-820 MHz).
Enclosed with the written manual you will find a folder: “Additional information for Sennheiser evolution wireless G3 systems”.
The folder will give you an overview of the setups showing banks and frequency of all G3 series.
All G3 wireless sets 100, 300 and 500, are pre-programmed with 20 banks, with groups of free selectable fixed frequency
presets. One significant difference between the series is the amount of frequencies in a bank. The 100 series holds 12 channels
in every bank. Banks in the 300 and 500 series hold even more.
The USERBANK is only used for large or complicated setups. This issue is not covered by this guide. For more info on this, please
refer to the written manual or even better: www.sennheiser.com.
Putting a setup of 4 channels into operation
In this example we will use 4 frequencies from bank 3 by using the Easy Setup facility.
The Easy Setup facility is very handy if you do not know if you are alone or if other users are transmitting close to your
operating position (e.g. in conference centers, on festivals, schools etc.). If you are not alone, you might run into problems.
Part of the Easy setup is a practical scan-facility, making it possible for you to check your operation area for other wireless
users.
Follow the steps below:
Turn on all receivers by pressing the esc button.1.
In this example we will use only 4, but the process is the same no matter how many channels you use.
Press2. SET on the first receiver
Find3. Easy Setup using the UP/DOWN arrows
Press4. SET
Find Scan New List5. using the UP/DOWN arrows
Press SET6. and you will start a scan
The receiver will work for approx. one minute. Do not interrupt this process. It will scan the area and tell you how
many and which frequencies you can use.
evolution G3 shortguide
10 evolution G3 shortguide • 2009
Most likely it will tell you: Bank 1 and ”Free:12”, meaning that all 12 frequencies in bank 1 are free for you to use. In
this example, however, we will use the Nordic legal frequency area of 800 – 820 MHz. Continue by doing:
Find7. Bank 3 using the UP/DOWN arrows.
If the display tells you: ”Free: 12”, you are most likely alone. If you get ”Free: 7” 5 of the 12 channels in bank 3 are
taken by other users or occupied by something else. Use always only free channels. We will assume you are alone in
this example.
Press8. SET and select channel 1
Press9. SET again and the display will show STORED – you have now programmed the receiver to receive on 800.400
MHz
Press10. esc and you will return to the standard display
Turn on a transmitter e.g. a BodyPack (remember to open the battery cover)11.
Press the12. sync button to synchronize the transmitter (hold it 5-10 cm in front of the receiver, the displays facing
towards each other (look above).
One set is operating now. To set up the rest of the sets continue by doing the following:
Press SET13. on the next receiver
Find14. Easy Setup using the arrow buttons
Press15. SET
Find Current List16. using the arrow buttons
Press SET17.
Find Bank 3 again18. using the arrow buttons.
Press SET19. and instead of channel 1 select channel 2 (801.300 MHz)
Press20. SET display shows STORED
Press21. esc to get back to the standard display
Turn on the next transmitter e.g. a handheld microphone.22.
Press the sync button on the receiver and synchronize transmitter and receiver .
Two sets are now operating.
Continue using bank 3 and select respectively channel 3 and 4 on the receiver and synchronize the transmitter.
Four sets should now be operating using 800.400 - 801.300 - 801.800 - 803.100 MHz.
Accessories
In the example above (using 4 receivers) you can maximize the RF reliability of the system by replacing the enclosed small
black antennas by an antenna splitter (ASA 1) in combination with 2 antennas (e.g. A 1031 or A 2003) on stands.
The extra equipment will be:
1 x antenna splitter ASA 1 + power supply NT 1-1AC
2 x directional antennas A 2003
2 x 3 m 50 ΩBNC antenna cable
2 x standard microphone stands
evolution G3 shortguide
evolution G3 shortguide • 2009 11
Extra equipment and accessories
A wide range of accessories fulfills the highest standards of technical compatibility. This might not be absolutely necessary for
a system to work, however, it will in most cases enhance the quality of sound and the reliability of a system.
A high-end microphone will enhance sound quality remarkably. Clip-on microphone MKE 2-EW and headset HSP 2-EW (omni-
directional) or HSP 4-EW (cardioid) are good examples on this kind of equipment. Also the hand held microphones can be
updated with high-end capsules from the 900 professional series e.g. Tech Award winning MMD 935 dynamic cardioids
capsule.
A wide range of extra equipment is provided for G3 wireless series e.g. charger and rechargeable batteries, 19” rackmounts,
230 V AC adaptors for transmitters making them constantly transmitting for days and weeks. Contact our technical staff and
sales support at +45 70 26 66 33 or visit www.sennheisernordic.com for more information.
evolution G3 shortguide
Sennheiser Nordic A/S Denmark • Skovlytoften 33 • DK-2840 Holte
Phone: +45 70 26 66 33 • Fax: +45 70 26 67 11
e-mail: [email protected] • www.sennheisernordic.com
Sennheiser Nordic 2009

Other Sennheiser Microphone System manuals

Sennheiser XS WIRELESS 1 User manual

Sennheiser

Sennheiser XS WIRELESS 1 User manual

Sennheiser evolution wireless G3 EW 100-935 G3-B-X User manual

Sennheiser

Sennheiser evolution wireless G3 EW 100-935 G3-B-X User manual

Sennheiser EW 322 G3 User manual

Sennheiser

Sennheiser EW 322 G3 User manual

Sennheiser EK 100 G3 User manual

Sennheiser

Sennheiser EK 100 G3 User manual

Sennheiser ew 112 G3 User manual

Sennheiser

Sennheiser ew 112 G3 User manual

Sennheiser MKE 440 User manual

Sennheiser

Sennheiser MKE 440 User manual

Sennheiser XS WIRELESS 1 DUAL Series User manual

Sennheiser

Sennheiser XS WIRELESS 1 DUAL Series User manual

Sennheiser Evolution Wireless Digital EW-DX EM 2 User manual

Sennheiser

Sennheiser Evolution Wireless Digital EW-DX EM 2 User manual

Sennheiser 300 series User manual

Sennheiser

Sennheiser 300 series User manual

Sennheiser XSW 2-835 User manual

Sennheiser

Sennheiser XSW 2-835 User manual

Sennheiser EMP 2015 Dimensions

Sennheiser

Sennheiser EMP 2015 Dimensions

Sennheiser ew 100 P G4 User manual

Sennheiser

Sennheiser ew 100 P G4 User manual

Sennheiser 100 - 01-09 User manual

Sennheiser

Sennheiser 100 - 01-09 User manual

Sennheiser EW 500 User manual

Sennheiser

Sennheiser EW 500 User manual

Sennheiser EW 512 G3 Dimensions

Sennheiser

Sennheiser EW 512 G3 Dimensions

Sennheiser ew 100 G4 User manual

Sennheiser

Sennheiser ew 100 G4 User manual

Sennheiser ME 104 Instruction manual

Sennheiser

Sennheiser ME 104 Instruction manual

Sennheiser 100-P - 01-09 User manual

Sennheiser

Sennheiser 100-P - 01-09 User manual

Sennheiser ew 100 G4 User manual

Sennheiser

Sennheiser ew 100 G4 User manual

Sennheiser evolution wireless G4 500 P Series User manual

Sennheiser

Sennheiser evolution wireless G4 500 P Series User manual

Sennheiser EK 2000 IEM User manual

Sennheiser

Sennheiser EK 2000 IEM User manual

Sennheiser EK IEM G4 User manual

Sennheiser

Sennheiser EK IEM G4 User manual

Sennheiser evolution wireless g3 SKM 300 User manual

Sennheiser

Sennheiser evolution wireless g3 SKM 300 User manual

Sennheiser SpeechLine User manual

Sennheiser

Sennheiser SpeechLine User manual

Popular Microphone System manuals by other brands

AKG PR 81 user guide

AKG

AKG PR 81 user guide

Retekess TT105 quick start guide

Retekess

Retekess TT105 quick start guide

Stageline TXS-2402SET instruction manual

Stageline

Stageline TXS-2402SET instruction manual

Majorcom: EMAGP16 user manual

Majorcom:

Majorcom: EMAGP16 user manual

Renishaw MP18 Installation and user guide

Renishaw

Renishaw MP18 Installation and user guide

Eikon AETHER RM1 user manual

Eikon

Eikon AETHER RM1 user manual

CTS Any Spot user manual

CTS

CTS Any Spot user manual

AkkuPoint TPH 900 user manual

AkkuPoint

AkkuPoint TPH 900 user manual

AKG PERCEPTION WIRELESS SR45 User instructions

AKG

AKG PERCEPTION WIRELESS SR45 User instructions

Piezotronics 378C10 Installation and operating manual

Piezotronics

Piezotronics 378C10 Installation and operating manual

VideoLabs MicCOMMAND Installation & user guide

VideoLabs

VideoLabs MicCOMMAND Installation & user guide

Realistic 32-1228 owner's manual

Realistic

Realistic 32-1228 owner's manual

DMT 300HD instruction manual

DMT

DMT 300HD instruction manual

thomann the t.bone GigA Pro Wind Set user manual

thomann

thomann the t.bone GigA Pro Wind Set user manual

Acesonic uhf-a6 user manual

Acesonic

Acesonic uhf-a6 user manual

Nady Systems W-1KU owner's manual

Nady Systems

Nady Systems W-1KU owner's manual

Radwin 2000 Series user manual

Radwin

Radwin 2000 Series user manual

Shure UHF Wireless System user guide

Shure

Shure UHF Wireless System user guide

manuals.online logo
manuals.online logoBrands
  • About & Mission
  • Contact us
  • Privacy Policy
  • Terms and Conditions

Copyright 2025 Manuals.Online. All Rights Reserved.