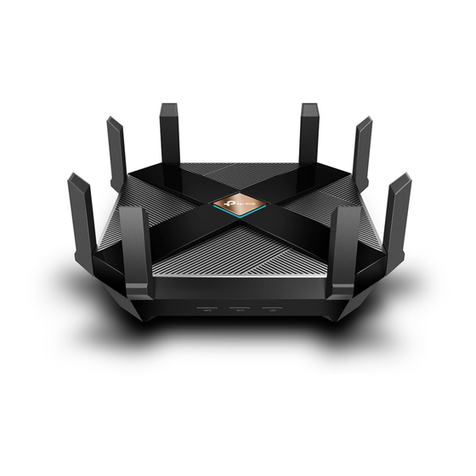
Seethelight VMG8324 User manual

Internet User Guide, VMG8324 & VMG8924 Last amended: 13/10/2014
1
Internet User Guide
For the VMG8324 and VMG8924 routers

Internet User Guide, VMG8324 & VMG8924 Last amended: 13/10/2014
2
Contents Page
1. Introduction and Your Fibre Equipment 3
2. Setting up your internet connection 6
2.1 A Wired Connection 7
2.2. A Wireless Connection 7
2.3 A Wired connection using the patch panel (using your house’s internal wiring) 8
3. About Your Router 10
4. Connecting to Wireless Networks 13
4.1 Windows Vista 13
4.2 Windows XP 14
4.3 MAC OS X-version 10.4 14
4.4 Windows 7 15
4.5 Windows 8 15
4.6 OSX Lion/Mountain Lion 16
5. Internet Troubleshooting 17

Internet User Guide, VMG8324 & VMG8924 Last amended: 13/10/2014
3
Please note: This guide is for Zyxel VMG8324 and VMG8924 routers only.
This is fibre: this is the future
Welcome to the next-generation of communications: future-proof, cutting-edge technology that allows for
more entertainment, a richer experience and super-fast downloads. Seethelight deliver high-speed internet
via fibre optics that makes hi-tech applications, home working and video conferencing a reality.
Brace yourself – the broadband you’ve used in the past doesn’t compare to fibre’s stunning connectivity. It’s
worth looking out for the little dierences from traditional data services – but don’t worry, we’ll be covering
them in the next few pages.
Please ensure that you read this guide carefully to help you get the best out of your seethelight services.
Because seethelight use fibre to bring you high-speed internet, we use some equipment that you may not be
familiar with. This next section will give you a quick1234 overview of this equipment.
Your home will have either of these two set-ups:
1. Introduction and Your Fibre Equipment
Battery
Back-Up
ONT
Patch
Panel
Telephone
Adaptor
Configuration A: Patch panel linked to internal wiring to enable internet service in multiple rooms.*
*Exact layout of equipment may vary. Your internal wiring is the responsibility of the house owner/landlord.
To resolve an internal wiring problem please contact a qualified electrician.

Internet User Guide, VMG8324 & VMG8924 Last amended: 13/10/2014
4
Configuration B: The same as A but without a patch panel.* *Exact layout of equipment may vary.
FYI:
Fibre is short for ‘fibre optics’. Fibre optics are small glass threads through which light is
passed. Internet and voice data is converted from electrical impulses into light, passed down
the fibre as light, then converted back into electrical impulses.
This allows data to flow up and down the fibre.
Your Fibre Equipment continued...
Battery Back-Up
This useful piece of kit provides back-up battery power, so if the mains power fails, you will still be able to
make telephone calls for up to eight hours. Please note that Internet services are not supported when your
ONT is running on battery back-up power.
Patch Panel
This can be used to distribute data services throughout the home via internal cabling. Using the patch
cables between the socket and the ONT, you can deliver services wherever they are needed in the home
(for more on this see 2.4 A ‘wired’ connection using the patch panel )
Telephony Master Socket and Telephone Adaptor
Applicable for voice services. Please see Telephone User Guide for more information.
Battery
Back-Up
ONT
Telephone
Adaptor

Internet User Guide, VMG8324 & VMG8924 Last amended: 13/10/2014
5
Your Fibre Equipment continued...
ONT (Optical Network Terminal)
This is where the light that passes through the fibre optics on the seethelight network is converted into
electrical signals for use by your telephone or computer. The ONT is typically located in an under stairs
cupboard (though this may vary from house to house). It has two or four internet and two telephony ports
situated on the underside.
Note: Make sure your ONT’s power supply is plugged-in and switched on or you will not have a connection to
the seethelight network for both telephony and internet.
The ONT has several lights located on it, which tell you its status. These lights can be useful to help you
troubleshoot any problems with your connection. The table below describes the lights which may indicate
a problem with your connection.
Please note, the lights may vary between dierent versions of the ONT.
Light name Colour Meaning
EQPT O No power*
Green OK
MGMT O No power*
Green OK
Red, Amber or Flashing No connection*
Power Green Power OK
O No power*
PON Green Connection OK
Red No connection**
WAN Green Connection OK
Red No connection**
LOS Red No connection**
Action
*Check power and other cables are properly connected
** Check that there are no bends in the fibre connection

Internet User Guide, VMG8324 & VMG8924 Last amended: 13/10/2014
6
2. Setting up your internet connection
Make sure you have all of the following pieces of equipment before setting up your internet connection.
Network Ethernet cable
(colour may vary)
Wireless Zyxel Router
Router Power Supply ONT
Your set-up options:
1. A ‘wired’ connection
Internet speeds slow down over wireless connections, so for the best download & upload speeds, use wired.
2. A ‘wireless’ connection
If you have a PC/laptop (made in the last six years), or Apple Mac then you will be ready to go, as it will be
‘wireless enabled’ as standard. New Apple Macs and a few other devices, (such as Samsung Galaxy S4/S5/
Note 3, Xbox One, HTC One and newest versions of the Macbook Pro) come with 802.11ac enabled WiFi.
If your computer isn’t ‘wireless enabled’, you’ll need the following equipment:
For laptop: Wireless USB adaptor or wireless PCMCIA card
For PC: Wireless USB adaptor or wireless network card
3. A ‘wired’ connection using your house’s internal wiring
Using the patch-panel, you can deliver services wherever they are needed in the home
And remember:
Follow these instructions closely and don’t attempt to disassemble any of your seethelight equipment
Don’t turn on your power supply until you’re sure everything is connected correctly
1
2
Wi-Fi
L
ig
h
t
Off
WPS
DSL LAN 1 LAN2 LAN3 LAN4 WAN PHONE 1 PHONE 2 RESET POWER ON/OFF

Internet User Guide, VMG8324 & VMG8924 Last amended: 13/10/2014
7
1
2
W
i
-
F
i
L
i
g
ht
O
f
f
W
P
S
DSL LAN 1 LAN2 LAN3 LAN4 WAN PHONE 1 PHONE 2 RESET POWER ON/OFF
LAN
PORT
(1-4)
INTERNET
PORT 1
BLUE
WAN PORT
INTERNET
PORT
2.1 A ‘Wired’ Connection
2.2 A ‘Wireless’ Connection
1
2
W
i
-
Fi
L
ight
Off
W
P
S
DSL LAN 1 LAN2 LAN3 LAN4 WAN PHONE 1 PHONE 2 RESET POWER ON/OFF
INTERNET
PORT 1
BLUE
WAN PORT
Insert an Ethernet
cable into internet
port 1 of the ONT
Take the other end of
the cable and insert
into the Blue WAN
port of your router
Take another Ethernet
cable and insert into
any of the routers LAN
ports (1-4)
Take the other end of
the cable and insert into
the internet port of your
internet enabled device
1
2
3
4
You will now be able
to find the wireless
network and connect. For
information on how to do
this, see 6. Connecting to
Wireless Networks.
Insert an Ethernet
cable into internet
port 1 of the ONT
Take the other end of
the cable and insert
into the Blue WAN
port of your router
1
2
3

Internet User Guide, VMG8324 & VMG8924 Last amended: 13/10/2014
8
2.3 A ‘wired’ connection using the patch panel (Using your house’s internal wiring)
1
2
W
i-Fi
L
ig
h
t
O
f
f
W
PS
DSL LAN 1 LAN2 LAN3 LAN4 WAN PHONE 1 PHONE 2 RESET POWER ON/OFF
INTERNET
PORT 1
BLUE
WAN PORT
LAN
PORT
(1-4)
INTERNET
PORT
Take another Ethernet
cable and plug one end
into any of your rout-
er’s LAN ports (1-4)
and the other end into
the relevant port of the
patch panel associated
with the room where
you would like services
provided.
With the other end of this
cable, connect to your PC/
Internet enabled device
through its internet port.
Use another Ethernet cable
and take one end and plug
into a wall socket in the
relevant room that your
internet service has been
enabled to.
Insert an Ethernet
cable into internet
port 1 of the ONT
Take the other end of
the cable and insert
into the Blue WAN
port of your router
1
2
3
4
5
Internal
Wiring

Internet User Guide, VMG8324 & VMG8924 Last amended: 13/10/2014
9
Note: You can enable your internet service to more rooms by adding additional Ethernet cabled connections
between your router and your patch panel as shown in the diagram below:
A ‘wired’ connection using the patch panel (Using your house’s internal wiring)
continued...
1
2
Wi-Fi
L
i
g
h
t
O
f
f
W
PS
DSL LAN 1 LAN2 LAN3 LAN4 WAN PHONE 1 PHONE 2 RESET POWER ON/OFF
INTERNET
PORT 1
BLUE
WAN PORT
INTERNET
PORT
INTERNET
PORT
LAN
PORTS
(1-4)
Internal
Wiring
Internal
Wiring

Internet User Guide, VMG8324 & VMG8924 Last amended: 13/10/2014
10
3. About your Router
On the top of your router, you will find a number of status LEDs that indicate the status of the device. These
lights can be useful to help you troubleshoot any problems with your connection.
LED’s on the device:
Note: The Wifi 5G is only applicable to the VMG8924 Router
None of the LEDs are on if the Device is not receiving power.
LED COLOUR STATUS DESCRIPTION
POWER
PWR/SYS
Green On The device is receiving power and ready for use
Blinking The Device is self testing
Red
On The Device detected an error whilst self testing, or there is a
device malfunction
O The Device is not receiving power
DSL Green On The ADSL line is up
Blinking The Device is initializing the ADSL line
Orange
On The VDSL line is up
Blinking The Device is initializing the VDSL line
O The DSL line is down
INTERNET
Green
On The Device has an IP connection but no trac.
Your Device has a WAN IP address (either static or assigned
by a DHCP server), PPP negotiation was successfully
completed (if used) and the DSL connection is up.
Blinking The Device is sending or receving IP trac.
O There is no Internet connection or the gateway is in bridged
mode.
Red
On The Device attempted to make an IP connection but failed.
Possible causes are no response from a DHCP server, no
PPPoE response, PPPoE authentication failed.
LAN
Green
On The Device has a successful 100 Mbps Ethernet connection
with a device on the Local Area Network (LAN)
Blinking The Device is sending or receiving data to/from the LAN at
1000 Mbps
O The Device does not have an Ethernet connection with the
LAN.

Internet User Guide, VMG8324 & VMG8924 Last amended: 13/10/2014
11
WiFi 2.4G Green On The 2.4 GHz wireless network is activated
Blinking The Device is communication with other wireless clients
Orange Blinking The Device is setting up a WPS connection.
O The 2.4 GHz wireless network is not activated
WiFi 5G
(Only applicable
for VMG8924)
Green On The 5 GHz wireless network is activated
Blinking The Device is communicating with 5 GHz wireless clients
Orange
Blinking The Device is setting up a WPS connection with a 5 GHz
wireless client
O The 5 GHz wireless network is not activated
Note: This is only compatible with 802.11ac devices.
WAN
Green
On The Device has a successful 1000 Mbps Ethernet connection
on the WAN.
Blinking The Device is sending or receiving data to/from the WAN at
1000 Mbps.
Orange
On The Device has a successful 10/100 Mbps Ethernet
connection on the WAN.
Blinking The Device is sending or receiving date to/from the WAN at
10/100 Mbps.
O There is no Ethernet connection on the WAN.
PHONE 1,
PHONE 2 Green
On A SIP account is registered for the phone port.
Blinking A telephone connected to the phone port has its receiver o
the hook or there is an incoming call.
Orange
On A SIP account is registered for the phone port and there is a
voice message in the corresponding SIP account.
Blinking A telephone connected to the phone port has its receiver o
the hook and there is a voice message in the corresponding
SIP account.
O The phone port does not have a SIP account registered.
USB1
Green
On The Device recognises a USB connection through the USB1
slot.
Blinking The Device is sending/receiving data to/from the USB device
connected to it.
O The Device does not detect a USB connection through the
USB1 slot
USB2
Green
On The Device recognises a USB connection through the USB2
slot.
Blinking The Device is sending/receiving data to/from the USB device
connected to it.
O The Device does not detect a USB connection through the
USB2 slot

Internet User Guide, VMG8324 & VMG8924 Last amended: 13/10/2014
12
3. About your Router continued...
3.2 Changing the admin password
seethelight recommend that you change your router’s default password (quick1234) to something else to
help keep your computer safe online. Use the following procedure to change your password and ensure that
you make a note of your new password.
Launch your web browser and type http://192.168.1.254 into your web browser’s address bar, then press
enter. Enter the username admin and the default password quick1234 into the router’s web page. Now close
the Quick Start screen and proceed to Maintenance then User Account and set a new password.
3.1 Configuring your router
Note: If you plan to connect your computer via a wireless connection then please configure your computer as
described in 4. Connecting to wireless networks and then continue with this section.
Your router is shipped pre-configured and is ready to be connected to the network. If you do need to login to
your router, then enter http://192.168.1.254 into your web browser and when promoted, enter the username
admin and the password quick1234.

Internet User Guide, VMG8324 & VMG8924 Last amended: 13/10/2014
13
You will find a sticker attached to the underside of your router. It will contain the following information:
ˉYour SSID: The name of your wireless network associated with your router
ˉYour 5GHz SSID: The name of your 5GHz wireless network associated with your router (Only applicable
with VMG8924 routers)
ˉWPA2 PSK: The password you will need to enter on your PC’s wireless client to gain access to this network
You will find instructions on how to set up a wireless connection for the following operating systems:
Windows Vista (see page 13)
Windows XP (see page 14)
MAC OSX - version 10.4 (see page 14)
Windows 7 (see page 15)
Windows 8 (see page 15)
OSX Lion/Mountain Lion (see page 16)
IMPORTANT: If you don’t have any of the above operating systems, or if you use a non-standard wireless
client, then please consult the appropriate manufacturer manual.
4. Connecting to wireless networks
FYI:
SSID or Service Set Identifier, is used to identify wireless networks. By displaysing a list of
SSID’s in your range, you can select one to connect to.
WPA2: Security protocol used to secrure wireless computer networks.
4.1 Windows Vista
1. Click on the Start button and then click Connect To.
2. Now click on the network that you want to connect to (your SSID), then click Connect.
3. Now enter your network password (WPA2 PSK) then click Connect’
1 2 3

Internet User Guide, VMG8324 & VMG8924 Last amended: 13/10/2014
14
4. Connecting to wireless networks continued...
4.2 Windows XP
4.3 MAC OS X-version 10.4
1. Right click the wireless network icon located in the lower right corner of your screen or go to Connect To
on the start menu.
2. Click View Available Wireless Networks
3. A window will appear displaying the wireless networks in your area. Click on your network (your SSID) and
then click Connect.
4. Now enter your network password (WPA2 PSK) and click Connect. You should now be connected.
1. Go to the System Preferences Icon on your dock then click on Network under the Internet & Network
heading.
2. Click on the Turn AirPort On button and select the correct network (your SSID) from the Network Name
list.
4. Now enter your network password (WPA2 PSK) then click OK followed by Apply.
1
1
2
2
4
3

Internet User Guide, VMG8324 & VMG8924 Last amended: 13/10/2014
15
4.4 Windows 7
4.5 Windows 8
1. Click the Start button and right click on Computer and Properties and select Device Manager
2. Click the arrow next to Network Adaptors to see if there is a Wi-Fi adaptor listed. If you don’t have a
wireless adaptor, you will have to buy one to plug into one of your computer’s USB ports.
3. To connect to a wireless network, click the Wi-Fi icon. You should now see a list of available networks.
4. To connect to a network, just click on its name. If it’s a secure network and it’s the first time you’ve
used it, you’ll need a password. If it’s your home network, your internet provider will have given you a
password – sometimes it’s printed on a sticker attached to the router.
If you’ll be using the same connection regularly, you can tick the box to connect automatically.
5. The first time you connect to a network, you’ll be asked to choose whether it’s a home, work or public
network.
1 2 3
Wifi Name 1
Wifi Name 4
Wifi Name 7
Wifi Name 9
Wifi Name 2
Wifi Name 5
Wifi Name 8
Wifi Name 10
Wifi Name 3
Wifi Name 6
Wifi Name 11
1. Move the mouse cursor to the upper right corner of the screen until the charms bar appears. Select
‘Settings’ and then select ‘WiFi’.
2. Select the wireless network you wish to connect to, and click on connect. You will be asked to enter your
password.
4. Connecting to wireless networks continued...

Internet User Guide, VMG8324 & VMG8924 Last amended: 13/10/2014
16
4.6 OSX Lion/Mountain Lion
1. Click on the AirPort icon in your menu bar and you will be presented with a list of visible wireless networks.
Select the correct Network you wish to join.
2. If the network requires a password, you will be promoted to enter it here. If it doesn’t. you should be
automatically connected.
1 2
4. Connecting to wireless networks continued...

Internet User Guide, VMG8324 & VMG8924 Last amended: 13/10/2014
17
5. Internet Troubleshooting
I can’t get a connection:
Check that all cables are attached correctly and that your computer and router are switched on
If you’re using a wireless connection, try a wired connection instead to isolate where the problem lies
Ensure that the WAN port of the router is connected to port 1 of the ONT.
Some laptops have a switch to turn the wireless connection o or on. Make sure this switch is set to ‘on’
Turn o both your computer and router. After a minute or so, turn them on and try again
Make sure you’ve entered the web address in your browser correctly. For example: http://www.
seethelight.co.uk
My connection is slow:
There are a number of factors outside of seethelight’s control that may aect the speed at which your
computer receives data:
Wireless networks are slower than a wired connection
Computer performance problems caused by old hardware or incompatible software Viruses or malware
slowing your PC down
The general internet is busy – the internet is a shared resource and speed is dependent on the number of
users online
The number of programs running on the computer such as peer-to-peer (P2P) software
The total amount of computers, games consoles or internet enabled devices sharing the internet
connection
If you are experiencing a slower connection than expected or have no broadband connection at all, there are
things that you can check that may improve your connection speed to the internet.
Reboot your router and computer and any devices that you are trying to connect.
Make sure there are lights on your router, and that it’s switched on.
Check all the power cables are plugged in properly and it’s switched on at the mains.
Ensure that the WAN port of the router is connected to port 1 of the ONT.
There may be a network outage that is aecting your area. You can check for outages on www.seethelight.
co.uk or call our customer services on 02921 678 544 for advice on this.
To access the internet, you need a working phone line. If there is no dial tone or you cannot make an
outbound call, check our telephone user guide for help, or call us on 02921 678 545.
Ensure that your computer’s antivirus software is up to date and you regularly run a full virus scan.
Disable background programs such as file-sharing or peer-to-peer (P2P). These programs consume
the computer’s system resources and use your broadband bandwidth to upload and download files.
Empty the browser cache – the process is dierent depending on the browser you are using. For
Internet Explorer 8 go to Tools, Internet Options then click Delete. In the next window select Temporary
Internet Files and click Delete.
Wireless connections are susceptible to many environmental factors which can cause interference. This will
limit the speed of your wireless connection between your router and PC.
To obtain the fastest possible speed we recommend that you use a wired connection. Alternatively, try
upgrading your router and computer to the latest Wireless ‘N’ technology which provides faster connection

Internet User Guide, VMG8324 & VMG8924 Last amended: 13/10/2014
18
speeds. Remember that a wired connection will provide a faster, more reliable connection. For more
information on wireless and for wireless troubleshooting, click here.
I get an error message when I connect my PC to the wireless network:
Try disabling your computer’s firewall and try again, remember to ensure that you have your firewall
enabled before connecting to the internet
If your connection works when the firewall is disabled, then contact your supplier for further advice
If you’ve checked the above:
Check that the correct lights are illuminated on your router (for more on this see About your router)
Check that the lights on your ONT are showing that your service is working properly (for more on this see
Your fibre equipment)
Internet Service Test
If you’re still having problems, it could be your internal wiring. You can connect your router directly to the
ONT through data port 1 (see 2.1 A ‘wired’ connection ) to see if this is the case. Your internal wiring is the
responsibility of the house owner/ landlord. To resolve an internal wiring problem, please contact a
qualified electrician.
5. Internet Troubleshooting Continued...
Still Having Trouble?
Call us on
02921 678 545
for technical advice.
This manual suits for next models
1
Table of contents
Other Seethelight Network Router manuals


