manuals.online logo
Brands
  1. Home
  2. •
  3. Brands
  4. •
  5. Sekonic
  6. •
  7. Measuring Instrument
  8. •
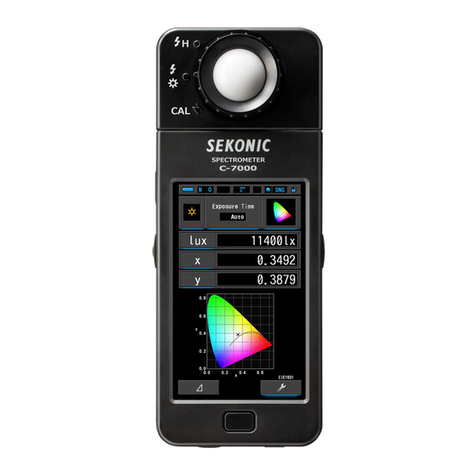
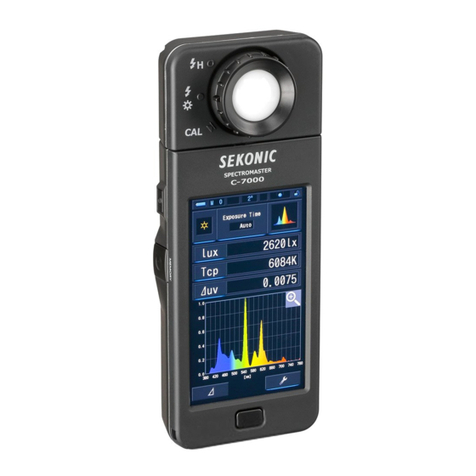
  9. Sekonic SPECTROMASTER C-7000 User guide

Sekonic SPECTROMASTER C-7000 User guide

SPECTROMASTER
C-7000
Startup Guide
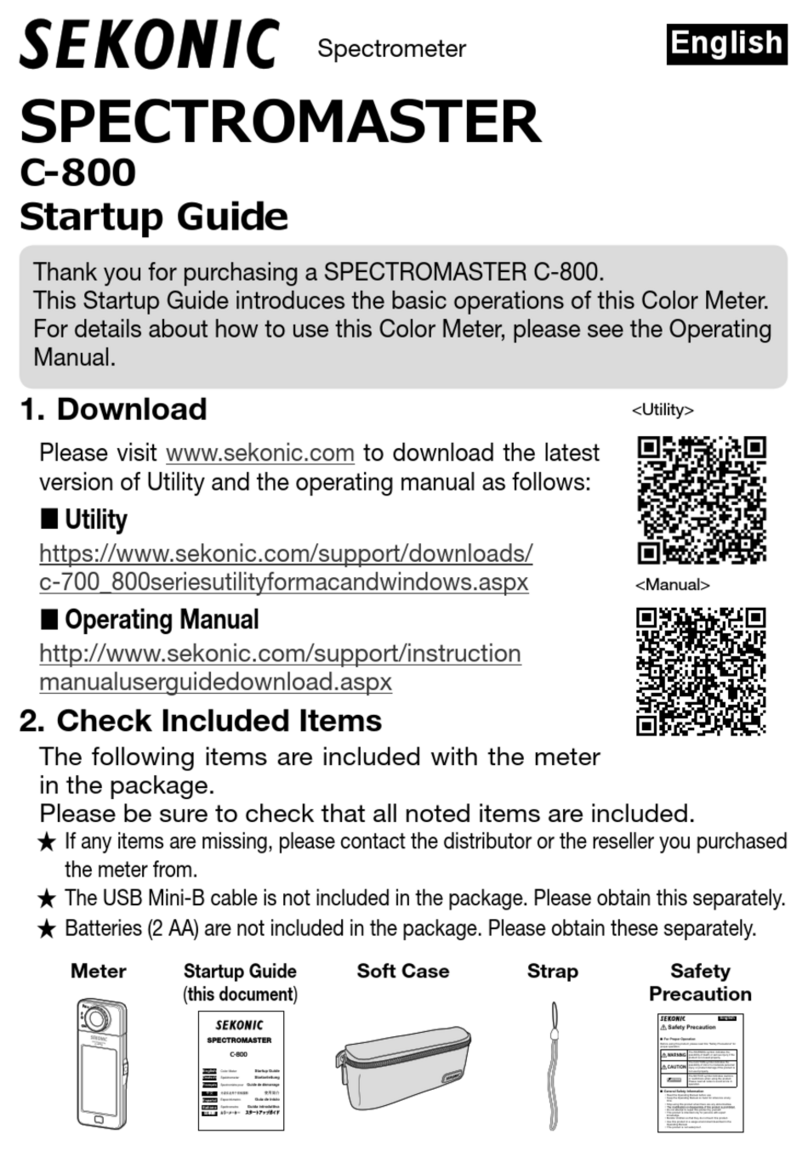
Thank you for purchasing a SPECTROMASTER C-7000.
This Startup Guide introduces the basic operations of this Color Meter.
For details about how to use this spectrometer, please see the
Operating Manual on the CD-ROM (included with the products).
1. Download
Please visit www.sekonic.com to download the latest
version of Utility and the operating manual as follows:
■Utility
https://www.sekonic.com/support/downloads/
c-700_800seriesutilityformacandwindows.aspx
■Operating Manual
http://www.sekonic.com/support/instruction
manualuserguidedownload.aspx
2. Check Included Items
The following items are included with the meter
in the package.
Please be sure to check that all noted items are included.
★
If any items are missing, please contact the distributor or the reseller you purchased
the meter from.
★
Batteries (2 AA) are not included in the package. Please obtain these separately.
Meter
Startup Guide
(
this document
)
Safety
Precaution
Safety
Requirement and
Precaution
Soft Case CD-ROM
&
日本語
分光色彩照度計
スタートアップガイド
English
Color Meter
Startup Guide
Spektrometer
Deutsch
Startanleitung
Français
Spectromètre pour
Guidededémarrage
Español
Espectrómetro
Guíadeinicio
Italiano
Spettrometro
Guidaintroduttiva
中文
光谱仪适用于照相摄影
使用简介
C-7000
SPECTROMASTER
Safety Precaution
For Proper Operation
Before using this product, please read this "Safety Precautions" for
proper operation.
WARNING
The WARNINGsymbol indicates the
possibility of death or serious injury if the
product is not used properly.
CAUTION
The CAUTION symbol indicates the
possibility of minor to moderate personal
injury or product damage if the product is
not used properly.
NOTICE
The NOTICE symbol indicates cautions
or restrictions when using the product.
Please read all notes to avoid errors in
operation.
General Safety Information
• Read the Operating Manual before use.
• Keep the Operating Manual on hand for reference at any
time.
• Stop using this product when there are any abnormalities.
• The modication or disassembly of this product is prohibited.
• Do not attempt to repair this product by yourself.
• This product is intended only for persons with expert
knowledge.
• Monitor children so that they do not touch this product.
• Use this product in a usage environment described in the
Operating Manual.
• This product is not waterproof.
WARNING
There is a danger of electrical shock when using high
voltage strobes.
Avoidcontacting the terminals.
This product emits electromagnetic waves.
Do not bring this product close to persons with
pacemakers.
Do not use this product in an explosive atmosphere.
Use of devices emitting electromagnetic waves is
prohibited in hospitals.
CAUTION
• Check the material of the neck strap to see if there is any
risk of allergy.
• Be careful of sudden emission of lights from strobes.
NOTICE
• Do not leave this product on car dashboards in hot weather.
This may damage the product.
• Remove the batteries when this product is not in use for a
long period of time.
• When the desired performance is not achieved, stop using
this product and contact the service center.
Information for Users on Collection and
Disposal of Old Equipment
Toprotect environment, do not through this device
and batteries away with the normal household waste
at the end of those life, but bring them in at an
ofcial collection point of your country for recycling.
English
Intended Usage
Themeter is designed for:
•Measuring correlated color temperature, deviation, color rendering
properties(CRI, TM-30, SSI, TLCI/TLMF), illuminance, tristimulus
value,chromaticitycoordinates, dominant wavelength and excitation purity
ofvarious lighting sources such as LEDs, organic EL’s and projectors.
•Measuring automotive LED headlights and other types of lamps.
•Measuring the illuminance of optical bio-reactions.
•Controlling the illuminance and monitoring spectral distribution of light
sourcefor indoor agriculture.
•Evaluating the illuminance, color temperature, and color rendering index
ofroad lighting, indoor lighting, store lighting, and others.
•Checking the quality, illuminance and color of light source in production of
anykinds of light source manufacturers.
Power Supply
•AA batteries: :1.5V × 2 (alkaline, manganese)
•USB bus-power :5V/500mA or less
viaUSB cable when connected to computer
(LimitedPower Source or Class 2 Power Source)
USB Connection
•The application software of “C-700/C-7000 Series Utility” can be used to
save the measurement and graphic display,change the meter setting and
update the rmware while meter is connected to computer or tablet by USB
cable.
Environmental Condition
•Indoor use
•Altitude of operation (m) :Max 2000 m
•Pollution degree (PD) :PD2
•Operating temperature :-10°C ~ 40°C (without condensation)
•Operating humidity :85%RH or less (at 35°C)
(without condensation)
Safety Precaution
English
WARNING
•Infants or toddlers may accidentally wrap the strap around their necks, so please place it in a
locationout of their reach. There is a danger of suffocation.
•Do not place batteries in open ames, attempt to short, disassemble or apply heat to them,
or use unspecied batteries. They may burst and cause res, serious injury, or damage the
environment.
•Do not use the spectrometer in a place containing ammable or combustible vapors. Otherwise,
it may cause a re.
•Do not drop uids on the spectrometer. Also, do not attempt to insert metals into it.
Doing so may cause a re or an electric shock. If any uid drops on or a metal is inserted into
thespectrometer, turn the power OFF immediately, and remove the battery (or unplug the USB
powercable). Then, consult our Support Center for assistance.
•Do not disassemble or modify this spectrometer. Doing so may cause a re or an electric shock.
CAUTION
•Do not handle this product with wet hands, or leave it in the rain or in a location where water
maysplash on it, where the product may be submerged in water, or it may come in contact with
moisture.There is a danger of electric shock if the "Flash Light Cord (PC) Mode" is used. This
mayalso result in damage to the product.
•Do not attempt to disassemble the product for modication or parts replacement. It may affect
measurementresults or damage the meter.
•Any signicant impact to the meter housing or LCD screen can cause physical damage and
failureof performance. Even when the meter is in the bag or pocket, damage is possible under
severeimpact or pressure conditions.
•When controlling the meter with the LCD, gently touch with your nger. Using pointed pens or
pencilsmay scratch the LCD screen or damage the product.
•If the equipment is used in a manner not specied by the manufacturer, the protection provided
bythe equipment may be impaired.
•Infants or toddlers may accidentally grab the strap and swing the product, so please place it in a
locationout of their reach, as the meter may be damaged by impacts.
•Be careful that the neck strap does not come loose when carrying the product, as the meter may
bedamaged when dropped.
•Do not use or store the product in a place where it may be dropped and damaged by impacts
or where it will be affected by constant vibration. This product contains precision optical
components, and it may be damaged by these mechanical shocks. Also, do not subject the
productto vibrations or impact when handling.
•Keep this product away from excessive dust, high humidity, and corrosive gases. Otherwise a
productfailure may occur.
•Do not measure a bright object that emits light exceeding the measuring range (wavelength and
illuminance).They may damage the optical components and result in inaccurate measurement.
•Before removing or replacing the battery or USB cable, always turn the power OFF.
Otherwise,the product may fail.
•Do not place the product on an unstable or tilted bench. Otherwise, it may drop and you may
beinjured.
Strap
USB
Mini-B cable
Spectrometer
<Utility>
<Manual>
English
3. Names of Parts
&
[Rear View]
[Front View]
❶Light Receptor
❷Light Selection Ring
❿Tripod Socket
❸Power Button
❹Display Panel
❺
Measuring Button
❼Memory Button
❻Menu Button
❽
Battery Cover Latch
❾Battery Cover
[Bottom View]
⓭Strap Eyelet
⓬Sync Terminal
⓫USB Mini-B Connector
[Battery Compartment Section]
Battery
Cover Latch
Tabs Battery
Cover
⓮Battery Compartment
4. Turning the Power ON/OFF
After installing the batteries, turn the Light Selection Ring ❷to the
dark calibration position ( ) and turn ON this instrument
by pressing the Power Button ❸.
After the Opening screen displays (for 2 seconds) in the Display
Panel, dark calibration starts. After dark calibration properly ends,
the Display Mode Selection Screen displays.
&
Light Selection Ring ❷
Power Button ❸
[Opening Screen][Display Mode
Selection Screen]
★ You can reduce start up time by simply tapping the screen when the
Opening screen appears.
★
Please wait 3 or more seconds between turning the power ON/OFF.
★
To turn OFF the power, press and hold the Power Button for more than
one second. The meter is powered off after the display disappears.
★
If Dark Calibration Position Conrmation screen appears, set the Light Selection
Ring ❷to Dark Calibration position and perform calibration again.
*
If "Please set Light Selection Ring for dark
calibration" is displayed, set the Light
Selection Ring ❷to the dark calibration
position to start calibration.
*When taking measurements, set the Light
Selection Ring ❷to the range L (icon at
the middle) for ALL ambient light.
For flash light, set the ring to "H" (icon
at the top) high-power (brighter than
640lx·s) ash or "L" (icon at the middle)
for low-power ash (lower than 640lx·s).
Dark Calibration Position
Confirmation Screen
NOTE
Dark calibration is performed when new batteries are set, 24 hours passed
since last use or there is a big change in temperature between turning power
OFF and ON again.
Except the cases above, dark calibration after power ON is skipped.
5. Measuring Mode and Display Mode
You can change screens after turning the power on as follows.
Changes from the Display Mode Selection Screen to the Measuring
Screen.
★
Pressing Menu Button
❻
shifts to the Display Mode Selection screen.
Please set Light Selection
Ring for dark calibration.
[Measuring Mode
Selection
Screen]
[Measuring Screen
(Text Mode)]
[Display Mode
Selection Screen]
(Page 1)
13
6
4
9
7
2
5
8
󱧃
󱧁
󱧂
[Display Mode
Selection Screen]
(Page 2)
󱧄
Measuring Mode Icon Description
Ambient Light
Mode
Measures continuous light such as sunlight, tungsten, fluorescent, and LED
lights.
Cordless Flash
Mode
Detects flash light without meter-flash connection after Measuring
Button pressed to arm meter (for 90 seconds) and flash fired separately.
Cord (PC) Flash
Mode
Detects flash light with PC (synchro) cord meter-flash connection.
No. Display Mode Name
Description
1
[Text] Icon Displays user-selected 5 items in numeric values.
2
[Spectrum] Icon Displays 3 user-selected values and spectrum distribution graph.
3
[CRI] Icon Displays the selected average CRI (Ra) or individual CRI (R1 ~ R15) numerically.
Each CRI is displayed in a bar graph.
4
[TM-30] Icon Displays three current measurement values (selectable) and color vector graphic.
5
[SSI] Icon Displays the current measurement values (color temperature, ⊿uv and SSI) and
SSI spectrum graph.
6
[TLCI/TLMF] Icon Displays the current measurement values and memorized values (in color
temperature and ⊿uv), TLCI and TLMF with spectrum graph.
7
[CIE1931 (CIE1964)]
Icon
Displays the preset data together with the CIE1931 chromaticity diagram (or
CIE1964 chromaticity diagram for a 10° viewing angle).
8
[
CIE1976] Icon Displays the measurement result together with the CIE1976 chromaticity diagram.
9
[Spectrum
Comparison] Icon
Compares the current measurement value and up to 2 memorized values as yellow
and/or red lines in the spectrum distribution graph.
󱧁
[CRI Comparison]
Icon
Compares the current measurement value and memoried value to show the color
temperature and average CRI (Ra). Also, individual CRI (R1 to R15) is displayed in a
bar graph.
󱧂
[CIE1931 (CIE1964)
Comparison] Icon
Displays the preset data and the stored measurement value (up to 2 types of data)
together with the x and y coordinates in the CIE1931 chromaticity diagram (or
CIE1964 chromaticity diagram for a 10° viewing angle).
󱧃
[CIE1976
Comparison] Icon
Displays the measured result and the stored measurement value (up to 2 types of
data) together with the u' and v' coordinates on the CIE1976 chromaticity diagram.
󱧄
[Setting] Icon Displays Setting screen. (

7.
Setting
)
6. Tool Box
Touching the “Tool Box ( )” icon in any measurement
screen shifts to the Tool Box screen where frequently used
functions are listed.
7. Setting
Touching the “Setting” icon in the Display Mode
Selection screen shifts the display to the Setting
screen.
Here you can set functions and display methods
required for measurement in advance.
[Tool Box Screen]
[Setting (Page 1, page2) Screen]

Other manuals for SPECTROMASTER C-7000

2

This manual suits for next models

1

Other Sekonic Measuring Instrument manuals

Sekonic SPEEDMASTER L-858D User manual

Sekonic

Sekonic SPEEDMASTER L-858D User manual

Sekonic SPECTROMASTER C-800 User manual

Sekonic

Sekonic SPECTROMASTER C-800 User manual

Sekonic Flashmate L-308S User manual

Sekonic

Sekonic Flashmate L-308S User manual

Sekonic C-700 User manual

Sekonic

Sekonic C-700 User manual

Sekonic C-500 User manual

Sekonic

Sekonic C-500 User manual

Sekonic L-608 CINE User manual

Sekonic

Sekonic L-608 CINE User manual

Sekonic AUTO LEADER L-188 User manual

Sekonic

Sekonic AUTO LEADER L-188 User manual

Sekonic FLASHMATE L-308X User guide

Sekonic

Sekonic FLASHMATE L-308X User guide

Sekonic i-346 User manual

Sekonic

Sekonic i-346 User manual

Sekonic LITEMASTER PRO L-478DR-A-EL User guide

Sekonic

Sekonic LITEMASTER PRO L-478DR-A-EL User guide

Sekonic SPECTROMASTER C-7000 User manual

Sekonic

Sekonic SPECTROMASTER C-7000 User manual

Sekonic SPECTROMASTER C-800 User guide

Sekonic

Sekonic SPECTROMASTER C-800 User guide

Sekonic TWINMATE L-208 User manual

Sekonic

Sekonic TWINMATE L-208 User manual

Sekonic FLASHMATE L-308BII User manual

Sekonic

Sekonic FLASHMATE L-308BII User manual

Sekonic DIGI LITE L-318B Operating instructions

Sekonic

Sekonic DIGI LITE L-318B Operating instructions

Sekonic DIGI MASTER L-718 User manual

Sekonic

Sekonic DIGI MASTER L-718 User manual

Sekonic L-478D Series User guide

Sekonic

Sekonic L-478D Series User guide

Sekonic Litemaster Pro L-478D User manual

Sekonic

Sekonic Litemaster Pro L-478D User manual

Sekonic SPEEDMASTER L-858D User manual

Sekonic

Sekonic SPEEDMASTER L-858D User manual

Sekonic SPEEDMASTER L-858D User guide

Sekonic

Sekonic SPEEDMASTER L-858D User guide

Sekonic DIGITALMASTER L-758DR User manual

Sekonic

Sekonic DIGITALMASTER L-758DR User manual

Sekonic TWINMATE L-208 User manual

Sekonic

Sekonic TWINMATE L-208 User manual

Sekonic LITEMASTER PRO L-478 Series User manual

Sekonic

Sekonic LITEMASTER PRO L-478 Series User manual

Sekonic Studio Deluxe L-28 C2 User manual

Sekonic

Sekonic Studio Deluxe L-28 C2 User manual

Popular Measuring Instrument manuals by other brands

Enpaix ETG15F1 user manual

Enpaix

Enpaix ETG15F1 user manual

PR electronics 4511 product manual

PR electronics

PR electronics 4511 product manual

Amphenol Protimeter ReachMaster Pro instruction manual

Amphenol

Amphenol Protimeter ReachMaster Pro instruction manual

ENENSYS Divi Catch RF user guide

ENENSYS

ENENSYS Divi Catch RF user guide

Dewetron DW2-CLAMP-DC-POWER-8 Technical reference manual

Dewetron

Dewetron DW2-CLAMP-DC-POWER-8 Technical reference manual

LaserLiner AC-Tracer operating instructions

LaserLiner

LaserLiner AC-Tracer operating instructions

Anritsu MS2690A Operation manual

Anritsu

Anritsu MS2690A Operation manual

VDO CONTISYS OBD - V3.0 instruction manual

VDO

VDO CONTISYS OBD - V3.0 instruction manual

LOVATO ELECTRIC DMED301MID instruction manual

LOVATO ELECTRIC

LOVATO ELECTRIC DMED301MID instruction manual

Major tech MT935 instruction manual

Major tech

Major tech MT935 instruction manual

Sentry ST 722 instruction manual

Sentry

Sentry ST 722 instruction manual

Testec TT-AF 1200 instruction manual

Testec

Testec TT-AF 1200 instruction manual

Pennsylvania 7400 Operation manual

Pennsylvania

Pennsylvania 7400 Operation manual

HP 8559A Operation and service manual

HP

HP 8559A Operation and service manual

Schaller G110 operating manual

Schaller

Schaller G110 operating manual

Deif MIB 7000 Installation Instructions and Reference Handbook

Deif

Deif MIB 7000 Installation Instructions and Reference Handbook

Powelectrics IN4MA Metron-p Technical Manual and Specifications

Powelectrics

Powelectrics IN4MA Metron-p Technical Manual and Specifications

EZ Meter A4231/3 user manual

EZ Meter

EZ Meter A4231/3 user manual

manuals.online logo
manuals.online logoBrands
  • About & Mission
  • Contact us
  • Privacy Policy
  • Terms and Conditions

Copyright 2025 Manuals.Online. All Rights Reserved.