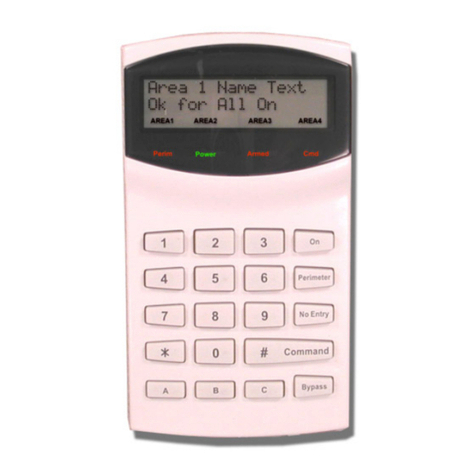
Select Entry Systems TEC1ACL Series User manual

TEC1ACLSeriesQuickStartKeypadProgrammingandInstallationGuide
Rev 01/21
Rev A
ThisQuickStartGuideAppliesto:
TEC1ACL2L/4LSeries
Thisexampleshowshowtosetadirectoryrecord(Code,Name,Phone#
andPINforentrance1with24/7access)usingthekeypad.TosetaPIN,the
ENABLEPINSparametermustbesetto1(seestep2below).Forother
settingspleasereferto“TEC1ACLSeriesMenus”
1) ENTERPROGRAMMINGMODEtoaccesstheCODES&NAMESmenu:
• Press*0togethertodisplay“Password”.
• Enter6‐digitpasswordfollowedby*(factorydefaultis777777*)
Thisdisplays“MAINMENU/SELECT1‐8”.
• Press1todisplay“CODES&NAMES,SELECT1‐9”
2) SkipthisstepifyouknowPINsareenabled.Press8todisplay“ENABLE
PINS=X”.IfXis1press*;ifXis0thenpress1*.
3) ProgramadirectoryrecordtoincludeaPIN:
• FromCodesandNames,press1toselect“AddNew”todisplay“CODE=”
• Enteracodefollowedby*e.g.“100*”.Displaywillnowshow“NAME=”
• Enteraname.ForNAMESonly,aftereachcharacter,press#tomove
cursore.g.J#O#H#N#willspell“JOHN”.Tocompletethename,press*.
Displaywillnowshow“PHONE#=”
• Enterphonenumbere.g.3055551212,then*todisplay“PIN=”
• Enter4‐digitPINe.g.1234then*todisplay“ENTRANCE=0”
• Tosetentrance1Press1*todisplay“TGGROUP=0”
• TosetTimeGroup0Press0*(TG0is24/7)toshow“CODE=”fornext
entry.Ifnootherentriesareneeded,exitprogrammingmode.
4) EXITPROGRAMMINGMODE:
Press*0together===>TEC1ACLwelcomemessagewillbedisplayed.
AdditionalInformation:
WhenProgrammingwithSelcomSoftware,choosefirmware/model
selectionasTEC1ACL2.5andup.
QuickStartInstallationGuide(SeeTEC1ACLInstallerGuideforSafety
Warnings)
● Power:DONOTUSEACTRANSFORMER.A12VDC/2Apowersupplyis
suppliedandshouldbewiredtoDCinputmarkedonthebackboxterminal
block.InternalpowerconnectionfromtheterminalblocktoP1connectoron
PCBisfactoryinstalled.Ifinstallerchooses,athisownrisk,nottousethe
powersupplyprovided,warrantyisvoided.
● Ground:TheTEC1ACLGroundStudMUSTbeconnectedusingaminimum
#16ga.strandedwireconnectedtoagoodearthgroundusinge.g.aground
rodorcoldwaterpipe.Themaximumgroundwirelengthis50feet.Ifan
adequateearthgroundisnotprovided,surgedamageprotectionbuiltinto
TEC1ACLseriesunitsdiminishesandvoidsthewarranty.
● Telephone:RJ‐11plugandcablefordial‐outphonefromCellularInterface
Module(Factoryinstalled).ConnecttoTE‐TEonP1.
● Relays:Two(2)relayswithboth(N/O)and(N/C).Maximumratingeach
contact24voltsAC/DCat2A.ConnectusingNC/COM/NONC/COM/NOonP1A
●Rex(RequesttoExit)Inputs:TheRX1andRX2areVOLT‐FREE(dry)contacts.
ConnectusingRX1‐COM‐RX2onP1.

TEC1ACL Series Menus
01/21
RevA Page1of3
MAINMENU
1CODES&NAMES
2ENT.CONTROL
3SYS.PARAM.
4TITLEPAGE
5CLOCKSETUP
6SITECODES
7LOGDATA
8CLEARDATA
9DISPLAYDATA
1‐ CODES&NAMES
‐DIRECTORYRECORDS
1‐ADD/EDIT‐Thisisthesequenceofadding,editinganddeletingRECORDSonthedirectory.
E=Entrance/Doornumber 1=ENT1 2=ENT2 3=ENT1&2
T=Timegroupnumber T=(1‐7) T=0(24/7)
CODE NAMEPHONE PINETCARD1ETCARD2ETCARD3ETCARD4ET
1234 NickR. 55512345671234101234520234563000001320002511
2‐FINDNAME‐Searchforanameinthedirectory,andfindthecodelocationnumber
3‐FINDPIN‐Searchforapinprogrammedandgivesyouthecodelocationnumber
4‐FINDCARD‐Searchforacardprogrammedandgivesyouthecodelocationnumber
5‐CODESUSED‐Showshowmanycodesarealreadyinusedfromthetotalmemorycap.
8‐ENABLEPINS‐P
ins capability
0=disable/1=enable
9‐ENABLECARDS‐
Cards capability and diagnostic mode.
0=disable/1=enable/2=diagnostic(willshowcardinfoonDisplay)
2‐ ENT.CONTROL
‐ENTRANCECONFIGURATION DEFAULTS
1. ENT1TIME‐Door1time (01–99)sec 10
2. ENT1TONE‐Door1opentone (0–9)tone0=off 6
3. ENT1LATCH‐Door1holdopentone (0–9)tone0=off 0
4. ENT1GPSHD‐AutounlockTimeSchedGroup(0–7)TG0=none 0
5. ENT2TIME‐Door2time (01–99)sec 10
6. ENT2TONE‐Door2opentone (0–9)tone0=off 0
7. ENT2LATCH‐Door2holdopentone (0–9)tone0=off 0
8. ENT2GPSHD‐AutounlockTimeSchedGroup (0–7)TG0=none 0

TEC1ACL Series Menus
01/21
RevA Page2of3
3‐ SYS.PARAM.
‐SYSTEMPARAMETERS DEFAULTS
1‐ CODELEN‐ Directorycodesize (1–4)digitcode 3
2‐ TALKTIME‐ Timetalkingafterconnect (1–9)min 1
3‐ RINGCOUNT‐ #ofringstoanswer (0–9)0=off 3
4‐ STRIKEOUT‐ #ofpinsattempt (0–9)0=disable 3
5‐ KEYPADON‐ Aftercallplaced 0=disable/1=KPactive 0
6‐ SPKRTONE‐ TonetoenableSPKR (0–9)0=disable 0
7‐ PSWD‐ Programmingpassword (6Digits) 777777
8‐ SERNUM‐ Unitserialnumber (6Digits) 2xxxxx
4‐ TITLEPAGE
‐DISPLAYMESSAGES
1‐ TITLEPAGE 2lineprogrammable/4lineprogrammableDisplaymessage
2‐ DISPTYPE 1=2linedisplay/2=4linedisplaySize
5‐ CLOCKSETUP
1‐CLOCK Set<min(00‐59)/hour(00‐24)/day(Sun1‐Sat7)/date(DD/MM/YY)>
05:5801/02/202 CLK:5:58amJan22020Monday
17:3001/10/206 CLK:5:00pmJan102020Friday
2‐TIMESCHEDULES (0–24)hoursstartandendtimes/(1–7)weekdays
SCHEDSTIMEETIMESMTWTFSH
006:0017:30‐23456‐ from6:00amto5:30pmMon‐Fri
108:0012:001‐‐‐‐‐‐7 from8:00amtoNoonSun&Sat
3‐HOLIDAYS (0‐9)10holidays
HOLMONTHDATE
0 06 04 Jul4
1 12 25 Dec25
4‐TIMESCHEDGROUP (1‐7)7groupoftimeschedules
GRPTSCHED
01234567
10‐‐‐‐‐‐‐ Group1willfollowTimeSchedule0
2‐1‐‐‐‐‐‐ Group2willfollowTimeSchedule1
301‐‐‐‐‐‐ Group3willfollowTimeSchedule0&1

TEC1ACL Series Menus
01/21
RevA Page3of3
6‐ SITECODES
‐SC=Facilitycodes
1‐ SITECODE (0‐9)10facilitycodes
SITECODE0001 Location0SC=001
SITECODE1255 Location1SC=255
7‐ LOG.DATA
‐BUFFERCONTROL
1‐ VIEWLOG Showslogtransactionsbypage
2‐ SENDLOG Showsalltransactions
3‐ LOGSIZE Showsnumbersofeventsandbufferspaceavailable
4‐ CLEARLOG Eraselog0=no/1=yes
8‐ CLEARDATA
(Inalleraseoptions0=no/1=yes)
1‐ SETPARAMETERS Setallparametersbacktofactorydefaults
2‐ CLRTIMESCHEDS Erasedalltimesschedules
3‐ CLRHOLIDAYS Erasedallholidays
4‐ CLRTSGROUPS Erasedalltimegroups
5‐ CLRSITECODES Erasedallsitescodes
6‐ SETTITLEPAGE Settitlepagebacktofactorydefaults
9‐ DISPLAYDATA
1‐ SHOWINFOShowsmainparametersoncomputerscreen
VER2.XX
CODE/NAMECAPACITY=0051
CODELEN=3
ENABLEPINS=0
ENABLECARDS=0
PRESS#TOSEETHE
NAMESTHENDIALTHE
CODETOTHERIGHT
OFTHENAME
PASSWORD=777777
<CR>TOCONTINUE
