Sena LinkIn Ride Pal III User manual

User’s Guide
EN

EN
1
GETTING STARTED.......................................... 4
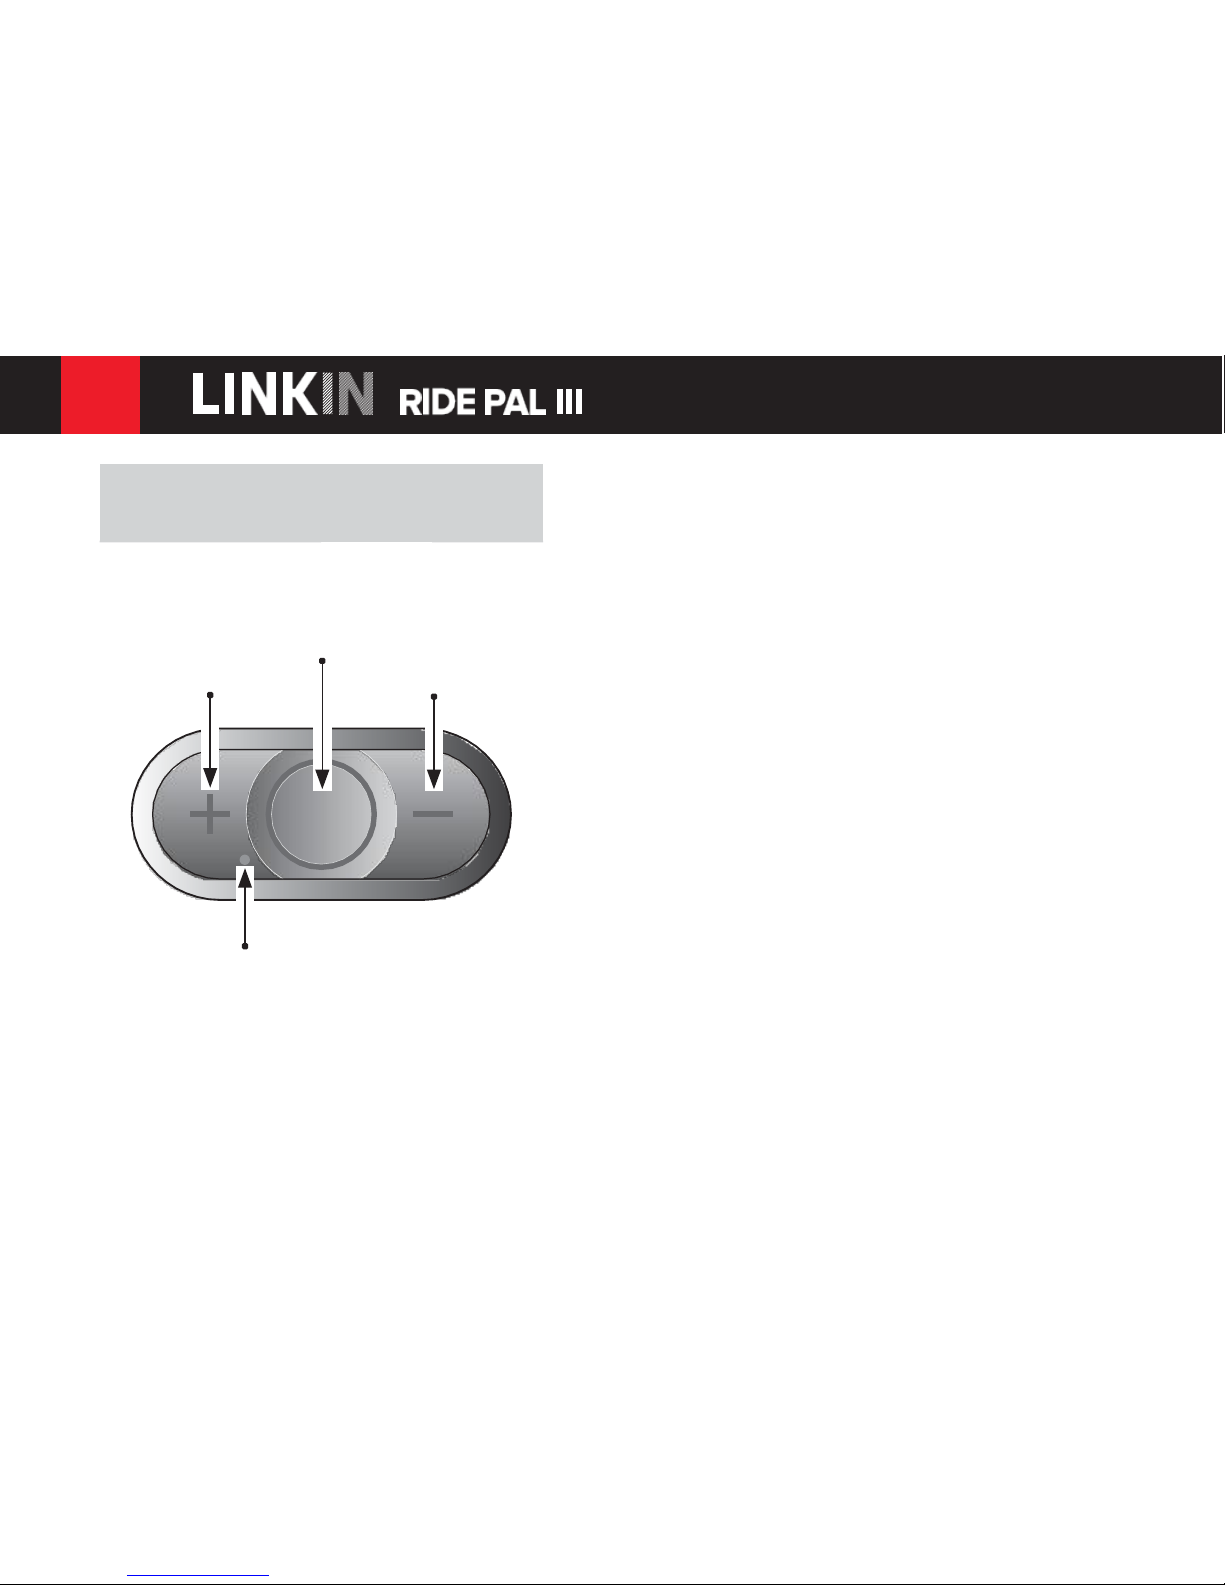
1.1
Button Operation......................................................4
1.2
Powering Onand Off................................................... 4
1.3
Charging..................................................................5
1.4
Checking theBattery Level......................................5
1.5
VolumeAdjustment..................................................6
1.6
LS2 BluetoothDevice Manager................................6
2
PAIRING THE HEADSET WITH BLUETOOTH
DEVICES ............................................................ 7
2.1 MobilePhonePairing-MobilePhone, Bluetooth
Stereo Device............................................................... 7
2.2
Multipoint Pairing - Second Mobile Phone, GPS, and
SR10 .......................................................................8
2.3
Advanced Selective Pairing: A2DP Stereo or
Handsfree...................................................................... 9
2.4
IntercomPairing.....................................................11
3
MOBILE PHONE,GPS,SR10 .......................... 12
3.1
Mobile PhoneCall Making andAnswering..............12
3.2
Speed Dialing........................................................14
3.3
GPS Navigation .....................................................15
3.4
Sena SR10,Two-WayRadio Adapter.....................15
4
STEREO MUSIC............................................... 16
4.1
Bluetooth Stereo Music.......................................... 16
4.2
Music Sharing........................................................17
5
INTERCOM....................................................... 17
5.1
Starting Two-way Intercom.........................................17
5.2
Ending Two-wayIntercom..........................................18
5.3
Intercom and MobilePhone Call ............................19
6
UNIVERSAL INTERCOM ................................. 20
6.1
Universal IntercomPairing..................................... 20
6.2
Two-wayUniversal Intercom......................................21
7
FUNCTION PRIORITY ..................................... 21
8
CONFIGURATION SETTING........................... 22
8.1
Mobile Phone Pairing.............................................23
8.2
Multipoint Phone Pairing........................................23
8.3
Phone Selective Pairing......................................... 24
8.4
Media Selective Pairing.........................................24
8.5
Assigning Speed Dial............................................. 25
8.6
Enabling/Disabling VoicePrompts............................26
8.7
Enabling/Disabling Sidetone..................................26
8.8
Enabling/Disabling AdvancedNoiseControl™ ........27
CONTENTS

EN
8.9
Delete All Bluetooth Pairing Information .................27
8.10
Factory Reset ........................................................28
8.11
Exit VoiceConfiguration Menu.................................28
9
FIRMWARE UPGRADE.................................... 29
10
TROUBLESHOOTING...................................... 30
10.1
IntercomFailure.....................................................30
10.2
IntercomReconnection..............................................30
10.3
Fault Reset............................................................31
10.4
Factory Reset ........................................................31
11
OPERATION QUICK REFERENCE ................. 32
CERTIFICATIONANDSAFETYAPPROVALS....... 34
•
FCC Compliance Statement.......................................34
•
FCC RFExposure Statement.....................................35
•
FCC Caution..............................................................35
•
CE Declarationof Conformity.....................................35
•
Industry Canada Statement........................................35
•
Bluetooth License ......................................................36
•
WEEE(WasteElectricalandElectronicEquipment) ....36
SAFETY INFORMATION........................................ 37
•
Product Storageand Management.............................37
•
Product Use ....................................................................37
•
Battery .......................................................................39
PRODUCT WARRANTYANDDISCLAIMER ......... 40
•
Limited Warranty.............................................................40
•
WarrantyExclusions...................................................43
•
Warranty Service........................................................45

EN
4
1.1
Button Operation
Center Button
1.2
Powering On and Off
Topowerontheheadset,presstheCenter
Buttonandthe(+)Buttonatthesametime
whilehearingascendingbeepsandavoice
prompt,“Hello”.Topowerofftheheadset,
presstheCenterButtonandthe(+)Buttonat
(+) Button
StatusLED
(-)Button
the same time while hearing descending beeps
and a voice prompt,
“Goodbye”
.
1
GETTINGSTARTED

EN
1.3
Charging
Youcanchargetheheadsetbyconnectingthe
supplied USB power & data cable into a
computer’s USB port or USB wall charger. You
can use any standard micro USB cable to
chargetheunit.ThechargingLEDturnsred
while charging and turns blue when fully
charged. It takes about 2.5 hours to be
completelycharged.
or
AC Adapter
1.4
Checking the Battery Level
1.4.1 LED Indicator
When the headset is powering on, their red
LED flashes rapidly indicating the battery level.
4 flashes = High, 70~100%
3 flashes = Medium, 30~70%
2 flashes = Low, 0~30%
5
Note:
Thebatterynormallylasts7hoursofusage
time.

EN
6
1.4.2 Voice Prompt Indicator
When you power on the headset, keep
pressingtheCenterButtonandthe(+)Button
simultaneouslyforabout5secondsuntilyou
hearthree,hightonedbeeps.Thenyouwill
hear a voice prompt indicating the battery
level.However,ifyoureleasethebuttonsas
soonastheheadsetturnson,youwillnothear
the voice prompt for the battery level
indication.
1.5
Volume Adjustment
Youcaneasilyadjustthevolumebypressing
the(+)Buttonorthe(-)Button.Youwillheara
beepwhenthevolumereachesthemaximum
or minimum level. The volume is set and
maintained independently atdifferent levels for
eachaudiosourceevenwhenyourebootthe
headset. For example, once you set the volume
formobilephonehandsfree,itwillnotchange
even ifyou adjust the volume for your Bluetooth
MP3 music. However, if you adjust the volume
during stand-by mode, it will affect volume
levels of every audio source.
1.6
LS2 Bluetooth Device
Manager
The LS2 Bluetooth Device Manager allows you
to upgrade the firmware and configure the
device settings directly from your PC. Using
this software, you can assign speed dial
presets and more. It is available for both
Windows and Mac.

EN
BeforeusingtheLINKINRidePalIIIBluetooth
headsetwithanyotherBluetoothdevicesfor
the first time, you will need to pair them
together.YoucanpairtheLINKINRidePalIII
withBluetoothmobilephones,Bluetoothstereo
devicessuchasMP3players,ormotorcycle
specific Bluetooth GPS navigation, and with
other LRP Bluetooth headsets. The pairing
operation is required only once for each
Bluetooth device. The headset remains paired
with the devices and automatically reconnects
tothemwhentheyarewithinrange.Youwill
hear a high toned single beep and a voice
promptwhenevertheheadsetreconnectsto
thepaireddevice:“Phone connected” toa
mobile phone, “Media connected” to a
Bluetoothstereodevice.
2.1
Mobile Phone Pairing - Mobile
Phone, Bluetooth Stereo
Device
1.
PressandholdtheCenterButtonfor12
secondsuntilyouhearavoiceprompt,
“Configuration menu”
.
2.
Tapthe(+)Buttonuntilyouhearavoice
prompt,
“Phone pairing”
.
3.
Search for Bluetooth devices on your
mobilephone.SelecttheLINKINRidePal
IIIinthelist ofthedevicesdetectedonthe
mobilephone.
4.
Enter 0000 for the PIN. Some mobile
phonesmaynotaskforthePIN.
5.
Themobile phone confirms that pairing has
beencompletedandtheheadsetisready
touse.Youwillhearavoiceprompt,“Your
headsetispaired”
.
7
2
PAIRING THE HEADSET
WITH BLUETOOTH
DEVICES

EN
8
6.
If the pairing process is not completed
within three minutes, the headset will return
to stand-by mode.
2.2
Multipoint Pairing - Second
Mobile Phone, GPS, and SR10
1.
PressandholdtheCenterButtonfor12
secondsuntilyouhearavoiceprompt,
“Configuration menu”
.
2.
Tapthe(+)Buttonuntilyouhearavoice
prompt,
“Multipoint pairing”
.
3.
SearchforBluetoothdevicesontheHFP
device. Select the LINKIN Ride Pal III in
thelistofthedevicesdetectedontheHFP
device.
4.
Enter 0000 for the PIN. Some HFP devices
maynotaskforthePIN.
5.
The HFP device confirms that the pairing
iscompletedandtheheadsetisreadyto
use.Youwillhearavoiceprompt,“Your
headsetispaired”
.
Note:
1.
If the Bluetooth connection between the
headsetandamobilephoneisdisconnected,
press the Center Button for 3 seconds to
recover the Bluetooth connection
immediately.
2.
If the Bluetooth connection between the
headsetandamediaplayerisdisconnected,
press the Center Button for
1
second to
recovertheBluetoothconnectionandplay.

EN
9
2.3
Advanced Selective Pairing:
A2DP Stereo or Handsfree
When youareusing a smartphone, sometimes
youmayneedtoselectivelyusetheheadset
for A2DP stereo music only or for mobile phone
handsfree only. These instructions are for
advanceduserswhowanttopairtheheadset
totheirsmartphoneswithonlyoneselective
profile: A2DP for stereo music of HFP for phone
calls.
Ifyouhavepreviouslypairedamobilephone
to the headset, you must clear the previous
pairinglistonbothdevices:themobilephone
andtheheadset.Toclearthepairinglistonthe
headset,pleasedoafactoryresetorfollowing
thepairinglistclearingproceduredescribedin
section 8.10, “Factory Reset” or8.9, “Delete All
Bluetooth Pairing Information”. Toclear the
pairinglistonthemobilephone,pleasereferto
the mobile phone manual. For most
smartphones,deletetheheadsetfromthelist
ofBluetooth devices in the settings menu.
Note:
1.
TheSenaSR10isaBluetoothtwo-wayradio
adapterforgroupcommunication,anduses
Hands-FreeProfile.Theincomingaudiofrom
the two-way radio via SR10 is heard in the
background while having an intercom
conversationoramobilephonecall.
2.
TheGPSnavigationoraradardetectorcould
beconnectedtotheSR10bywire.TheGPS
voice instruction or the radar detector alarm
is also heard in the background via SR10
while having an intercom conversation or a
phone call. Please refer to the SR10 User’s
Guidefordetails.

EN
10
2.3.1
A2DPStereoMusic Only
1.
PressandholdtheCenterButtonfor12
secondsuntilyouhearavoiceprompt,
“Configuration menu”
.
2.
Tapthe(+)Buttonuntilyouhearavoice
prompt,
“Media selective pairing”
.
3.
Search for Bluetooth devices on your
smartphone. Select the headset in the list
ofdevicesdetectedonyourphone.
4.
Enter 0000 for the PIN. Some mobile
phonesmaynotaskforPIN.
2.3.2
HFP for Phone Call Only
1.
PressandholdtheCenterButtonfor12
secondsuntilyouhearavoiceprompt,
“Configuration menu”
.
2.
Tapthe(+)Buttonuntilyouhearavoice
prompt,
“Phone selectivepairing”
.
3.
Search for Bluetooth devices on your
smartphone. Select the headset in the list
ofdevicesdetectedonyourphone.
4.
Enter 0000 for the PIN. Some mobile
phonesmaynotaskforPIN.

EN
11
2.4
Intercom Pairing
2.4.1
Pairing with Other LINKINRide
Pal III Headsets for Intercom
Conversation
Theheadsetcanbepairedwithuptothree
other headsets for Bluetooth intercom
conversation.
1.
Turnonthetwoheadsets(AandB)that
youwouldliketopairwitheachother.
2.
Press and hold the Center Button of the
headset A and B for 5 seconds until red
LEDs of the both units start to flash rapidly.
Youwillhearavoiceprompt,“Intercom
pairing”.
3.
TaptheCenterButtononanyoneofthetwo
headsets AandB,andwait unittheLEDs
ofbothheadsetsturntoblueandintercom
connection is automatically established.
Thetwo headsets AandBarepairedwith
eachotherforintercomconversation.Ifthe
pairingprocessisnotcompletedwithinone
minute,theheadsetwillreturntostand-by
mode.
4.
You can make other pairing between
headsetsAandC,andbetweenheadsets
AandDbyfollowingthesameprocedure
asabove.
5.
The intercom pairing queue is ‘Last-
Come, First-Served’. If a headset has
multiple paired headsets for intercom
conversations, the last paired headset is
setasfirstintercomfriend.Theprevious
intercom friend becomes
second intercom
friend, andthird intercom friend
.

EN
12
2.4.2
PairingwithOtherSenaHeadset
ModelsforIntercomConversation
TheLINKINRidePalIIIcanbepairedwithall
otherSenaheadsetmodelssuchasthe20S,
10Candthe10Sforintercomconversation.
Please follow the same procedure as above to
pair with theseheadset models.
3.1
Mobile Phone Call Making and
Answering
1.
Whenyouhaveanincomingcall,simply
taptheCenterButtontoanswerthecall.
2.
Toendacall,presstheCenterButtonfor
2secondsuntilyouhearamid-tonesingle
beep,orwaitforthecalledpersontoend
the call.
3.
Torejectacall,presstheCenterButtonfor
2secondsuntilyouhearabeepwhilethe
phone is ringing.
3
MOBILE PHONE, GPS,
SR10
Note:
Forexample,afterthepairingprocedureslisted
above, headset D is the first intercom friend
of headset A. Headset C is the second
intercomfriendofheadsetA,andheadsetBis
thethird intercom friend ofheadsetA.

EN
13
4.
Thereareseveralwaystomakeaphone
call:
•
Enternumbersonyourmobilephone’s
keypadandmakeacall.Thenthecallis
automaticallytransferredtotheheadset.
•
Press the Center Button for 3seconds in
stand-by mode to activate the voice
dialer ofyour mobile phone. For this, the
voice dialing function must be available
on the mobile phone. Refer to your
mobile phone manual for further
instruction.
Note:
1.
If you have two phones connected to your
headset and you have an incoming call from
the second phone during the call of the first
phone,thenyoumaystill receivethecallfrom
the second phone. In this case, the call from
the first phone is on waiting mode. If you end
a call, then it will automatically guide you to
thefirstphonecall.
2.
If you have a mobile phone and a GPS
connectedtoyourheadset,you maynot be
able to listen to the GPS voice instruction
duringthephonecall.

EN
14
3.2
Speed Dialing
Youcanquicklymakeaphonecallbyusing
the voice speed dial menu.
1.
Toenter into the voice speed dial menu,
pressthe(+)Buttonfor3secondsuntilyou
will hear a mid-toned single beep and a
voice prompt,
“Speed dial”
.
2.
Tapthe (+) Button or the (-) Button to
navigate between the menus. You will hear
voice prompts for each menu item.
3.
TaptheCenterButtontoselectavoice
menuamong the followings:
(1)
Lastnumberredial
(2)
Speed dial1
(3)
Speed dial2
(4)
Speed dial3
(5)
Cancel
4.
After selecting the last number redial menu,
youwillhearavoiceprompt,“Last number
redial”.Then,toredialthelastphonecall
number, tap the Center Button.
5.
Tocall one of the speed dials, tap the (+)
Buttonorthe(-)Buttontonavigatebetween
the menus until you hear a voice prompt,
“Speed dial (#)”. Then, tap the Center
Button.
6.
If you want to exit the speed dial
immediately,tapthe(+)Buttonorthe
(-)Buttonuntilyouhearvoiceprompt,
“Cancel”,andtaptheCenterButton.Ifyou
donotpressanybuttonwithin15seconds,
the headset will exit the voice speed dial
menuandgobacktostand-bymode.

EN
15
3.3
GPS Navigation
IfyoupairaBluetoothGPStotheheadsetas
described in section 2.2, “Multipoint Pairing
-SecondMobile Phone,GPS,andSR10”,you
can listen to GPS instructions wirelessly. Tap
the (+) Button or the (-) Button to adjust
volume. The GPS voice instruction interrupts
intercomconversationbutitisautomatically
reestablished after the GPS voice instruction
ends.
3.4
Sena SR10, Two-Way Radio
Adapter
Youcanuseatwo-wayradioandtheheadset
Bluetoothintercomsimultaneouslybyusing the
Sena SR10, a Bluetooth Two-way Radio
Adapter (please refer to section 2.2, “Multipoint
Pairing - Second Mobile Phone, GPS, and
SR10”).Incoming audio fromthe two-way radio
willnotinterruptanintercomconversationbut
isheardinthebackground.Thisisusefulwhen
you have an intercom conversation with a
passengeronthebackseatanduseatwo-way
radio for group communication with other
motorcycle riders.
Note:
1.
Make sure that you connect the mobile
phoneandtheheadsettousethespeeddial
function.
2.
You need to assign speed dial numbers
beforeusingthespeeddial(pleasereferto
section 8.5, “Assigning Speed Dial”).

EN
16
4.1
Bluetooth Stereo Music
The Bluetooth audio device must be paired
with the headset by following the “Mobile
PhonePairing-MobilePhone,BluetoothStereo
Device” procedures described in the section
2.1. The headset supports the Audio/Video
Remote Control Profile (AVRCP), so if your
Bluetooth audio device also supports the
AVRCP, you can use the headset to remotely
control music playback. Not only can you
adjust the volume but you can also use
functions such as play, pause, next track and
previous track.
1.
Toplayorpausemusic,presstheCenter
Buttonfor1seconduntilyouhearadouble
beep.
2.
Toadjustthevolume,tapthe(+)Buttonor
the (-)Button.
3.
Totrackforwardortrackback,pressand
holdthe(+)Buttonorthe(-)Buttonfor1
seconduntilyouhearamid-tonesingle
beep.
4
STEREO MUSIC

EN
17
4.2
Music Sharing
Youcanstartsharingmusicwithanintercom
friendusingBluetoothstereomusicduringa
two-wayintercomconversation(pleasereferto
section5.1,“Starting Two-wayIntercom”).
When you terminate music sharing, you can go
backtotheintercomconversation.Tostartor
terminate sharing music, press the Center
Button for 1 second during an intercom
conversationuntilyouhearadoublebeep.To
trackforwardortrackback,pressandholdthe
(+)Buttonorthe(-)Buttonfor1second.
Please make sureyour intercom devices are
pairedasdescribedinsection2.4,“Intercom
Pairing”.
TheLINKINRidePalIIIcanconnectwithall
versions of theLINKIN Ride Pal IIIBluetooth
headsetsandSenaBluetoothheadsets.
5.1
Starting Two-way Intercom
You can start an intercom conversation with
one of any intercom friends by tapping the
CenterButton:TaptheCenterButtononceto
intercom with the
first intercom friend
, tap the
Center Button twice to intercom with the
secondintercomfriend,andtaptheCenter
Buttonthreetimestointercomwiththethird
intercom friend
.
5 INTERCOM
Note:
1.
Both you and your intercom friend can
remotelycontrolmusicplaybacksuchas
trackforwardandtrackback.
2.
Musicsharingwillbe pausedwhenyouare
usingyourmobilephoneorlisteningtoGPS
instructions.

EN
18
1
st
intercom friend
5.2
Ending Two-way Intercom
To terminate an intercom conversation, single
tap the Center Button. Any intercom connection
withanyintercomfriendwillbeterminatedbya
singletapping.Adoubleortripletappingwill
donothinginthiscase.
2
nd
intercom friend
End Two-way Intercom Conversation
3
rd
intercom friend
Start Two-way Intercom Conversation
Note:
The intercom connection distance is about
400 m depending on the terrain.

EN
19
5.3
Intercom and Mobile Phone
Call
1.
When you have an incoming mobile phone
call during an intercom conversation,
youwillheararingtone.Youcanchoose
whether to 1) answer the mobile phone
callandstoptheintercomconversation,
or2)rejectthephonecallandstayonthe
intercom conversation.
1)
Toanswerthephonecallandstopthe
intercom conversation, tap the Center
Button.Whenyouhangupthephone
call, the intercom will automatically be
recovered.
2)
Torejectthephonecallandstayonthe
intercomconversation,presstheCenter
Button for 2 seconds until you hear a
beep.
Unlike other motorcycle Bluetooth
headsets, this prevents a user from being
dropped out of an intercom conversation
by an incoming mobile call.
2.
Whenyouhaveanincomingintercomcall
during amobilephonecall,youwillhear
doublehightonedbeeps,alertingyouthat
there is an incoming intercom call. You
will also hear a voice prompt, “Intercom
requested”.Inthiscase,theintercomcall
doesnotoverridethemobilecallbecause
intercom has lower priority than mobile call.
Youhavetohangupthemobilephonecall
tomakeorreceiveanintercomcall.

EN
20
Youcanhaveanintercomconversationwith
non-Sena Bluetooth headsets using the
Universal Intercom function. Non-Sena
Bluetoothheadsetscanbeconnectedtothe
LRP Bluetooth headset if they support the
Bluetooth Hands-Free Profile (HFP). The
working distance may differ depending on the
performanceofBluetoothheadsetthatitis
connected to. In general, it is shorter than
normal intercom distance since it uses the
Bluetooth Hands-Free Profile.
6.1
Universal Intercom Pairing
The headset can be paired with non-Sena
Bluetooth headsets for Bluetooth intercom
conversation.Youcanpairtheheadsetwith
only onenon-Sena Bluetooth headset soifyou
pair with a different non-Sena Bluetooth
headset, the previous pairing will be removed.
1.
Turn on the headset and a non-Sena
Bluetooth headset that you want to pair with.
2.
Press and hold the Center Button for 8
seconds until the blue LED will flash rapidly
andyouwill hearmultiplebeeps.Youwill
hear a voice prompt,
“Universal intercom
pairing”.
3.
Perform the operation required for
handsfree pairing on the non-Sena
Bluetooth headset (refer to the User’s Guide
for the headsets you want to use). The
headsetwillautomaticallypairwithanon-
SenaBluetoothheadsetwheneacharein
pairing mode.
6
UNIVERSAL INTERCOM
Table of contents
Other Sena Headset manuals

Sena
Sena SMH10 User manual

Sena
Sena 3S PLUS User manual

Sena
Sena Tufftalk Lite User manual

Sena
Sena Schuberth SC1 User manual

Sena
Sena TUFFTALK-LITE-01 User manual

Sena
Sena SMH10R User manual

Sena
Sena EXPAND MESH User manual

Sena
Sena SPH10H User manual

Sena
Sena SPH10H User manual

Sena
Sena SMH5 MULTICOM User manual