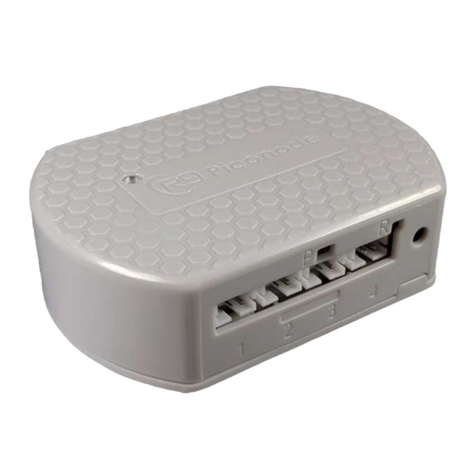
Sensing Labs SenlabA 4MA-LAB-13NS User manual

SENSING LABS SAS
Cap Oméga
Rond-point Benjamin Franklin
CS 39521
34960 - Montpellier Cedex 2
France
www.sensing-labs.com
SenlabA
4MA-LAB-xxNS©
User guide
SENSING-LABS
VERSION 02 –REV D / FEBRUARY 2018

©2018 Sensing-labs
1
Sensing Labs SenlabA 4MA-LAB-xxNS –User guide –Version 2 –REV D
Warning, take care to respect the operating temperature of the senlab:
-20°C to +70°C for outdoor and 0°C to +55°C for indoor version
Thank you for your choosing our Senlab product!
We hope you will find the instructions on this user manual clear and easy to follow.
General overview
The Senlab Analog (SenlabA) sensor is a smart LoRaWAN™ radio device with an
analog 4-20mA input.
The SenlabA product is intented to be connected to any sensors with 4-20mA
output, to it 50cm free ended cable.
Any question about your sensor compatibility? Please contact your distributor.
Part number
Casing
type
Protection
level
Dimension
4MA-LAB-13NS
Outdoor
IP67
102x56x35mm
4MA-LAB-41NS
Indoor v2
IP30
91.5x50x25mm
3 steps are required to make your SenlabA fully operational, described below.
Warning, the 4-20mA current loop must be powered by an external power supply,
or by the sensor (transmitter).
The SenlabA is only passive current sensor, it doesn't provide power for the loop.
Provisioning
of the device
On-site
installation
Activation of
the device
Outdoor
Indoor v2
4-20mA

©2018 Sensing-labs
2
Sensing Labs SenlabA 4MA-LAB-xxNS –User guide –Version 2 –REV D
Provisioning of the device
You have to be sure that your Senlab device has been well commissioned to be able to
reach your LoRaWAN network.
✓Contact if needed your distributor to get your Senlab configuration
✓Required information for provisioning the device into your LoRa system are listed in
the following table:
* = If asked when ordering, devices are already provisioned into your SLgateway.
If not, you need these parameters.
➢Important: Applicative configuration of Senlab device can be done:
-At factory (for minimal batch of 1000 devices)
-By your distributor (more often)
-By yourself (if you have your own SLsetting tool)
➢In all cases, you have to refer to parameter list described into the Application
features chapter to fit to your use case and get a “Plug&Play” device.
➢Application configuration can also be dynamically adjusted Over The Air.
Warning, don’t unprovision device from your system before stopping it!
(refer application features to stop the application via RF)
devEUI
appEUI
appKey
appSkey
NwkSkey
netId
devAddress
Case 1 : OTAA / PUBLIC
Typical configuration for Network
Operator based architecture
X
required
required
Case 2 : ABP / PUBLIC
Typical configuration for Private
mono gateway network
X
required
required
required
Case 3 : ABP / PUBLIC
Sensing-Labs SLgateway V2
configuration (local network)
X
Optional*
Optional*
Optional*
Optional*
Optional*

©2018 Sensing-labs
3
Sensing Labs SenlabA 4MA-LAB-xxNS –User guide –Version 2 –REV D
On-site installation
➢POSITIONING: You have first to find the best position to your Senlab:
✓Prefer vertical position (antenna part upwards as on following pictures)
✓Avoid positioning the cable pulled vertically under the device (prefer coiled
positioning or use the rear gutters for outdoor version)
Device type
Device mounting
All versions
Stick the product to the wall or cabinet with a double-sided adhesive tape
Indoor version
Screw the rear side of the product to the wall with countersunk screws
make sure the screw heads don’t exceed from the plastic side once installed
Outdoor version
Use plastic cable ties with screw mount
➢WIRING DIAGRAM: The Senlab must be plugged to 4mA sensor as follow
Now the device is well physically installed and plugged, you need to activate it in order
to start current measurement as well as radio connection.
For best radio performance:
- Positioned the upper part of the device upwardly in a free space area
- avoid positioning the Senlab against a metallic element
BROWN = -(negative)
Any other
4-20mA sensor ...
OR
ORANGE = +(positive)
OTHERS = UNCONNECTED
Outdoor
OR
Indoor
v2
+(positive)
-(negative)
up

©2018 Sensing-labs
4
Sensing Labs SenlabA 4MA-LAB-xxNS –User guide –Version 2 –REV D
Activation of the device
To activate the Senlab device, you have to use a magnet (min pulling force 1Kg).
✓Remove the magnet as soon as the LED flashes!
✓If activation fails (No solid LED ON 2sec), Senlab will come back in storage mode.
✓After successful activation, device will send its RESTART message (start event)
Deactivation of the device
Senlab can be deactivated (storage mode): all measurement and radio transmissions will
be stop until activation process. That means you need a physical access to the Senlab to
active it again.
There are 2 ways to deactivate a Senlab:
➢Over the Air: By sending a Downlink request STOP application
(via your LoRaWAN frame management system)
➢With physical access (only for test devices): By holding the magnet during 20
seconds, then the LED stay ON for 4 seconds.
Put Magnet
1 sec
LED blinking up to 10s
(connection status...)
LED ON 2sec
= device
ACTIVATED
Once activated, if you pass the magnet one more time, the device will
indicate its activation status after 3s LED blinking:
--> Solid LED ON 2sec will confirm that device is activated
LED Status
LED
MAGNET
area

©2018 Sensing-labs
5
Sensing Labs SenlabA 4MA-LAB-xxNS –User guide –Version 2 –REV D
Application features (datalog mode)
This chapter describes the SenlabA application features available in datalog mode
(accessible via SLgateway or SLcodec –refer respective User Guide for more details)
Measure data
ID
Description
Type
Unit
Range
current
Measured current of 4-20mA connected
sensor
FLOAT
mA
0...25
battery_current_level
Battery level of the device
UINT8
%
1…100
Event data
ID
Description
Type
Unit
Range
start_event
Happens when device is restarted on the field
BOOL
-
-
Configuration requests
Parameter ID
Description
Type
Unit
Range
Datalog configuration
(ID = request_write_datalog_cfg)
log_period
Device will measure every X minutes
UINT16
Minute
1...1440
(1440=
24h)
log_tx_period
Device will send logged measure every X
minutes (must be a multiple of log_period)
UINT16
Minute
3...1440
log_tx_random_activation
(optional)
Maximize device datalog reliability
BOOL
-
-
Reset battery level
(ID = request_reset_battery_level)
Must be used after battery replacement only
NO PARAMETERS
Stop application
(ID = request_stop_application)
Warning: activation with magnet will be
mandatory to reactivate the device
NO PARAMETERS

©2018 Sensing-labs
6
Sensing Labs SenlabA 4MA-LAB-xxNS –User guide –Version 2 –REV D
Standard mode (1 log per transmission)
This chapter describes the SenlabA application standard frame formats for decoding
device payload by yourself.
Uplink message RESTART - FPort 4 (for device configured in standard mode)
This frame is automatically sent after a successful network connection for informing the
application layer of its activation.
ID
(1B)
DEV_EUI
(8B)
APP_TYPE (1B)
Version
(3B)
Ext ID
(1B)
Log Period
(2B)
Tx Period
(2B)
Max batt. Level
(4B)
0x00
LSB first
SenlabA: 0x41
Major
Minor
Revision
0x00
0xLLLL
0xTTTT
0xBBBBBBBB
✓0xLLLL: the log period expressed in 2 seconds units
✓0xTTTT: the transmit period expressed in 2 seconds units
✓0xBBBBBBBB: the maximum battery level used for battery life calculation expressed in mAs
Uplink message DATALOG - FPort 3 (format valid for one log per transmission only)
ID
(1B)
BATTERY_LEVEL
(1B)
Internal data
(n bytes)
Log value
(Last 2B)
0x00
0xBB
Confidential (Length is variable)
0xAAAA MSB first
✓0xBB: the battery level expressed in 1/254 %
✓0xAAAA: input current expressed in 1/200 mA as a 2 bytes unsigned int [0-25mA]
Downlink request STOP APPLICATION –FPort 2
This operation (request/response) will stop the Senlab application (stop of radio
transmission). After response confirmation, new activation of device will be necessary.
Request
ID
(1B)
STOP PARAM.
(2B)
Response
ID
(1B)
STATUS
(1B)
STOP PARAM.
(2B)
0x01
0x0700
0x81
0x00 OK
0x01 KO
0x0700
To use full power of Senlab datalog mode (up to 24 log per
transmission), you have to use SLcodecs tool.
• Refer to the “SLCodecs Application Note” or contact us to get more
information about SLcodecs integration and usage

©2018 Sensing-labs
7
Sensing Labs SenlabA 4MA-LAB-xxNS –User guide –Version 2 –REV D
Battery replacement (Indoor version only)
Replacement battery must by a Lithium 3,6V AA type with 50mA min of supported
continuous current Contact your distributor to get original battery reference.
Indoor V2 have the capability to keep activation status during a few minutes, so the
process is:
1. Open the casing
2. Remove the old battery and, during the same minute, put the new battery
3. Check if the device activation is still OK (see “Activation of the device” chapter)
4. In case activation lost, you need to activate the device again
5. Close the casing
1. Send the configuration request “request_reset_battery_level”to the device, using
your application
ATTENTION:
EN: There is a risk of explosion if the battery is replaced by an incorrect type. Dispose of
used batteries according to instructions.
FR: Il y a risque d’explosion si la batterie est remplacée par une batterie de type incorrect.
Mettre au rebut les batteries usagées conformément aux instructions.
Security
Electrical safety
All circuits are SELV (Safety extra low voltage), including interface circuits which are only
used for measurement (signals without power, these circuits are considered LPS).
Ambient temperature of use
The ambient temperature of use is comprised between 0°C and +55°C.

©2018 Sensing-labs
8
Sensing Labs SenlabA 4MA-LAB-xxNS –User guide –Version 2 –REV D
Legals
SENSING LABS SAS reserves the right to make corrections, modifications,
enhancements, improvements and other changes to its products and services at
any time and to discontinue any product or service without notice.
SENSING LABS products is not authorized for use in safety-critical applications
(such as life support) where a failure of the product would reasonably be expected
to cause severe personal injury or death, unless officers of the parties have executed
an agreement specifically governing such use.
Buyers confirm that they have all necessary expertise in the safety and regulatory
ramifications of their applications, acknowledge and agree that they are solely
responsible for all legal, regulatory and safety-related requirements concerning their
products and any use of the product in such safety-critical applications,
notwithstanding any applications-related information or support that may be
provided by SENSING LABS SAS.
© 2018 SENSING LABS SAS. All rights reserved. Sensing Labs logo, are registered
trademarks of SENSING LABS SAS. All other brands and product names mentioned in
this document are the property of their respective holders.
This is a non-contractual document and specifications are subject to change at any
time without notice.
For more information about this software:
website - http://www.sensing-labs.com
support –http://support.sensing-labs.com
Headquarters:
SENSING LABS SAS.
CAP OMEGA,
rond point Benjamin Franklin
34960 Montpellier cedex 02 –France
This manual suits for next models
1
Table of contents
Other Sensing Labs Accessories manuals
