manuals.online logo
Brands
  1. Home
  2. •
  3. Brands
  4. •
  5. eufy Security
  6. •
  7. Accessories
  8. •
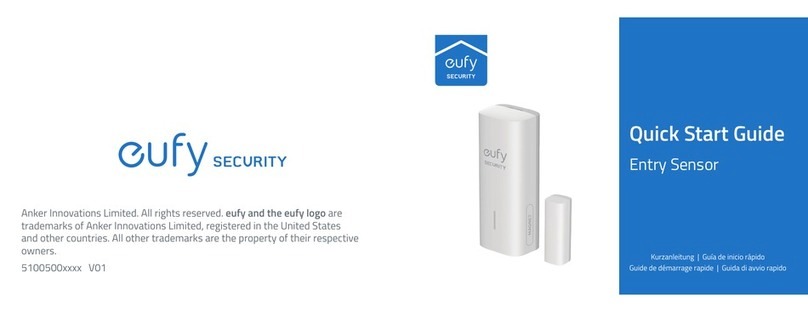
  9. eufy Security T8910 User manual

eufy Security T8910 User manual

Anker Innovations Limited.All rights reserved. eufy Security and eufy Security Logo
are trademarks of Anker Innovations Limited, registered in the United States and
other countries.All other trademarks are the property of their respective owners.
Model: T8910
51005002527 V01
User Manual
Motion Sensor
TABLE OF
CONTENTS
English 01
Deutsch 12
Español 21
Français 30
Italiano 39
Nederlands 48
Português 57
 66
What’s Included 01 07 Using the Motion Sensor
Product Overview 02 08 Replacing the Battery
Installing Batteries 02 08 Specications
Adding Motion SensorTo
Your System 03 09 Notice
Mounting the Motion Sensor 04
01 English English 02
WHAT’S INCLUDED
For Motion Sensor Installation
Motion Sensor T8910
Welcome Card
Mount
Mounting Screws
CR123A Battery
User Manual
3M Adhesive Strip
PRODUCT OVERVIEW
Battery Compartment
LED Indicator
Motion Sensor
SYNC Button
INSTALLING BATTERIES
Remove the battery compartment lid on the Motion Sensor and insert the provided
CR123A battery.
03 English English 04
ADDING MOTION SENSOR TO
YOUR SYSTEM
Note: Make sure you've completed the setup of your eufy Security HomeBase.
Follow the onscreen instructions on the Eufy Security app to add your motion sensor.
1. Choose Add Device, then select Motion Sensor to add it to your system.
2. Press and hold the SYNC button for 2 seconds until the LED indicator blinks
blue.The Motion Sensor is waiting to pair.
3. The LED indicator turns solid blue to indicate the pairing is successful.
LED Status Description
Blinking blue continuously Waiting to connect
Solid blue for 5s Paired successfully
Off Failed to connect to the HomeBase
Note: The LED indicator, device name and timer can be customized on the eufy
Security app.
MOUNTING THE MOTION
SENSOR
Find a Location for Mounting
The motion sensor can be installed on a wall. To get optimal detection coverage,
consider the following factors before mounting the motion sensor:
• Determine the area of detection and ensure there is an unobstructed eld of
view
• Determine the height and tilt angle
• Avoid direct sources of heat or sunshine, curtains, plants, or pets.
Ideally, the motion sensor should be installed on a wall facing the door through which
people are likely to enter. We recommend placing the motion sensor close to a
corner to get the optimal detection coverage.
05 English English 06
You can also install the motion sensor in your garage, dining room, or basement.
Height and Tilt Angle
The motion sensor should be mounted 2m / 6⁴/₇ft to 2.5m / 8⅕ ft above the oor
with a tilt angle of preferably 20º downwards. If you have a large pet weighing more
than 50 lb, change to a 10º downwards tilt.
With Pets
2-2.5 m
10°
No Pets
2-2.5 m
20°
To better detect the area where people may break in, rotate the motion sensor
horizontally up to 30º.
Sensitivity
The sensitivity can be adjusted based on the room size.The default setting is medium
sensitivity.
Mount the Motion Sensor
1. There are two methods of mounting the motion sensor at the selected location:
• Use the 3M adhesive strip:
①Snap the adjustable wall mount onto the motion sensor base.
② Stick the adhesive strip on the back of the sensor, remove the lm, and stick
the motion sensor on the wall.
③Rotate the motion sensor to adjust the detection coverage.
• Use the provided screws:
①Place the mount against the wall and use a pencil to mark the desired
location for mounting.
②Drill holes at each marking. No need to drill a pilot hole in the wooden walls.
07 English English 08
③Insert anchors into the holes, and fix the mount onto the wall with the
provided screws. No anchors are needed on wooden walls.
④Clip the motion sensor back onto the mount.
⑤Rotate the motion sensor to adjust the detection coverage.
USING THE MOTION SENSOR
After the motion sensor is installed, the alarm will be triggered once movement is
detected within the motion sensor’s coverage area.
When the motion sensor is working, its LED indicator shows as below:
LED Status Description
Blinking blue Movement detected while the HomeBase is connected
Blinking red Movement detected while the HomeBase is not connected
When the motion sensor is in the test mode, the LED indicator shows as below:
LED Status Description
Solid red Enter the test mode successfully
Blinking red for 1 second Movement detected when the motion sensor is in the test
mode
Off Failed to enter the test mode
REPLACING THE BATTERY
When the motion sensor’s battery is low, the LED indicator shows as below. ou
should replace the battery to keep the motion sensor working.
LED Status Description
Blinking blue Movement detected while the HomeBase is connected
Blinking red Movement detected while the HomeBase is not connected
SPECIFICATIONS
Battery: 1× CR123A battery
Operating Temperature: -10ºC - 40ºC /14°F - 104°F
Storage Temperature: -20ºC - 60ºC /-4°F - 140°F
09 English English 10
NOTICE
FCC Statement
This device complies with Part 15 of the FCC Rules. Operation is subject to the
following two conditions: (1) this device may not cause harmful interference, and (2)
this device must accept any interference received, including interference that may
cause undesired operation.
Warning: Changes or modications not expressly approved by the party responsible
for compliance could void the user's authority to operate the equipment.
Note: This equipment has been tested and found to comply with the limits for a Class
B digital device, pursuant to Part 15 of the FCC Rules.These limits are designed to
provide reasonable protection against harmful interference in a residential installation.
This equipment generates uses and can radiate radio frequency energy and, if not
installed and used in accordance with the instructions, may cause harmful interference
to radio communications. However, there is no guarantee that interference will not
occur in a particular installation. If this equipment does cause harmful interference to
radio or television reception, which can be determined by turning the equipment off
and on, the user is encouraged to try to correct the interference by one or more of
the following measures: (1) Reorient or relocate the receiving antenna. (2) Increase the
separation between the equipment and receiver. (3) Connect the equipment into an
outlet on a circuit different from that to which the receiver is connected. (4) Consult
the dealer or an experienced radio/ TV technician for help.
FCC Radio Frequency Exposure Statement
The device has been evaluated to meet general RF exposure requirements.The device
can be used in xed / mobile exposure condition. The min separation distance is 20cm.
Notice: Shielded cables
All connections to other computing devices must be made using shielded cables to
maintain compliance with FCC regulations.
The following importer is the responsible party.
Company Name: POWER MOBILE LIFE, LLC
Address: 400 108th Ave NE Ste 400, Bellevue,WA 98004-5541
Telephone: 1-800-988-7973
This product complies with the radio interference requirements of the European
Community.
Declaration of Conformity
Hereby,Anker Innovations Limited declares that this device is in compliance with
the essential requirements and other relevant provisions of Directive 2014/53/EU.
For the declaration of conformity, visit www.eufylife.com.
Do not use the Device in the environment at too high or too low temperature, never
expose the Device under strong sunshine or too wet environment.
The suitable temperature for the product and accessories is -10°C-40°C.
RF exposure information:The Maximum Permissible Exposure (MPE) level has been
calculated based on a distance of d=20 cm between the device and the human body.
To maintain compliance with RF exposure requirement, use product that maintain a
20cm distance between the device and the human body.
CAUTION RISK OF EXPLOSION IF BATTERY IS REPLACED BY AN INCORRECT
TYPE. DISPOSE OF USED BATTERIES ACCORDING TOTHE INSTRUCTIONS
SUB-1G Frequency range: 866~866.8MHz (for EU) ; 920~920.8MHz (for US)
Max Output Power: 6.496dBm (ERIP)
Anker Innovations Deutschland GmbH | Georg-Muche-Strasse 3-5, 80807 Munich,
Germany
AnkerTechnology (UK) Ltd | Suite B, Fairgate House, 205 Kings Road,Tyseley,
Birmingham, B11 2AA, United Kingdom
This product is designed and manufactured with high quality materials and
components, which can be recycled and reused.
This symbol means the product must not be discarded as household waste,
and should be delivered to an appropriate collection facility for recycling.
Proper disposal and recycling helps protect natural resources, human health
and the environment. For more information on disposal and recycling of this
product, contact your local municipality, disposal service, or the shop where
you bought this product.
IC Statement
This device complies with Industry Canada licence-exempt RSS standard(s). Operation
is subject to the following two conditions:
(1) this device may not cause interference, and
(2) this device must accept any interference, including interference that may cause
undesired operation of the device."
Le présent appareil est conforme aux CNR d'Industrie Canada applicables aux
11 English
appareils radio exempts de licence. L'exploitation est autorisée aux deux conditions
suivantes:
(1) l'appareil nedoit pas produire de brouillage, et
(2) l'utilisateur de l'appareil doit accepter tout brouillage radioélectrique subi, même si
le brouillage est susceptible d'en compromettre le fonctionnement."
This Class B digital apparatus complies with Canadian ICES-003.
Cet appareil numérique de la classe B est conforme à la norme NMB-003 du Canada.
IC RF Statement
When using the product, maintain a distance of 20cm from the body to ensure
compliance with RF exposure requirements.
Lors de l'utilisation du produit, maintenez une distance de 20 cm du corps an de
vous conformer aux exigences en matière d'exposition RF.
FCC ID: 2AOKB-T8910 IC: 23451-T8910
Anker Innovations Limited
Room 1318-19, Hollywood Plaza, 610 Nathan Road, Mongkok, Kowloon, Hong Kong
INHALTS-
VERZEICHNIS
Im Lieferumfang 13 16 Montage des Bewegungssensors
Produktübersicht 14 19 Verwenden Des Bewegungssensors
Einsetzen Der Akkus 14 20 Austauschen Des Akkus
Hinzufügen Eines
Bewegungssensors Zu Ihrem
System 15 20 Technische Daten
13 Deutsch Deutsch 14
IM LIEFERUMFANG
Installation des Bewegungssensors
Bewegungssensor
T8910
Willkommenskarte
Halterung
Befestigungsschrauben
CR123A-Batterie
Benutzerhandbuch
3-m-Klebestreifen
PRODUKTÜBERSICHT
Akkufach
LED-Anzeige
Bewegungssensor
SYNC-Taste
EINSETZEN DER AKKUS
Entfernen Sie den Deckel des Akkufachs am Bewegungssensor und setzen Sie den
mitgelieferten CR123A-Akku nach Entfernen des Isolierlms ein.
15 Deutsch Deutsch 16
HINZUFÜGEN EINES
BEWEGUNGSSENSORS ZU IHREM
SYSTEM
Stellen Sie sicher, dass Sie zuerst die Einrichtung Ihrer eufy Security HomeBase
abgeschlossen und die Firmware auf die neuesteVersion aktualisiert haben.
Befolgen Sie die Bildschirmanweisungen in der eufy Security-App zum Hinzufügen
Ihres Bewegungssensors.
1. Wählen Sie „Gerät hinzufügen“ und anschließend den Bewegungssensor, um ihn
Ihrem System hinzuzufügen.
2. Halten Sie die SYNC-Taste 2 Sekunden lang gedrückt, bis die LED-Anzeige blau
blinkt. Der Bewegungssensor wartet auf das Koppeln.
3. Die LED-Anzeige wechselt zu einem dauerhaften Blau, um anzuzeigen, dass die
Kopplung erfolgreich war.
LED-Status Beschreibung
Blinkt dauerhaft blau Wartet aufVerbindung
Leuchtet 5 Sekunden lang
blau Erfolgreich gekoppelt
Aus Verbindung mit der HomeBase fehlgeschlagen
Hinweis: Die LED-Anzeige und der Gerätename können in der eufy Security-App
angepasst werden.
MONTAGE DES
BEWEGUNGSSENSORS
Suchen Sie nach einem Montageort
Der Bewegungssensor kann an einer Wand installiert werden. Berücksichtigen Sie
vor der Montage des Bewegungssensors die folgenden Faktoren, um einen optimalen
Erkennungsbereich abzudecken:
• Bestimmen Sie den Erkennungsbereich und sorgen Sie für ein uneingeschränktes
Sichtfeld.
• Bestimmen Sie Höhe und Neigungswinkel.
• Vermeiden Sie direkte Wärmequellen oder Sonneneinstrahlung, Vorhänge, Panzen
oder Haustiere
Idealerweise wird der Bewegungssensor an einer Wand mit Ausrichtung auf die Tür
montiert, durch die Personen in der Regel eintreten. Wir empfehlen das Positionieren
des Bewegungssensor in der Nähe einer Ecke, um einen optimalen Erfassungsbereich
abzudecken.
17 Deutsch Deutsch 18
Sie können den Bewegungssensor auch in Ihrer Garage, im Esszimmer oder im Keller
installieren.
Höhe und Neigungswinkel
Der Bewegungssensor sollte 2 bis 2,5 m über dem Boden mit einem Neigungswinkel
von bevorzugt 20° nach unten montiert werden.Wenn Sie ein großes Haustier mit
einem Gewicht von mehr als 22 kg haben, ändern Sie den Winkel zu 10 ° nach unten.
Mit Haustieren
2-2.5 m
10°
Ohne Haustiere
2-2.5 m
20°
Zur besseren Erkennung des Bereichs, in dem Personen einbrechen könnten, drehen
Sie den Bewegungssensor horizontal um bis zu 30°.
Empndlichkeit
Die Empfindlichkeit kann auf Basis der Zimmergröße eingestellt werden. Die
Standardeinstellung ist eine mittlere Empndlichkeit (Erkennungsbereich von 6 bis 8
Metern).
Montage des Bewegungssensors
1. Der Bewegungssensor kann mit zwei Methoden am gewählten Ort montiert
werden:
• Verwenden des 3-m-Klebestreifens:
①Lassen Sie die einstellbare Wandbefestigung auf dem Bewegungssensor
einrasten.
②Kleben Sie den Klebestreifen auf die Rückseite des Sensors, entfernen Sie die
Folie und kleben Sie den Bewegungssensor an die Wand.
③Drehen Sie den Bewegungssensor, um den Erkennungsbereich anzupassen.
• Verwenden Sie die mitgelieferten Schrauben:
①Positionieren Sie die Halterung an der Wand und markieren Sie die
gewünschte Stelle für die Montage mit einem Bleistift.
19 Deutsch Deutsch 20
②Bohren Sie an jeder Markierung ein Loch. In Holzwänden sind keine
Vorbohrungen erforderlich.
③Setzen Sie Dübel in die Löcher und befestigen Sie die Halterung mit den
mitgelieferten Schrauben an der Wand. Für Holzwände sind keine Dübel
erforderlich.
④Befestigen Sie den Bewegungssensor wieder an der Halterung.
⑤Drehen Sie den Bewegungssensor, um den Erkennungsbereich anzupassen.
VERWENDEN DES
BEWEGUNGSSENSORS
Nach der Installation des Bewegungssensors wird der Alarm ausgelöst, sobald eine
Bewegung im Erkennungsbereich des Bewegungssensors erkannt wird.
Wenn der Bewegungssensor funktioniert, zeigt seine LED-Anzeige Folgendes an:
LED-Status Beschreibung
Blinkt blau Es wurde eine Bewegung erkannt, während die HomeBase
verbunden ist.
Blinkt rot Es wurde eine Bewegung erkannt, während die HomeBase
nicht verbunden ist.
Wenn sich der Bewegungssensor im Testmodus befindet, zeigt die LED-Anzeige
Folgendes an:
LED-Status Beschreibung
Leuchtet rot Erfolgreicher Wechsel in den Testmodus
Blinkt 1 Sekunde lang rot Es wurde eine Bewegung erkannt, wenn sich der
Bewegungssensor im Testmodus bendet
Aus Wechsel in den Testmodus fehlgeschlagen
AUSTAUSCHEN DES AKKUS
Wenn der Akkustand des Bewegungssensor niedrig ist, zeigt seine LED-Anzeige
Folgendes an. Sie sollten den Akku austauschen, damit der Bewegungssensor weiterhin
funktioniert.
LED-Status Beschreibung
Blinkt rot Es wurde eine Bewegung erkannt, während die Akkuladung
niedrig ist.
TECHNISCHE DATEN
Akku: 1× CR123A-Akku
SUB-1G Frequenzbereich: 866 ~ 866,8 MHz (für EU); 920 ~ 920,8 MHz (für USA)
Betriebstemperatur: -10 ºC - 40 ºC
Lagertemperatur: -20 ºC - 60 ºC
Español 22
TABLA
DE CONTENIDOS
Contenido 22 25 Instalación del sensor de
movimiento
Descripción del producto 23 28 Uso Del Sensor De
Movimiento
Instalación De La Pila 23 29 Sustitución De La Pila
Adición Del Sensor De
Movimiento Al Sistema 24 29 Especicaciones
CONTENIDO
Para la instalación del sensor de movimiento
Sensor de movimiento
T8910
Tarjeta de bienvenida
Soporte
Tornillos de montaje
Pila CR123A
MANUAL DEL
USUARIO
Tira adhesiva 3M
23 Español Español 24
DESCRIPCIÓN DEL PRODUCTO
Compartimento de la pila
Indicador LED
Sensor de movimiento
Botón Sincronizar
INSTALACIÓN DE LA PILA
Extraiga la tapa del compartimento de la pila del sensor de movimiento e inserte la
pila CR123A suministrada después de retirar la película aislante de la pila.
ADICIÓN DEL SENSOR DE
MOVIMIENTO AL SISTEMA
Asegúrese de haber completado la configuración del dispositivo HomeBase de
eufy Security y de haber actualizado el rmware a la versión más reciente.
Siga las instrucciones en pantalla de la aplicación eufy Security para añadir el sensor de
movimiento.
1. Seleccione Añadir dispositivo y, a continuación, seleccione Sensor de movimiento
para añadirlo al sistema.
2. Mantenga pulsado el botón Sincronizar durante 2 segundos hasta que el indicador
LED parpadee en color azul. El sensor de movimiento está esperando el
emparejamiento.
25 Español Español 26
3. El indicador LED se ilumina en color azul jo para indicar que el emparejamiento
se ha completado correctamente.
Estado de LED Descripción
Azul intermitente continuo Esperando conexión
Azul jo durante
5 segundos Emparejamiento correcto
Apagado Error de conexión al dispositivo HomeBase
Nota: El indicador LED y el nombre del dispositivo se pueden personalizar en la
aplicación eufy Security.
INSTALACIÓN DEL SENSOR DE
MOVIMIENTO
Identique una ubicación para la instalación
El sensor de movimiento se puede instalar en una pared. Para obtener una cobertura
de detección óptima, considere los siguientes factores antes de instalar el sensor de
movimiento:
• Determine el área de detección y asegúrese de que no haya obstrucciones en el
campo de visión.
• Determine la altura y el ángulo de inclinación.
• Evite fuentes directas de calor, la luz solar, las cortinas, las plantas y las mascotas.
Lo ideal es instalar el sensor de movimiento en una pared orientada hacia la puerta
a través de la cual es probable que entren las personas. Se recomienda colocar el
sensor de movimiento cerca de una esquina para obtener una cobertura de detección
óptima.
También puede instalar el sensor de movimiento en el garaje, el comedor o el sótano.
Altura y ángulo de inclinación
El sensor de movimiento se debe instalar preferiblemente a una distancia de 2 a 2,5 m
sobre el nivel del suelo con un ángulo de inclinación hacia abajo de 20º. Si tiene una
mascota grande que pese más de 22,5 kg, cambie a una inclinación hacia abajo de 10º.
Con mascotas
2-2.5 m
10°
27 Español Español 28
Sin mascotas
2-2.5 m
20°
Para una mejor detección del área por donde los intrusos pueden acceder al interior,
gire el sensor de movimiento horizontalmente hasta 30º.
Sensibilidad
La sensibilidad se puede ajustar según el tamaño de la habitación. La conguración
predeterminada de sensibilidad es Media (rango de detección de 6 a 8 metros).
Instalación del sensor de movimiento
1. Puede instalar el sensor de movimiento en la ubicación deseada de dos formas:
• Mediante el uso de la tira adhesiva 3M:
①Coloque el soporte de montaje en pared ajustable en la base del sensor de
movimiento.
②Adhiera la tira adhesiva a la parte posterior del sensor, retire la película y
pegue el sensor de movimiento a la pared.
③Gire el sensor de movimiento para ajustar la cobertura de detección.
• Mediante el uso de los tornillos de montaje suministrados:
① Coloque el soporte contra la pared y utilice un lápiz para marcar la ubicación
de instalación deseada.
② Taladre un oricio en cada marca. En las paredes de madera, no es necesario
taladrar un oricio piloto.
③Inserte tacos en los orificios y fije el soporte a la pared con los tornillos
suministrados. El uso de tacos no es necesario en paredes de madera.
④Coloque el sensor de movimiento en el soporte.
⑤Gire el sensor de movimiento para ajustar la cobertura de detección.
USO DEL SENSOR DE
MOVIMIENTO
Una vez que haya instalado el sensor de movimiento, la alarma se activará cuando se
detecte movimiento en el área de cobertura del sensor de movimiento.
Cuando el sensor de movimiento está en funcionamiento, el indicador LED se ilumina
de la siguiente forma:
Estado de LED Descripción
Azul intermitente Se ha detectado movimiento mientras el dispositivo
HomeBase está conectado
Rojo intermitente Se ha detectado movimiento mientras el dispositivo
HomeBase no está conectado
Cuando el sensor de movimiento está en modo de prueba, el indicador LED se
ilumina de la siguiente forma:
29 Español
Estado de LED Descripción
Rojo jo El modo de prueba se ha activado correctamente
Rojo intermitente durante
1 segundo
Se ha detectado movimiento mientras el sensor de
movimiento está en modo de prueba
Apagado Error al activar el modo de prueba
SUSTITUCIÓN DE LA PILA
Cuando la pila del sensor de movimiento está próxima a agotarse, el indicador LED se
ilumina de la siguiente forma: Sustituya la pila para que el sensor de movimiento siga
funcionando.
Estado de LED Descripción
Rojo intermitente Se ha detectado movimiento cuando la pila está próxima a
agotarse
ESPECIFICACIONES
Batería: 1 pila CR123A
Intervalo de frecuencia SUB-1G: 866-866,8 MHz (para Europa); 920-920,8 MHz (para
EE. UU.)
Temperatura de funcionamiento: -10 ºC-40 ºC
Temperatura de almacenamiento: -20 ºC-60 ºC
TABLE DES
MATIÈRES
Contenu 31 34 Montage du détecteur de
mouvement
Présentation du produit 32 37 Utilisation Du Détecteur De
Mouvement
Installation Des Piles 32 38 Remplacement Des Piles
Ajout D'un Capteur De
Mouvement ÀVotre Système 33 38 Spécications
31 Français Français 32
CONTENU
Pour l'installation du détecteur de mouvement
Détecteur de
mouvement T8910
Carte de bienvenue
Support
Vis de montage
Pile CR123A
MANUEL DE
L'UTILISATEUR
Bande adhésive
3M
PRÉSENTATION DU PRODUIT
Compartiment de batterie
Voyant LED
Détecteur de
mouvement
Bouton SYNC
INSTALLATION DES PILES
Retirez le couvercle du compartiment des piles sur le détecteur de mouvement et
insérez la pile CR123A fournie après avoir enlevé le lm d'isolation.
33 Français Français 34
AJOUT D'UN CAPTEUR DE
MOUVEMENT À VOTRE SYSTÈME
Assurez-vous d'avoir terminé la conguration de votre HomeBase eufy Security et mis
à jour le microprogramme vers la dernière version.
Suivez les instructions à l'écran sur l'application eufy Security pour ajouter un
détecteur de mouvement.
1. Choisissez Ajouter un périphérique, puis sélectionnez Détecteur de mouvement
pour l'ajouter à votre système.
2. Maintenez le bouton SYNC enfoncé pendant 2 secondes jusqu'à ce que le voyant
LED clignote en bleu. Le détecteur de mouvement est en attente d'appairage.
3. Le voyant LED devient bleu pour indiquer que l'appairage est réussi.
État LED Description
Bleu clignotant en continu En attente de connexion
Bleu xe pendant 5 s Appairage réussi
Désactivé Impossible de se connecter au HomeBase
Remarque : Le voyant LED et le nom de l'appareil peuvent être personnalisés au
sein de l'application eufy Security.
MONTAGE DU DÉTECTEUR DE
MOUVEMENT
Trouver un emplacement pour le montage
Le détecteur de mouvement peut être installé sur un mur. Pour une couverture de
détection optimale, tenez compte des facteurs suivants avant de monter le détecteur
de mouvement :
• Déterminez la zone de détection et assurez-vous que le champ de vision n'est pas
obstrué
• Déterminez la hauteur et l'angle d'inclinaison
• Évitez les sources directes de chaleur ou de soleil, les rideaux, les plantes et les
animaux
Dans l'idéal, le détecteur de mouvement devrait être placé sur un mur faisant face à la
porte par laquelle les gens sont susceptibles d'entrer. Nous vous recommandons de
placer le détecteur de mouvement à proximité d'un coin pour obtenir une couverture
de détection optimale.
35 Français Français 36
Vous pouvez également installer le détecteur de mouvement dans votre garage, salle à
manger ou sous-sol.
Hauteur et angle d'inclinaison
Le détecteur de mouvement devrait être monté entre 2 m/6⁴/₇pi et 2,5 m/8⅕pi au-
dessus du sol, avec un angle d'inclinaison de 20º vers le bas de préférence. Si vous avez
un gros animal de compagnie pesant plus de 50 lb, préférez une inclinaison de 10º vers
le bas.
Avec des animaux de compagnie
2-2.5 m
10°
Sans animaux de compagnie
2-2.5 m
20°
Pour mieux détecter la zone où des gens pourraient vous cambrioler, faites pivoter le
détecteur de mouvement horizontalement jusqu'à 30º.
Sensibilité
La sensibilité peut être modiée selon la taille de la pièce. Le paramètre par défaut est
une sensibilité moyenne (portée de détection de 6 à 8 mètres).
Montage du détecteur de mouvement
1. Deux méthodes sont disponibles pour monter le détecteur de mouvement à
l'emplacement de votre choix :
• Utiliser la bande adhésive 3M :
①Clipsez le support mural réglable à la base du détecteur de mouvement.
②Collez la bande adhésive au dos du capteur, retirez le film et collez le
détecteur de mouvement sur le mur.
③Faites pivoter le détecteur de mouvement pour régler la couverture de
détection.
• Utilisez les vis fournies :
①Placez le support contre le mur et utilisez un crayon pour marquer
l'emplacement de montage.

Other manuals for T8910

1

This manual suits for next models

1

Other eufy Security Accessories manuals

eufy Security HomeBase 2 User manual

eufy Security

eufy Security HomeBase 2 User manual

eufy Security T8900 User manual

eufy Security

eufy Security T8900 User manual

eufy Security 906290 User manual

eufy Security

eufy Security 906290 User manual

eufy Security T8222 User manual

eufy Security

eufy Security T8222 User manual

eufy Security T8200 User manual

eufy Security

eufy Security T8200 User manual

eufy Security T8740 User manual

eufy Security

eufy Security T8740 User manual

eufy Security T8203 User manual

eufy Security

eufy Security T8203 User manual

eufy Security T8221 User manual

eufy Security

eufy Security T8221 User manual

eufy Security T8210 User manual

eufy Security

eufy Security T8210 User manual

eufy Security T8220 User manual

eufy Security

eufy Security T8220 User manual

eufy Security T8900 User manual

eufy Security

eufy Security T8900 User manual

eufy Security 2K User manual

eufy Security

eufy Security 2K User manual

eufy Security T8200S User manual

eufy Security

eufy Security T8200S User manual

eufy Security T8213 User manual

eufy Security

eufy Security T8213 User manual

Popular Accessories manuals by other brands

Bontrager FORK manual

Bontrager

Bontrager FORK manual

Apogee symphony i/o mk II quick start guide

Apogee

Apogee symphony i/o mk II quick start guide

GE Reuter-Stokes FLAME TRACKER Operation & maintenance manual

GE Reuter-Stokes

GE Reuter-Stokes FLAME TRACKER Operation & maintenance manual

Marmitek DS90 user manual

Marmitek

Marmitek DS90 user manual

Siemens LDS 6 operating instructions

Siemens

Siemens LDS 6 operating instructions

Multiple Awnings Brasilia User and installation manual

Multiple Awnings

Multiple Awnings Brasilia User and installation manual

BOB Revolution Weather Shield Weather Shield instructions

BOB

BOB Revolution Weather Shield Weather Shield instructions

Kalorik EM 47774 manual

Kalorik

Kalorik EM 47774 manual

ESTEBAN SILVER COLOR EDITION Use Instructions Leaflet

ESTEBAN

ESTEBAN SILVER COLOR EDITION Use Instructions Leaflet

STEINEL StudioLine HF 3600 operating instructions

STEINEL

STEINEL StudioLine HF 3600 operating instructions

Evolveo Terra NV4 manual

Evolveo

Evolveo Terra NV4 manual

Rittal SK 3185830 Assembly and operating instructions

Rittal

Rittal SK 3185830 Assembly and operating instructions

Di-soric FSB 10 M G1-B8 operating manual

Di-soric

Di-soric FSB 10 M G1-B8 operating manual

Oregon Scientific BAR609HGA user manual

Oregon Scientific

Oregon Scientific BAR609HGA user manual

Bosch rexroth RegisterControl ATEX MLC 14VRS operating instructions

Bosch

Bosch rexroth RegisterControl ATEX MLC 14VRS operating instructions

Endress+Hauser Prosonic S FDU91 technical information

Endress+Hauser

Endress+Hauser Prosonic S FDU91 technical information

Wacom Intuos Creative Stylus manual

Wacom

Wacom Intuos Creative Stylus manual

Parker Squibb Taylor SkyTrak SK2-1009-D Installation, operation & maintenance manual

Parker

Parker Squibb Taylor SkyTrak SK2-1009-D Installation, operation & maintenance manual

manuals.online logo
manuals.online logoBrands
  • About & Mission
  • Contact us
  • Privacy Policy
  • Terms and Conditions

Copyright 2025 Manuals.Online. All Rights Reserved.