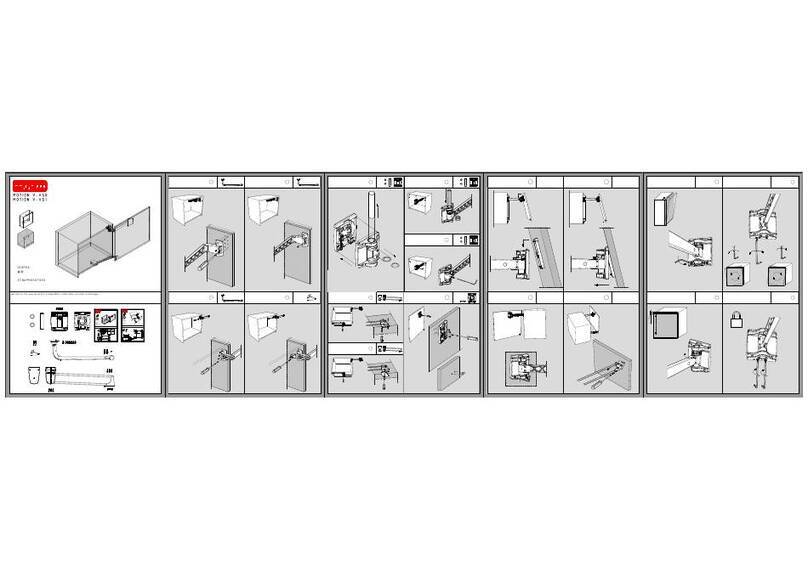
SERVETTO Automation Motion-V Series Quick start guide

L. N° 1 Remote control one button

Figure 2
ENGLISH

ASSEMBLY PHASES OF THE ELECTRIC MOTION MOTOR
1. DETERMINING THE ELECTRIC MOTION MOTOR DIRECTION OF ROTATION.
Incase the electric Motion motor is installed in one of the positions shown in Figure 3, place the selector of rotation
direction (O) on the letter “A”.
Figure 3
ENGLISH

ASSEMBLY PHASES OF THE ELECTRIC MOTION MOTOR
1. DETERMINING THE ELECTRIC MOTION MOTOR DIRECTION OF ROTATION.
Incase the electric Motion motor is installed in one of the positions shown in Figure 4, place the selector of the rota-
tion direction (O) on the letter “B”.
Figure 4
ENGLISH

Figure 5
Figure 5
2. DRILLING
Place the drilling template in the desired installation position and make the holes of 5 mm diameter.
ENGLISH

Figure 7
3. FIXING
Install the small arm (S) that moves the motion arm, then insert the dowel pins (that are placed on the motor block) in the
holes of the wardrobe side.After you have checked the correct electric Motion position, you can go on with its fixing by using
the 4 screws supplied with the product.
4. BUMPERS REPLACEMENT AND ARM LOCKING
REPLACE THE BUMPERS WITH THE ONES SUPPLIED WITH THE ELECTRIC MOTION (FIGURE 7.A).TIGHTEN THE SOCKET HEAD
SCREWS PLACED ON THE MOTION ARM.
Figure 7.BFigure 7.A
ENGLISH

5. DAMPERS REPLACEMENT
Replace both dampers, that you had previously installed with the manual Motion, with the ones supplied with the electric
Motion. Make sure that the installed dampers have the back side of a black colour.
Figure 9
Figure 8
ENGLISH

Figure 10
66..ELECTRICELECTRIC CONNECTIONCONNECTION
Place the transformer far from damp spaces and in a well ventilated position, connect the jack male to the female plug
(R) (that is on the motor block). Then connect the transformer power plug to the socket and be sure that the red light
on the transformer turns on. This means that it is working correctly.
TOUCH INSTALLATION
11..INSERTIONINSERTION OFOF THETHE BBAATTETTERRY Y
Take care to insert the battery in the correct direction, otherwise the device does not work correctly.
EENNGGLLIISSHH
AATTTTEENNTTIIOONN: AFTER YOU HAVE INSTALLED THE MOTOR, MAKE SURE THAT THE TRANSFORMER POWER
PLUG IS ALWAYS ACCESSIBLE, SINCE IT MUST BE EASY TO DISCONNECT IT FROM THE MOTOR IN CASE OF
EMERGENCY.

Figure12
Figure 11
2. INSTALLATION POSSIBILITIES
The touch device can be directly installed to the wardrobe door by making a milling whose dimensions should be as
indicated in figure 11. Then install the touch device to the interior side of the wardrobe door by using the 2 supplied
screws . Then place the Touch sticker to the front side of the wardrobe door where the Touch is placed.
ONCE YOU HAVE INSTALLED THE TOUCH DEVICE, PLEASE WAIT 5 MINUTES AND AFTER THAT YOU CAN PROCEED WITH
ITS PROGRAMMING.
FRONT VIEW
Ø 70
FRONT VIEW
ENGLISH

Figure13
The Touch device can also be installed to any not metallic surfaces such as glass, plastic, marble ecc. by using the supplied
biadhesive tape.The maximum allowed door thickness to install the Touch device by using the biadhesive tape can change
according to the door material. In case you are using the biadhesive, please remove both the support and the spring.
ONCE YOU HAVE INSTALLED THE TOUCH DEVICE, PLEASE WAIT 5 MINUTES AND AFTER THAT YOU CAN PROCEED WITH
ITS PROGRAMMING.
ATTENTION: THE TOUCH DEVICE DOES NOT WORK CORRECTLY, IF YOU INSTALL IT ON A METALLIC SURFACE.
ENGLISH

Figure 14
TOUCH PROGRAMMING
1. Please take care that the electric Motion power cable is connected to the socket.
2. Press the programming button (M) (placed on the Motion motor block), once the led signal (L) turns on, release the
button (Figure 14).
3. Put into action the touch device just once by placing your hand on the touch sensor until you hear a beep-. After that,
release it (Figure 15).
The Motion motor has now acquired the touch command for opening and closing the door.
If you want to reset the touch device, you have to press the programming button (M) for about 10 seconds, when the led
signal (L) turns off, release the button and after 10 seconds all the previously saved commands will be deleted. You can
now start a new programming of the electric Motion.
Figure15
PROGRAMMING BUTTON (M)
ENGLISH

PUSH
Figure 19Figure 19
FiguFigurree 1818
FiguFigurree 1717
FiguFigurree 1616
PROGRAMMING OF THE REMOTE CONTROL
1. With a small screwdriver, unscrew the 2 screws of the battery compartment (Figure 16).
2. Take care to insert the battery in the correct direction ,otherwise the device does not work correctly (Figure 17).
3. Retighten the screws and fix the battery compartment cover (Figure 18).
EENNGGLLIISSHH
AATTTTEENNTTIIOONN: AFTER 10 SECONDS OF INACTIVITY, THE REMOTE CONTROL GOES INTO STANDBY MODE. TO
REACTIVATE IT, PRESS THEBOTTON ON THE RIGHT SIDE OF THE REMOTE CONTROL (FIGURE 19).

FiguFigurree 2020
FiguFigurree 2222
PUSH
PUSH
+
_
PUSH
LED
FiguFigurree 2121
PROGRAMMING OF THE REMOTE CONTROL
1. Take care that the electric Motion power cable is connected to the socket.
3. Select on the remote control the wardrobe compartment from 0 to 9 by press-
ing the buttons with the arrow mark (Figure 20).
4. Press the programming button (M) (on the motor block) and when the led sig-
nal (L) turns on ,release the button (Figure 21).
5. Press once the button "MOT" on the remote control (Figure 22).
The Motion motor has now acquired the command of the button "MOT" for
opening and closing the wardrobe compartment after selecting the related com-
partment number.
If you want to reset the remote control, press the programming botton (M) for
about 10 seconds, when the led signal (L) turns off, release the button and after
10 seconds all the previously saved commands will be deleted. You can now start
a new programming of the electric Motion.
You can program the electric Motion opening and closure by using both the
Touch or the remote control commands.
PROGRAMMING BUTTON (M)
EENNGGLLIISSHH

press the button MOT on the remote control (24) or the button on
the single button remote control (25).

BATTERYBATTERY
EENNGGLLIISSHH
SAFETY PRECAUTIONS
•
• Do not connect the electric Motion to the mains supply if the plug or the transformer power cable (C) are
damaged.
• unplug the electric Motion when unused for long periods of time.
• place the electric Motion near an electric socket . The power cable (C) should be easily approachable in case you
need to disconnect it.
• protect the transformer cable (C) from being walked on.
•
always make sure that the plug of the transformer cable (C) is correctly inserted in the socket and that there is
electric power.
• never attempt to recharge, heat up or dispose of spent batteries in a fire. Heat can cause batteries to explode.
• do not allow children to play with batteries.
• do not allow children to play with items of packaging. Plastic bags, sheets and boxes can cause suffocation
and injury.
• do not open neither the electric Motion (A) nor the transformer (B): high voltages inside the unit can cause
electric shock.
• do not place neither the electric Motion nor the remote control in damp spaces or near steam and /or water.
• do not connect the electric Motion near heat sources such as radiators, heat registers, stoves or other apparatus
that produce heat.
• refer all servicing to qualified service personnel. Please apply to the retailer where you have bought your
electric Motion.
ECOLOGYECOLOGY
Recommendations for respecting thte environment.
PPAACKCKAAGINGGING
The packaging materials used for this product comply with relevant environmental standards. If you have
enough room, keep the packaging at least for the period of the warranty. If you must dispose of the packaging
do not throw it into the environment but dispose of it responsibly.
BBAATTERIESTTERIES
Dispose of the ecological batteries through proper channels for the collection and disposal of environmentally
dangerous waste. Never throw the batteries into the environment. Whenever possible use mercury-fre batteries
to limit environmental impact.
TECHNICAL SPECIFICATIONS
ELECTRICELECTRIC MMOOTIONTION POWERPOWER SOURCESSOURCES
Voltage: 100-240 V
Frequency: 50-60 Hz
Power: 60 W
Insulation class:II
Attention
Attention: the transformer output electric power is low voltage (12V), so there is not any danger inside the
wardrobe compartment.
Battery lithium 3V (cod. CR2477N).
This appliance is not intended for use by persons (including children) with reduced physical, sensory or mental
capabilities, or lack of experience and knowledge, unless they have been given supervision or instruction
concerning use of the appliance by a person responsible for their safety. Children should be supervised to ensure
that they do not play with the appliance.

ENVIRONMENTAL INFORMATION
The product you have purchased contains extracted natural resources that have been used in the manufacturing process. This product can contain sub-
stances known to be hazardous to the environment or to the human health.
Waste Electrical and Electronic Equipment (commonly known as WEE) should never be disposed of in the municipal waste stream (residential garbage col-
lection). The above indicated symbol (showing a crossed-out-waste bin) reminds you to dispose of your "end of life" product properly. Substances such as
glass, plastic, and certain chemical compounds are highly recoverable, recyclable, and reusable. You can do your part for the environment by following these
simple steps:
•when your electrical or electric equipment is no longer useful to you, take it back to your local waste collection administration for recycling.
•In some cases, your "end of life" product may be returned to the retailer towards the purchase of a similar equipment.
•If you need further assistance in recycling, reusing, changing the product, please contact your nearest retailer.
Finally we suggest that you follow further environmentally friendly actions by recycling the inner and outer packaging (including shipping containers) this
product was delivered in. With your help, we can reduce the amount of natural resources needed to procedure electrical and electronic equipment, mini-
mize the use of landfills for the disposal of "end of life" products, and generally improve our quality of life by ensuring that potentially hazardous sub-
stances are not released into the environment and are disposed of properly. The improper disposal of the "end of life" product makes the user liable to
sanctions according to the national rules of each country.
WARRANTY CERTIFICATE
This product has been submitted to strict control testing by the manufacturer,in accordance with the actual international standards.
We are thus sure of its high quality. If the Automation Motion-V does not work correctly, we kindly ask you to contact the retailer where you have bought
it for assistance. They will send the defective piece to the manufacturer that will repair it by using only original spare parts.
IMPORTANT!
•In this case, it is necessary to produce this warranty together with the proof of purchase (invoice or receipt) showing the date of purchase.
SERVETTOsrl
Via Brughetti 32 - I-20030 Bovisio M.go (MB)
Tel: +39/0362558899
Sito internet: www.servetto.it - E-mail: servetto@servetto.it
WARRANTY CONDITIONS:
1. the warranty covers the free replacement or reparation of the electric Servetto components in case of manufacturing defects.
the product is warranted for a period of 24 months or 5000 opening and closure from the date of purchase, that is proved by this certificate and by the
receipt or invoice indicating the date of purchase as well as the name of the retailer.If the buyer does not produce this document, the warranty is not valid
and all the reparation expenses will be a buyer cost. In case the buyer loses this certificate, the manufacturer is not responsible and cannot issue any dupli-
cate certificate.
2. the warranty does not cover damages or defects resulting from accidents during the transport, negligence, mishandling, wrong installation, unauthorized
repair,tampering and/ or any other circumstances that cannot be considered as manufacturing defects.The warranty does not cover the removable parts/
accessories, unless it can be proved that it is a manufacturing defect. The warranty does not even apply to the technical assistance during the installation
and/or the testing of the product as well as to the components subject to wear.
3. the manufacturer declines any responsibility for any damage that could be directly or indirectly caused to persons, domestic animals or objects, for not
observing the instructions indicated in the leaflet “directions for use”, giving all the necessary instructions about installation, use and maintenance of this
product.
4. the product will be repaired by the manufacturer. The buyer will pay for the transport cost and risks.
5. after 24 months from the date of purchase, the warranty is not valid any more. After the warranty period has expired, the manufacturer will undertake
to repair the product and the buyer will bear all the costs related to replaced components, manpower and transport, according to the actual manufacturer
prices. The warranty decays after 3 years that the product has been removed from the official price list.
6. the present warranty is the only one valid. Nobody is allowed, except the manufacturer, to extend or change the warranty conditions nor to release any
other written or verbal warranties. In any case, the warranty excludes both the replacement of the product and the extension of the warranty after the defect
has occurred.
ENGLISH
This manual suits for next models
3
Table of contents
Other SERVETTO Door Opening System manuals
Popular Door Opening System manuals by other brands

Global Automatics
Global Automatics Premier-Slide 100 Technical manual

Henderson
Henderson Evolve Glass SIM Kit Fitting instructions

ECO Schulte
ECO Schulte SR BG III Assembly instruction

Assa Abloy
Assa Abloy Sargent FIREGUARD 2408 Series Wiring instructions

hager
hager 8300 Series quick start guide

Dorma
Dorma 8916 AF8MJ manual