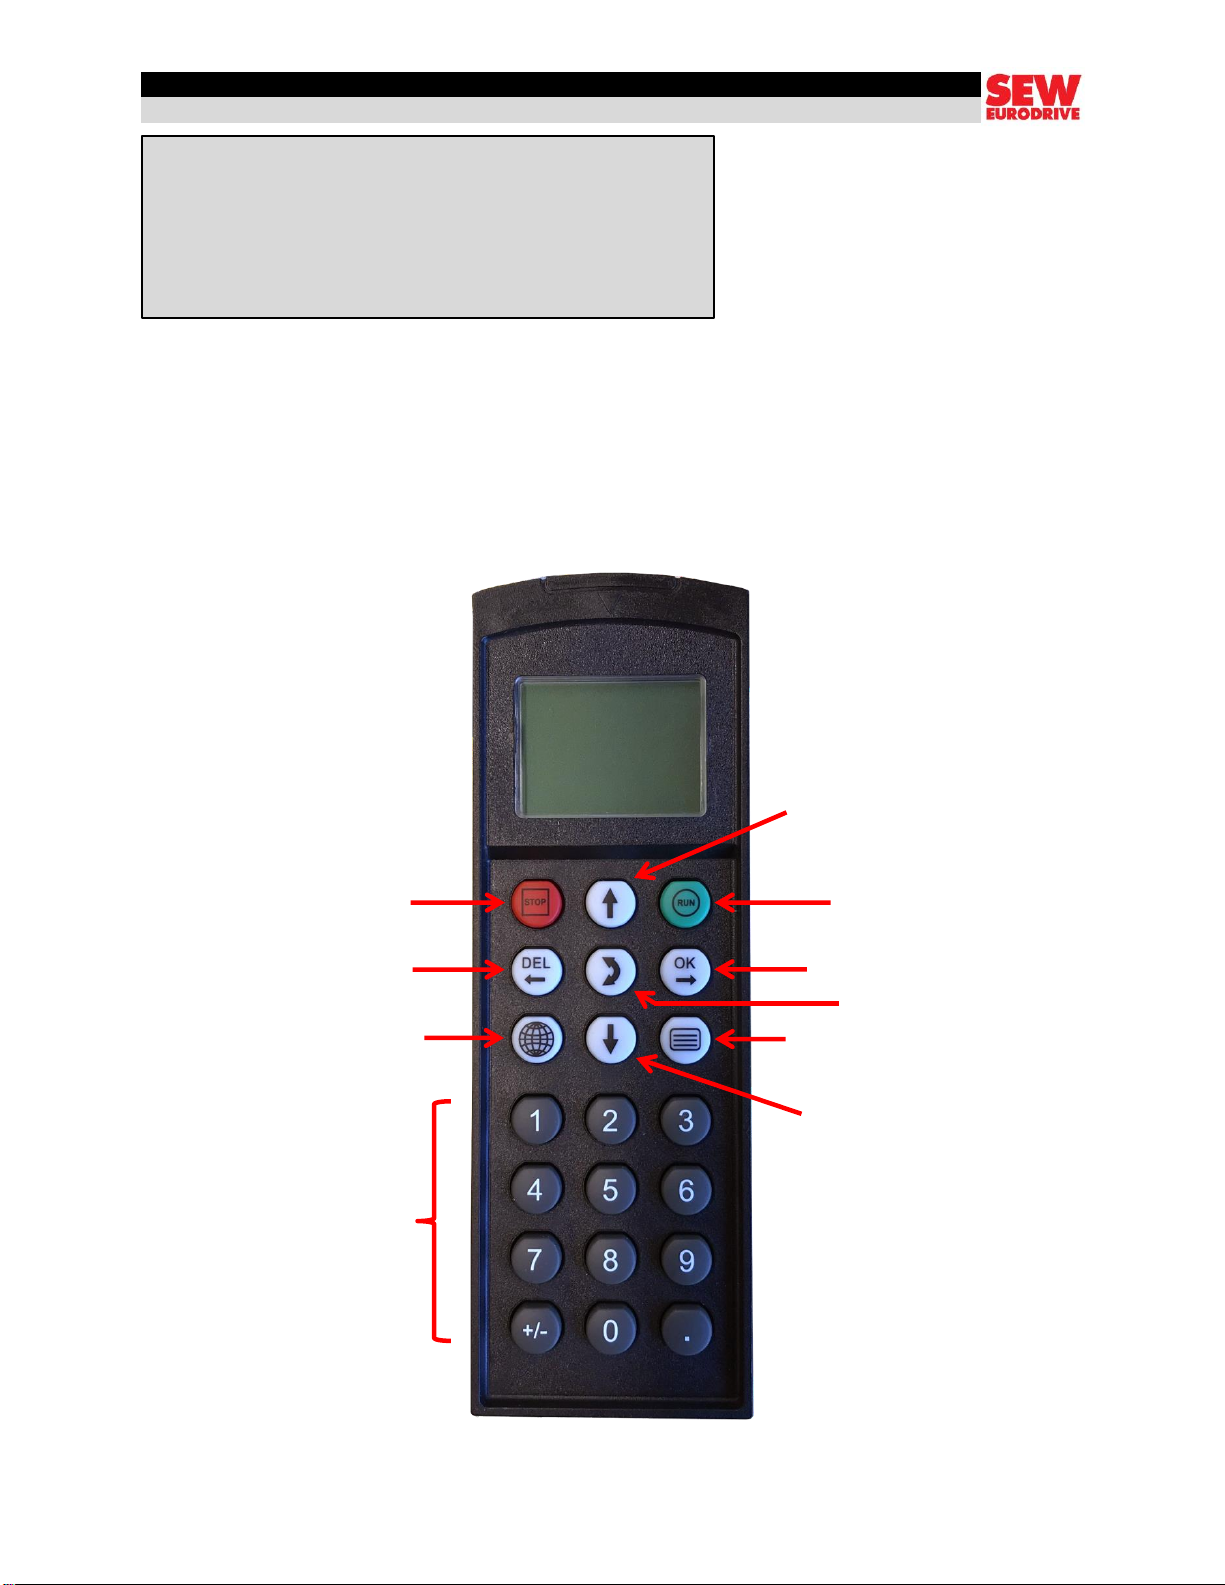
Using the DBG60 Keypad
5
Step 3
Key in a speed value and press the CONFIRM button. A positive number makes the motor
turn clockwise. To make the motor run counterclockwise, key in the speed and press the –
button before pressing the CONFIRM button.
Step 4
Press the RUN MOTOR button to start the motor.
Press the STOP MOTOR button when you’re finished.
Step 5
Press the EXIT button to leave manual mode.
Reminder: always exit manual mode before disconnecting the keypad. If you fail to deactivate it,
the drive will remain in manual mode and ignore all other control signals.
The keypad isn’t the best tool for editing a large number of parameters, but it’s fine if you have
to change just one or two. Let’s adjust a few parameters to see how it’s done.
As you probably noticed when you tested the drive in manual mode, the PWM base frequency is
back at 4 kHz, which isn’t pleasant to hear. We’ll change it to 16 kHz.
Step 1
Press the MOVE UP / MOVE DOWN buttons until PARAMETER MODE appears.
Press the CONFIRM button.
Step 2
Key in 860 and press the CONFIRM button to access the PWM frequency 1 parameter.
Directly keying in a parameter number takes you straight to that parameter. The keypad display
shows a short description so you can verify that you have the correct one.
In this case, the parameter has a fixed set of choices (2.5, 4, 8, 12, and 16).
Step 3
Use the MOVE UP / MOVE DOWN buttons to cycle through the choices until you reach 16.
Step 4
Press the CONFIRM button, followed by the SWITCH button.
Step 5
Press the MENUS button to exit.
Step 6
Run the drive in manual mode to confirm that you’ve changed the PWM base frequency.