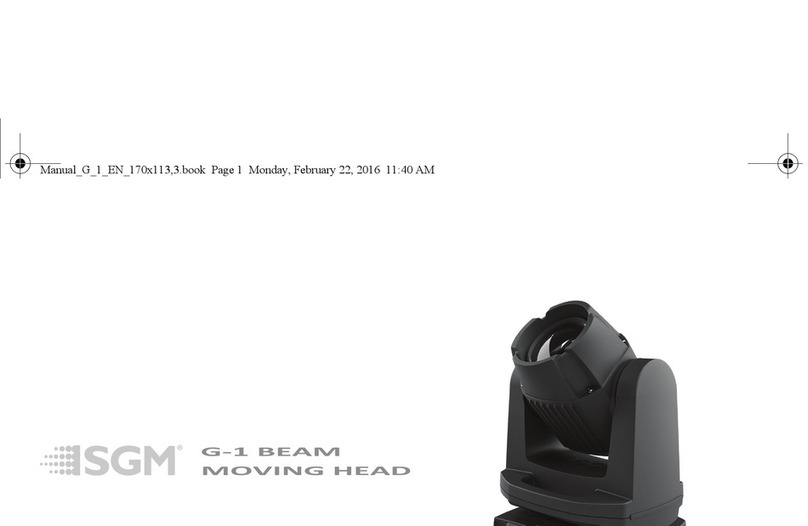
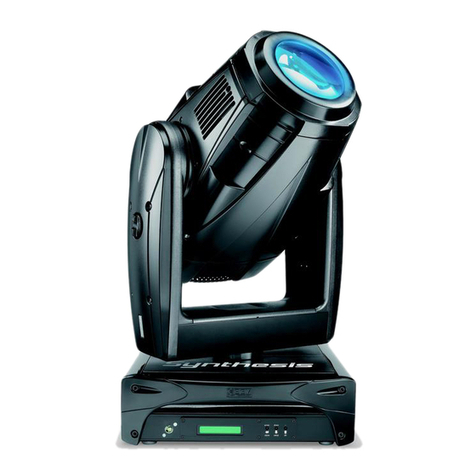
SGM IDEA SPOT 700 User manual

00.1.LE
RLAUN
AMS’
RES
U
GB
I
D
F
E
P
M O VINGHEADS
IDEASPOT 700

Vi ringraziamo per aver acquistato un prodotto SGM.
Per ottenere i migliori risultati dal suo utilizzo, vi preghiamo di leggere attentamente questo manuale di istruzioni.
Al suo interno troverete le informazioni tecniche e le specifiche d’uso del prodotto. Nelle pagine in appendice tro-
verete inoltre schemi e diagrammi destinati all’assistenza tecnica.
Nell’ottica di qualità SGM, è possibile che l’Azienda apporti migliorie ai suoi prodotti, per cui consigliamo di alle-
gare il manuale al prodotto stesso e di trascrivere il numero di serie nell’ultima pagina della copertina: utilizzando
il presente manuale con un apparecchio fabbricato prima o dopo la sua stampa, potrebbero esserci discrepanze
fra l’apparecchio e quanto riportato nel manuale stesso.
Thank you for buying an SGM product.
To obtain the best results, please carefully read this instruction manual in which you will find technical information
and specifications for use of the product, as well as diagrams for technical service in the appendix.
In light of SGM quality, the company may make improvements to its products. Therefore, we recommend that the
manual be attached to the product and the serial number copied onto the back cover: using this manual with
equipment manufactured before or after its printing, might show discrepancies between the equipment and the
information listed in the manual.
Wir danken Ihnen für den Kauf eines Produkts von SGM.
Zur Erzielung der besten Resultate bei der Benutzung bitten wir Sie, die vorliegende Bedienungsanleitung aufmerk-
sam zu lesen. Darin finden Sie die technischen Informationen sowie die Anweisungen für die Benutzung des
Produkts. Im Anhang befinden sich auBerdem die Schaltpläne undv Diagramme für den Kundendienst.
SGM behält sich das Recht vor, Verbesserungen an den Produkten vorzunehmen und deshalb empfehlen wir, die
Bedienungsanleitung dem Produkt stets beizulegen und die Seriennummer auf der letzten Seite des Umschlags
einzutragen. Bei der Verwendung dieses Handbuches mit einem Gerät, das vor oder nach der Drucklegung produ-
ziert wurde, können sich Abweichungen zwischen Gerät und dem Inhalt des Handbuches ergeben.
Nous vous remercions d’avoir achetéun produit SGM.
Pour optimiser son utilisation, nous vous prions de bien vouloir lire attentivement cette notice oùvous trouverez
les informations techniques et les caractéristiques d’utilisation du produit. En outre, vous trouverez également,
dans les pages en appendice, les schémas et les diagrammes concernant l’assistance technique.
Le concept de qualitéSGM, lui permet d’améliorer continuellement ses produits et c’est pourquoi nous vous con-
seillons de joindre la notice au produit et d’inscrire le numéro de sèrie sur la page de couverture. En effet, si on
l’utilise avec un appareil fabriquéavant ou après son impression, il peut y avoir des différences entre l’appareil et
ce qui figure dans la notice.
Les estamos sumamente agradecidos por haber elegido un producto SGM.
Para obtener los mejores resultados, les rogamos leer detenidamente el presente manual de instrucciones. El
mismo contiene las informaciones técnicas y las indicaciones de uso del producto. Las páginas anexas contienen
además los esquemas y diagramas necesarios para la asistencia técnica.
Para mantener la calidad SGM, es posible que la Empresa aporte mejoras sus productos, por ello les aconsejamos
conservar el manual junto con el aparato correspondiente y escribir su número de serie en la última página del
manual;si en cambio se utiliza el presente manual con un aparato frabicado antes o después de su impresión, es
probable que existan discrepancias entre el aparato y las indicaciones del mismo.

GB SGM
Idea Spot 700 XM473-V1.0-NR
1
Table of Contents
INTRODUCTION: .......................................................................................................................2
Feature : ........................................................................................................................... 2
OVERVIEW................................................................................................................................3
GENERAL GUIDELINES ............................................................................................................... 5
INSTALLATION INSTRUCTIONS....................................................................................................5
In talling or replacing the lamp............................................................................................. 5
Mounting the device ............................................................................................................ 7
In tallation method via clamp ............................................................................................... 8
DMX-512 control connection ................................................................................................. 8
Control Board .................................................................................................................. 11
FUNCTION MODE .................................................................................................................... 13
DMX Addre Setting ........................................................................................................ 13
Di play the DMX 512 value of each channel ......................................................................... 13
Slave Setting ................................................................................................................... 13
Auto Program .................................................................................................................. 13
Mu ic control ................................................................................................................... 13
INFORMATION........................................................................................................................ 13
Time information.............................................................................................................. 13
Current Time ................................................................................................................... 13
Software ver ion .............................................................................................................. 14
LAMP CONTROL ...................................................................................................................... 14
PERSONALITY......................................................................................................................... 15
RESET-FUNCTIONS ................................................................................................................. 16
EFFECT ADJUST...................................................................................................................... 16
USERS MODE SET................................................................................................................... 16
EDIT PROGRAM ...................................................................................................................... 16
INSTRUCTIONS ON USE: ......................................................................................................... 19
ERROR MESSAGE.................................................................................................................... 24
CLEANING AND MAINTENANCE................................................................................................. 25
TECHNICAL SPECIFICATIONS ................................................................................................... 25

SGM GB
XM473-V1.0-NR Idea Spot 700
2
KEEP THIS MANUAL FOR FUTURE NEEDS
Thank you for your patronage. We are confident that our excellent product and ervice can ati fy you.
For your own afety, plea e read thi u er manual carefully before in talling the device.
CAUTION !
Keep thi device away from rain and moi ture!
Unplug main lead before opening the hou ing
Every per on involved with the in tallation, operation and maintenance of thi device ha to:
-be qualified
-follow carefully the in truction of thi manual
INTRODUCTION:
Thank you for having cho en thi profe ional moving head.
You will ee you have acquired a powerful and ver atile device.
Unpack the device. In ide the box you hould find: the fixture device, an XLR connection cable, a afety
rope, two omega clamp and thi manual. Plea e check carefully that there i no damage cau ed by
tran portation. Should there be any, con ult your dealer and don’t in tall thi device.
Feat res:
Lamp: Philip MSR GOLD 700 SA/2 DE
3 Control channel mode : 24 / 22 / 34 channel
Stand alone operation with ma ter/ lave function, can be ound activated
Pan/tilt movement: - 8 bit and 16 bit re olution
- For mooth and preci e re olution
- Pan: 540°/630° optional, Tilt: 265°movement
- High peed of pan/tilt movement, peed of pan/tilt movement i adju table
- Scan po ition memory, auto repo ition after unexpected movement
Motorized color wheel with 8 interchangeable dichroic filter and open, rainbow-effect with adju table
peed in both direction
CMY color mixture to get indefinite color effect
30 CMY and color wheel MACROS and Random CMY
Two rotation gobo wheel with 6 interchangeable rotating gobo plu open each, both 2 gobo wheel
have different peed of gobo haking and rainbow effect, and gobo indexing
”Slot in & out” gobo/color wheel y tem
Animation flame effect
Pri m : 3 –facet peed adju table pri m rotate in two direction with 16 pri m macro effect
Strobe effect with 1-13 fla he per econd or random trobe via hutter
Motorized focu
Zoom: 15°~30° linear zoom
Dimmer: 0%~100% full range dimming
Iri from 5%~100% with pul e iri effect.
Steple fro t, 0%~100% linear change fro t
Bule LCD di play
Pre et program: 7 built in program can be called up via DMX controller
Editable program: Edit and ave the program to in ide EEPROM via the control board or external
controller, up to 250 cene can be aved and then can be run in Stand Alone or ound activated
Number of cene in Program Run can be changed individually

GB SGM
Idea Spot 700 XM473-V1.0-NR
3
OVERVIEW
1. Objective-len
2. LCD-Di play
3. Mode/E c-button
4. Up-button
5. Down-button
6. Enter-button
7. Microphone
8. Wirele DMX antenna
9. Wirele indicator
10. Lamp y tem
11. Yoke
12. Carrying handle
13. DMX output ocket
14. DMX input ocket
15. Fu e
16. Power upply

SGM GB
XM473-V1.0-NR Idea Spot 700
4
SAFETY INSTRUCTIONS
CAUTION
Be careful with your operation . With a dangerou voltage you can Suffer a
dangerou electric hock when touching wire !
Thi device ha left the factory in perfect condition. In order to maintain thi condition and to en ure a afe
operation, it i ab olutely nece ary for the u er to follow the afety in truction and warning note written
in thi u er manual.
IMPORTANT
Damage cau ed by the di gregard of thi u er manual are not ubject to warrenty.
The dealer will not accept liability for any re ulting defect or problem .
If the device ha been expo ed to temperature change due to environmental change , do not witch it on
immediately. The ari ing conden ation could damage the device. Leave the device witched off until it ha
reached room temperature.
Thi device fall under protection-cla I. Therefore it i e ential that the device be earthed.
The electric connection mu t carry out by qualified per on.
The device hall only be u ed with rate voltage and frequency.
Make ure that the available voltage i not higher than tated at the end of thi manual.
Make ure the power cord i never crimped or damaged by harp edge . If thi would be the ca e,
replacement of the cable mu t be done by an authorized dealer.
Alway di connect from the main , when the device i not in u e or before cleaning it. Only handle the
power cord by the plug. Never pull out the plug by tugging the power cord.
During initial tart-up ome moke or mell may ari e. Thi i a normal proce and doe not nece arily
mean that the device i defective, it hould decrea e gradually.
Plea e don't project the beam onto combu tible ub tance .
Fixture cannot be in talled on combu tible ub tance , keep more than 50cm di tance with wall for
mooth air flow, o there hould be no helter for fan and ventilation for heat radiation.
If the external flexible cable or cord of thi luminaire i damaged, it hall be exclu ively replaced by the
manufacturer or hi ervice agent or a imilar qualified per on in order to avoid a hazard.
CAUTION
Never touch device during operation!
The hou ing may heat up.
Never look directly into the light ource,
a en itive per on may uffer an epileptic hock.
Plea e be aware that damage cau ed by manual modification to the device are not ubject to warranty.
Keep away from children and non-profe ional .

GB SGM
Idea Spot 700 XM473-V1.0-NR
5
GENERAL GUIDELINES
Thi device i a lighting effect for profe ional u e on tage , in di cotheque , theatre , etc.
Thi fixture i only allowed to be operated with the max alternating current which tated in the technical
pecification in the la t page of thi manual, the device wa de igned for indoor u e only.
Lighting effect are not de igned for permanent operation. Con i tent operation break may en ure that
the device will erve you for a long time without defect . Do not hake the device.
Avoid brute force when in talling or operating the device.
The device hall only be u ed complete with it protective hield.
While choo ing the in tallation- pot, plea e make ure that the device i not expo ed to extreme heat,
moi ture or du t. The minimum di tance between light-output from the projector and the illuminated
urface mu t be more than 0.5 meter, Lighting can not be in talled where there i combu tible.
Alway fix the fixture with an appropriate afety cable if you u e the quick lock cam in hanging up the
fixture, plea e make ure the 4 quick lock fa tener turned in the quick lock hole correctly.
If you u e the quick lock cam in hanging up the fixture, plea e make ure the 4 quick lock fa tener turned
in the quick lock hole correctly.
Operate the device only after having familiarized with it function . Do not permit operation by per on not
qualified for operating the device. Mo t damage are the re ult of unprofe ional operation.
Plea e u e the original packaging if the device i to be tran ported.
For afety rea on , plea e be aware that all modification on the device are forbidden.
If thi device will be operated in any way different to the one de cribed in thi manual, the product may
uffer damage and the guarantee become void. Furthermore, any other operation may lead to
hort-circuit, burn , electric hock, lamp explo ion, cra h, etc.
INSTALLATION INSTRUCTIONS
Installing or replacing the lamp
CAUTION
Only in tall the lamp with the device unplugged from the main .
The lamp ha to be replaced when it i damaged or deformed.
Before replacing the lamp let the lamp cool down, becau e during operation, the lamp can reach very high
temperature.
During the in tallation of halogen lamp do not touch the gla bulb bare handed. Alway u e a cloth to
handle the lamp during in ertion and removal.
Do not in tall lamp with a higher wattage. They generate higher temperature than which the device wa
de igned for.

SGM GB
XM473-V1.0-NR Idea Spot 700
6
For the in tallation, you need one Philip MSR GOLD 700 SA/2 DE
Proced re:
1. Un crew the 4 crew A, B, C and D on the bottom of the hou ing, holding the plate where the lamp i
underneath.
2. Gently pull the ocket holder u ing the knob in the middle.
3. Carefully in ert the lamp into the ocket. Plea e remember there i only one way to in ert the lamp.
Gently lide the lamp and it lamp holder back into place and fa ten the 4 crew .
4. On the acce plate there are 3 mall crew marked 1, 2 and 3.which are u ed to adju t the lamp
holder in the lamp hou ing. You can adju t the 3 crew to fine-turn the po ition of the lamp to get the
maximum light output a hown below.
1
32
A
B
C
D
Plea e remember the lamp i not a hot-re trike type, you mu t wait for approximately 15 minute after
having turned off the lamp before you can turn it back on again.
CAUTION
Do not operate thi device with open cover.

GB SGM
Idea Spot 700 XM473-V1.0-NR
7
Mo nting the device
CAUTION
Plea con ider the EN 60598-2-17 and the other re pective national norm
during the in tallation. The in tallation mu t only be carried out by a
qualified per on.
The applicable temperature for the lignting i between -25°C to 45°C. Do not u e the lighting under or
above the temperature.
The in tallation of the effect ha to be built and con tructed in a way that it can hold 10 time the weight
for 1 hour without any harming deformation.
The in tallation mu t alway be ecured with a econdary afety attachment, e.g. an appropriate afety
rope.
Never tand directly below the device when mounting, removing or ervicing the fixture.
The operator ha to make ure the afety relating and machine technical in tallation are approved by an
expert before taking the device into operation for the fir t time.
The e in tallation have to be approved by a killed per on once a year.
The lighting hould be put in a relatively broad pace. En ure there i no barrier in the range of 50cm²
around the lighting.
CAUTION
Before
taking into operation for the fir t time, the in tallation ha to be
approved by an expert.
Ca tions:
The effect hould be in talled out ide area where per on may reach it, walk by or be eated.
CAUTION
When in talling the device, make ure there in no highly inflammable
material within a di tance of min. 0,5m
Overhead mounting require exten ive experience, including among t other calculating working load
limit , in tallation material being u ed, and periodic afety in pection of all in tallation material and the
device. If you lack the e qualification , do not attempt the in tallation your elf. Improper in tallation can
re ult in bodily injury.
CAUTION
The electric connection mu t only be carried out by a qualified electrician.
Before mounting make ure that the in tallation area can hold a minimum point load of 10 time the
device’ weight.
Connect the fixture to the main with the power plug

SGM GB
XM473-V1.0-NR Idea Spot 700
8
Installation method via clamp
Plea e refer to the picture below:
Screw one clamp each via a M12 crew and nut onto the Omega holder .
In ert the quick-lock fa tener of the fir t Omega holder into the re pective hole on the bottom of the
device. Tighten the quick-lock fa tener fully clockwi e. In tall the econd Omega holder.
Pull the afety-rope through the hole on the bottom of the ba e and over the tru ing y tem or a afe
fixation pot. In ert the end in the carabine and tighten the afety crew.
DMX-512 control connection
Connect the provided XLR cable to the female 5-pin XLR output of your controller and the other ide to the
male 5-pin XLR input of the moving head. You can chain multiple
Moving head together through erial linking. The cable needed hould be two core, creened cable with XLR
input and output connector . Plea e refer to the diagram below.

GB SGM
Idea Spot 700 XM473-V1.0-NR
9
Starting addre 49 Starting addre 25 Starting addre 1
DMX-512 connection with DMX terminator
For in tallation where the DMX cable ha to run a long di tance or i in an electrically noi y environment,
uch a in a di cotheque, it i recommended to u e a DMX terminator. Thi help in preventing corruption
of the digital control ignal by electrical noi e. The DMX terminator i imply an XLR plug with a 120 Ω
re i tor connected between pin 2 and 3,which i then plugged into the output XLR ocket of the la t fixture
in the chain. Plea e ee illu tration below.
4
5
Projector DMX starting address selection
All fixture hould be given a DMX tarting addre when u ing a DMX ignal, o that the correct fixture
re pond to the correct control ignal . Thi digital tarting addre i the channel number from which the
fixture tart to “li ten” to the digital control information ent out from the DMX controller. The allocation
of thi tarting addre i achieved by etting the correct number on the di play located on the ba e of the
device.
You can et the ame tarting addre for all fixture or a group of fixture , or make different addre for
each fixture individually.
If you et the ame addre , all the unit will tart to “li ten” to the ame control ignal from the ame
channel number. In other word , changing the etting of one channel will affect all the fixture
imultaneou ly.
If you et a different addre , each unit will tart to “li ten” to the channel number you have et, ba ed on
the quantity of control channel of the unit. That mean changing the etting of one channel will affect
only the elected fixture.
In the ca e of the moving head, which i 24 channel fixture, you hould et the tarting addre of the fir t
unit to 1, the econd unit to 25(24 + 1), the third unit to 49 (25+ 24), and o on.

SGM GB
XM473-V1.0-NR Idea Spot 700
10
Operting instr ctions of the internal DMX wireless system
1. Equipment :
DMX 512 controller, wirele tran mitter, and the fixture with wirele receiver.
2. Me age from the LED indicator:
1. Rapid fla hing red/Green: logging in to a tran mitter
2. Slow fla hing Red/Green: Logged on a tran mitter and the DMX line i idle (No DMX i connected
to tran mitter).
3. Solid Green: Logged on to a tran mitter and receiving DMX data.
4. Solid Red: Not logged on to a tran mitter (free)
3. DMX in the menu of the fixture:
On a fixture in talled with wirele y tem, in order to witch between wirele control y tem and
traditional DMX control (with cable), a new menu WDMX i added to the di play board.
ON: (Activate WDMX)
1. When the fixture i on power,and the WDMX i activated to ON tatu , but did not connect to the
controller and did not log in to the tran mitter, the fixture will earch for the DMX ignal ource. If
the fixture i connected to the DMX controller it can be controlled by DMX controller; if it i log in
to the wirele tran mitter, it can be controlled by the Tran mitter
2. When the fixture i power off, and the WDMX i in ON tatu , if the fixture i connected to DMX
controller. After the fixture i power on, it can be controlled only by the DMX controller which
connected. The fixture can log in the wirele tran mitter, and receive only radio ignal from
tran mitter, but not DMX from the tran mitter.
OFF: (De-activate WDMX)
In thi tatu , wirele y tem i not activated, o the fixture can not log in the tran mitter.
REST: (re et WDMX memory);
Can remove the fixture from the connection with the tran mitter, the fixture become free and ready
to log in any tran mitter.
OUT:(Act & Data Out)
4. Setup the wirele y tem:
1. Connect the tran mitter with the DMX controller
2. To make the fixture in talled with wirele receiver log in to the tran mitter
a) Initially, the indicator on the receiver fixture hould be in Solid red
b) Pre and hold the configuration button on tran mitter for le than 3 econd the red/green
LED on the tran mitter and the receiver fixture will fla h rapidly for about 5~ 10 econd while
the y tem goe through it etup procedure.
c) Once the receiver fixture i logged in to the tran mitter (T1), the fixture with wirele receiver
will keep the memory, even if re tart the power, thi unit will log in the tran mitter (T1)
automatically.
3. U e the DMX 512 to control the fixture
5. Remove the receiver from tran mitter (T1) and to log in to another tran mitter (T2)
Case 1: Remove a receiver:
a) On the control board of the fixture, enter menu to activated the function of REST;
b) The LED for wirele on the fixture hould turn to Solid red; the receiver can log out from the
tran mitter (T1);
c) pre the configuration button on tran mitter(T2) for le than 3 econd, then the fixture will tart
to connect with the tran mitter(T2)
Case 2: Remove all receiver from a tran mitter (T1) to log in to T2;
a) Pre and hold the configuration button on the T1 a lea t 5 econd , can clear the connection with
all the fixture .
b) All the red/green LED on the receiver fixture will turn to Solid red to indicate that the receiver
are una igned and removed from the tran mitter ( T1);
c) Pre and hold the configuration button on the T2 le then le than 3 econd , the fixture will
connect with the T2
PS:
1. Plea e log the receiver out from the tran mitter after every job, o that the receiver are in free un
a igned tate and ready to be a igned to a tran mitter.
2. Do not connect the fixture which i under the communication of wirele y tem to the DMX controller,
otherwi e it will cau e interference from the DMX controller.

GB SGM
Idea Spot 700 XM473-V1.0-NR
11
Control Board
The Control Board offer everal feature : you can imply et the tarting addre , witch on and off the
lamp, run the pre-programmed program or make a re et.
The main menu i acce ed by pre ing the Mode/esc-button until the di play tart fla hing. Brow e
through the menu by pre ing the Up-button or Down-button. Pre the Enter-button in order to elect
the de ired menu. You can change the election by pre ing the Up-button or Down-button. Confirm every
election by pre ing the Enter-button. You can leave every mode by pre ing the Mode/esc-button. The
function provided are de cribed in the following ection .
To access the display men via the internal battery, press the UP or DOWN b tton. The display
will a tomatically switch off abo t 10 seconds after the last act ation of the b ttons.
Default etting haded
Function
Mode
Set Dmx Addre
Value Di play
Set To Slave
Auto Program
Mu ic Control
A001~AXXX
PAN……
Slave1,Slave2,Slave3
Ma ter / Alone
Ma ter / Alone
DMX addre etting
DMX value di play
Slave etting
Auto program
Mu ic control
Time Information Current Time
Total Life Hour
La t Run Hour
Lamp Hour
Lamp Off Time
Timer Pa word
Clear La t Run
L-Timer Pa word
Clear Lamp Time
XXXX(Hour )
XXXX(Hour )
XXXX(Hour )
XXXX(Hour )
XXXX(Minute)
Pa word=XXX
ON/OFF
Pa word=XXX
ON/OFF
Power on running time
Fixture running time
Fixture La t time clear
Lamp running time
Lamp off time
Timer Pa word 038
Clear Fixture La t time
Lamp Pa word Code=”038”
Clear lamp time
Temperature Info Head Temperature XXX°C/°F Temperature in the head
Information
Software Ver ion Ver1.0…… Software ver ion of each IC
Lamp Control
Lamp On or Off
Automatic La-On
Lamp On Via DMX
Lamp Off Via DMX
Lamp On at Temp.
Lamp Off at Temp.
ON/OFF
ON/OFF
ON/OFF
ON/OFF
20~79°C,45°C /68~174°F 113°F
80~139°C, 130°C /176~282°F, 266°F
Lamp on/off
Lamp on/off when Power on
Lamp on via DMX
Lamp off via DMX
Lamp re tart at temp.
Lamp off at temp.
Statu Setting Addre via DMX
No DMX Statu
Pan Rever e
Tilt Rever e
Pan Degree
Feedback
Movement Speed
Mic Sen itivity
Hibernation
ON/OFF
Clo e/Hold/Auto/Mu ic
ON/OFF
ON/OFF
630/540
ON/OFF
Speed 1~ 4
0~99%
0FF/1~99M,15M
Add. via DMX
Auto run if no DMX
Pan Rever e movement
Tilt Rever e movement
Pan Degree Select
Movement Feedback witch
Movement Mode Select
Sen itivity of Mic.
Stand by mode
Service Setting Service Pa word
Fan Voltage
Gobo Speed
Pa word=XXX
High/Low
Quick/Slow
Service Code“=050”
Fan Voltage Select
Gobo Change Speed
Fan Control Auto Fan Speed
High Fan Speed
Low Fan Speed
Fan Speed Mode Select
Per onality
Di play Setting
Shutoff Time 02~59m 05m Di play hutoff time

SGM GB
XM473-V1.0-NR Idea Spot 700
12
Key Lock ON/OFF Key Lock
Temperature C/F
Cel iu
Fahrenheit
Temperature witch
between °C/°F
Initial Effect PAN…… PAN =XXX Initial effect po ition
Wirele DMX De-Act WDMX
Activate WDMX
Act & Data Out
Re t WDMX Mem
De-activate WDMX
Activate WDMX
Act & Data Out
Re et Wirele DMX Mem
Re et Default ON/OFF Re tore factory et.
Re et Function
Re et All
Re et Pan&Tilt
Re et Color
Re et Gobo
Re et Shutter
Re et Other
Re et all motor
Re et Pan/Tilt
Re et color wheel
Re et gobo
Re et hutter and/or
dimmer
Re et other motor
Te t Channel PAN …… Te t function
Manual Control PAN
:
PAN =XXX
:
Fine adju tment of the lamp
Effect Adju t
Calibrate Value --Pa word--
Color wheel
:
Pa word=XXX
Color wheel=XXX
:
Calbrate and adju t the
effect to tandard/right
po ition Pa word “050”
U er Mode Standard Mode
Ba ic Mode
Extended Mode
U er Mode A
U er Mode B
U er Mode C
U er’ mode to change
channel number
U er Mode Set
Edit U er Mode Max Channel
PAN
:
Max Channel = XX
PAN = CH01
:
Pre et U er mode
Select Program Auto Pro Part 1
Auto Pro Part 2
Auto Pro Part 3
Program 1 ~ 10 Program 1
Program 1 ~ 10 Program 2
Program 1 ~ 10 Program 3
Select program to be run
Edit Program Program 1
:
Program 10
Program Te t
Step 01=SCxxx
Step 64=SCxxx
(“STEP XX”)
Te ting program
Program in loop
Save and exit
Edit Scene Edit Scene 001
~ Edit Scene
250
Pan,Tilt,……
--Secne Time--
Input By Out ide
Pan=xxx……
TIME=xx.x
Save and automatically
return
manual cene edit
Edit Program
Rec. Controller XX~XX Automat. cene rec

GB SGM
Idea Spot 700 XM473-V1.0-NR
13
FUNCTION MODE
DMX Address Setting
With thi function, you can adju t the de ired DMX-addre via the Control Board.
Select “Set DMX address” via the encoder.
Pre the encoder, adju t the DMX addre by turning the encoder.
Pre the encoder to confirm.
Pre the Mode/E c-button in order return to the main menu.
Display the DMX 512 val e of each channel
With thi function you can di play the DMX 512 value of each channel. The di play automatically how the
channel with a value changing.
Slave Setting
With thi function, you can define the device a lave.
A to Program
With thi function, you can run the internal program. You can elect the de ired program under “Select
program”. You can et the number of tep under “Edit program”. You can edit the individual cene
under “Edit scenes”. With thi function, you can run the individual cene either automatically, i.e. with
the adju ted Step-Time.
M sic control
With thi function, you can run the internal program ound-controlled.
INFORMATION
Time information
C rrent Time
With thi function, you can di play the temporary running time of the device from the la t power on. The
di play how “XXXX”, “XXXX” tand for the number of hour . The counter i re etted after turning the
device off.
Total Life Ho rs
With thi function, you can di play the running time of the device. The di play how “XXXX”, “XXXX”
tand for the number of hour .
Last R n Ho rs
With thi function, you can di play la t the running time of the lamp. The di play how “XXXX”, “XXXX”
tand for the number of hour .
Lamp Ho rs
With thi function, you can di play the running time of the lamp. The di play how “XXXX”, “XXXX” tand
for the number of hour .
Lamp Off Time
With thi function, you can di play the temporary running time of the lamp from the la t lamp on. The
di play
Show “XXXX”, “XXXX” tand for the number of hour . The counter i re etted after turning the lamp off.
Time Password
With thi function, you can di play the timer pa word. The time pa word i 038.
Clear Last R n
With thi function, you can clear la t run time of the fixture. The di play how “ON” or “OFF”, Pre “Enter”
to confirm.
L-Time Password
With thi function, you can di play the timer pa word. The time pa word i 038.

SGM GB
XM473-V1.0-NR Idea Spot 700
14
Clear LampTime
With thi function you can clear the running time of the lamp. Plea e clear the lamp time every time you
replace the lamp.
Select “Clear lamp time” by turning the encoder.
Pre the encoder, the di play how “ON” or “OFF”.
Pre the encoder to confirm.
Pre the Mode/E c-button in order to return to the main menu.
Temp. Info.
Head Temp
With thi function you can di play the temperature on the di play board of the ba e (near CMY-filter) in
Cel iu .
Software version
With thi function, you can di play the oftware ver ion of the device.
Select “Software version” by turning the encoder.
Pre the encoder, the di play how “V-X.X”, “X.X” tand for the ver ion number, e.g. “V-1.0”
Turn the encoder in order to read the ver ion of every individual IC.
Pre the Mode/E c-button in order to return to the main menu.
LAMP CONTROL
When the real temperature around the lamp i higher than the pre et value, the lamp will be hut down in
5 minute automatically.
When the LCD di play how “Off”, it mean the lamp mu t be turned on again manually;
When the LCD di play how “Hot”, it mean the actual temperature around the lamp i till higher than the
pre et value, o even the lamp can not be triked even the menu Lamp i turned to ON, a the lamp witch
i compelled to turned off.
When the temperature unit after the temperature value come to lowerca e letter “c” or “f”, it mean menu
Lamp i turned to ON, but the lamp i not full dimming up.
When the temperature unit after the temperature value come to capital letter “C” or “F”, it menu Lamp i
turned to ON, and the lamp i full inten ity.
Lamp on/off
With thi function you can witch the lamp on or off via the Control Board.
Select "Lamp on/off" by turning the encoder.
Pre the encoder, the di play how “ON” or “OFF”.
Turn the encoder to elect “ON” if you wi h to trike the lamp or “OFF” in order to witch it off.
Pre the encoder to confirm.
Pre the Mode/E c-button in order to return to the main menu.
Remark: The menu Lamp On/Off i the oftware command only, the lamp can be triked ucce fully only
when the menu Lamp i et to ON and the actual temperature i lower than the limited value.
Lamp on/off when power on
With thi function you can elect if the lamp will be witched on when witching the power on. Select “ON”
by turning the encoder if you wi h to enable thi function or “OFF” if you don’t.
Lamp on via external controller
With thi function you can elect if you can witch the lamp on via an external controller (DMX-channel of
internal program , value 64-79). Select “ON” by turning the encoder if you wi h to enable thi function or
“OFF” if you don’t.
Lamp off via external controller
With thi function you can elect if you can witch the lamp off via an external controller (DMX-channel of
internal program , value 224-239). Select “ON” by turning the encoder if you wi h to enable thi function
or “OFF” if you don’t.
Lamp on at temp.
With thi function you can et the in ide temperature from which the projector will re trike the lamp after
automatic lamp hut off.
Lamp off at temp.
With thi function you can et the in ide temperature at which the projector will automatically witch the
lamp off. Turn the encoder to elect the maximum in ide temperature between 60° C and 159° C. In ide
temperature below 90° C are not critical. 90° C and more hould lead to the lamp being witched off.

GB SGM
Idea Spot 700 XM473-V1.0-NR
15
Plea e note that the out ide temperature hould not exceed 45° C.
When the temperat re aro nd the lamp is higher than the preset val e contin o sly p to 5
min tes, the lamp will be sh t off a tomatically.
If the lamp be sh t off a tomatically d e to over heat, it can not be striked again a tomatically,
it m st be t rned on again by man ally.
PERSONALITY
Stat s Settings
Address Via DMX
With thi function, you can adju t the de ired DMX-addre via an external controller.
Select “Address via DMX” by turning the encoder.
Pre the encoder, the di play how “ON” or “OFF”.
Turn the encoder to elect “ON” if you wi h to enable thi function or “OFF” if you don’t.
Pre the encoder to confirm.
Pre the Mode/E c-button in order to return to the main menu.
On the controller, et the DMX-value of channel 1 to "7".
Set the DMX-value of channel 2 to "7"or "8". When et to "7" you can adju t the tarting addre
between 1 and 255. When et to "8" you can adju t the tarting addre between 256 and 511.
Set the DMX-value of channel 3 to the de ired tarting addre . If you want to et the tarting addre
to 57, et channel 1 to "7", channel 2 to "7" and channel 3 to "57". If you want to et the tarting
addre to 420, et channel 1 to "7", channel 2 to "8" and channel 3 to "164" (256+164=420).
Wait for approx. 20 econd and the unit will carry out a re et. After that, the new tarting addre i
et.
Hold If No DMX
With thi function, when the drive i not DMX ignal, it run automati m, clo e, hold and mu ic, the default
i hold.
Pan Reverse
With thi function you can rever e the Pan-movement.
Tilt Reverse
With thi function you can rever e the Tilt-movement.
Pan Degree
With thi function, you can elect pan degree for 630 or 540.
Feedback
With thi function, you can feedback witch of pan movement or tilt movement.
Movement Speed
With thi function, you can elect can mode from 1 to 4.
Mic Sensitivity
With thi function, the default i 70%, you can elect the de ired microphone en itivity from 0 % to 99 %.
Hibernation
Stand by mode - 0FF/1~99M,15M
Service Setting
Service Password
With thi function, you can et the ervice pa word.
Fan Voltage
With thi function, you can elect fan voltage for high or low, the default i High.
Attention: The model is not recommended when ambient temperat re is higher than 15 Celsi s
degree.
Gobo speed
With thi function, you can elect GOBO peed for quick or low, the default i Quick.
Fans Control
With thi function, you can et the peed of the running fan . The election have Auto、high and low.

SGM GB
XM473-V1.0-NR Idea Spot 700
16
Display Setting
Sh t off time
With thi function you can hut off the LCD di play after 2 to 59 minute . Turn the encoder in order to elect
the de ired hut off time.
Key Lock
Key Lock -- ON/OFF
Temperat re C/F
With thi function, Di play the temperature for Cel iu or Fahrenheit.
Initial Effect
With thi function, Di play initial effect po ition.
Wireless DMX
From factory, thi projector i prepared for wirele data tran mi ion (W-DMX). If you wi h to de-activate
W-DMX control, you can elect the function “De-activate WDMX” by turning the encoder. With the function
“re t”, you can log out the projector from the wirele ender.
Reset Defa lt
With thi function, you can elect re tore factory et for ON or OFF, the default i OFF.
RESET-FUNCTIONS
With thi function you can re et the device via the Control Board. You can elect the different re et
function by turning the encoder.
EFFECT ADJUST
Test f nction of each channel
With thi function you can te t each channel on it (correct) function.
Lamp adj stment
With thi function, you can adju t the lamp more ea ily. All effect will be canceled, the hutter open and
the dimmer inten ity will be et to 100 %. With the individual function , you can focu the light on a flat
urface (wall) and erform the fine lamp adju tment.
Calibrate val es
With thi function, you can calibrate and adju t the effect wheel to their correct po ition . The pa word
of calibrate value i 050.
USERS MODE SET
In thi menu, u er can elect different channel li t by different equence:
For example, after the u er enter thi manual, if elect Auto Program = CH 22, mean in thi U er’ mode,
the “Dimmer” i in Channel 16.
User mode
With thi function, you can create u er defined channel order .
Preset User mode
With thi function, you can adju t the re t u er defined channel order.
EDIT PROGRAM
Select program
With thi function, you can elect the program for the Program Run.
Edit program
With thi function, you can edit the internal program .
Edit scenes
With thi function, you can edit the cene of the internal program .
A to scenes rec.
The moving head feature an integrated DMX-recorder by which you can tran mit the programmed cene
from your DMX-controller to the moving head. Adju t the de ired cene number via the encoder (from –

GB SGM
Idea Spot 700 XM473-V1.0-NR
17
to). When you call up the cene at your controller, they will automatically be tran mitted to the moving
head.
Exc rsion:
A Ma ter unit can end up to 3 different data group to the Slave unit , i.e. a Ma ter unit can tart 3
different Slave unit , which run 3 different program . The Ma ter unit end the 3 program part in a
continuou loop.
The Slave unit receive data from the Ma ter unit according to the group which the Slave unit wa a igned
to. If e.g. a Slave unit i et to “Slave 1” in the menu “Set to Slave”, the Ma ter unit end “Auto Program
Part 1” to the Slave unit. If et to “Slave 2”, the Slave unit receive “Auto Program Part 2”.
To tart a Auto Program plea e proceed a follow :
1. Slave-Setting
Select “Function Mode” by turning the encoder.
Pre the Enter button to confirm.
Select “Set to lave” by turning the encoder.
Pre the Enter button to confirm.
Turn the encoder to elect “Slave 1”, “Slave 2” or “Slave 3”.
Pre the Enter button to confirm.
Pre the Mode/E c button in order to return to the main menu.
2. A tomatic Program R n
Select “Function Mode” by turning the encoder.
Pre the Enter button to confirm.
Select “Auto Program” by turning the encoder.
Pre the Enter button to confirm.
Turn the encoder to elect “Ma ter” or “Alone”. The election "Alone" mean Stand Alone-mode and
"Ma ter" that the device i defined a ma ter.
Pre the Enter button to confirm.
Pre the Mode/E c button in order to return to the main menu.
3. Program selection for A to Pro Part
Select “Edit program” by turning the encoder.
Pre the Enter button to confirm.
Select “Select program ” by turning the encoder.
Pre the Enter button to confirm.
Turn the encoder to elect “Auto Pro Part 1”, “Auto Pro Part 2” or “Auto Pro Part 3”, and thu elect
which Slave program i to be ent. Selection “Part 1” mean , that the Slave unit run the ame program
a the ma ter unit .
Pre the Enter button to confirm.
Pre the Mode/E c button in order to return to the main menu.
4. Program selection for Edit Program
Select “Edit program” by turning the encoder.
Pre the Enter button to confirm.
Select “Edit program” by turning the encoder.
Pre the Enter button to confirm.
Turn the encoder to elect the de ired program. With thi function you can edit pecific cene into a
pecific program.
Pre the Enter button to confirm.
Pre the Mode/E c button in order to return to the main menu.

SGM GB
XM473-V1.0-NR Idea Spot 700
18
5. A tomatic Scene Recording
Select “Edit program” by turning the encoder.
Pre the Enter button to confirm.
Select “Edit cene ” by turning the encoder.
Turn the encoder to elect the de ired cene number . You can program a maximum number of 250
Turn the encoder to elect the de ired cene number . You can program a maximum number of 250
cene .
Pre the Enter button to confirm.
Pre the Mode/E c button in order to return to the main menu.
Example:
Program 2 include cene : 10, 11, 12, 13
Program 4 include cene : 8, 9, 10
Program 6 include cene : 12, 13, 14, 15, 16
Auto Pro Part 1 i Program 2;
Auto Pro Part 2 i Program 3;
Auto Pro Part 3 i Program 6
The 3 Slave group run the Auto Program in certain time egment , a hown in the following picture:
Table of contents
Other SGM Light Fixture manuals
Popular Light Fixture manuals by other brands

Larson Electronics
Larson Electronics Golight instruction manual
Ortech
Ortech OE-G026 instruction manual

Triton Blue
Triton Blue Q-BEAM200 user manual
Philips
Philips 1050DRN specification
Seiwa
Seiwa LZLA Series instruction manual
Cooper Lighting
Cooper Lighting Quiet Ceiling Series QCT-1975BK Specification sheet
