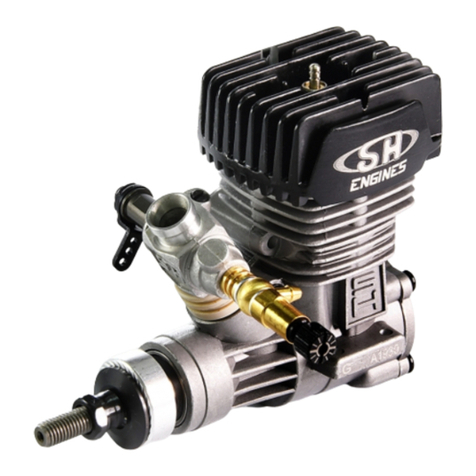
SH Engines SH .21 XB User manual

Displacement..............................................................................3.497cc
Bore ............................................................................................16.27mm
Stroke .........................................................................................16.75mm
Maximum RPM ...........................................................................38,000rpm
Power..........................................................................................2.8hp@38,000rpm
Weight.........................................................................................464gr
lCeramic Piston (XB) with 8-Port Chrome-Plated Brass Sleeve (Liner)
lAluminium Piston (XB-1) with 8-Port Chrome-Plated Brass Sleeve (Liner)
lDual Ball Bearing-Supported Crankshaft and Dual Bushing-Supported Connecting Rod
lThree-Needle Slide Carburettor and Heat-Dissipating Cylinder Head
l7.5mm and 8.5mm Carburettor Intake Restrictors
P/N PT2008-XB
P/N PT2008-XB-1
Cylinder Head
Carburettor
Assembly
Crankshaft
Fuel
Nipple
Throttle Arm High Speed
Needle Valve
Low Speed
Needle Valve
Due to manufacturing changes and
improvements, your engine may
differ slightly from that shown.
Crankcase
Idle Stop Screw
Page 1
SH .21 XB AND XB-1 PRO COMPETITION OFF-ROAD ENGINE OPERATING INSTRUCTIONS
INTRODUCTION
BECOMING FAMILIAR WITH YOUR ENGINE
CAUTION - PLEASE READ BEFORE USE!
Thank you for choosing the SH .21 XB/XB-1 PRO Competition Off-Road engine.
All SH engines are designed for high power output and easy handling.
The SH .21 XB/XB-1 PRO Competition Off-Road engines are designed specically
for 1/8th scale off-road racing and feature competition-grade aluminium-alloy
parts, a ceramic piston (XB) / Aluminium piston (XB-1) with 8-port chrome-plated
brass sleeve (liner), dual ball bearing-supported crankshaft, three-needle
slide carburettor with 7.5mm and 8.5mm intake restrictors, heat-dissipating
cylinder head and superb attention to detail and quality. All SH engines are
manufactured using CNC manufacturing equipment to ensure every engine is
produced to the exacting quality that you would expect from an engine of this
caliber. SH engines offer the best in reliability, power and cost.
SH engines will consistently give you dependable performance and reliability
and will be a source of satisfaction and pleasure if you follow these instructions
as to the engine’s proper and safe use. You alone are responsible for the safe
operation of your engine, so act sensibly and with care at all times. This engine
is not a toy. It is a precision-built machine whose power is capable of causing
serious injury to yourself and others if abused, misused or if you fail to observe
proper safety precautions while using it.
l Never use any fuel in your engine other than glow fuels specically designed
for use in model car/buggy engines. Use of any other types of fuel can cause
severe damage to the engine and/or personal injury.
NEVER USE GASOLINE/PETROL OR DIESEL FUEL!
l Never operate your model on any public streets. This could cause trafc
accidents, personal injury or property damage.
lBefore starting the engine, make sure that the throttle trim is set to the idle
position. Starting the engine at any setting above idle can cause the model
to lurch out of your hands.
lWhen the engine is running, there are certain parts that rotate at high speeds.
Be careful not to touch the drive shafts, gears, clutch assembly or other
moving parts. Serious injury could result.
lIt is normal for the engine to get very hot during operation, especially the
cylinder head and exhaust system. Never touch the engine or exhaust system
while they are hot.
lModel car engines produce vibration when they are running. It is important
to periodically check the engine mounting screws, exhaust mounting
screws and other assemblies to ensure they are tight. Running the engine
with the engine mounting screws loose can lead to severe engine and/or
chassis damage.
lGlow fuel engines emit exhaust vapors that are poisonous and can be
dangerous to your health. It is important that you operate your engine in a
very well-ventilated area, preferably outdoors.
l Glow fuels, like those used in your model engine, are poisonous. Follow all
the precautions that are printed on the fuel manufacturer's container.
l Keep glow fuels out of the reach of children.
l Glow fuels are extremely ammable. Keep glow fuels away from high heat,
sparks, and ame.
Please read through these operating instructions in their entirety to familiarise
yourself with the features and operation of your new SH .21 XB/XB-1 PRO
Competition Off-Road engine.
Should you encounter any problems with your engine, we have included a
separate Troubleshooting Guide with these Operating Instructions to help
you solve them. Please use the photos below to familiarise yourself with the
components of your new SH engine.
Mid Range
Needle Valve
Exhaust Port

The throttle arm angle can be adjusted to better suit your particular
vehicle's throttle linkage setup.
Using a 1.5mm hex wrench,
loosen the grub screw at the base
of the throttle arm, then adjust the
angle of the throttle arm either
forward or backward and firmly
tighten the grub screw.
The carburettor is held in place using the pinch sleeve and socket-cap screw
installed in the crankcase. Slide
the base of the carburettor into the
crankcase, being careful to keep
the carburettor perpendicular to the
front of the engine. With your thumb,
push down on the carburettor rmly
so the base of the carburettor ts
completely into the crankcase and the carburettor O-ring seals the gap between
the two parts. While holding the carburettor in place, GENTLY tighten the socket-cap
screw with a 2mm hex wrench to draw the pinch sleeve into place.
The idle stop screw adjusts the closure of the carburettor barrel. The idle stop
screw should be adjusted so that
the carburettor barrel stays open
about 1/16" (1mm). Turning the idle
stop screw clockwise will cause
the carburettor barrel to stay open
more. Turning the idle stop screw
counterclockwise will allow the
carburettor barrel to close more. If the carburettor barrel stays open too far,
the engine will idle very high and your vehicle's clutch will never disengage.
If the idle stop screw is closed too far, the engine may die during idle or when
you engage your vehicle's brakes. Ideally, the engine should idle smoothly,
yet slow enough so that the clutch stays disengaged.
WARNING The socket-cap screw only needs to be tightened enough to
keep the carburettor from turning in the crankcase. Overtightening the
socket-cap screw can cause severe damage to the base of the carburettor.
The engine does not include an exhaust system. The exhaust system is typically
designed for the particular car, truck
or buggy that you have and is
generally included with your kit.
The engine is designed to be used
with a tuned pipe. To extract optimal
power and performance from your
engine, we strongly suggest the
use of a 1/8th scale tuned pipe designed for the powerband that you desire.
The engine uses a standard 1/8th scale round slip-on header held in place
with a spring around the cylinder head.
Fuel Recommendation
For the break-in period you should use a fuel specically designed for R/C
car engines that contains no more than 20% nitromethane and 10%~14%
oil content. Once the engine has been adequately broken in (about 45~60
minutes of run-time) you can switch to an R/C car fuel containing up to, but
no more than, 30% nitromethane and 10%~14% oil content. We recommend
using XTM Racing or Trinity Monster Horsepower fuel.
WARNING We do not recommend using fuels designed for R/C airplane
engine use. These fuels do not contain the proper amount of lubricants;
therefore, they will cause the engine to overheat or run erratically and severe
damage to the engine can result.
Glow Plug Recommendation
The glow plug can make a big difference in how your engine performs. For both
the break-in period and normal use, we recommend using a "cold" or "medium"
heat-range glow plug intended specically for performance engines like the SH
Engines # 5 or the SH Engines # 4. After the break-in period you may want to
use a different heat-range glow plug. If the engine has a hard time idling, you
may want to use a hotter glow plug, like the SH Engines # 3.
WARNING Do not use glow plugs intended for four stroke airplane
engines or glow plugs with an "idle bar". Using the wrong type of glow plug
will cause the engine to run erratically and make it difcult to tune properly.
The wrong type of glow plug could also damage the engine.
If at any time the engine becomes difcult to turn over - STOP! The engine
has become ooded (hydro-locked) and the excess fuel must be removed or
damage to the engine could occur. To remove the excess fuel from the engine
follow the steps listed below:
lCompletely close the high speed needle valve (turn clockwise) until it
bottoms out. Do this gently. Don't force it!
lRemove the glow plug from the cylinder head.
lWith a rag over the top of the engine, turn over the engine using your starter
box to expel the excess fuel from the engine.
lMake sure that the glow plug has not been fouled, then reinstall it.
lReset the high speed needle valve (turn counterclockwise) 3 full turns out
from bottom (fully closed).
IMPORTANT After running the engine for the day, turn the crankshaft so
that the piston is at bottom dead center. If you leave the piston at top dead
center, the piston may lock in place when the engine cools down.
1mm
Grub Screw
Socket-Cap
Screw
Page 2
CARBURETTOR INSTALLATION
IDLE STOP SCREW
EXHAUST SYSTEM
THROTTLE ARM POSITION
FUEL AND GLOW PLUG RECOMMENDATIONS
WARNING ABOUT HYDRO-LOCKING
CARBURETTOR INTAKE RESTRICTORS
The engine features intake restrictors that you can use to ne-tune the power
output of the engine. The engine
co m es st ock wi th an 8. 5mm
restrictor already installed in the
carburettor. A 7.5mm restrictor is
included separately. To change the
restrictor, remove the restrictor by
rmly twisting and pulling it out of
the carburettor. Apply a light coat of after-run oil to the o-rings on the new
restrictor, then rmly push it into the carburetor. Do not run the engine without
a restrictor in place.

High Speed Needle Valve
The high speed needle valve is preset from the factory for the initial starting
procedure. Do not make adjustments to it at
this time. The high speed needle valve is used
to meter the air/fuel mixture at full throttle. Turn
the needle valve clockwise to lean the mixture or
turn the needle valve counterclockwise to richen
the mixture.
Check to ensure that the high speed needle valve is set at 3 full turns
out from the closed position for the break-in process.
Low Speed Needle Valve
The low speed needle valve is preset from the factory for the initial starting
procedure. Do not make adjustments to it at
this time. The low speed needle valve meters
the air/fuel mixture at idle and during transition
from idle to full throttle. Turn the needle valve
clockwise to lean the mixture or turn the needle
valve counterclockwise to richen the mixture. The
low speed needle valve is preset from the factory, but minor adjustments may
need to be made to suit your application: fuel used, glow plug and environment
all contribute to the setting.
Do not adjust the low speed needle valve until AFTER the engine has
been broken in.
There may come a time when you get the needle valve settings out of spec,
resulting in poor engine performance or not even being able to start the engine
at all. If this occurs, reset the high speed, mid range and low speed needle
valves to their factory settings as described below:
Resetting the High Speed Needle Valve
l Gently turn the high speed needle valve clockwise until it bottoms out (fully
closed). Do not force it or you may damage the carburettor.
l Turn the high speed needle valve counterclockwise (open) 3 full turns.
Resetting the Mid Range Needle Valve
l The mid range needle valve should be ush with the carburettor housing.
Resetting the Low Speed Needle Valve
l Open the carburettor barrel completely.
l While holding the carburettor barrel open with your ngers, use a at blade
screwdriver to gently turn the low speed needle valve clockwise until it
bottoms out (fully closed). Do not force it or you may damage the
carburettor. From this point, turn the low speed needle valve counterclockwise
3 full turns.
PRO TIP When the engine is new, it can sometimes be difcult to turn
over and may cause your starter box to slip. A trick to help this is to loosen
the glow plug slightly, start the engine, then remove the glow starter and
retighten the glow plug. This effectively lessens the engine's compression,
making it easier to turn over the engine.
The SH .21 XB PRO Competition Off-Road engine features a ceramic piston
(XB-1 features an aluminium piston) and a chrome-plated brass sleeve (liner).The
cylinder sleeve (liner) is tapered at the top, causing resistance when the piston
moves through the top of the stroke. This is normal. When the engine heats up to
operating temperature, this resistance will decrease and the proper clearance will
be achieved. The break-in procedure will guide you through the steps necessary
to properly break in your new engine. Please follow the steps closely.
Breakingin anenginewitha ceramicpiston is the sameasbreakingin astandard
ABC engine, except that the break-in period may take a little longer.
DO NOT OMIT THE ENGINE BREAK-IN PROCEDURE!
The break-in process allows the engine parts to perfectly t to each other
and properly protect each part from premature wear. The engine should
be broken in using a good quality R/C car fuel that contains no more
than 20% nitromethane and 10%~14% oil content.
qFollow the Starting Procedure to start the engine.
qOnce the engine starts, keep the glow starter attached to the glow plug
and let the engine run for about 10 seconds without giving it throttle. This
will allow the engine to warm up. At this point the engine should be running
very "rich" and the engine will also sound like it's running rough.
To make sure that you're not leaning out the engine too
much and overheating it during break-in and under normal
use, we suggest using a temp gun to monitor the engine's
temperature.
During break-in, engine temperature should not exceed
280ºF (138ºC). The optimum engine operating temperature
is 230º~260ºF (110º~127ºC). The minimum engine operating
temperature is 180ºF (82ºC).
Turn Clockwise
to Lean
Turn
Counterclockwise
to Richen
Turn Clockwise
to Lean
Turn
Counterclockwise
to Richen
Page 3
HIGH SPEED, MID RANGE AND LOW SPEED NEEDLE VALVES
RESETTING THE NEEDLE VALVES TO THE FACTORY SETTINGS
BREAK-IN PROCEDURE
Mid Range Needle Valve
The mid range needle valve is preset from the factory for the initial starting procedure
and normal use, and is used ne-tune the air/fuel
mid range mixture. Turn the needle valve
clockwise to lean the mixture or turn the needle
valve counterclockwise to richen the mixture. Do
not make adjustments to the mid range need
valve until after tuning both the high and low
speed needle valves, and until AFTER the engine has been broken in.
qIf your vehicle's fuel tank has a primer pump, press this pump several
times to draw fuel to the carburettor. When the fuel reaches the carburettor,
stop priming. Over-priming the engine can cause the engine to "hydro-lock".
Never try to start the engine if it is hydro-locked. This could cause serious
damage to the engine.
qIf your fuel tank does not have a primer pump, fuel will be drawn into the
carburettor when you turn the engine's crankshaft using your starter box.
qThe engine is started by connecting the power to the glow plug then turning
the crankshaft, using your starter box, until the engine starts. Once the engine
has started, your vehicle can be removed from the starter box.
IMPORTANT We recommend using a 1/8th scale starting box to start
your engine. We strongly suggest reading the operating instructions that
are included with your starter box before attempting to start the engine. This
will ensure that you are familiar with how to use your starter box properly,
so you don't damage your starter box or your engine.
STARTING PROCEDURE
Turn Clockwise
to Lean
Turn
Counterclockwise
to Richen

A Replacement Parts List, Troubleshooting Guide, and Warranty Information can
be found on the separate sheet packaged with your new engine. For service and
support in North America only, please contact us using the information below:
IMPORTANT It is of the utmost importance that the engine never be
leaned out too much. When running the engine, you should always be
able to see a faint trail of smoke coming from the tuned pipe. If you can’t,
stop the engine immediately and richen the high speed needle valve (turn
counterclockwise). You should also make sure there is plenty of air owing
over the cylinder head to keep the engine from overheating.
After your engine has been broken in, you can set the high speed, low speed,
and mid-range needle valves for optimum engine performance.
WARNING Be careful to never lean out the engine too much. Remember
that the lubricants for your engine are suspended in the fuel. If you lean out
the fuel mixture too much you will also be lowering the amount of lubricant
entering your engine. Less lubricant means more chance of your engine
overheating and possible engine failure.
Setting the Low Speed Needle Valve
qStart the engine and adjust the high speed needle valve as per the procedures
above. Close the throttle until the engine slows down enough so that your
vehicle's clutch is disengaged and the wheels don’t turn when your vehicle is
lifted from the ground. Allow the engine to idle for about 10~15 seconds.
IMPORTANT We suggest using a temp gun to frequently check the
operating temperature of your engine during use. The optimal operating
temperature is between 230º and 260ºF (110º~127ºC). Do not let the engine
exceed 280ºF (138ºC). If the engine exceeds 280ºF (138ºC), stop the engine
immediately and re-tune the carburettor to a richer setting.
In North America:
Global Services
18480 Bandilier Circle
Fountain Valley, CA 92708
Phone: (714) 963-0329
Fax: (714) 964-6236
Email: service@globalhobby.net
SH engines are distributed exclusively in North America by Global Hobby Distributors
All contents copyright © 2008 Global Hobby Distributors Version 1 January 2008
Page 4
FINE-TUNING YOUR ENGINE
qAfter the engine has been running for about 10 seconds, remove the glow
starter from the glow plug. Advance the throttle in short, quick bursts and drive
your vehicle for about 2~3 minutes. If the engine is running rich enough, you
should notice smoke coming from the tuned pipe and the engine should sound
like it’s running very rough. Also, your vehicle will barely be moving because
the engine is running so rich that it won't produce much power. This is what
you want for now. If there is not smoke coming from the tuned pipe, richen the
high speed needle valve 1/4 turn (turn counterclockwise). After 2~3 minutes
stop the engine by pinching the fuel line to the carburettor.
qLet the engine cool for approximately 10 minutes, then restart it. Set
the high speed needle valve mixture to a slightly leaner setting, about 1/8
turn more in (turn clockwise). Repeat the procedure above, advancing the
throttle in short, quick bursts and driving your vehicle for about 2~3 minutes,
then stop the engine again and let it cool for approximately 10 minutes.
qRepeat the procedure above, leaning the high speed needle valve about
1/8 turn more each time. In all, you should run the engine a total of about
45~60 minutes. After 45~60 minutes of run-time the engine will be broken in.
Run the engine with the high speed needle valve set slightly rich, but lean
enough to power your vehicle adequately. At this point the engine should hold
a good setting on the high speed needle valve and you can begin to ne tune
the needle valve settings to increase performance.
Setting the High Speed Needle Valve
qStart the engine and remove the glow starter from the glow plug, then allow
the engine to warm up for about 10 seconds.
qAfter the engine has warmed up, drive your vehicle as you normally would.
If the engine seems to be running rich (i.e., not reaching maximum power),
lean the high speed needle valve about 1/16 of a turn (turn clockwise) at a time
until the desired setting is achieved. Always make sure that you run the engine
slightly rich - you want to be able to see a faint exhaust trail at all times.
IMPORTANT To get more power from your engine you can use fuel
containing up to 30% nitromethane. We must caution you though, that once
you run the engine with increased nitro you may not get satisfactory results
if you decide to go back to a lower nitro content.
q While holding your vehicle off the ground (making sure to keep your ngers
away from the moving parts), quickly open the throttle in a short burst. If the engine
just stops running as soon as the throttle is advanced, the low speed needle valve
is too lean and the engine is not getting enough fuel. With the engine stopped,
richen the low speed needle valve about 1/16 of a turn (turn counterclockwise).
qRestart the engine and repeat the procedure above until the engine will
transition smoothly and quickly. Very slight hesitation in the transition is normal.
qIf you quickly advance the throttle and the engine seems to be very rich
during transition (i.e., lots of smoke coming from the tuned pipe and very rough
sounding), the low speed needle valve is too rich and the engine is getting too
much fuel. With the engine stopped, lean the low speed needle valve about
1/16 of a turn (turn clockwise).
qRestart the engine and repeat the procedure above until the engine will
transition smoothly and quickly. Very slight hesitation in the transition is normal.
Setting the Mid Range Needle Valve
qStart the engine and adjust the high and low speed needle valves as per
the previous procedures. Turn the mid range needle valve in no more than
1/8th of turn incremenets to adjust the engine's mid range transition. If the
engine's mid range is rich, lean the mid range needle valve. If the engine's
mid range is lean, richen the mid range needle valve. Do not adust the mid
range needle valve until after both the high and low speed needle valves
are properly adjusted.
qNow drive your vehicle as you normally would for a while to get a feel for
how the engine reacts to throttle. Now that you know the proper way to tune
the engine, you can make slight adjustments to the carburettor until you are
satised with the performance.
l After you are nished running the engine for the day, pinch the fuel line to
stop the engine. This will allow the engine to burn any excess fuel out of the
crankcase. Remove the glow plug from the engine and squirt several drops
of after-run oil into the glow plug hole and the carburettor opening. Turn the
crankshaft several times to distribute the oil throughout the engine, then
reinstall the glow plug and copper washer. The after-run oil will prevent the
inside of the engine (especially the crankshaft bearings) from rusting.
l Check the engine's cylinder head bolts and backplate screws after each
day of use to ensure that they're tight. This will prevent air leaks from causing
erratic engine performance.
l After running the engine for the day, turn the crankshaft so that the piston is
at bottom dead centre. If you leave the piston at top dead center, the piston
may lock in place when the engine cools down.
ENGINE MAINTENANCE AND SERVICE INFORMATION

147500 TE001 Cylinder Head Screw Set (4)
147507 TE0050 Wrist Pin Clips (2)
147510 TE012A Carburettor Retaining Bolt Assembly
147512 TE011 Flywheel Collet
147518 TE9004A Carburettor Barrel Dust Boot
147519 TE9003 Idle Needle Valve O-Ring
147520 TE9007 Idle Needle Valve
147521 TE9018 Throttle Ball Cup
147522 TE9005 Throttle Arm (Ball Link)
147523 TE9016 Throttle Arm Grub Screw
147524 TE9011 High Speed Needle Valve
147525 TE9012 High Speed Needle Valve O-Ring
147526 TE9013 High Speed Needle Valve Mounting Seat
147527 TE9014 Needle Valve Seat Washers
147528 TE9015 Fuel Nipple
147530 TE9009 Idle Stop Screw O-Ring
147533 TE010A Carburettor Base O-Ring
147546 TE12228 Backplate O-Ring
147551 TE003C Head Button
147552 TE004A Head Gasket - 0.10mm
147553 TE004B Head Gasket - 0.20mm
147555 TE006 Wrist Pin
ORDER # REFERENCE # DESCRIPTION
Revision 1 January 2008
147556 TE008D Connecting Rod
147563 TE023 Backplate Screw Set
147567 TE9006 Carburetor Restrictor O-Ring
147582 TE020A Exhaust Header Gasket
147584 TE2002M-4 Cylinder Head
147585 TE2031IA Piston and Sleeve Set (Aluminium)
147586 TE2009A Carburretor Assembly - 3-Needle Slide
147679 TE2031HA Piston and Sleeve Set (Ceramic)
147680 TE015B Front Ball Bearing
147681 TE2019A Crankcase
147682 TE016D1 Rear Ball Bearing
147683 TE017L5 Crankshaft - SG
147684 TE022E-1 Backplate
147685 TE9010A Idle Stop Screw
147686 TE9017G Mid Range Needle Valve Only
147687 TE9022A Mid Range Needle Valve O-Ring - Large
147688 TE9022B Mid Range Needle Valve O-Ring - Small
147689 TE20901A Carburettor Body Only
147690 TE9008AB1 Carburettor Intake Restrictor - 8.5mm
147691 TE9008AB3 Carburettor Intake Restrictor - 7.5mm
147692 TE9002C Carburettor Barrel
SH .21 XB AND XB-1 PRO COMPETITION OFF-ROAD ENGINE EXPLODED PARTS VIEW AND PARTS LIST
ORDER # REFERENCE # DESCRIPTION
147500
147584
147551
147552
147553
147585
147679
147555
147507
147556
147586
147533
147512
147680
147510
147567
147690/147691 147692
147518
147519
147520
147530
147685
147524
147526
147525
147527
147528
147533
147689
147582
147682
147681
147683
147686
147687
147688
147563
147684
147546
147521
147522
147523

This troubleshooting guide has been provided to help you diagnose and solve most problems that you may encounter with your SH
engine. Most problems encountered can be solved by carefully following the problem-cause-solution sections below. If you cannot solve
the problem using this troubleshooting guide, please feel free to contact us using the information below.
1) Engine does not start A) Failed glow plug A) Replace glow plug with new one
B) Glow Starter not charged and/or faulty B) Fully charge glow starter and/or replace
C) Idle mixture screw set too lean C) Reset idle mixture to factory setting (Pg 3)
D) Old or contaminated fuel D) Replace with new fuel
E) Engine ooded with too much fuel E) Remove glow plug and expel fuel from cylinder (Pg 2)
F) Air leak in fuel system and/or engine F) Replace fuel lines and/or tighten all engine bolts
2) Engine does not draw fuel A) Air leak in fuel system and/or engine A) Replace fuel lines and/or tighten all engine bolts
B) High speed needle valve fully closed B) Reset high speed needle valve to factory setting (Pg 3)
C) Idle mixture screw set too lean C) Reset idle mixture to factory setting (Pg 3)
D) Fuel lines kinked D) Check and straighten fuel lines
E) Defective fuel tank E) Replace fuel tank
3) Engine does not transition A) Failed and/or wrong type glow plug A) Replace with new recommended glow plug (Pg 2)
B) Old and/or wrong type fuel B) Replace with new recommended fuel
C) High speed needle valve set too rich C) Reset high speed needle valve to leaner setting
D) Idle mixture set too lean D) Set idle mixture richer
E) Idle mixture set too rich E) Set idle mixture leaner
F) Air leak in fuel system and/or engine F) Replace fuel lines and/or tighten all engine bolts
4) Engine overheats A) Engine running too lean A) Richen high speed needle valve
B) Body shell too restrictive B) Open larger vents in body to allow air to enter and exit
C) Wrong type of fuel used C) Use fuel recommended only for R/C cars
D) Engine not fully broken in D) Allow engine further break-in time
5) Engine vibrates excessively A) Engine and/or engine mounts loose A) Tighten all engine and engine mounting bolts
6) Engine does not idle down A) Idle stop screw out of adjustment A) Adjust idle stop screw to factory setting (Pg 2)
B) Engine has developed an air leak B) Check and tighten all engine screws
C) One or more carburettor O-ring damaged C) Replace carburettor O-ring(s)
D) High speed needle valve set too lean D) Reset high speed needle valve to factory setting (Pg 3
PROBLEM CAUSE SOLUTION
Your SH engine is guaranteed to be free of workmanship and component error for a period of 90 days starting from the original time of purchase. Warranty
claims must be acoompanied by an itemized sales receipt that shows the purchase date. Do not return your engine to the place of purchase. They are
not authorised or equipped to perform warranty work on SH engines. When requesting warranty service, please observe the following guidelines:
l Always send the complete engine, including the carburettor. The engine must be removed from the vehicle rst. Do not send your vehicle along with
the engine.
l Include a note detailing the problem or service you are requesting. Service cannot be provided
without this information. Include your daytime phone number, shipping address and/or email address
in the event we need more details pertaining to the service requested.
l If your engine is out of the warranty period you may request an estimate of services at the time you
return your engine for service. An omission of this request implies permission for Global Services
to service your engine at our discretion.
l Include a method of payment for any service charges.
l Send the engine to us by United Parcel Service, Federal Express or by Insured Mail. Postage is
nonrefundable.
l Send your package to the address at right.
SH .21 XB AND XB-1 PRO COMPETITION OFF-ROAD ENGINE TROUBLESHOOTING GUIDE
WARRANTY AND SERVICE INFORMATION
In North America:
Global Services
18480 Bandilier Circle
Fountain Valley, CA 92708
Phone: (714) 963-0329
Fax: (714) 964-6236
Email: service@globalhobby.net
This manual suits for next models
1
Table of contents
Other SH Engines Engine manuals
Popular Engine manuals by other brands
GAS GAS
GAS GAS EC FSE 400 - SERVICE 2002 & 2003 Service manual
Beckhoff
Beckhoff AM8000 Series Operation instructions
OLI
OLI MVE manual
Briggs & Stratton
Briggs & Stratton 12J800 Series Illustrated parts list

Fastech
Fastech Ezi-STEP-BT-42 Series operating manual

Briggs & Stratton
Briggs & Stratton 90000 475 Series Operator's manual
