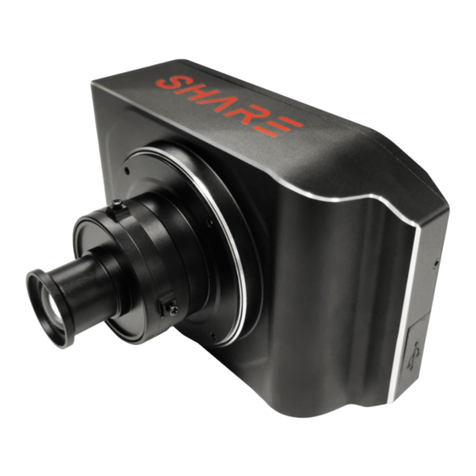
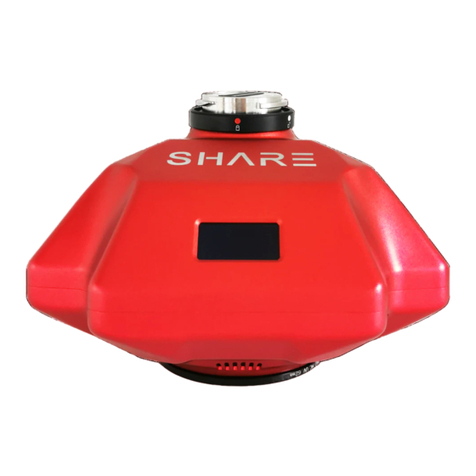
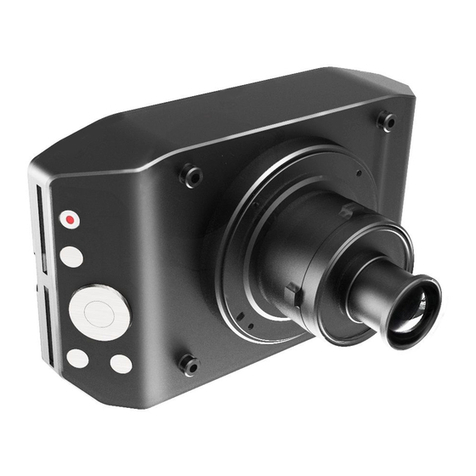
SHARE 202S Pro V2 User manual

Aerial Oblique Camera SHARE 202S Pro V2
User Manual V2.0
2021.03
深圳赛尔智控科技有限公司
SHENZHEN SHARE UAV TECHNOLOGY CO., LTD


Disclaimer and Warning
Please read this entire document carefully to ensure proper configuration before use. The
copyright of this document and all other collateral documents belong to SHENZHEN SHARE
UAV TECHNOLOGY CO., LTD (abbreviated as “SHARE UAV”). SHARE UAV has the final
interpretation right of this document and all other collateral documents.
SHARE UAV has right to update, modify or terminate the content of this document without
prior notice. For update information, visit website www.shareuavtec.com and click on the
product page for this product.
Do Not allow people under the age of 18 to use the SHARE 202S Pro V2.
Do Not modify or disassemble the SHARE 202S Pro. SHARE UAV accepts no liability for
damage, injury or any legal responsibility incurred directly or indirectly from the use of this
product. The user shall observe safe and lawful practices including, but not limited to, those
set forth in this manual.
By using SHARE UAV products, you hereby signify that you have read this disclaimer and
warning carefully and that you understand and agree to abide by the terms and condition
herein. You agree that you are solely responsible for your own conduct while using this
product, and for any consequences thereof. You agree to use this product only for purposes
that are proper and in accordance with all applicable laws, rules, and regulations.

1
Contents
1. Product Overview............................................................................................................................1
1.1 SHARE 202S Pro V2 Introduction.......................................................................................... 1
1.2 Features.................................................................................................................................1
1.3 In the Box...............................................................................................................................2
1.4 Parameters............................................................................................................................ 2
2. Installation....................................................................................................................................... 2
2.1 Camera Introduction............................................................................................................. 2
2.2 Camera Installation............................................................................................................... 3
3. Camera Operation........................................................................................................................... 6
3.1 Power On............................................................................................................................... 6
3.2 Take Photo............................................................................................................................. 8
3.3 Camera Setting...................................................................................................................... 9
3.4 Data Copy............................................................................................................................ 11
3.5 Repair...................................................................................................................................11
4. Camera Maintenance.................................................................................................................... 12
5. After Sales......................................................................................................................................13
5.1 Delivery................................................................................................................................13
5.2 After-sales Services............................................................................................................. 13

2

1. Product Overview
Aerial oblique camera is equipped with five high-pixel lenses, which can break through the
limitations of single orthorimages on traditional mapping camera. By mounting multiple
camera sensors on the same flying platform, it will acquire real images with spatial
information from multiple different angles, vertical and oblique. To present more details of
the texture feature. 3D data of oblique camera can realistically reflect the appearance,
position, height and other attributes of ground features. Enhance the high immersion and to
make up for the shortcomings of low artificial simulation of traditional modeling. It can bring
revolutionary efficiency improvements to the mapping filed by using UAV and automatic
modeling systems.
1.1 SHARE 202S Pro V2 Introduction
Model No.:
SHARE 202S Pro V2
Camera Type:
Oblique Camera
Total Pixels:
210 MP
Focal Length:
40 mm & 56 mm
Sensor Size:
35.9 x 24 mm
Interval:
≥1.3s
Camera Size:
160 x 160 x 125 mm
N.W.:
≈1200g
Storage:
1280 GB
Manufacturer:
SHARE UAV
The aerial oblique camera, SHARE 202S Pro V2 features five professional mapping lens with a
total pixel of 210 million. It can realize high accuracy surveying and mapping with no GCP
used. With high compatibility, SHARE 202S Pro V2 is able to mounted on VTOL, multi rotor
and DJI M300 RTK. By using CNC designed, SHARE 202S Pro V2 is light-weight but tough
structure. Smaller drag coefficient is more conducive to aerial survey flight. At the same time,
SHARE 202S Pro V2 also has lots of advantages such as self-checking, one-key reset,
intelligent temperature control and real-time data transmission.
1.2 Features
* Mounting via DJI SkyPort, highly compatible with DJI M300 RTK drones
* For other drones, mounting via J30J-15 Port
* Compatible with DJI Terra, support one-key imported into software
* Achieve high-precision without setting ground control points
* Compatible with third-party software for 3D modeling, such as Context Capture
* Camera firmware is automatically upgraded online
* Copy data speed is up to 300MB/s through Share Data Manager
* Real-time image transmission of downward vision
* Real-time data on DJI Pilot (PSDK supported)
* Professional mapping lens, high mapping working rate

2
1.3 In the Box
Items
Oblique
Camera
Storage
Box
Gimbal
Cover
Data
Storage
Module
Data
Reading
Module
Data
Cable
Camera
Cable
Cleaning
Cloth
User
Manual
QTY
1pc
1pc
1pc
1pc
1pc
1pc
1pc
2pcs
1pc
1.4 Parameters
Aerial Oblique Camera(SHARE 202S Pro V2) Parameters
Camera parameters
QTY of Lens
5 pcs
Power on/off
Auto on/off
Power supply
SkyPort integrated / DC 12V ~ 50V
Photo reading
TYPE-C data cable
Effective pixels
42.4 million (total 210 million pixels)
Sensor size
Full frame (35.9 x 24 mm)
Pixel size
4.5um
Image resolution
7952 x 5304
Oblique degree
45 degree
Storage
1280 GB
Exposure mode
Autopilot trigger
Exposure time
≥1.3s
Focal lens
45 mm x 1pc (Nadir)
56 mm x 4pcs (Oblique)
Working
environment
Working temperature
0℃~50℃
Humidity
95%
Dimensions
Size
160 x160 x 125 mm
Weight
≈1200 g
2. Installation
2.1 Camera Introduction
The front of the oblique camera SHARE 202S Pro V2 is equipped with an OLED screen. When
installing the camera, please make sure the direction of the camera and the drone is the
same.
There is a SkyPort on the top of SHARE 202S Pro, it integrates all functions including the
power supplying, data link, RTK signal, video transmission and mounting. It’s seamless
docking with DJI M300 RTK.
There is a J30J-15 port on the backside of SHARE 202S Pro V2, it also integrates functions
including power supplying, communication and controlling. Through this port, it’s able to be
used on the other drones except for DJI drones.

3
2.2 Camera Installation
Mounting methods of aerial oblique camera SHARE 202S Pro:
2.2.1 SkyPort Connection
Installation step:
1) Press the button of the gimbal port, remove the gimbal cover of it.
2) Remove the lens cover.
3) Align the white dots of the two port of the camera with the red dots on the UAV, and
embed them in the installation position.
4) Rotate the camera mount to the locked position, align the red dots to fix the white dots,
and the camera installation is complete.

4
2.2.2 J30J-15 Port Connection
This camera cable is included in the box.
Items
Pictures
Functions
Plug A
Connect to Camera
Plug B
(XT30)
Power Line
(12V ~ 50V)
Plug C
(A2547H-4P)
PPS Signal Cable
PIN1: PPS
PIN4: GND
Plug D
(A2510HM-3P-R)
Shutter and Hot Shoe Cable:
PIN1: Shutter
PIN2: Hot shoe signal +
PIN3: Hot shoe signal -

5
Plug E
(A2547H-5P)
TTL Cable:
PIN1: NC
PIN2: NC
PIN3: GND
PIN4: TX/RS232 TX
PIN5: RX/RS232 RX
The end of the J30J-15 signal cable is plugged into the J30J-15 connector of the oblique
camera. The power end is XT30 male, which is used to supply power to the camera; the
three-pin signal plug (male) is the camera shutter hot shoe wire.
The power supply for oblique camera use the unified external power supply design. The
device is compatible with 12V~50V DC power supply. When the camera is working, the
instantaneous power supply needs to reach 65W to ensure the normal operation of the
device; when the camera is reading data, it use the Type-C cable to connect camera with
computer, doesn’t need external power to camera.
2.2.3 Camera Mounted on Other Drones
1) The bottom of the camera is square with two sets (8pc) of M3 threaded holes. The two
sets of threaded holes are in "×" and "+"-shaped steps, respectively located on the square

6
corners with sides of 112mm and 118mm. Threaded hole depth 6mm;
2) The 4 threaded holes can be directly installed and fixed with rubber damping balls, and
the installation structure can be designed according to different structures of the flying
platform. The installation method is flexible and diversified.
3. Camera Operation
3.1 Power On
3.1.1 Using SkyPort
The oblique camera use drone to supply power, power on/off in sync with the drone. Take
M300 RTK as an example. Step of power on:
1) Mount the SHARE 202S Pro on the DJI drone, and please make sure the installation is
firm.
2) Turn on the power of the drone, the camera will start to self-checking. It will take about
40s to power on. When it’s done, the camera beeps.
3) After the camera is turned on normally, the OLED will display as follows:
OLED Display
Meaning
Remark
ON
The camera is power on
When power off, it will show OFF
0
RTK status
RTK has 4 display statues
0-- no solution,
16-- single point solution
34-- floating point solution
50-- fixed solution
27℃
Camera temperature
Current camera temperature
P
Number of instructions
triggered on taking photo
The times needed to be triggered
F, R, D, B, L
Number of taking photo
on different lens
F - the front vision, R - the right vision
D - the down vision, B - the back vision
L - the left vision
(It will restart and clear after the
camera power off)
4) During the camera start up process, the real-time data window of the Pilot screen display
interface displays the photo-unavailable state, and displays the photo-capable state after
normal booting.

7
5) During the camera start up process, the time setting or camera setting interface will
appear on the image transmission interface. At this time, the camera initialization will
automatically switch the interface. After the camera is turned on, the image transmission
image display will enter the photo interface.
3.1.2 Using J30J-15 Port
The oblique camera uses external power through XT30 plugger. It will automatically start up
when power on. Step of power on:
1) Mount the SHARE 202S Pro V2 on the drone, and please make sure the installation is firm.
2) Turn on the power of the drone, the camera will start to self-checking. It will take about
40s to power on. When it’s done, the camera beeps.
3) After the camera is turned on normally, the OLED will display as follows:
OLED Display
Meaning
Remark
ON
The camera is power on
When power off, it will show OFF
999
Initial value in PWM mode
TTL mode and TTH mode trigger photo
display time value when triggered
30℃
Camera temperature
Current camera temperature
P
Number of instructions
triggered on taking photo
The times needed to be triggered
F, R, D, B, L
Number of taking photo
on different lens
F - the front vision, R - the right vision
D - the down vision, B - the back vision
L - the left vision
(It will restart and clear after the
camera power off)

8
3.2 Take Photo
3.2.1 When using DJI Pilot to control
After the oblique camera is started, the camera enters the photo-capable state. The bottom
left corner of the upper picture shows the real-time image of the downward-looking camera.
The indoor light is insufficient and the image is black. At this point, the user can control the
camera to take a single photo by single-clicking the camera button on the right-hand side of
the remote control. The real-time data window shows the current working state of the
camera, and the upper one shows that the camera has been triggered five times to take a
picture.

9
3.3 Camera Setting
Using DJI Pilot to create routes and set parameters.
1) Setting SHARE 202S Pro oblique camera
Open DJI Pilot – Mission Flight -- Create a Route -- Mapping -- Create a mapping area –
Custom Camera – Add Camera – Camera Setting -- Overlap setting
2) Parameters of SHARE 102S PRO
SHARE 202S PRO
Photo resolution (W)
Sensor size (W)
Focus
7952px
35.9mm
40mm
Photo resolution (H)
Sensor size (H)
Minimum interval
5304px
24mm
1.3s
Save the camera setting.

10
3) Payload setting
Enter the payload setting menu, which has those functions:
Items
Functions
Real-time data ON/OFF
Control the display and hide of the real-time data window
Shutter
Change the shutter speed (500/640/800/1000/1250)
ENTER
Enter button, using when the camera reports an error
ON/FF
Control camera on/off (default setting: off)
Test
Control camera shooting (default setting: off)

11
3.4 Data Copy
Different from other series of products, SHARE 202S Pro V2 camera uses a pluggable data storage
module to store data. The photos and POS data collected by the camera work are stored in the
data storage module. When reading data, users only need to plug the storage module into the
reading data module. And connected to the computer through the data cable to view and copy
the data.
3.5 Repair
1) Common problems might happen when using oblique camera SHARE 202S Pro V2
A. Can Not find the image database file
B. Image database file error
C. Can Not read the storage card

12
2) When the three error happen, there are two method to repair
A. Automatic repair: user can restart the power of the device, and the camera will
automatically initiate the repair.
B. Manual repair: Click the ENTER button in the payload settings and confirm the selection
according to the instructions.
4. Camera Maintenance
When using the oblique camera, please pay attention to the daily maintenance.
1) Avoid storing the camera in a place of extreme heat, strong vibration, close to strong
magnetic field and high humidity.
2) Please do not use detergent containing diluent or gasoline and other organic solvents to
clean UV Lens.
3) When storing the equipment, try to avoid long-term exposure of light to the lens.
4) Avoid bringing the equipment directly from cold places to warm places, and prevent
moisture condensation.
5) The working temperature of the equipment is about - 10 ~ 45 ℃. It is not recommended
to work in extremely cold and hot environment beyond the working temperature range.
6) Pay attention to check whether the connecting screws of the equipment are damaged or
loose. It is recommended that the shutter be returned to the factory for maintenance after
200 thousand times.
7) Pay attention to the cleaning and drying of DJI SkyPort connecting ring, and install the
protective cover in time.

13
5. After Sales
5.1 Delivery
(1) All equipment delivered by SHARE UAV shall be packed in accordance with the standard
protective measures for packaging and transportation. Such packaging shall meet the
requirements for long-distance transportation, moisture resistance, shock resistance, rust
prevention, etc. required according to the specific properties of the equipment to ensure
that the equipment arrived safely at the place of delivery.
(2) Packaging
The SHARE 202S Pro V2 camera transport case uses an industrial-grade box manufacturing
process. The box uses an engineering plastic moisture-proof box. The structure is strong and
durable.
The position of the transport box needs to keep the cover up. It is strictly forbidden to
reverse the position of the transport box. Avoid severe vibration and bump during
transportation.
5.2 After-sales Services
Warranty Terms: 1year warranty since delivery.
Warranty conditions: Quality issues only. Devices with below conditions will be out of
warranty even if within warranty time: damaged, out of order caused by improper usage,
failure caused by misoperation or software/firmware parameter changes, or disassembled
without authorization ect.

14
Feedback:
This manual suits for next models
1
Table of contents
Other SHARE Digital Camera manuals

