Sharkoon VAYA User manual

www.sharkoon.com
Manual

VaYa EconomY
Table of contents page
1. Features 1
2. Package contents 2
3.The case at a glance 3
4. Mounting a mainboard 6
5. Mounting a power supply 8
6. Mounting a hard disk drive 9
7. Mounting an optical drive 10
8. Mounting a 3.5" device 12
9. Mounting an add-on card 13
10. Mounting additional fans / optimized airflow 13
Dear customer!
Congratulations for purchasing this premium quality SHARKOON product. For a long life time and to take full
advantage of this product we recommend you to read this manual completely.
Enjoy our product!
SHARKOONTechnologies
ECONOMY

VaYa EconomY
1. Features
• ATXcase
• 4x5.25"drivebays
• 4x3.5"baysforHDDs(internal)
• 1x3.5"mountingbay(external)
• Front-I/O:
2xUSB2.0,2xaudio
• Blackinteriorpainting
• 7slotsforadd-oncards
• Plasticfrontpanelwithmeshairinlet
• QuickfastenersforopticaldrivesandHDDs,mainboardmountingpanelwithinstallation
opening for coolers
• 2openingsforwatercooling
• Cablemanagementsystem
• Fanconguration:
• Dimensions:465x185x440mm(LxWxH)
• Weight:~5kg
Casefront 1x120mmLEDfan
(red/pre-installed)
Sidepanel 1x120mmor1x140mmfan
(optional)
Rear panel 1x80mm,92mmor120mmfan
(optional)
1
VaYa EconomY
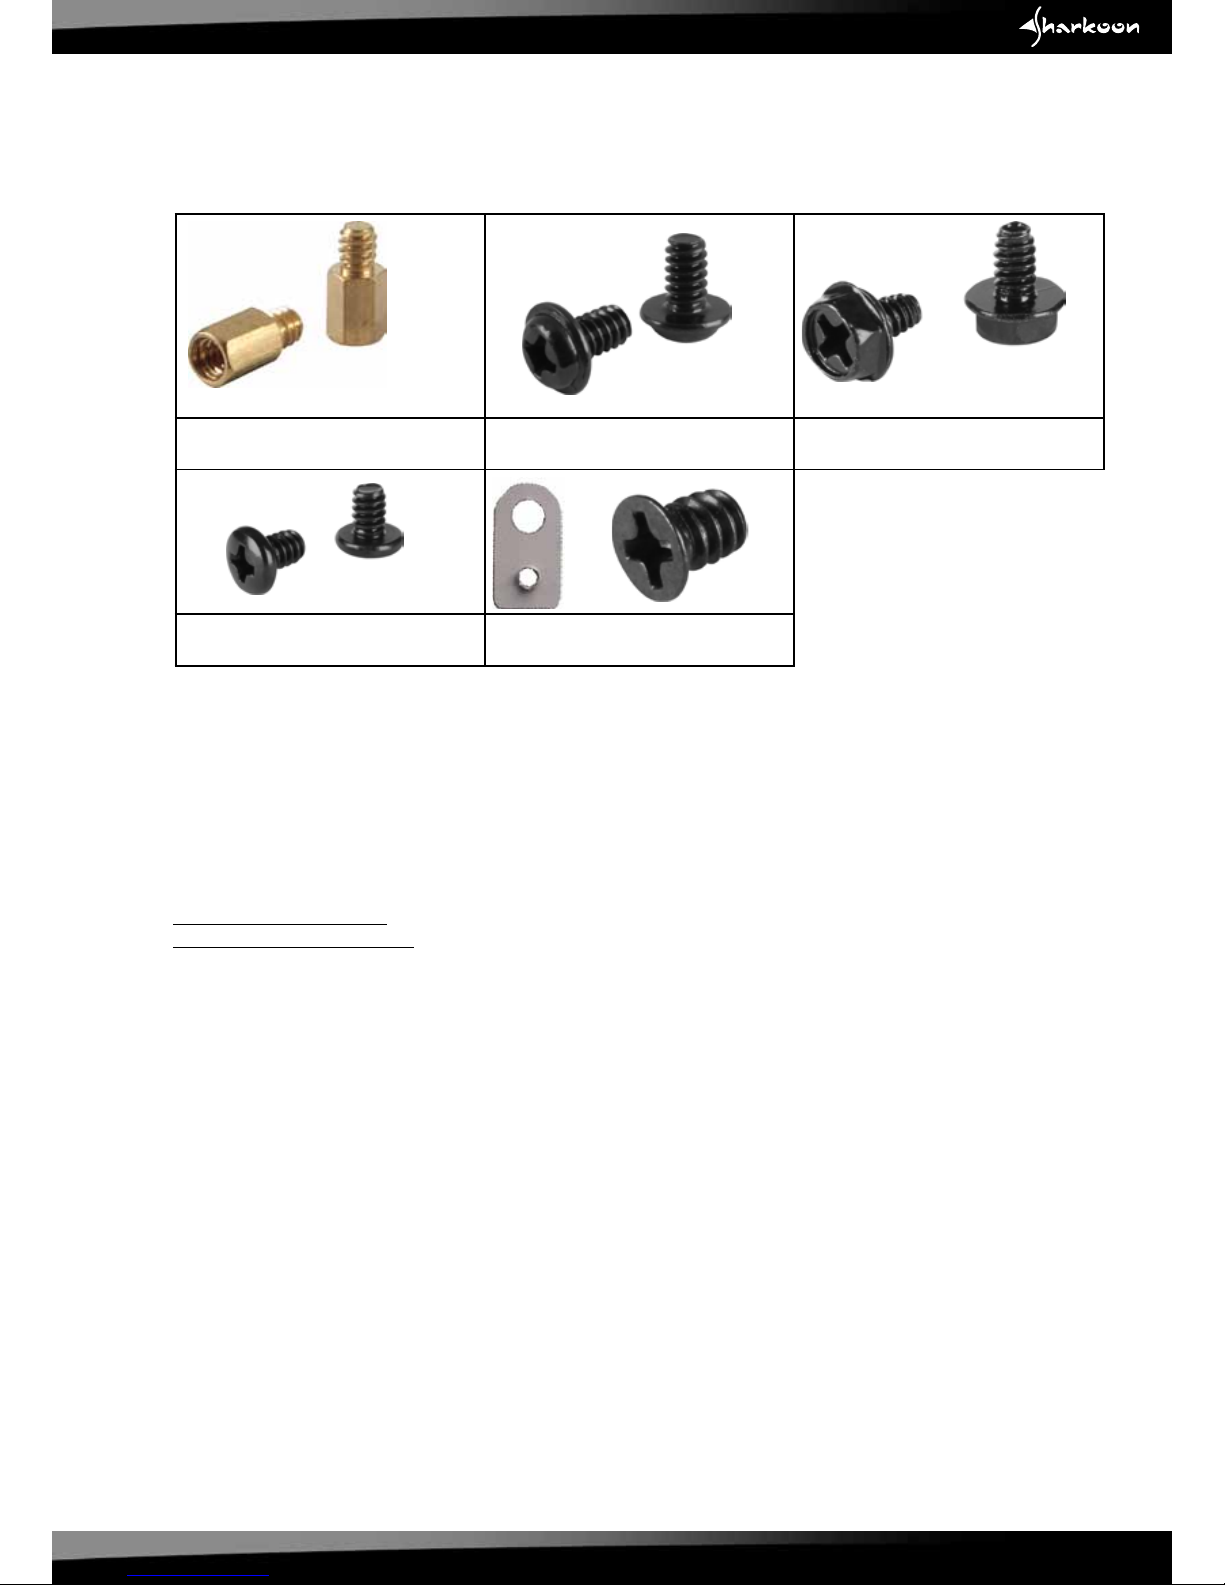
2. Package contents
• ATXcase“Vaya”
• Accessorykit
9xstand-offsformainboard 25xscrewsformainboardand
drivemounting(3.5"and5.25")
4xscrewsforPSUmounting
16xscrewsforHDDmounting 1xlockattachmentand
corresponding screw
Note:
If you are missing any of the items listed above, please contact our customer service immediately:
[email protected] (Germany and Europe)
[email protected] (international).
2
VaYa EconomY
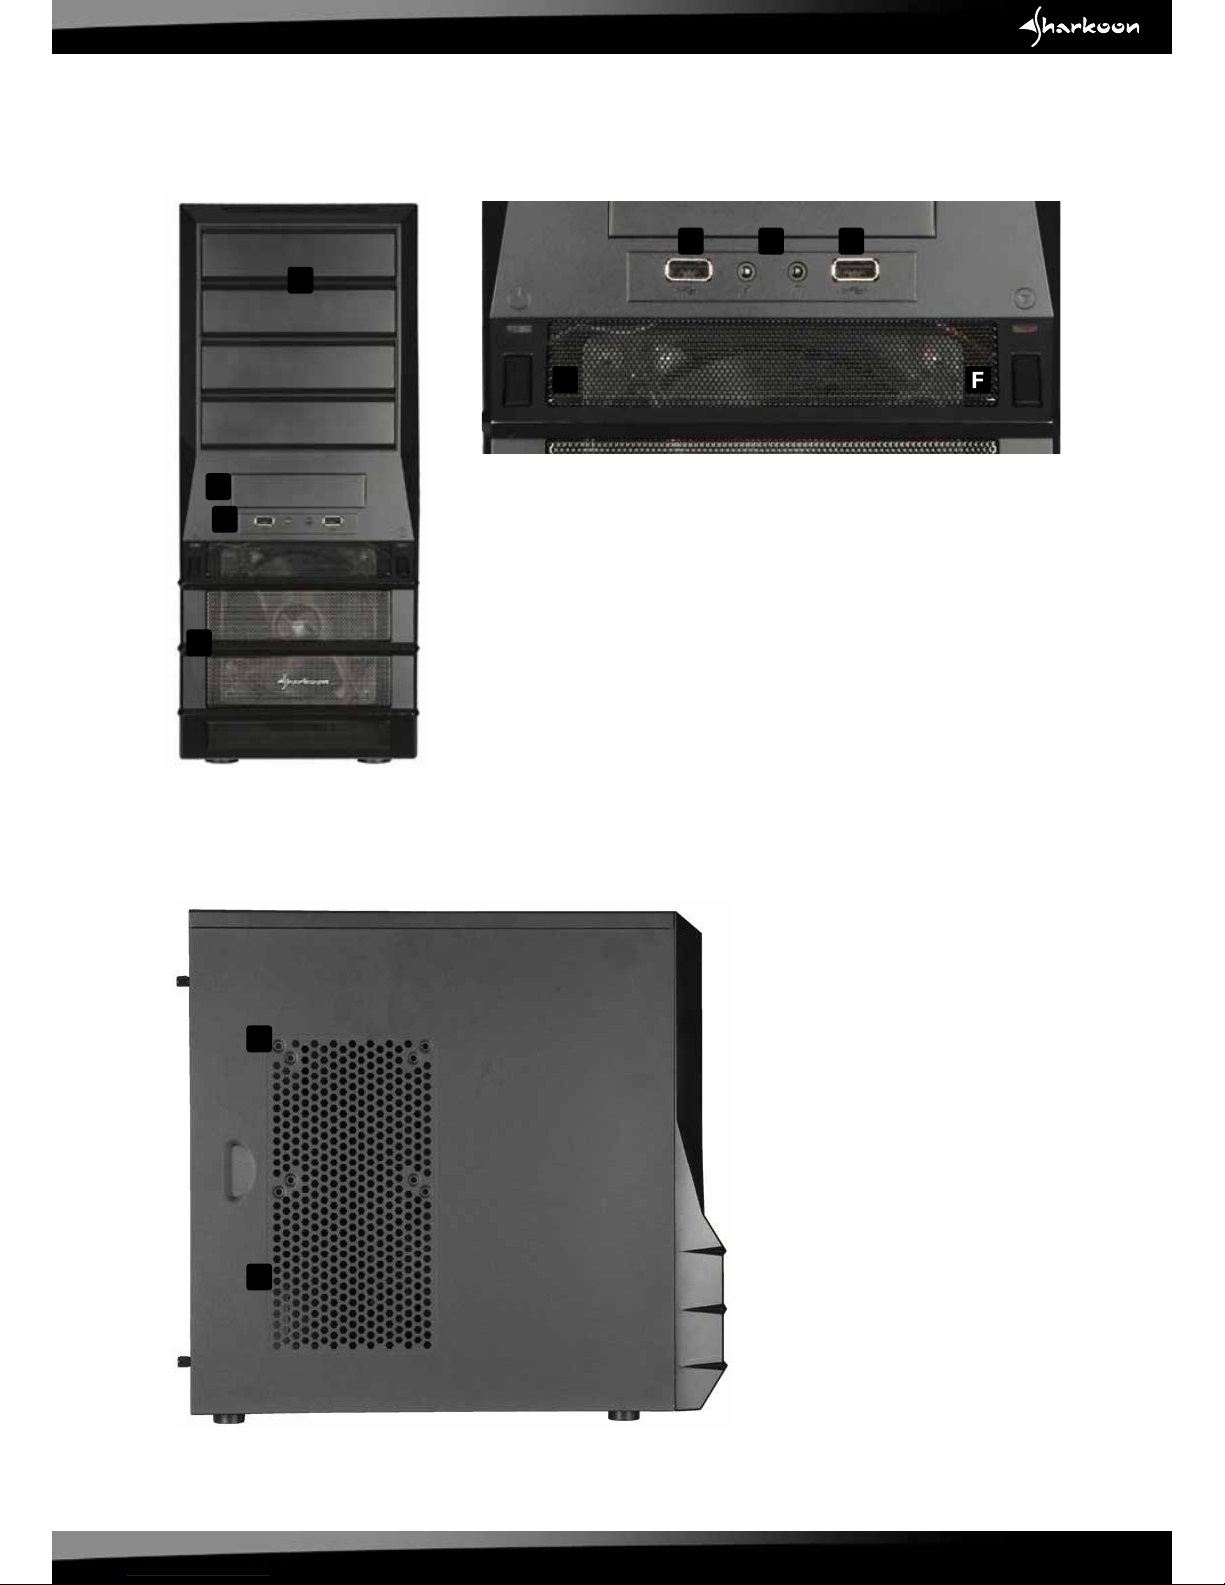
3.The case at a glance
D
A
B
C
E
ba a
A–5.25"mountingbays
B–3,5"mountingbay
C–FrontI/Owith:
a–2xUSB2.0and
b–2xaudioconnectors
D–behindtheMeshpanel:120mmLEDfan(pre-installed)
E–PowerbuttonandLED
F–ResetbuttonandLED
Front view
Sideview(closed/left)
A
B
A–Fanbracket(120or140mm)
B–Airinlet
3

VaYa EconomY
Sideview(opened/left)
A–Mountingbaysfor5.25"devices
B–Mainboardmountingpanel
featuring:
a–InstallationopeningforCPU
coolers and
b–Cablemanagementsystem
C–Quickfastenersforopticaldrives
D–Quickfastenersforharddisk
drives
D
A
B
C
b
a
Rear view
D
E
AB
C
F
F
F
F
A–OpeningforI/Oshield
B–Openingsforwatercooling
C–Fanbracket(80,92or120mm)
D–Slotbezels
E–PSUbracket
F–Thumbscrews
4

VaYa EconomY
Viewfrombelow
A
B
A A
A
A–Casefeet
B–Airinletforpowersupply
D
E
A
B
C
F
Connectorsfor:
A–HDD-LED
B–ResetSwitch
C–PowerSwitch
D–PowerLED+
E–PowerLED–
G
F–USBconnectoroftheUSBfronthub
G–Audioconnectors(HDAudioandAC’97)
The internal cables and connectors
Note:
For further information on how to install the intended devices, refer to their respective user
documentation.
5

VaYa EconomY
4. Mounting a mainboard
1. Removethethumbscrewsonthecase’srearsideandtaketheleftsidepaneloffthecase.
Laydownthecasesidewiseonanevensurface.
2.Themountingpanelofthemainboardprovidesvariousdrillingsforstand-offs(g.1).
g.1
Themainboardcontainsspecialscrewopenings(g.2).
g.2
Place the mainboard onto the mounting panel.You have to screw a stand-off into every drilling of the
mountingpanelyoucanseethroughthemainboard’sscrewopenings.
6

VaYa EconomY
3. Remove the mainboard and screw the stand-offs into the respective drillings of the mounting panel
(g.3).
g.3
(Stand-offs)
4.PresstheI/Oshield(deliveredwiththemainboard)intotheI/Oshieldopeninginthecase’srearpanel.
5. Place the mainboard back onto the stand-offs and attach it to the mainboard using the screws for
mainboardmounting(g.4).
(Screwsformainboardmounting)
g.4
6.Connectthecase'sfrontI/Ocablestotherespectiveconnectorsofthemainboard(alsorefertoyour
mainboard’smanualforfurtherinformation).
7

VaYa EconomY
5. Mounting a power supply
1. SetupthecaseinfrontofyouandputthePSUagainstthePSUbracketonthecase’srearsidefromthe
inside(g.5).
g.5
2.AttachthePSUtothecasefromtheoutsideusingtheincludedscrewsforPSUmounting(g.6).
g.6
(ScrewsforPSUmounting)
8
Table of contents
Other Sharkoon Computer Accessories manuals

Sharkoon
Sharkoon Bandit User manual

Sharkoon
Sharkoon VG6 Series User manual

Sharkoon
Sharkoon RGB Slider User manual

Sharkoon
Sharkoon SCORPIO 1000 User manual

Sharkoon
Sharkoon Skiller SGC1 User manual

Sharkoon
Sharkoon RUSH POWER M User manual

Sharkoon
Sharkoon ELITE SHARK CA300T User manual

Sharkoon
Sharkoon 8-BAY RA ID STATION User manual

Sharkoon
Sharkoon TG5 RGB User manual

Sharkoon
Sharkoon RGB FLOW User manual


