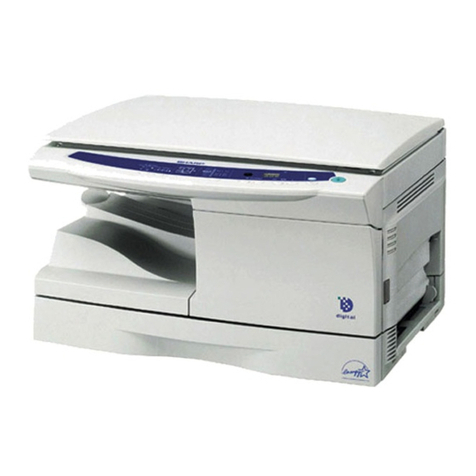
Sharp AJ-5030 User manual

cover.fm Page 1 Thursday, February 8, 2001 9:21 AM

TOP
TOP
Printing
Index
Introduction
Scanning
Using the Sharp
Control Panel
Table of Contents
Working with
Imaging Files
1
Table of Contents 1
1. Introduction 3
Main Features ............................................................................................... 5
Launching the Software ................................................................................ 6
2. Scanning 14
About the Scanner ...................................................................................... 15
About TWAIN .............................................................................................. 16
Precautions when Preparing and Scanning Originals ................................. 17
Selecting the Scan Source .......................................................................... 18
How to Scan in the SHARP Desktop .......................................................... 20
Selecting the Right Resolution .................................................................... 27
Using the Scanner in Other Applications .................................................... 28
3. Working with Imaging Files 29
Importing a Document to the SHARP Desktop ........................................... 31
Creating Documents and Folders in the Desktop ....................................... 32
Changing Document Views ......................................................................... 35
Renaming Documents and Folders in the Desktop ..................................... 43
Storing Documents ...................................................................................... 47
Image Enhancing Tools .............................................................................. 50
Drawing and Other Editing Tools ................................................................ 55
Changing Annotation Settings ..................................................................... 59
Table of Contents
Aj5030TOC.fm Page 1 Tuesday, February 6, 2001 9:32 AM

TOP
TOP
Printing
Using the Sharp
Control Panel
Index
Introduction
Table of Contents
Scanning
Working with
Imaging Files
2
Document Stacking and Unstacking ........................................................... 79
Sorting Documents ...................................................................................... 82
Document Summary Tool ........................................................................... 84
Finding Documents ..................................................................................... 87
Importing and Exporting .............................................................................. 93
Linking to Other Applications ...................................................................... 99
E-Mailing Documents ................................................................................ 103
Changing Desktop Properties ................................................................... 105
4. Printing 109
Printing from the SHARP Desktop ............................................................ 110
Printing to the Desktop from Other Applications ....................................... 113
5. Using the SHARP Control Panel 118
Opening the Control Panel ........................................................................ 120
Setup for Auto Dial E-mail ......................................................................... 121
Programming Rapid Key and Speed Dial Numbers .................................. 123
Using a Rapid Key or Speed Dial Number for E-mail ................................ 128
Setting Up the E-mail Key ......................................................................... 134
Making a Backup of the Control Panel Settings ........................................ 136
Monitoring Print Jobs in the Status Tab .................................................... 137
Changing and Maintaining Print Cartridges .............................................. 138
Index 145
Aj5030TOC.fm Page 2 Friday, March 9, 2001 3:34 PM
TOP
TOP
Printing
Index
Introduction
Scanning
Using the Sharp
Control Panel
Table of Contents
Working with
Imaging Files
3
1. Introduction
Main Features...................................................................... 5
Launching the Software....................................................... 6
01.fm Page 3 Monday, February 5, 2001 4:31 PM

TOP
TOP
Printing
Index
Introduction
Scanning
Using the Sharp
Control Panel
Table of Contents
Working with
Imaging Files
4
The Sharp AJ5030 software consists of the SHARP AJ5030 Control
Panel and the SHARP AJ5030 Desktop. The SHARP Control panel
allows you to program auto dial numbers in the SHARP Color MFP
(Multi Function Peripheral) unit for e-mail and fax, and change and
align print cartridges in the Color MFP unit. The SHARP Desktop
serves as a centralized base for managing and manipulating
documents coming from or going to the Color MFP unit.
01.fm Page 4 Monday, February 19, 2001 11:28 AM

TOP
TOP
Printing
Index
Introduction
Scanning
Using the Sharp
Control Panel
Table of Contents
Working with
Imaging Files
5
Main Features
•Printing
You can print both from the SHARP Desktop, and from other
applications. You can also print from other applications into the
SHARP Desktop to create a centralized file registry.
• Scanning
The scanner component of the SHARP Desktop gives you features
you would normally find in a dedicated scanner, and is TWAIN
compatible.
•Linking
The SHARP Desktop supports linking to other applications. You
can, for example, link to your e-mail software to send a SHARP
Desktop document as an e-mail attachment.
If you attempt to scan in or transmit via e-mail a document
containing an excessively large amount of data such as a
photograph at high resolution, an error may result that will
cause the SHARP Desktop to freeze.
Note
01.fm Page 5 Monday, February 5, 2001 4:31 PM

TOP
TOP
Printing
Index
Introduction
Scanning
Using the Sharp
Control Panel
Table of Contents
Working with
Imaging Files
6
Launching the Software
To launch the SHARP Desktop or the Control Panel, access the
Programs menu from the Start button on the taskbar of your
Windows®desktop, as shown below. Then select Sharp AJ5030
from the Programs menu. A menu will appear showing Sharp
AJ5030 Desktop and Sharp AJ5030 Control Panel. Click on the
desired component to launch it.
01.fm Page 6 Friday, February 16, 2001 1:59 PM

TOP
TOP
Printing
Index
Introduction
Scanning
Using the Sharp
Control Panel
Table of Contents
Working with
Imaging Files
7
The SHARP Desktop is shown above. Documents are received into
the SHARP Desktop via scanner, file import, and the Sharp AJ5030
Desk driver. Once documents are on the desktop they can be acted
upon by a set of internal document tools. Specifically, the desktop
allows you to:
01.fm Page 7 Monday, February 5, 2001 4:31 PM

TOP
TOP
Printing
Index
Introduction
Scanning
Using the Sharp
Control Panel
Table of Contents
Working with
Imaging Files
8
•Scan documents
•Store documents
•Import from and export documents to other file formats
•Print documents
•E-mail documents
•Interface with other Windows®applications and other services
•Enhance document images
•Annotate documents and highlight text within documents
•Summarize document information
•Search for and retrieve documents
•Stack documents
01.fm Page 8 Monday, February 5, 2001 4:31 PM

TOP
TOP
Printing
Index
Introduction
Scanning
Using the Sharp
Control Panel
Table of Contents
Working with
Imaging Files
9
About the Desktop Window
The SHARP Desktop window consists of five basic parts: the
Toolbar, the Folder Area, the Application Link Area, the View Area,
and the Status Bar.
Toolbar View Area
Folder Area
Application Link Area Status Bar
01.fm Page 9 Monday, February 5, 2001 4:31 PM

TOP
TOP
Printing
Index
Introduction
Scanning
Using the Sharp
Control Panel
Table of Contents
Working with
Imaging Files
10
•Toolbar
The Toolbar runs across the top of the SHARP Desktop window,
and contains both menu commands and buttons to open the
scanner window, create a new document, change the view style of
documents in the View Area, and perform other tasks. The Toolbar
can be hidden or displayed by selecting Toolbar in the View menu.
Acquire Image:
Click on this button to invoke scanning.
New document:
Click on this button to create a new document.
New folder:
Click on this button to create a new folder.
Find:
Click on this button to find a document.
List View:
Clicking on this button will cause all documents in the SHARP
Desktop to be displayed as a list.
01.fm Page 10 Monday, February 5, 2001 4:31 PM

TOP
TOP
Printing
Index
Introduction
Scanning
Using the Sharp
Control Panel
Table of Contents
Working with
Imaging Files
11
Thumbnail View:
Clicking on this button will cause all documents in the SHARP
Desktop to be displayed side-by-side as “thumbnail” images.
Page View:
Select a document and then click on this button to view it as a
full page.
Show Image Toolbox:
Clicking on this button when in Page View will either display or
hide the Image Toolbox.
Stack:
Clicking on this button will cause any selected documents in
the SHARP Desktop to be stacked on top of each other.
Unstack:
Click on this button to unstack any selected document stack in
the SHARP Desktop.
Unstack top page:
Click on this button to unstack the top page only from any
selected document stack in the SHARP Desktop.
01.fm Page 11 Monday, February 5, 2001 4:31 PM

TOP
TOP
Printing
Index
Introduction
Scanning
Using the Sharp
Control Panel
Table of Contents
Working with
Imaging Files
12
MFP Control Panel:
Click on this button to invoke the SHARP Control Panel.
Annotation Properties:
Click on this button to set and change properties for
annotating documents.
Zoom In:
Click on this button in Page View to increase the magnification
for viewing a document.
Zoom Out:
Click on this button in Page View to decrease the
magnification for viewing a document.
Fit to Window:
Click on this button in Page View to fit the entire document
within the window.
Help:
Click on this button and then click on any part of the SHARP
Desktop that you want more information about. A pop-up
explanation will appear.
01.fm Page 12 Monday, February 5, 2001 4:31 PM

TOP
TOP
Printing
Index
Introduction
Scanning
Using the Sharp
Control Panel
Table of Contents
Working with
Imaging Files
13
•Folder Area
The Folder Area allows you to access and save documents in an
Explorer-like interface.
•Application Link Area
This area is in the lower left corner of the SHARP Desktop window
and contains links to other applications, indicated by an icon. Just
click on the icon to bring up the linked application. Some links are
created automatically, but you can also create your own links.
•View Area
The View Area is where documents in the SHARP Desktop are
displayed. There are three ways to view documents to make it
easier to handle and edit them: List View, Thumbnail View and
Page View.
•Status Bar
Running along the very bottom of the SHARP Desktop window is
the Status Bar. Here various messages about activities in SHARP
Desktop are displayed, such as the name of the folder currently
opened, or the size and characteristics of a selected document.
The Status Bar can be hidden or displayed by selecting Toolbars
and then Status Bar in the View menu.
01.fm Page 13 Monday, February 5, 2001 4:31 PM

TOP
TOP
Printing
Index
Introduction
Scanning
Using the Sharp
Control Panel
Table of Contents
Working with
Imaging Files
14
2. Scanning
About the Scanner............................................................. 15
About TWAIN..................................................................... 16
Precautions when Preparing and Scanning Originals ....... 17
Selecting the Scan Source ................................................ 18
How to Scan in the SHARP Desktop................................. 20
Selecting the Right Resolution .......................................... 27
Using the Scanner in Other Applications........................... 28
02.fm Page 14 Monday, February 5, 2001 4:32 PM

TOP
TOP
Printing
Index
Introduction
Scanning
Using the Sharp
Control Panel
Table of Contents
Working with
Imaging Files
15
About the Scanner
The scanner component of your Color MFP unit gives you features
you would find in a dedicated scanner. It is fully TWAIN compatible,
and can be used both with the SHARP Desktop and with other
TWAIN-compatible applications.
If you have connected your computer to the Color MFP unit
with a parallel cable, the TWAIN driver of the scanner will fully
support ECP mode. However, if the parallel port of your
computer is set to a mode slower than ECP mode, overall
scanning speed will be reduced. To attain the fastest scanning
speed, use a computer that supports ECP mode, and be sure
to set the parallel port of your computer to ECP mode. The
parallel port mode setting can be adjusted through the setup
during Windows®startup.
Note
02.fm Page 15 Monday, February 5, 2001 4:32 PM

TOP
TOP
Printing
Index
Introduction
Scanning
Using the Sharp
Control Panel
Table of Contents
Working with
Imaging Files
16
About TWAIN
The TWAIN standard defines a software protocol and application
programming interface for communication between software
applications and image acquisition devices. It provides a simple
methodology for connecting TWAIN-compatible applications with
TWAIN-aware devices. As a TWAIN-aware device, your Color MFP
unit can be used with any TWAIN-compatible application.
02.fm Page 16 Monday, February 5, 2001 4:32 PM

TOP
TOP
Printing
Index
Introduction
Scanning
Using the Sharp
Control Panel
Table of Contents
Working with
Imaging Files
17
Precautions when Preparing and Scanning Originals
Use original documents that are as clean and clear as possible.
Even with a high-performance scanner like the Color MFP unit, the
quality of scanned images will never exceed the quality of the
original. Use clearly focused pictures that have been correctly
exposed and printed whenever possible.
Choose an image that matches your requirements as closely as
possible.
Whenever a scanned document is modified, the overall picture
quality will be reduced. The retouching process only makes some
elements of the picture more acceptable, such as brightness or
focus, but the real picture quality is not improved. For example, if you
scan an image at too low a resolution, the information left out cannot
be simulated later. Always set the scanning conditions carefully
before scanning.
02.fm Page 17 Monday, February 5, 2001 4:32 PM

TOP
TOP
Printing
Index
Introduction
Scanning
Using the Sharp
Control Panel
Table of Contents
Working with
Imaging Files
18
Selecting the Scan Source
If you already have a scanner connected to your computer, you must
specify the scan source in the SHARP Desktop in order to switch
between scanners. Follow the procedure below:
1Open the Select Source dialog box by selecting Select
Source... from the File menu of the SHARP Desktop.
02.fm Page 18 Monday, February 5, 2001 4:32 PM

TOP
TOP
Printing
Index
Introduction
Scanning
Using the Sharp
Control Panel
Table of Contents
Working with
Imaging Files
19
2In the Sources: list box, select the scanner you wish to
use—in this case, the AJ5030 Scanner—by clicking on it
once, then on Select. If other TWAIN-compatible drivers
are installed on your computer, they will show in the
Sources: list box.
02.fm Page 19 Tuesday, February 6, 2001 3:29 PM
Other manuals for AJ-5030
3
This manual suits for next models
1
Table of contents
Other Sharp All In One Printer manuals

Sharp
Sharp MX-C507F User manual

Sharp
Sharp UX-5000 User manual

Sharp
Sharp AL-1651CS User manual

Sharp
Sharp MX-C312 Guide

Sharp
Sharp MX-3550N User manual

Sharp
Sharp AR-M277 IMAGERs User manual

Sharp
Sharp MX-B201D Guide

Sharp
Sharp MX-M950 Quick start guide

Sharp
Sharp AR-M300N. User manual

Sharp
Sharp AR-M160 User manual

Sharp
Sharp AR-6020V User manual

Sharp
Sharp AL-2021 User manual

Sharp
Sharp MX-2300N Guide Technical manual

Sharp
Sharp MX-B200 User manual

Sharp
Sharp AR-208S User manual

Sharp
Sharp AR-208S Setup guide

Sharp
Sharp AL-2051 Guide

Sharp
Sharp Advanced MXM365N User manual

Sharp
Sharp MX-B402 Guide

Sharp
Sharp MX-6240N User manual