Sharp DV-NC200X User manual

–1 –EN
VCR/DVD COMBINATION
OPERATION MANUAL
Please read this Operation Manual carefully before using
your VCR/DVD COMBINATION.
4
PULL OPEN
DV-NC200
OPERATE
OPEN/CLOSE
PLAYSTOP
DVDVCRCH
TIMER
RECPLAYREW FF
STOP/
EJECT
(TRACKING)
OUTPUT
The region number for this
VCR/DVD is 4.
MODEL
DV-NC200X
PA L
PREFACEDVD FUNCTIONS SETUP
VCR FUNCTIONSINFORMATION PRECAUTIONS
H9945AD_1.indd 1H9945AD_1.indd 1 5/11/2005 6:46:28 PM5/11/2005 6:46:28 PM

PRECAUTIONS
–2 –EN
FOR YOUR SAFETY (in Australia):
Install any external aerial to AS 1417.1
NOTE:
This VCR/DVD can be used only where the power supply is AC
220 V-240 V, 50 Hz. It cannot be used elsewhere.
CAUTION:
USE OF CONTROLS OR ADJUSTMENTS OR
PERFORMANCE OF PROCEDURES OTHER THAN THOSE
SPECIFIED HEREIN MAY RESULT IN HAZARDOUS
RADIATION EXPOSURE.
AS THE LASER BEAM USED IN THIS VCR/DVD IS
HARMFUL TO THE EYES, DO NOT ATTEMPT TO
DISASSEMBLE THE CABINET. REFER SERVICING TO
QUALIFIED PERSONNEL ONLY.
WARNING:
TO REDUCE THE RISK OF FIRE OR ELECTRIC SHOCK, DO
NOT EXPOSE THIS EQUIPMENT TO RAIN OR MOISTURE.
TO REDUCE THE RISK OF FIRE OR ELECTRIC
SHOCK, AND ANNOYING INTERFERENCE, USE THE
RECOMMENDED ACCESSORIES ONLY.
TO PREVENT FIRE OR SHOCK HAZARD, DO NOT
EXPOSE THIS APPARATUS TO DRIPPING OR
SPLASHING, NO OBJECTS FILLED WITH LIQUIDS, SUCH
AS VASES, SHOULD BE PLACED ON THE APPARATUS.
Laser Diode Properties
Material: GaAs
Wave length: DVD: 655 nm
CD: 790 nm
Emission Duration: Continuous
Laser output: Max. 0.8 mW
Power Cord Protection
To avoid any malfunctions of the VCR/DVD, and to protect against
electric shock, fire or personal injury, please observe the following.
• Hold the plug firmly when connecting or disconnecting the AC
power cord.
• Keep the AC power cord away from heating appliances.
• Never put any heavy object on the AC power cord.
• Do not attempt to repair or reconstruct the AC power cord in any
way.
• This VCR/DVD is classified as a CLASS 1 LASER product.
• The CLASS 1 LASER PRODUCT marking is embossed on the rear
cover.
• This product contains a low power laser
device. To ensure continued safety, do
not remove any cover or attempt to
gain access to the inside of the product.
Refer all servicing to qualified personnel.
Location and Handling
• Do not stand the VCR/DVD vertically. Install the VCR/DVD in a hori-
zontal and stable position. Do not place anything directly on top of
the VCR/DVD. Do not place the VCR/DVD directly on top of the TV.
• Do not cover or place the VCR/DVD in enclosed spaces to prevent
excessive temperature build up.
• Do not place the VCR/DVD in direct sunlight, or near heat sources.
• Depending on the environment, the temperature of the VCR/DVD
may increase slightly. This is not a malfunction.
• Keep the VCR/DVD away from strong magnetic objects.
• Do not place any object containing water or other liquids on the
VCR/DVD. In the event that liquid should enter the cabinet, unplug
the VCR/DVD immediately and contact the retailer or service centre
approved by SHARP immediately.
• Do not remove the VCR/DVD cabinet. Touching parts inside the cabi-
net could result in electric shock and/or damage to the VCR/DVD.
For service and adjustment inside the cabinet, call a qualified dealer
or service centre approved by SHARP.
• Be sure to remove a disc and video tape and unplug the AC power
cord from the output before carrying the VCR/DVD.
Nonuse Periods
• When the VCR/DVD is not being used, switch the VCR/DVD to the
standby mode.
• When left unused for a long period of time, the VCR/DVD should be
unplugged from the household AC outlet.
No Fingers or Other Objects Inside
Do not put your fingers or objects on the disc tray or in the cassette
compartment.
Warning of Dew Formation
Moisture may form inside the VCR/DVD under the following conditions:
• Immediately after a heater is turned on.
• In a steamy or humid room.
• When the VCR/DVD is suddenly moved from a cold to warm envi-
ronment.
If moisture forms inside this VCR/DVD, it may not operate properly or
damage the video tape. In such case, turn on the power and wait for
more than 2 hours for the moisture to evaporate.
PRECAUTIONS
SAFETY INFORMATION
DVD
DVD/VCR
VCR
DIGITAL
AUDIO OUT
AUDIO
OUT
S-VIDEO
OUT
COMPONENT
VIDEO OUT
AUDIO OUT
VIDEO OUT
COAXIALOPTICAL
AUDIO IN
VIDEO IN
L
R
AERIAL
RF OUT
Y
CB/
PB
CR/
PR
L
R
L
R
CLASS 1 LASER PRODUCT
KLASSE 1 LASER PRODUKT
KLASS 1 LASER APPARAT
CLASSE 1 PRODUIT LASER
H9945AD_1.indd 2H9945AD_1.indd 2 5/11/2005 6:46:48 PM5/11/2005 6:46:48 PM

PREFACE
–3 –EN
PREFACE
Table of Contents
PRECAUTIONS
SAFETY INFORMATION. . . . . . . . . . . . . . . . . . . . . . . . . . . . . . . . . . . . . .2
Location and Handling. . . . . . . . . . . . . . . . . . . . . . . . . . . . . . . . . . . . . . . . . . . . 2
Nonuse Periods . . . . . . . . . . . . . . . . . . . . . . . . . . . . . . . . . . . . . . . . . . . . . . . . . . . 2
No Fingers or Other Objects Inside. . . . . . . . . . . . . . . . . . . . . . . . . . . . . . . . 2
Warning of Dew Formation . . . . . . . . . . . . . . . . . . . . . . . . . . . . . . . . . . . . . . . 2
PREFACE
Table of Contents . . . . . . . . . . . . . . . . . . . . . . . . . . . . . . . . . . . . . . . . . . . . . . . . . 3
Symbols Used in This Manual . . . . . . . . . . . . . . . . . . . . . . . . . . . . . . . . . . . . . 3
Supplied Accessory . . . . . . . . . . . . . . . . . . . . . . . . . . . . . . . . . . . . . . . . . . . . . . . 3
Copyright. . . . . . . . . . . . . . . . . . . . . . . . . . . . . . . . . . . . . . . . . . . . . . . . . . . . . . . . . 4
Copy Protection . . . . . . . . . . . . . . . . . . . . . . . . . . . . . . . . . . . . . . . . . . . . . . . . . . 4
Notice for Progressive Scan Outputs . . . . . . . . . . . . . . . . . . . . . . . . . . . . . . 4
If There Is Noise Interference on the TV
while a Broadcast Is Being Received . . . . . . . . . . . . . . . . . . . . . . . . . . . . . 4
Maintenance . . . . . . . . . . . . . . . . . . . . . . . . . . . . . . . . . . . . . . . . . . . . . . . . . . . . . 4
ABOUT THE VIDEO CASSETTES AND DISCS . . . . . . . . . . . . . . . . . .5
Playable Media . . . . . . . . . . . . . . . . . . . . . . . . . . . . . . . . . . . . . . . . . . . . . . . . . . . 5
Unplayable Media . . . . . . . . . . . . . . . . . . . . . . . . . . . . . . . . . . . . . . . . . . . . . . . . 5
SETUP
FUNCTIONAL OVERVIEW . . . . . . . . . . . . . . . . . . . . . . . . . . . . . . . . . . .6
Front Panel . . . . . . . . . . . . . . . . . . . . . . . . . . . . . . . . . . . . . . . . . . . . . . . . . . . . . . . 6
Display . . . . . . . . . . . . . . . . . . . . . . . . . . . . . . . . . . . . . . . . . . . . . . . . . . . . . . . . . . . 6
Rear Terminals . . . . . . . . . . . . . . . . . . . . . . . . . . . . . . . . . . . . . . . . . . . . . . . . . . . . 7
VCR/DVD SWITCHING . . . . . . . . . . . . . . . . . . . . . . . . . . . . . . . . . . . . . .7
ABOUT THE REMOTE CONTROL . . . . . . . . . . . . . . . . . . . . . . . . . . . . .8
Installing the Batteries for the Remote Control . . . . . . . . . . . . . . . . . . . . 8
Operable Range . . . . . . . . . . . . . . . . . . . . . . . . . . . . . . . . . . . . . . . . . . . . . . . . . . 8
Buttons for DVD Only . . . . . . . . . . . . . . . . . . . . . . . . . . . . . . . . . . . . . . . . . . . . . 8
Buttons for Both VCR and DVD . . . . . . . . . . . . . . . . . . . . . . . . . . . . . . . . . . . . 9
CONNECTIONS. . . . . . . . . . . . . . . . . . . . . . . . . . . . . . . . . . . . . . . . . . . .10
Connection to a TV . . . . . . . . . . . . . . . . . . . . . . . . . . . . . . . . . . . . . . . . . . . . . . 10
Basic TV Connection . . . . . . . . . . . . . . . . . . . . . . . . . . . . . . . . . . . . . . . . . . . . . 10
Connection to an Audio System . . . . . . . . . . . . . . . . . . . . . . . . . . . . . . . . . 11
PREPARATION FOR USE . . . . . . . . . . . . . . . . . . . . . . . . . . . . . . . . . . .12
Turn on the VCR/DVD for the First Time / Video Channel Setting /
Automatic Channel Preset / Clock Set Up . . . . . . . . . . . . . . . . . . . . . . 12
Select a Channel / Picture Select / Manual Channel Preset . . . . . . . 13
Skip a Preset Channel / Change the On-Screen Language. . . . . . . . 14
VCR FUNCTIONS
PLAYBACK . . . . . . . . . . . . . . . . . . . . . . . . . . . . . . . . . . . . . . . . . . . . . . . .14
OTHER OPERATIONS . . . . . . . . . . . . . . . . . . . . . . . . . . . . . . . . . . . . . .15
Time Search / Index Search . . . . . . . . . . . . . . . . . . . . . . . . . . . . . . . . . . . . . . 15
Auto Repeat . . . . . . . . . . . . . . . . . . . . . . . . . . . . . . . . . . . . . . . . . . . . . . . . . . . . . 16
RECORDING. . . . . . . . . . . . . . . . . . . . . . . . . . . . . . . . . . . . . . . . . . . . . . .16
Recording & OTR (One Touch Recording). . . . . . . . . . . . . . . . . . . . . . . . . 16
Timer Recording . . . . . . . . . . . . . . . . . . . . . . . . . . . . . . . . . . . . . . . . . . . . . . . . . 17
HINTS FOR OTR AND TIMER RECORDING . . . . . . . . . . . . . . . . . . .17
Direct Dubbing . . . . . . . . . . . . . . . . . . . . . . . . . . . . . . . . . . . . . . . . . . . . . . . . . . 18
Copying a Video Tape . . . . . . . . . . . . . . . . . . . . . . . . . . . . . . . . . . . . . . . . . . . . 18
OTHER INFORMATION. . . . . . . . . . . . . . . . . . . . . . . . . . . . . . . . . . . . .19
Status Display. . . . . . . . . . . . . . . . . . . . . . . . . . . . . . . . . . . . . . . . . . . . . . . . . . . . 19
Hi-Fi Stereo Sound System . . . . . . . . . . . . . . . . . . . . . . . . . . . . . . . . . . . . . . . 19
Video Casette Tape. . . . . . . . . . . . . . . . . . . . . . . . . . . . . . . . . . . . . . . . . . . . . . . 19
TV Colour System . . . . . . . . . . . . . . . . . . . . . . . . . . . . . . . . . . . . . . . . . . . . . . . . 19
Automatic Operation . . . . . . . . . . . . . . . . . . . . . . . . . . . . . . . . . . . . . . . . . . . . 19
Real Time Tape Counter . . . . . . . . . . . . . . . . . . . . . . . . . . . . . . . . . . . . . . . . . . 19
DVD FUNCTIONS
PLAYBACK . . . . . . . . . . . . . . . . . . . . . . . . . . . . . . . . . . . . . . . . . . . . . . . .20
DISC Menu / Resume / Paused and Step-by-Step Playback /
Fast Forward/Reverse Search . . . . . . . . . . . . . . . . . . . . . . . . . . . . . . . . . . . 20
Slow Forward/Slow Reverse / Zoom / Rapid Play /
Playing
the Disc Recorded in VR Mode (Video Recording Format)
. . . . . . . . 21
MP3, JPEG PLAYBACK . . . . . . . . . . . . . . . . . . . . . . . . . . . . . . . . . . . . .22
Kodak Picture CD . . . . . . . . . . . . . . . . . . . . . . . . . . . . . . . . . . . . . . . . . . . . . . . . 22
Dual Playback / Transition Mode /
Adjustment of Picture Size / Folder Playback . . . . . . . . . . . . . . . . . . . 23
ONSCREEN DISPLAY . . . . . . . . . . . . . . . . . . . . . . . . . . . . . . . . . . . . . .24
SEARCH FUNCTION . . . . . . . . . . . . . . . . . . . . . . . . . . . . . . . . . . . . . . .25
Track Search / Title/Chapter Search / Time Search . . . . . . . . . . . . . . . . 25
MARKER SETUP . . . . . . . . . . . . . . . . . . . . . . . . . . . . . . . . . . . . . . . . . . .26
REPEAT / RANDOM / PROGRAMMED PLAYBACK . . . . . . . . . . . .26
Repeat Playback . . . . . . . . . . . . . . . . . . . . . . . . . . . . . . . . . . . . . . . . . . . . . . . . . 26
Repeat A-B Playback / Random Playback / Programmed Playback
. . . 27
SPECIAL SETTINGS . . . . . . . . . . . . . . . . . . . . . . . . . . . . . . . . . . . . . . . .28
Subtitle Language / Audio Language /Camera Angles /
Digital Gamma Setting . . . . . . . . . . . . . . . . . . . . . . . . . . . . . . . . . . . . . . . . . 28
Stereo Sound Mode / Virtual Surround . . . . . . . . . . . . . . . . . . . . . . . . . . . 29
DVD SETUP . . . . . . . . . . . . . . . . . . . . . . . . . . . . . . . . . . . . . . . . . . . . . . .29
QUICK SETUP Menu. . . . . . . . . . . . . . . . . . . . . . . . . . . . . . . . . . . . . . . . . . . . . . 29
CUSTOM Menu . . . . . . . . . . . . . . . . . . . . . . . . . . . . . . . . . . . . . . . . . . . . . . . . . . 29
LANGUAGE Setting . . . . . . . . . . . . . . . . . . . . . . . . . . . . . . . . . . . . . . . . . . . . . . 30
DISPLAY Setting. . . . . . . . . . . . . . . . . . . . . . . . . . . . . . . . . . . . . . . . . . . . . . . . . . 30
AUDIO Setting . . . . . . . . . . . . . . . . . . . . . . . . . . . . . . . . . . . . . . . . . . . . . . . . . . . 31
PARENTAL Setting. . . . . . . . . . . . . . . . . . . . . . . . . . . . . . . . . . . . . . . . . . . . . . . . 31
OTHERS Setting . . . . . . . . . . . . . . . . . . . . . . . . . . . . . . . . . . . . . . . . . . . . . . . . . . 32
Reset to the Default Setting (except for PARENTAL Setting). . . . . . . 32
INFORMATION
LANGUAGE LIST. . . . . . . . . . . . . . . . . . . . . . . . . . . . . . . . . . . . . . . . . . .33
SPECIFICATIONS . . . . . . . . . . . . . . . . . . . . . . . . . . . . . . . . . . . . . . . . . .33
TROUBLESHOOTING GUIDE . . . . . . . . . . . . . . . . . . . . . . . . . . . . . . .34
Symbols Used in This Manual
The following symbols appear in some headings and notes in this manual.
Description refers to playback or recording of video cassette tapes.
Description refers to playback of DVD Video discs (including DVD-
RW/-R and DVD+RW/+R discs (Video mode only)).
Description refers to playback of VR mode (Video Recording format).
The VR mode (Video Recording format) is a recording mode to enjoy
editing the programme or manual mode for recording in desired reso-
lution and time.
Description refers to playback of Audio CDs.
Description refers to playback of Video CDs.
Description refers to playback of Video CDs without PBC function.
Description refers to playback of MP3 discs.
Description refers to viewing of JPEG discs.
Supplied Accessory
• Remote control with two AA
size (R-6) batteries
• Round Coaxial cable
• Video/Audio cables
• Operation Manual
DV-NC200X
4
PAL
H9945AD_1.indd 3H9945AD_1.indd 3 5/11/2005 6:46:50 PM5/11/2005 6:46:50 PM

PREFACE
–4 –EN
Copyright
Copyright may exist in material you wish to record. Copying such
material without permission of the relevant licensee(s) or owner(s)
of the copyright is prohibited by law. SHARP is not in a position to
authorise the recording of copyright works and nothing in this manu-
al should be read or implied as giving that authority.
Copy Protection
This VCR/DVD supports Macrovision copy protection.
On DVD discs that include a copy protection code, if the contents of
the DVD disc are copied using a VCR, the copy protection code pre-
vents the videotape copy from playing normally.
U.S. Patent Nos. 4,631,603; 4,577,216; 4,819,098; 4,907,093; 5,315,448;
and 6,516,132.
This product incorporates copyright protection technology that
is protected by U.S. patents and other intellectual property rights.
Use of this copyright protection technology must be authorised
by Macrovision, and is intended for home and other limited view-
ing uses only unless otherwise authorised by Macrovision. Reverse
engineering or disassembly is prohibited.
Notice for Progressive Scan Outputs
Consumers should note that not all high definition television sets are
fully compatible with this product and may cause artifacts to be dis-
played in the picture. In case of picture problems with 525 or 625
progressive scan output, it is recommended that the user switch the
connection to the ‘standard definition’output. If there are questions
regarding your TV set compatibility with this 525p or 625p DVD player,
please contact our customer service centre.
“Licensed under one or more of U.S. Pat. 4,972,484, 5,214,678,
5,323,396, 5,530,655, 5,539,829, 5,544,247, 5,606,618, 5,610,985,
5,740,317, 5,777,992, 5,878,080, or 5,960,037.”
If There Is Noise Interference on the TV while a
Broadcast Is Being Received
Depending on the reception condition of the TV, interference may
appear on the TV monitor while you watch a TV broadcast and the
VCR/DVD is left on. This is not a malfunction of the VCR/DVD or the TV.
To watch a TV broadcast, turn off the VCR/DVD.
Manufactured under license from Dolby Laboratories.
“Dolby” and the double-D symbol are trademarks of Dolby
Laboratories.
“DTS” and “DTS Digital Out” are trademarks of Digital Theater
Systems, Inc.
“Kodak Picture CD COMPATIBLE” is a trademark of Eastman
Kodak Company.
is a trademark of DVD Format/Logo Licensing Corporation.
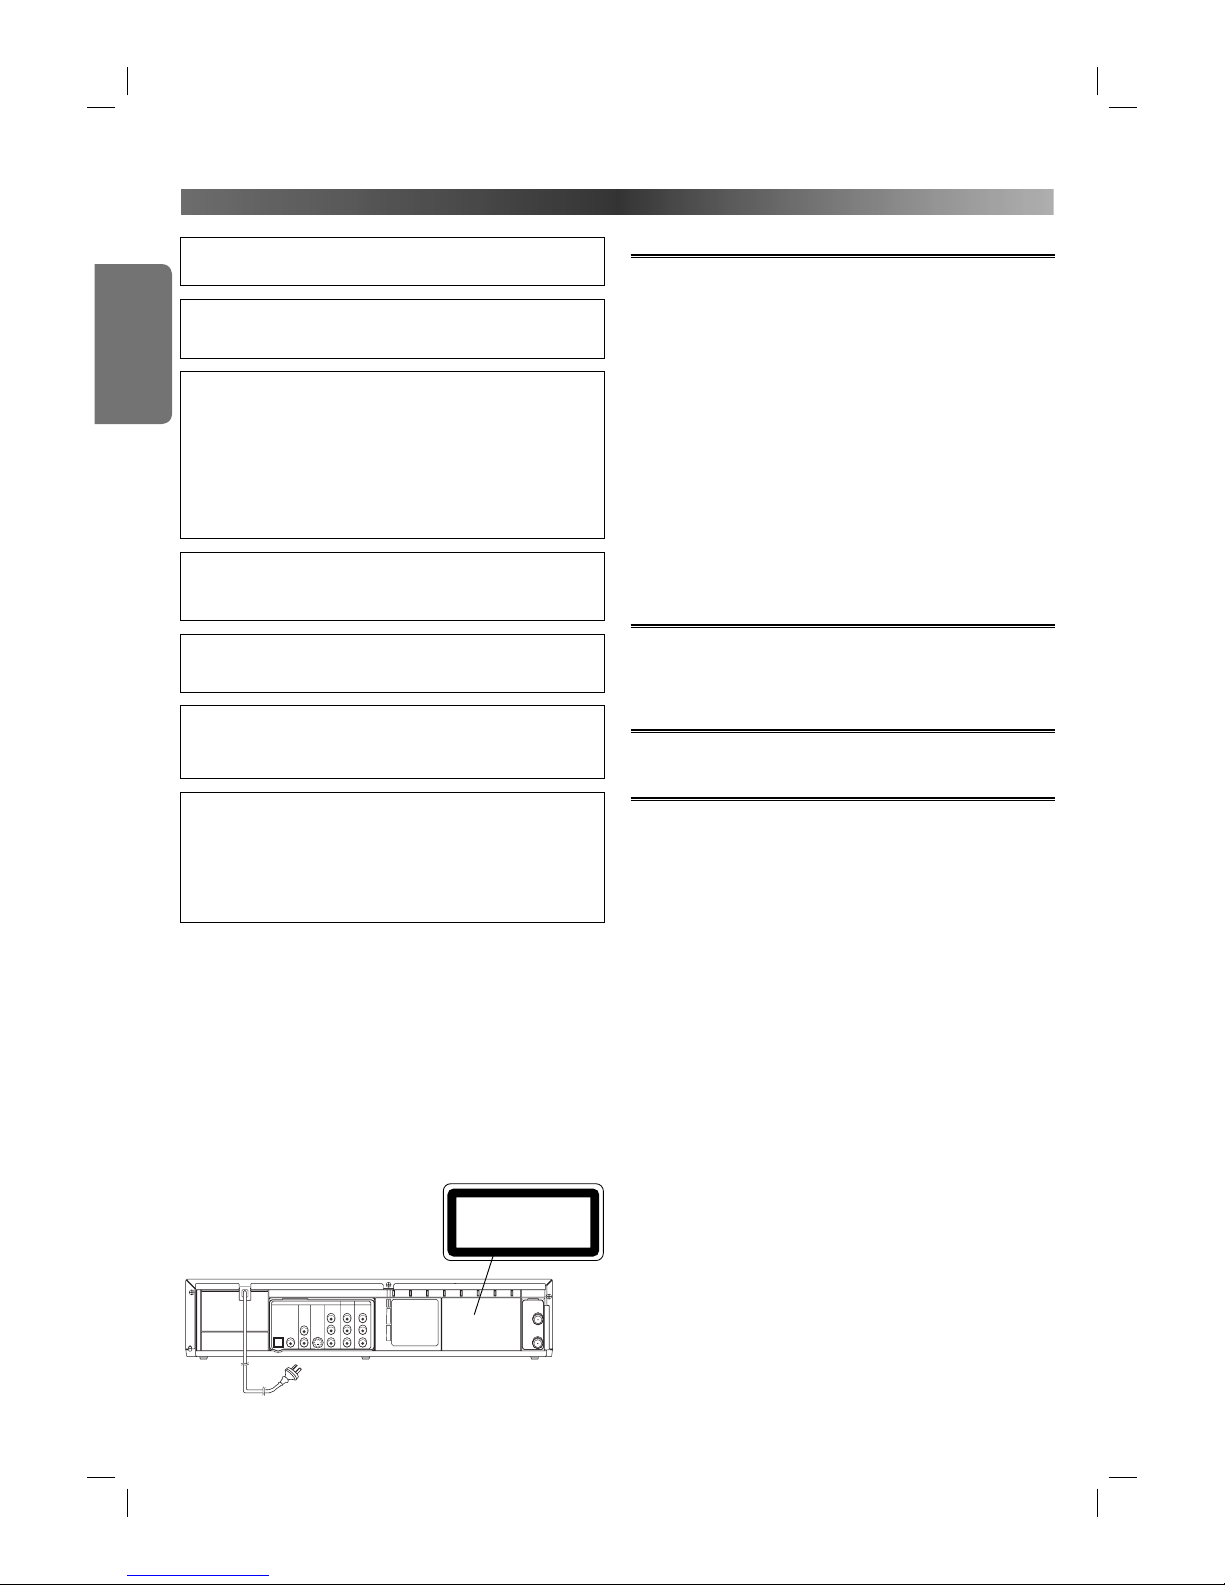
For Customer Use:
Read carefully the information located at the bottom of your VCR/
DVD and enter below the Serial No. Retain this information for
future reference.
Model No.: VCR/DVD COMBINATION: DV-NC200X
Serial No.: ______________________________________
Maintenance
Servicing
1. Please refer to relevant topics in the “TROUBLESHOOTING GUIDE”
on page 34 before returning the product.
2. Do not attempt to service this VCR/DVD yourself. Instead, unplug
it and contact a SHARP Approved Service Centre for inspection.
(Refer to page 35.)
3. Be sure the service technician uses authorised replacement parts
or their equivalents. Unauthorised parts may cause fire, electrical
shock, or other hazards.
4. Following any service or repair, be sure the service technician per-
forms safety checks to certify that this VCR/DVD is in safe operat-
ing order.
Cleaning the Cabinet
• Use a soft cloth slightly moistened with a mild detergent solution. Do
not use a solution containing alcohol, spirits, ammonia or abrasive.
Cleaning Discs
• When a disc becomes dirty, clean it with a cleaning cloth. Wipe the
disc from the centre out. Do not wipe in a circular motion.
• Do not use solvents such as benzine, thinner, commercially avail-
able cleaners, detergent, abrasive cleaning agents or antistatic spray
intended for analogue records.
Recommended Measures for Optimum Picture Excellence
This VCR/DVD is a precision device constructed using extremely accu-
rate technology.
• The disc cannot be played if the disc drive component is worn out
or if the internal pick up lens is dirty.
• If this VCR/DVD still does not perform properly although you refer
to the relevant sections and to “TROUBLESHOOTING GUIDE” on
page 34, the laser optical pickup unit may be dirty. Consult a SHARP
Approved Service Centre for inspection and cleaning of the laser
optical pickup unit.
Soiling or friction affecting the pickup lens or disc drive can impair
the image quality. At the worst, neither video nor audio will be played
back. To maintain optimum picture quality, the Player should be ser-
viced (cleaned and replacement of some parts) every 1,000 hours.
Note that this period varies depending on the environment (tem-
perature, humidity, dust, etc.) in which the unit is used. Contact your
authorised SHARP supplier for details.
Disc Handling
• When you handle a disc, hold it by its edge and try not to touch the
surface of the disc.
• Always store a disc in its protective case when it is not used.
Auto Head Cleaning
• Automatically cleans video heads as you insert or remove a cassette,
so you can see a clear picture.
• Playback picture may become blurred or interrupted while the TV pro-
gramme reception is clear. Dirt accumulated on the video heads after
a long period of use, or the usage of rental or worn tapes can cause
this problem. If a streaky or snowy picture appears during playback,
the video heads in your VCR/DVD may need to be cleaned.
1. Please visit your local Audio/Video store and purchase a good
quality VHS Video Head Cleaner.
2. If a Video Head Cleaner does not solve the problem, please call
our help line mentioned on page 35 to locate a SHARP Approved
Service Centre.
Hint
• Remember to read the instructions along with the video head
cleaner before use.
• Clean video heads only when problems occur.
H9945AD_1.indd 4H9945AD_1.indd 4 5/11/2005 6:46:52 PM5/11/2005 6:46:52 PM

PREFACE
–5 –EN
ABOUT THE VIDEO CASSETTES AND DISCS
Playable Media
Playable media Mark (logo) Region code Recorded
signals Media size Tape speed and Disc types
Video
Cassettes PA L
-
Analogue video
with audio
Tape width
12.65 mm
SP : 23.39 mm/sec.
LP : 11.70 mm/sec.
DVD-Video
*1, 2, 3 or
Digital video
(MPEG2)
12 cm
or
8 cm Example Title 1 Title 2
Chapter 1 Chapter 2 Chapter 1 Chapter 2
Chapter 3 Chapter 4
DVD-RW
DVD-R
* 1, 3, 4, 5,
6, 8, 9
-
DVD+RW
DVD+R
* 1, 3, 4, 5,
7, 8, 9
-
12 cm
Video CD
* 3, 5
-
Digital video
with audio
12 cm
or
8 cm
&YBNQMF
5SBDL 5SBDL 5SBDL 5SBDL
5SBDL 5SBDL
7JEFP$%
PS
"VEJP$%
Audio CD
* 3, 5, 10
-
Digital audio
CD-RW
CD-R
* 3, 4, 5,
8, 9, 10
-
Digital audio
or
MP3
or
JPEG &YBNQMF (SPVQ (SPVQ
5SBDL 5SBDL 5SBDL 5SBDL
5SBDL 5SBDL
.1
PS
+1&(
Kodak
Picture
CD
-
JPEG 12 cm
If you cannot play back a disc which bears one of the marks
above, check the following notes.
*1: This VCR/DVD conforms to the PAL colour system. Also you can
play discs recorded with the NTSC system via a PAL system TV set.
*2: Certain DVD-Video discs do not operate as described in this
manual due to the intentions of the disc’s producers.
*3: Scratched or stained discs may not be played back.
*4: Some discs cannot be played back because of incompatible
recording conditions, characteristics of the recorder or special
properties of discs.
*5: You can play back discs which bear the marks above. If you use
nonstandardised discs, this VCR/DVD may not play them back.
Even if they are played back, the sound or video quality will be
compromised.
*6: Depending on the recording status of a disc, the disc may not
be played back at all or normally (the picture or sound may not
be smooth, etc.). In this case, you need to finalise the disc with
the DVD recorder. Refer to the manual accompanying the DVD
recorder.
*7: Only the discs recorded in the video mode and finalised can be
played back. Unfinalised discs cannot be played back. Depending
on the recording status of a disc, the disc may not be played back
at all or the picture or sound may not be smooth, etc.
*8: If the recorded portion of the disc is too small (less than 55 mm
across), it may not play back properly.
*9: Do not glue paper or put stickers on to the disc. These may dam-
age the disc, and the VCR/DVD may not read it correctly.
*10: Also DTS CD is available on this VCR/DVD.
:This label indicates playback compatibility with DVD-RW discs
recorded in VR mode (Video Recording Format).
Hint
• This VCR/DVD cannot play back the DVD-RW that supports CPRM
(Contents Protection for Recordable Media).
• This VCR/DVD cannot play back the DVD-R discs recorded in VR
mode (Video Recording Format)
• 8 cm disc is not available on some media.
About the PBC Function of Video CD
This VCR/DVD conforms to ver.1.1 and ver.2.0 of Video CD standard,
with PBC function.
Ver.1.1 (without PBC function): You can enjoy playback picture as well
as music CD.
Ver.2.0 (with PBC function): When using a Video CD with PBC function,
“Pbc” appears on the display.
What is PBC? “PBC” stands for the Playback Control. You can play
interactive software using a menu screens. Refer to instructions of
Video CD.
Unplayable Media
• NEVER play back the following discs. Otherwise, malfunction
may result:
DVD-RAM, CD-I, Photo CD, DVD with region codes other than 4 or ALL,
DVD-ROM for personal computers, CD-ROM for personal computers
• On the following disc, the sound MAY NOT be heard.
Super Audio CD
• Any other discs without compatibility indications.
Hint
• Only the sound recorded on the normal CD layer can be delivered.
The sound recorded on the high density Super Audio CD layer
cannot be delivered.
H9945AD_1.indd 5H9945AD_1.indd 5 5/11/2005 6:46:53 PM5/11/2005 6:46:53 PM

SETUP
–6 –EN
DVD Output Mode
1. Lights up when the A-B repeat function is on.
2. Lights up when the ALL repeat function is on.
3. Lights up when the inserted disc comes to a pause.
4. Lights up when playing back in slow mode (DVD or Video CD).
5. Lights up when the inserted disc is being played back.
6. Lights up when the repeat function is on.
7. Displays how long the current title or track has been played back.
When a chapter or track is switched, the number of a new title,
chapter or track is displayed.
8. Displays a type of the disc which is inserted on the tray.
• DVD : DVD
• CD : Audio CD, MP3, JPEG, Kodak Picture CD
• VCD : Video CD
9. Lights up when the progressive scan system is activated.
VCR Output Mode
1. *Lights up when a tape is in the VCR/DVD.
2. Lights up during playback when the repeat function is on.
3. Lights up when the playback is in still or slow mode.
4. Lights up when the inserted cassette is being played back.
5. Works as a tape counter (hour, minute, second). Also displays a
channel number, tape speed, remaining time for OTR or current
time.
6. *Lights up when the Timer Recording or an OTR recording has
been set.
7. *Lights up during a recording. Flashes when a recording is paused.
* ,
and mark will disappear when you set VCR/DVD in DVD
mode. However, the function indicated by each mark is still working.
12 3 4 5 6 7
SETUP
FUNCTIONAL OVERVIEW
Front Panel
1. Disc Tray
2. PLAY (DVD)
To begin disc playback.
3. STOP (DVD)
To stop playback.
4. DVD OUTPUT Indicator
The indicator is on when this VCR/DVD is in the DVD mode.
Make sure that this indicator is on before using the DVD player.
5. OUTPUT
To select the DVD mode or VCR mode.
6. VCR OUTPUT Indicator
The indicator is on when this VCR/DVD is in the VCR mode. Make
sure that this indicator is on before VCR operation.
7. OPEN/CLOSE (DVD)
To open or close the disc tray.
8. CHANNEL
To change TV channels.
To adjust the tracking manually during VCR playback.
9. Display
10. Remote Sensor
11. TIMER Indicator
The indicator is on when the VCR/DVD is in standby mode for a
Timer Recording or during a One Touch Recording.
12. REC (VCR)
Press once to start recording or repeatedly to start One Touch
Recording. The indicator is on during recording.
13. PLAY (VCR)
To begin tape playback.
14. STOP/EJECT (VCR)
To stop playback. To eject the tape in the stop mode.
15. FF (VCR)
To fast forward the tape.
16. REW (VCR)
To rewind the tape.
17. Cassette Compartment
18. AUDIO IN Jacks (AV2 / VCR only)
Connect Audio cable coming from the audio out jacks of a cam-
corder, another VCR, or an audio source here.
19. VIDEO IN Jack (AV2 / VCR only)
Connect a cable coming from the video out jack of a camcord-
er, another VCR or an audio-visual source (laser disc player, video
disc player, etc.) here.
20. OPERATE
To turn the VCR/DVD ON or OFF.
The indicator is on when this VCR/DVD is turned on.
Display
PULL OPEN
DV-NC200
OPERATE
OPEN/CLOSE
PLAYSTOP
DVDVCRCH
TIMER
RECPLAYREW FF
STOP/
EJECT
(TRACKING)
OUTPUT
17 51516 1012 8111314 6 49 3 218 171920
H9945AD_1.indd 6H9945AD_1.indd 6 5/11/2005 6:46:55 PM5/11/2005 6:46:55 PM

SETUP
–7 –EN
21. MAIN (AC Power Cord)
Connect to a standard AC plug.
22. OPTICAL DIGITAL AUDIO OUT Jack (DVD only)
Connect to a compatible Dolby Digital receiver. Use to connect to
a Dolby Digital decoder, DTS decoder or MPEG decoder.
23. COAXIAL DIGITAL AUDIO OUT Jack (DVD only)
Connect to a compatible Dolby Digital receiver. Use to connect to
a Dolby Digital decoder, DTS decoder or MPEG decoder.
24. AUDIO OUT Jacks (Analogue Left/Right) (DVD only)
Connect to the Audio input jacks of A/V-compatible TV.
25. S-VIDEO OUT Jack (DVD only)
Use the S-Video cable to connect this jack to the S-VIDEO jack on
your A/V-compatible TV or wide screen TV for a higher quality
picture.
26. COMPONENT VIDEO OUT Jacks (DVD only)
Connect optional component Video cable here and to the
component Video jacks of TV.
27. DVD/VCR AUDIO OUT Jacks
Connect the supplied Audio cable here and to the Audio In Jacks
of a television or other audio equipment.
28. DVD/VCR VIDEO OUT Jack
Connect the yellow Video cable (supplied) here snd to the TV’s
Video jack.
29. AUDIO IN Jacks (AV1 / VCR only)
Connect Audio cable coming from the audio out jacks of cam-
corder, another VCR, or an audio source here.
30. VIDEO IN Jack (AV1 / VCR only)
Connect cable coming from the video out jack of camcorder,
another VCR, or an audio-visual source (laser disc player, video disc
player, etc) here.
31. AERIAL Jack
Connect your antenna, Cable Box or Direct Broadcast System.
32. RF OUT Jack
Use the supplied Round Coaxial cable to connect this jack to the
AERIAL jack on your TV.
$6$
$6$ 6 #2
6#2
$)')4!,
!5$)//54
!5$)/
/54
36)$%/
/54
#/-0/.%.4
6)$%//54
!5$)//54
6)$%//54
#/!8)!,/04)#!,
!5$)/).
6)$%/).
,
2
!%2)!,
2&/54
9
#"
0"
#2
02
,
2
,
2
PULLOPEN
DV-NC200
OPERATE
OPEN/CLOSE
PLAYSTOP
DVDVCRCH
TIMER
RECPLAYREW FF
STOP/
EJECT
(TRACKING)
OUTPUT
1 2 3
6
54
7
0
+10
8 9
TAPE
SPEED
DIRECT
SKIP TIMER
ON/OFF
CH
SLOW
SEARCH MODE
GAMMA
MENUTITLE
STILL/PAUSEREC/OTR
STOP
PLAY
FWD
REV
RETURN
SKIP
REPEAT
A-B REPEAT
CLEAR/C-RESET
ENTER
ZOOM
AUDIO
VCR
MARKER
DVD MODE
SETUP
SUBTITLE
OPEN/CLOSE
EJECT
ANGLE
DISPLAY
OPERATE
VCR/DVD COMBINATION
NA543AD
VCR
OUTPUT
DVD
OUTPUT button
DVD OUTPUT
indicator
VCR OUTPUT
indicator
DVD button
VCR button
VCR/DVD SWITCHING
Display During Operation
No disc inserted / cannot read disc. Appears when a disc is loaded on the
disc tray.
Appears when the disc tray is opening. Appears when a disc or tape is being
played back.
Appears when the disc tray is closing.
Appears when the PBC function is acti-
vated (Video CD playback only. Refer
to page 5).
Rear Terminals
Because this product is a combination of a VCR and a DVD player,
you must select first which component you wish to operate with
OUTPUT.
VCR MODE
Press VCR on the remote control.
(Verify that the VCR OUTPUT indicator is lit.)
DVD MODE
Press DVD on the remote control.
(Verify that the DVD OUTPUT indicator is lit.)
Hint
• Pressing only OUTPUT on the front panel DOES NOT switch the
mode of the remote control. You MUST select the correct mode
on the remote control.
In the wrong mode, the VCR/DVD does not respond to your com-
mands correctly. Before starting your desired operation, select
the correct mode by following the instruction (
VCR/DVDCOMBINATION
NA527AD
1 2 3
6
54
7
0
+10
8 9
STOP
PLAY
VCR DVD
press first.
or
VCR/DVDCOMBINATION
NA527AD
1 2 3
6
54
7
0
+10
8 9
STOP
PLAY
VCR DVD
press first.
) under the subject heading.
H9945AD_1.indd 7H9945AD_1.indd 7 5/11/2005 6:46:57 PM5/11/2005 6:46:57 PM

SETUP
–8 –EN
ABOUT THE REMOTE CONTROL
Installing the Batteries for the Remote Control
Install two AA size (R-6) batteries (supplied) matching the polarity
indicated inside battery compartment of the remote control.
Hint
• Do not mix alkaline and manganese batteries.
• Do not mix old and new batteries.
Operable Range
Keep in mind the following when using the remote control:
• Make sure that there is no obstacle between
the remote control and the remote sensor on the VCR/DVD.
• The maximum operable range as follows;
Beeline: approximately 7 m (23 feet)
Either side of centre: approximately 5 m (16 feet) within 30 degrees
Above: approximately 5 m (16 feet) within 15 degrees
Below: approximately 3 m (10 feet) within 30 degrees
PULLOPEN
DV-NC200
OPERATE
OPEN/CLOSE
PLAYSTOP
DVDVCRCH
TIMER
RECPLAYREW FF
STOP/
EJECT
(TRACKING)
OUTPUT
Buttons for DVD Only
DVD mode
Media type
Button
(Alphabetical order)
• Repeats playback of a selected section. •
Repeats playback of a selected section (VCD, CD).
• Press to change the camera angle to see the
sequence being played back from a different
angle (DVD-Video).
—
• Press to search chapter, title or time. • Press to search track.
• Press to search time (VCD, CD).
• Press to select DVD output mode and to use
the remote control in DVD mode.
• Press to select DVD output mode and to use the
remote control in DVD mode.
• Press to accept a setting. • Press to accept a setting.
• Press to adjust the black parts of the picture
brighter.
• Press to adjust the black parts of the picture
britghter (VCD).
• Press to call back the Marker display. • Press to call back the Marker display (VCD, CD).
• Activates Virtual Surround or Rapid Play.
• Activates programmed playback, random play-
back or folder playback mode (CD, MP3, JPEG).
• Activates the 3D sound (VCD, CD) .
• Repeats playback of the current disc, title or
chapter.
• Repeats playback of the current disc, group or
track.
• Returns to the previous operation. • Returns to the previous operation.
• Press to enter the setup mode or to change
setup items.
• Press to enter the setup mode or to change
setup items.
• Press to skip chapters or titles. • Press to skip tracks.
• Press to select a desired subtitle language. —
• Displays the title menu.
• Press to return to the first hierarchy in the
programme and file list when the file list is the
second hierarchy or deeper (MP3, JPEG).
• Enlarges part of a DVD-reproduced image. •
Enlarges part of a reproduced image (VCD, JPEG).
H9945AD_1.indd 8H9945AD_1.indd 8 5/11/2005 6:46:59 PM5/11/2005 6:46:59 PM

SETUP
–9 –EN
Buttons for Both VCR and DVD
DVD mode VCR mode
Media type
Button
(Alphabetical order)
• Press to select chapter or title
directly. • Press to select track directly. • Press to select channel
(except for +10 key).
• (up/down/left/right) Press to
select an item in the menu
and to move the cursor.
• (up/down/left/right) Press to select
an item in the menu and to move the
cursor.
• (up/down/left/right) Press to select
an item in the menu and to move
the cursor.
• Press to select a desired audio
language or sound mode.
• Press to select a desired sound mode
(VCD, CD)
.
• Press to select a desired sound
mode.
——
• Press to change TV channels or to
adjust the tracking manual.
• Press to clear the markers or
the incorrect input.
• Press to clear the markers or the incor-
rect input. • Press to reset the counter.
• Press to display the current
playback mode.
• Press to display the current playback
mode.
• Press to display the current time,
tape counter and channel number.
• Press to begin fast forward
playback to a desired point.
• Press to begin slow forward
playback during the pause
mode.
• Press to begin fast forward playback to
a desired point (VCD, CD, MP3).
• Press to begin slow forward playback
during the pause mode (VCD).
• Fast forwards playback to a desired
point.
• Press to forward in slow motion
faster.
• Press to display the DVD
menus. •
Press to display the MP3 or JPEG file lists.
• Press to display the VCR menu.
• Press to insert discs into or
remove them from the tray.
• Press to insert discs into or remove
them from the tray.
• Press to remove the tape from the
VCR.
• Press to turn the power on
and off. • Press to turn the power on and off. • Press to turn the power on and off.
• Press to begin playback. • Press to begin playback. • Press to begin playback.
——
• Press once to start recording or
repeatedly to start One Touch
Recording.
• Press to begin fast reverse
playback to a desired point.
• Press to begin slow reverse
playback during the pause
mode.
• Press to begin fast reverse playback to
a desired point (VCD, CD, MP3).
• Fast reverse playback to a desired
point.
• Press to reverse in slow motion
slower.
——
• Press to call up the index or time
search menu.
——
• Press to view the video tape in
slow motion.
• Press to pause playback or to
advance playback one frame
at a time.
• Press to pause playback.
• Press to pause playback or record-
ing or to advance playback one
frame at a time.
• Press to stop playback. • Press to stop playback. • Press to stop playback or record-
ing.
——
• Press to select the VCR’s recording
speed (SP or LP).
——
• Press to put the VCR into standby
mode for a Timer Recording.
——
• Press to select VCR output mode
and to use the remote control in
VCR mode.
H9945AD_1.indd 9H9945AD_1.indd 9 5/11/2005 6:47:02 PM5/11/2005 6:47:02 PM

SETUP
–10 –EN
CONNECTIONS
Connection to a TV
CAUTION:
• Be sure to turn off the VCR/DVD and equipment to be connected before connecting.
• Read through the Operation Manual for the equipment to be connected.
• Be sure to keep the VCR/DVD connection cables separate from the TV antenna cable when you install the VCR/DVD, because it may cause
electrical interference when you are watching television programmes.
• DTS audio cannot be produced with an analogue connection.
Basic TV Connection
CAUTION:
• Connect the VCR/DVD directly to the TV. Do not connect the VCR/DVD to a VCR,
then connect the VCR to the TV. Copyright protection in the VCR could distort the
picture playing on the VCR/DVD.
VCR
This VCR/DVD
TV
• When the VCR/DVD is connected to a TV using both a Video cable and an S-Video cable, only the S-Video connection is enabled (the VIDEO
connection is disabled).
• You will not be able to hear all of the sound being output by the VCR/DVD if you use the Video/Audio cables (supplied) to a monaural TV that
has only one AUDIO input jack.
Hint
• Be sure that the colours of the jacks and plugs match up when connecting the cable.
• Connect the VCR/DVD directly to the TV. If you attempt to view video on a TV connected via a VCR, the copy protection function will
scramble the picture.
• If you want to listen to the audio through audio equipment, connect only the S-Video or Video cable to the TV.
.
Method 1 Method 2 Method 3
Basic Audio Good picture Better picture Best picture
TV
Audio cable
(supplied)
VCR/DVD
or
Video
cable
(supplied)
S-Video
cable
(commercially
available)
(Analogue) AUDIO OUT VIDEO OUT S-VIDEO OUT COMPONENT VIDEO OUT
• The S-VIDEO OUT and COMPONENT VIDEO OUT jacks are only useful in DVD mode.
If your TV is compatible with 525 or 625 progressive scanning and you want to enjoy that high quality picture;
You must select the connection Method 3 above and progressive scanning mode. To set the mode, set “PROGRESSIVE” to “ON”in the DISPLAY
menu so that “P.SCAN” will appear on the display of this VCR/DVD. (The progressive scanning is not available in the VCR mode.) See pages 29, 30
for more details.
If your TV is not compatible with progressive scanning;
Use this VCR/DVD in interlace mode. Make sure that no “P.SCAN” is on the display of this VCR/DVD. If so, set “PROGRESSIVE” to “OFF” in the DISPLAY
menu so that “P.SCAN” on the display of this VCR/DVD will disappear.
$6$
$6$ 6 #2
6#2
$)')4!,
!5$)//54
!5$)/
/54
36)$%/
/54
#/-0/.%.4
6)$%//54
!5$)//54
6)$%//54
#/!8)!,/04)#!,
!5$)/).
6)$%/).
,
2
!%2)!,
2&/54
9
#
"
0
"
#
2
0
2
,
2
,
2
5P"&3*"-
KBDL
3PVOE$PBYJBMDBCMF
TVQQMJFE
5P3'065
KBDL
GSPN
"OUFOOB
57
Component Video
cable
(commercially
available)
H9945AD_1.indd 10H9945AD_1.indd 10 5/11/2005 6:47:05 PM5/11/2005 6:47:05 PM

SETUP
–11 –EN
Connection to an Audio System
Method 1 Method 2
LR
L
L
RR
AUDIO
VCR/DVD
Analogue audio
input jacks
(Analogue) AUDIO
OUT
or
Audio cable
(supplied)
Stereo system
Digital audio
input jack
Audio Coaxial or
Optical Digital cable
(commercially
available)
Dolby Digital decoder, DTS decoder, MPEG decoder,
MD deck or DAT deck
DIGITAL AUDIO OUT
Setting
Connection
SETUP > (QUICK) >
DOLBY DIGITAL
DTS MPEG
Connecting to Stereo
System. DPCM OFF DPCM
* To complete these settings, refer to pages 29, 31.
Hint
•Playing back a DVD using incorrect settings may generate noise
distortion and may also damage the speakers.
Setting
Connection
SETUP > (QUICK) >
DOLBY DIGITAL
DTS MPEG
Connecting to a
Dolby Digital, DTS
decoder or MPEG
decoder for Dolby
Digital, DTS or MPEG
audio output.
BITSTREAM
Connecting to the
other equipment
(an MD deck or
DAT deck etc.) with-
out Dolby Digital
decoder.
DPCM OFF DPCM
* To complete these settings, refer to pages 29, 31.
Hint
• The DVD AUDIO OUT and DIGITAL AUDIO OUT jacks are only use-
ful in DVD mode.
• The audio source on a disc in a Dolby Digital 5.1 channel surround
format cannot be recorded as digital sound by an MD or DAT
deck.
• By hooking this VCR/DVD up to a Multi-channel Dolby Digital
decoder, you can enjoy high-quality Dolby Digital 5.1 channel sur-
round sound as heard in the movie theatres.
• By hooking this VCR/DVD up to the DTS decoder, you can enjoy
5.1 channel surround system which reproduces the original sound
as truthfully as possible. 5.1 channel surround system is developed
by the Digital Theater System Inc.
• Playing back a DVD using incorrect settings may generate noise
distortion and may also damage the speakers.
Optical Cable (not supplied)
• Optical cable (not supplied) may be damaged when bent at sharp angles. Ensure cables are coiled in loops with a diameter of 15 cm or more
when storing them.
• Use a cable which is 3 m or shorter.
• Insert cable plugs firmly into the connectors when making connections.
• If a plug has dust or is dirty, clean it with a soft cloth before inserting it into a connector.
H9945AD_1.indd 11H9945AD_1.indd 11 5/11/2005 6:47:07 PM5/11/2005 6:47:07 PM

SETUP
–12 –EN
PREPARATION FOR USE
Turn on the VCR/DVD for the First Time
VCR/DVDCOMBINATION
NA527AD
1 2 3
6
54
7
0
+10
8 9
STOP
PLAY
VCR DVD
press first.
Refer to page 7 to switch between the VCR mode and the DVD mode.
1. Turn on the TV and select the video channel on the TV.
2. Select the desired language.
or
To decide.
LANGUAGE
B[ ENGLISH ]
Video Channel Setting
VCR/DVDCOMBINATION
NA527AD
1 2 3
6
54
7
0
+10
8 9
STOP
PLAY
VCR DVD
press first.
Video Channel Setting will be necessary if your VCR/DVD is connected to the TV
via the Round Coaxial cable.
1. Insert a pre-recorded tape.
2.
3.
YES
Do you see the playback picture on the TV screen?
NO
37
To stop playback.
Select and adjust your TV to channel 37.
•If channel 37 is set for broadcasting, or interference lines appear
on the picture, the RF converter must be set to a different chan-
nel between CH28 and CH69.
4. Select “INITIAL”.
or
To decide.
MENU
TIMER
SET UP
BINITIAL
5. Select “RF OUT“.
INITIAL
CH TUNING
CLOCK
BRF OUT
LANGUAGE
or
To decide.
6.
BRF OUT CH 37
or
• Select a channel which is not used for broadcast between chan-
nel 28 and 69 in your area, and press Cursor Bto confirm.
7.
•Set the TV channel to the RF OUT CHANNEL which was selected
on the VCR/DVD. A picture from the VCR/DVD will appear on the
TV screen. If picture does not appear, repeat steps 4to 7using a
different channel which is not used for broadcansting.
8. To stop playback.
Hint
• Repeat these steps only if either there was a power failure or this
VCR/DVD has been unplugged for more than 1 hour.
• You may also access the RF OUT CH menu by pressing and hold-
ing MENU on the remote control for 3 seconds during power off
until the RF OUT CH menu appears.
Automatic Channel Preset
VCR/DVDCOMBINATION
NA527AD
1 2 3
6
54
7
0
+10
8 9
STOP
PLAY
VCR DVD
press first.
You can programme the tuner to scan all the channels you can
receive in your area.
1. Select “INITIAL”.
or
To decide.
MENU
TIMER
SET UP
BINITIAL
2. Select “CH TUNING“. INITIAL
BCH TUNING
CLOCK
RF OUT
LANGUAGE
or
To decide.
3. Select “AUTO“.
To decide.
or
• The tuner scans and memorises all the active
channels in your area.
• After scanning, the tuner stops on the lowest
memorised channel.
CH TUNING
BAUTO
MANUAL
AUTO P01
CC
Clock Set Up
VCR/DVDCOMBINATION
NA527AD
1 2 3
6
54
7
0
+10
8 9
STOP
PLAY
VCR DVD
press first.
This VCR/DVD incorporates a 24-hour clock. The clock must be set for the Timer
Recording function to operate correctly.
1. Select “INITIAL”.
or
To decide.
MENU
TIMER
SET UP
BINITIAL
2. Select “CLOCK”.
or
To decide.
INITIAL
CH TUNING
BCLOCK
RF OUT
LANGUAGE
3. Select the current year.
or
To decide.
CLOCK
BYEAR 2005
MONTH 01
DAY 01 SA
HOUR __
MINUTE __
4. Select the current month. CLOCK
YEAR 2005
B MONTH 01
DAY 01 SA
HOUR __
MINUTE __
or
To decide.
5. Select the current day.
CLOCK
YEAR 2005
MONTH 07
BDAY 01 SA
HOUR __
MINUTE __
or
To decide.
Operations described after this section are mainly based on the remote control use. Some operations can be carried out on main unit.
H9945AD_1_P17.indd 12H9945AD_1_P17.indd 12 5/12/2005 7:29:06 PM5/12/2005 7:29:06 PM

SETUP
–13 –EN
6. Select the current hour.
CLOCK
YEAR 2005
MONTH 07
DAY 16 SA
BHOUR __
MINUTE __
or
To decide.
7. Select the current minute.
CLOCK
YEAR 2005
MONTH 07
DAY 16 SA
HOUR 01
BMINUTE __
or
To decide.
8. To exit the CLOCK screen.
Hint
• To go back one step, press Cursor s(during the steps 3to 7).
• Although seconds are not displayed, they begin counting from 00
when you exit by pressing MENU. Use this feature to synchronise
the clock with the correct time.
• Repeat these steps only if either there was a power failure or this
VCR/DVD has been unplugged for more than 1 hour.
Select a Channel
VCR/DVDCOMBINATION
NA527AD
1 2 3
6
54
7
0
+10
8 9
STOP
PLAY
VCR DVD
press first.
You can select a desired channel by using CH K/ Lor directly
pressing the Number buttons on the remote control.
1.
or
Select your desired channel number.
Hint
• Enter a channel numbers as a two-digit number for the quickest
results. For example, to select channel 6, press 0and 6. If you only
press 6, channel 6 will be selected after a brief delay.
• You can only select channels 1–99.
Picture Select
VCR/DVDCOMBINATION
NA527AD
1 2 3
6
54
7
0
+10
8 9
STOP
PLAY
VCR DVD
press first.
This function enables you to select the picture quality of a tape.
1. Select “SET UP”.
or
To decide.
MENU
TIMER
BSET UP
INITIAL
2.
SET UP
AUTO REPEAT [OFF]
BPICTURE [NORMAL]
Select “PICTURE”.
or
3. SET UP
AUTO REPEAT [OFF]
BPICTURE [SOFT]
To switch “NORMAL”, “SOFT” or “SHARP”.
4. To exit the PICTURE screen.
Hint
• Once you select the Picture Select mode, it stays in effect even
after you turn off the VCR/DVD.
Manual Channel Preset
VCR/DVDCOMBINATION
NA527AD
1 2 3
6
54
7
0
+10
8 9
STOP
PLAY
VCR DVD
press first.
Each channel is tuned manually and individually. DO NOT use
“Automatic Channel Preset” if you intend to use some of the pre-
tuned channels.
1. Select “INITIAL”.
or
To decide.
MENU
TIMER
SET UP
BINITIAL
2. Select “CH TUNING”.
or
To decide.
INITIAL
BCH TUNING
CLOCK
RF OUT
LANGUAGE
3. Select “MANUAL”.
CH TUNING
AUTO
BMANUAL
To decide.
or
4. Select “POSITION”.
To decide.
or
• When a weak signal is received in Manual Tuning mode, you
can change the background to solid blue or the static screen by
pressing CLEAR/C-RESET.
MANUAL
BPOSITON P01
CCCCCCCCCCCCCCCC
BAND [VHFL]
SKIP [ON]
5. Select your desired position number.
or
MANUAL
BPOSITON P01
CCCCCCCCCCCCCCCC
BAND [VHFL]
SKIP [ON]
or
To decide.
• You can select position number 01-99.
• If you know the area of the frequencies where the position
number you wish to receive, press Cursor K/ Lto select
“BAND”, then press Cursor Brepeatedly until your desired fre-
quency appears.
CHANNEL COVERAGE
VHF L: 45.75~138.25 MHz
VHF H: 140.25~423.25 MHz
UHF: 427.25~855.25 MHz
6.
or
To search.
or
• When a channel is found, the VCR/DVD will stop searching and
“ON” changes to “OFF” on the right siede of “SKIP” automatically
and the picture will appear on the TV screen.
• If “ON” appears on the right side of “SKIP”, press Cursor Bto
cancel the selecting position number then press Cursor K/ L
to point “SKIP”. Then press Cursor Bto select “OFF”.
MANUAL
POSITON P05
B
CCCC
CCCCCCCCCCCC
BAND [VHFH]
SKIP [OFF]
7. To exit the Manual Channel Preset.
• To confirm that a channel has been added, press CH K/ L.
H9945AD_1.indd 13H9945AD_1.indd 13 5/11/2005 6:47:15 PM5/11/2005 6:47:15 PM

SETUP
–14 –EN
VCR FUNCTIONS
Skip a Preset Channel
VCR/DVDCOMBINATION
NA527AD
1 2 3
6
54
7
0
+10
8 9
STOP
PLAY
VCR DVD
press first.
The channels you can no longer receive or seldom watch can be set to be
skipped when you access channel with CH K/ L.
1. Select “INITIAL”.
or
To decide.
MENU
TIMER
SET UP
BINITIAL
2. Select “CH TUNING”.
or
To decide.
INITIAL
BCH TUNING
CLOCK
RF OUT
LANGUAGE
3.
CH TUNING
AUTO
BMANUAL
Select “MANUAL”.
or
To decide.
4. Select “POSITION”.
or
To decide.
MANUAL
BPOSITON P01
CCCCCCCCCCCCCCCC
BAND [VHFL]
SKIP [OFF]
5.
or
Select relevant position number.
or
To decide.
MANUAL
BPOSITON P05
CCCCCCCCCCCCCCCC
BAND [VHFL]
SKIP [OFF]
6. Select ”SKIP [ON]”.
or
• To memorise the channel again, press Cursor B. “ON”will
change to “OFF”.
MANUAL
POSITON P05
CCCCCCCCCCCCCCCC
BAND [VHFL]
BSKIP [ON]
7. To exit the Manual screen.
Hint
• To confirm that a channel has been deleted, press CH K/ L.
Change the On-Screen Language
VCR/DVDCOMBINATION
NA527AD
1 2 3
6
54
7
0
+10
8 9
STOP
PLAY
VCR DVD
press first.
1. Select “INITIAL”.
or
To decide.
MENU
TIMER
SET UP
BINITIAL
2. Select “LANGUAGE”.
To decide.
or
INITIAL
CH TUNING
CLOCK
RF OUT
BLANGUAGE
3. Select the desired language.
or
LANGUAGE
B[ ENGLISH ]
To decide.
Hint
• If you accidentally select “ ġġġġġ” and need English: Press MENU
and choose “ߒԪ೪ۢ” by pressing Cursor K/ L. Then,
press Cursor B. Select “ᇮّ” by pressing Cursor K/ L. Then,
press Cursor B. Select “ENGLISH” by pressing Cursor K/ L.
Finally, press MENU.
Before:
Turn on the TV and set it to RF OUT channel.
• If RF OUT channel is already occupied for broadcasting, see “Video
Channel Setting” on page 12.
VCR/DVDCOMBINATION
NA527AD
1 2 3
6
54
7
0
+10
8 9
STOP
PLAY
VCR DVD
press first.
Refer to page 7 to switch between the VCR mode and the DVD mode.
1. 2.
3. 4. 5.
To stop playback.
Hint
• When a tape without erase-protection tab is inserted, the VCR/DVD will start playback automatically.
• Tracking adjustment will be activated automatically (Digital Tracking function) when you start playback.
• When playing pre-recorded tapes or tapes recorded on units other than your own, noise lines (black and white streaks) may appear on the
playback picture. If this occurs, you can adjust the tracking control manually by pressing CH K/ Luntil the streaks disappear. To return to the
DTR function, stop the tape once and start playback again.
<If a tape is already in the VCR/DVD...>
• Using the buttons on the VCR/DVD
Just press PLAY Bon the VCR/DVD. Power will automatically turn on and playback will start (Direct Button Operation).
• Using the buttons on the remote control
Press OPERATE to turn on, and then press PLAY B.
PULL OPEN
DV-NC200
OPERATE
CH
TIMER
RECPLAYREW FF
STOP/
EJECT
(TRACKING)
21
34
3
1
4
5
5
VCR FUNCTIONS
PLAYBACK
To eject a tape.
H9945AD_1.indd 14H9945AD_1.indd 14 5/11/2005 6:47:20 PM5/11/2005 6:47:20 PM

VCR FUNCTIONS
–15 –EN
OTHER OPERATIONS
To Cue or Review Picture during Playback
(Speed Search)
Press FWD gor REV h.
• Press it again and the VCR/DVD will search in super high speed.
• Super high speed is not available for an NTSC tape.
• The sound will be muted during Speed Search.
To Freeze the Picture on TV Screen during Playback
(Still Picture)
Press STILL/PAUSE F. Each time you press the button, the picture will
be forwarded by one frame.
• If the picture begins to vibrate vertically during the still mode, stabi-
lise the picture by pressing CH K/ L.
• If the picture is distorted or rolling vertically, adjust the vertical hold
control on your TV, if equipped.
Hint for “Speed Search” and “Still Picture”
• Usually there will be video “noise” lines (black and white streaks or
dots) on the screen. This is normal. The still picture will, in addition to
containing the “noise” lines, be black and white. This is not a fault of
the machine but merely a by-product of the technology involved in
producing a VCR with LP mode.
Counter Reset
Press CLEAR/C-RESET.
To Play Back in Slow Motion
Press SLOW during playback or the still mode.
• You can control the speed by pressing FWD g(faster) or
REV h(slower). Press PLAY Bto return to normal playback.
• If the noise bars appear on the TV screen, you can reduce it by press-
ing CH K/ L.
Auto Rewind
When a tape reaches its end during playback, fast forward, or record-
ing (except Timer Recording and One Touch Recording), the tape will
automatically rewind to the beginning. After rewinding finishes, the
VCR/DVD will eject the tape.
Hint
• Still/Slow/Pause mode will be automatically cancelled after 5 min-
utes to prevent damage to the tape and the video head.
• To return to playback from the Speed Search/Still/Slow mode,
press PLAY B.
Time Search
You can specify the time for fast forwarding or rewinding.
If a tape includes both programmes recorded in the PAL system and
ones recorded in the NTSC system, this function may not be operated
correctly.
• Insert a tape into this VCR/DVD.
1.
x2 (Twice)
TIME 0 : 0 0
2.
or Within 30 seconds.
Select the desired length of time for fast forwarding or rewinding.
0:01 ~ 9:59
(1 minute~9 hours and 59 minutes)
TIME 2 : 5 0
3. To rewind.
After searching ...
To fast forward.
Within 30 seconds.
4.
PLAY B
• When 0:00 is reached, the VCR/DVD will start playback
automatically.
Hint
• Time Search can be set up to 9 hours 59 minutes (9:59).
• This function is not available during recording.
• If the end of the tape is reached during a search, this VCR/DVD will
cancel the search and rewind the tape.
• To exit the Time Search mode, press MENU in step 2, or press
STOP Cafter step 3.
VCR/DVDCOMBINATION
NA527AD
1 2 3
6
54
7
0
+10
8 9
STOP
PLAY
VCR DVD
press first.
Index Search
You can specify the number of programmes to be skipped.
• The index mark will be made automatically when REC/OTR is
pressed. It will also be marked at the starting point of Timer
Recording and OTR.
• The index mark is not recorded if STILL/PAUSE Fis pressed and
released during recording.
• The time gap between index marks on the tape should be greater
than 1 minute for SP recording and 2 minutes for LP recording.
• Insert a tape into this VCR/DVD.
1.
x1 (Once)
INDEX 01
2.
Pro.1 Pro.2 Pro.3 Pro.4 Pro.5
02 01 01 02 03
Beginning
of tape
End
of tape
CURRENT PROGRAMME
INDEX MARK
01 ~ 20
INDEX 03
or Within 30 seconds.
3. To rewind.
After searching ...
To fast forward.
Within 30 seconds.
4. PLAY B
• When the preset programme is reached, the VCR/DVD will start
playback automatically.
Hint
• Index Search can be set up to 20.
• This function is not available during recording.
• If the end of the tape is reached during a search, this VCR/DVD will
cancel the search and rewind the tape.
• This VCR/DVD stores index mark at the beginning of the recording.
There should be time gap between 2 index marks for the Index
Search.
• To exit the Index Search mode, press MENU in step 2, or press
STOP Cafter step 3.
VCR/DVDCOMBINATION
NA527AD
1 2 3
6
54
7
0
+10
8 9
STOP
PLAY
VCR DVD
press first.
H9945AD_1.indd 15H9945AD_1.indd 15 5/11/2005 6:47:26 PM5/11/2005 6:47:26 PM

–16 –EN
This function enables you to set the duration of a recording simply by
pressing REC/OTR.
Before:
Turn on the TV and set it to RF OUT channel.
• If RF OUT channel is already occupied for broadcasting, see “Video Channel
Setting” on page 12.
Refer to page 7 to switch between the VCR mode and the DVD mode.
1.
with erase-protection tab
•If necessary, rewind or fast
forward the tape to the point
at which you want to begin
recording.
Insert a tape.
2. Select the desired channel.
or
P12
TV Screen
3.
SP
Tape Speed SP Mode
Recording / Playback TimeTape Type
LP Mode
E-60 1 hour 2 hours
E-120 2 hours 4 hours
E-180 3 hours 6 hours
E-240 4 hours 8 hours
Select the desired tape speed.
4.
I
SP
/PSNBMSFDPSEJOH
3&$
You can select a fixed recording time by
pressing REC/OTR repeatedly.
• Recording stops when 0:00 is reached.
• To check remaining time during an OTR, press DISPLAY.
• To change the recording length during an OTR, press REC/OTR
repeatedly until the desired length appears.
• To cancel the OTR but continue recording, press REC/OTR repeatedly I
appears without the recording length.
5. To stop recording or before the end time of OTR, press STOP C.
C
Hint
• To view one channel while recording another, press the channel
buttons on the remote control of your TV to switch the RF OUT
channel for broadcasting you want to watch.
• An NTSC 3.58 system is automatically distinguished by the VCR in
case of using external input mode.
• When you copy a tape recorded in an NTSC 3.58 system using
external input mode, you cannot select the LP mode at step 3.
Assemble Function
You can record in continuation from previous programme on a pre-
recorded tape.
1. Insert a pre-recorded tape. Press PLAY Bto start playback.
2. Press STILL/PAUSE Fat the desired point on the tape.
3. Press REC/OTR. The VCR/DVD will be the Recording Pause mode.
4. Press CH K/ Lto select the channel to be recorded.
5. Press REC/OTR or STILL/PAUSE F. The recording will begin.
6. Press STOP Cwhen recording is completed.
Accidental erasure prevention
To prevent accidental recording on a
recorded cassette, remove its erase-protection tab.
To record on it later, cover the hole with
plastic tape.
To stop recording temporarily (Pause mode)
Press STILL/PAUSE F.
• During the Recording Pause mode, 5
C
marks appear on the TV
screen. Each
C
mark represents 1 minute. After 5 minutes, the VCR
will automatically switch to the stop mode to prevent tape damage.
• Press it again to resume recording.
RECORDING
Recording & OTR (One Touch Recording)
VCR/DVDCOMBINATION
NA527AD
1 2 3
6
54
7
0
+10
8 9
STOP
PLAY
VCR DVD
press first.
PULL OPEN
DV-NC200
OPERATE
OPEN/CLOSE
VCRCH
TIMER
RECPLAYREW FF
STOP/
EJECT
(TRACKING)
1
5
2
4
You CANNOT copy a DVD to a videotape if
the DVD disc is copy protected.
3
4
2
5
2
Auto Repeat
You can repeat playback of a whole tape automatically.
• Insert a tape into this VCR/DVD.
1. Select “SET UP”.
MENU
TIMER
BSET UP
INITIAL
or
To decide.
2.
SET UP
BAUTO REPEAT [OFF]
PICTURE [NORMAL]
or
Select “AUTO REPEAT”.
3. SET UP
BAUTO REPEAT [ON]
PICTURE [NORMAL]
4.
AUTO REPEAT B
5. To stop playback.
Hint
• To cancel Auto Repeat, follow steps 1to 3. Then, press Cursor B,
so that “OFF“appears beside “AUTO REPEAT”. Press MENU to exit.
• If menu remains on the TV screen at step 3, press MENU to exit.
• Once you select “AUTO REPEAT”, it stays in effect even after you
turn off the VCR/DVD.
VCR/DVDCOMBINATION
NA527AD
1 2 3
6
54
7
0
+10
8 9
STOP
PLAY
VCR DVD
press first.
FSBTFQSPUFDUJPOUBC
VCR FUNCTIONS
H9945AD_1.indd 16H9945AD_1.indd 16 5/11/2005 6:47:29 PM5/11/2005 6:47:29 PM

VCR FUNCTIONS
–17 –EN
Timer Recording
You may programme the VCR/DVD to start and end a recording while
you are away. You can set 8 programmes to record on specific days,
daily or weekly within a 1-year period.
• Insert a tape with its erase-protection tab in place. (If necessary, rewind or
fast forward the tape to the point at which you want to begin recording.)
1. Select “TIMER”.
MENU
BTIMER
SET UP
INITIAL
To decide.
2.
B
TIMER NUMBER
4
DATE __/__
START __:__
END __:__
CHANNEL
__
SPEED __
Select an empty programme number.
or
To decide.
• If Cursor {is pressed when the TIMER
NUMBER is flashing, the entire programme
contents will be erased.
3.
• You can programme one year in advance.
• You can also select the recording routine option by pressing
Cursor K/Lwhen the month digit is flashing. Those pro-
grammes can only set a recording according to the same chan-
nel at the same time.
- For daily recording : Select “MO-FR” to recording from
Monday through Friday.
- For everyday recording : Select “MO-SU” to recording
everyday.
- For weekly recording : Select “W-MO” to recording
every week.
(e.g. W-MO : every Monday)
Select the desired month and day.
TIMER NUMBER
4
BDATE __
/03
START __:__
END __:__
CHANNEL
__
SPEED __
or
To decide.
4.
TIMER NUMBER
4
DATE
05/03 TU
BSTART 1 1 : __
END __:__
CHANNEL
__
SPEED __
or
To decide.
Select the desired start time (hour & minute).
5. Repeat the procedure in step 4to set the end time.
6. Select the desired channel.
TIMER NUMBER
4
DATE
05/03 TU
START 11:30
END 13:30
BCHANNEL P1 6
SPEED __
or
To decide.
7. Select the desired recording speed.
• To set another programme after step 7,
press Cursor B. Then, continue with step 2.
or
TIMER NUMBER
4
DATE
05/03 TU
START 11:30
END 13:30
CHANNEL P1 6
BSPEED S P
8. To exit.
9. TIMER indicator lights up on the front panel. (When
you turn off the VCR/DVD, “ ” will appear in the
front panel display.) The VCR/DVD will change to
the DVD mode. Turn off the VCR/DVD when you do
not use the DVD functions. In some occasions, how-
ever, the VCR/DVD may be automatically turned off,
instead of changing to the DVD mode after pressing
TIMER ON/OFF.
Hint
• If you have not set the clock yet, CLOCK setting menu appears. If
so, follow the steps outlined in the “Setting the Clock” . Then, set
the timer.
• If you do not press Cursor Bwithin 5 seconds of setting an item,
the input mode will move to the next step.
• Press Cursor {to go back one step from the current setting dur-
ing steps 3to 7.
To Check, Correct, or Cancel a Timer Programme
1. Press TIMER ON/OFF then, VCR on the remote control.
2. Press MENU, then Cursor B.
3. Press Cursor K/ Lto select the programme number which you want
to check. The details of the programme will appear on the TV screen.
• Press Cursor s/ Bto go to the digit you want to change. Then,
enter correct numbers by pressing Cursor K/ L.
• You may cancel the entire programme by pressing Cursor swhile
the programme number flashes.
4. Press MENU to exit.
5. Press TIMER ON/OFF to return to the timer standby mode.
To Cancel a Timer Recording in Progress
Press STOP C/EJECT Aon the VCR/DVD.
Hint
• STOP Con the remote control will not function in the Timer
Recording mode.
VCR/DVDCOMBINATION
NA527AD
1 2 3
6
54
7
0
+10
8 9
STOP
PLAY
VCR DVD
press first.
HINTS FOR OTR AND TIMER RECORDING
Before you set OTR or Timer Recording
• If a tape is not in the VCR/DVD or does not have the erase-protection
tab, the TIMER indicator on the front panel and “ ”flash and Timer
Recording cannot be performed. Please insert a recordable tape.
• Press VCR on the remote control before you set Timer Recording. Make
sure the remote control is in the VCR mode, then press TIMER ON/OFF.
After an OTR and a Timer Recording has been set, this
VCR/DVD operates as follows:
• When Timer Recordings are set, the TIMER indicator on the front panel
and “ ”will appear. To use the VCR as usual until the time for the
recording, press TIMER ON/OFF so that the TIMER indicator on the front
panel and “ ”disappear. Select either VCR or DVD mode, then continue
with the other features as described in this manual.
• “ ” will not appear in the DVD mode. However, the Timer Recordings
will remain as programmed.
• Once the VCR/DVD turns to the timer standby mode, no VCR functions
are available until TIMER ON/OFF is pressed. (OUTPUT on the front
panel and VCR on the remote control will not function.)
• To cancel the timer standby mode, press TIMER ON/OFF on the remote
control or STOP C/EJECT Aon the VCR/DVD, then press VCR to activate
the VCR function again.
• The mode of the VCR/DVD and the remote control may differ (VCR mode
or DVD mode) when you set Timer Recording or after you cancelled
Timer Recording. Press VCR or DVD on the remote control to select your
desired mode before you operate.
While OTR or Timer Recording is performing.
• I f a tape runs out before an OTR or a Timer Recording is finished, the
VCR/DVD ejects the tape and switches to the DVD mode automatically.
Press TIMER ON/OFF on the remote control or STOP C/EJECT Aon the
VCR/DVD, then press VCR to activate the VCR function again.
• I f
you want to use the VCR/DVD during a Timer Recording or while
“ ”
is
on or flashing, Press OPERATE to turn on the VCR/DVD. Press DVD on the
remote control to choose DVD mode, then continue with the other DVD fea-
tures as described in this manual. You don’t need to set the TIMER off to use
the DVD.
H9945AD_1_P17.indd 17H9945AD_1_P17.indd 17 5/12/2005 2:29:54 PM5/12/2005 2:29:54 PM

VCR FUNCTIONS
–18 –EN
ANT-O U T
ANT-IN
VCRDV D / V C R
COM PO N ENT
VIDEO OUT
AU D I O I N
VIDEO IN
AUDIO OUT
VIDEOOUT
LY
C
B
C
R
L
RR
DV D / V C R V C R
NT
T
LL
RR
L
R
12
Video/Audio cables
(supplied)
Round Coaxial cable
(supplied)
(Back of TV)
(Back of Recording VCR/DVD*)
(Back of another source)
or
*Front input jacks are also available.
AUDIO OUT
VIDEO OUT
AUDIO OUT
VIDEO OUT
AUDIO IN
AERIAL
RF OUT
VIDEO IN
When an OTR or a Timer Recording is completed...
• If the other Timer Recordings remain as programmed, the VCR/DVD
switches to the DVD mode automatically, and the TIMER indicator on
the front panel lights up to indicate the VCR/DVD is in the timer standby
mode. In some occasions, however, the VCR/DVD may be automatically
turned off, instead of changing to the DVD mode after pressing
TIMER ON/OFF.
• The TIMER indicator on the front panel flashes if there are no more Timer
Recordings on standby. If you want to use the VCR function, press
TIMER ON/OFF on the remote control or STOP C/EJECT Aon the VCR/
DVD. Then press VCR to activate the VCR function.
• Once the VCR/DVD switches to the DVD mode, all the VCR function will
be unavailable. “ ”will not appear as long as the DVD is in use. All the
DVD functions are available during OTR, timer standby mode and Timer
Recording.
• When you use the VCR/DVD in DVD mode during an OTR or a Timer
Recording, the VCR/DVD will not turn off automatically even if the end
time of the OTR or Timer Recording has been past.
Note (for Timer Recording) :
• If there is a power failure or the VCR/DVD is unplugged for more than 1
hour, clock and all timer settings will be lost.
To avoid overlap of Timer Programming ...
• A timer programme will not work while another programme is under
execution.
9:00 10:00 11:00
Programme 1
Programme 2
Programme 3
1. Insert a pre-recorded tape into the playing VCR.
2. Insert a tape with its erase-protection tab into the recording
VCR/DVD.
3. Press TAPE SPEED on the remote control of the recording
VCR/DVD to select the desired recording speed (SP/LP).
4. Select the “AV1” or “AV2” position on the recording VCR/DVD.
• To use the input jacks on the back of this VCR/DVD, select “AV1”
position by pressing 0, 0, 1 on the remote control or CH K/ L.
• To use the input jacks on the front of this VCR/DVD, select “AV2”
position by pressing 0, 0, 2 on the remote control or CH K/ L.
5. Press REC on the recording VCR/DVD.
6. Begin playback of the tape in another source.
7. To stop recording, press STOP C/EJECT Aon the VCR/DVD for
the recording VCR/DVD, then stop playback of the tape in another
source.
Hint
• For best results during dubbing, use the front panel controls when-
ever possible. The remote control might affect another source’s
operation.
• If video or colour fades in and out, you may be copying a copy
guarded video tape.
• Unauthorised recording of copyrighted materials may infringe on
the rights of copyright owners, violate copyright laws and may not
record clearly.
•“AV1”or “AV2”is found before the lowest memorised channel.
(Example: P02)
• “AV2”input jacks are on the front of this VCR/DVD.
Copying a Video Tape
Warning: Unauthorised recordings of copyrighted video tapes may be an infringement of copyright laws.
Connect the recording VCR/DVD(this unit), playing VCR(another VCR) and your TV as outline in the following diagram.
Direct Dubbing
Refer to page 7 to switch between the VCR mode and the DVD mode.
This will be possible only if the DVD is not copy protected.
1. Insert a tape.
with erase-protection tab
•If necessary, rewind or fast
forward the tape to the point
at which you want to begin
recording.
2. Insert a disc with label facing up.
3.
or
Press 0, 0, 3to select DISC.
DISC
TV Screen
4.
SP
Tape Speed SP Mode
Recording / Playback TimeTape Type
LP Mode
E-60 1 hour 2 hours
E-120 2 hours 4 hours
E-180 3 hours 6 hours
E-240 4 hours 8 hours
Select the desired tape speed.
5.
Recording starts.
6.
Playback starts.
7. To Stop Recording. To Stop Playback.
Hint
• Press STILL/PAUSE Fat the point where you want to start record-
ing when you do dubbing middle of the DVD.
• To stop recording temporarily, press STILL/PAUSE Fafter press
VCR. Press STILL/PAUSE Fagain to resume recording.
• You cannot record properly from the DVD disc recorded in the
NTSC system.
VCR/DVDCOMBINATION
NA527AD
1 2 3
6
54
7
0
+10
8 9
STOP
PLAY
VCR DVD
press first.
H9945AD_1.indd 18H9945AD_1.indd 18 5/11/2005 6:47:36 PM5/11/2005 6:47:36 PM

VCR FUNCTIONS
–19 –EN
Video Casette Tape
The VCR/DVD will operate with any casette
that bears the VHS mark. For best results, we
recommend the use of high-quality tapes. Do
not use poor quality or damaged tapes.
• You can prevent accidental erasing of a
recording by breaking off the erase-protection tab on the back edge
of the casette.
• If you decide to record on the tape again, cover the hole with plastic
tape.
TV Colour System
Different countries use different television colour systems. Tapes
recorded in the PAL or NTSC system can be played back on this
VCR/DVD. Usually, the picture on the TV screen will be in black and
white when you play back a tape that is recorded in a different colour
system.
Tapes recorded in the NTSC system can be played back on this
VCR/DVD and a PAL system TV set. This feature is only available in the
SP mode. When playing back such tapes, the picture may roll up or
down, shrink vertically and black bars may appear both at the top and
bottom of the screen. Adjust the vertical hold control on your TV, if
the TV features this control.
Hint
• When playing an NTSC tape playback picture may become
blurred or picture noise may appear during speed search, slow
motion or still mode. This is not a malfunction.
Automatic Operation
Automatic Rewind, Eject, Off
When the end of a tape is reached during recording, playback or fast
forward, the tape will automatically rewind to the beginning. After
that, the VCR/DVD will eject the tape.
• The tape will not auto-rewind during Timer Recording or One Touch
Recording.
Tape Eject
A tape can be ejected with the VCR/DVD power on or off (but the
VCR/DVD must be plugged in).
• If a Timer Recording is set, press STOP C/EJECT Atwice to eject a
tape.
Real Time Tape Counter
• This shows the elapsed recording or playback time in hours, minutes
and seconds on screen.
(Nothing is shown in the case of blank portion.)
• The “ – ” indication will appear when the tape is rewound further
than the tape counter position “0:00:00”.
• To reset tape counter, press CLEAR/C-RESET.
OTHER INFORMATION
Status Display
You can check the Counter or Clock & Channel number.
1.
Hi-Fi Stereo Sound System
This VCR/DVD will record and playback Hi-Fi stereo sound. In addition it has an A2 and NICAM stereo sound decoder.
This VCR/DVD will receive stereo and bilingual broadcasts and there are several ways of recording and playing back the sound.
1.
Each mode is indicated on the TV screen as following.
• During playback of the recorded tape in Hi-Fi mode
• During reception of stereo broadcasts
Mode Audio output Display on
the TV screen
Stereo Stereo STEREO
L L audio from the both speakers LEFT
R R audio from the both speakers RIGHT
Normal Monaural - None -
• During reception of bilingual broadcasts
Mode Audio output Display on
the TV screen
Main Main audio from the both speakers MAIN
Sub Sub audio from the both speakers SUB
Main/Sub • Main audio from the left speakers
• Sub audio from the both speakers MAIN + SUB
Hint
• If you play non-Hi-Fi tapes, the VCR/DVD will play automatically in monaural even if you select any mode.
• If the stereo signal becomes weak, the broadcast is automatically recorded in monaural.
VCR/DVDCOMBINATION
NA527AD
1 2 3
6
54
7
0
+10
8 9
STOP
PLAY
VCR DVD
press first.
VCR/DVDCOMBINATION
NA527AD
1 2 3
6
54
7
0
+10
8 9
STOP
PLAY
VCR DVD
press first.
erase-protection tab
C
SP
0:12:34
C
SP 17:40
P02
STEREO
<CLOCK and CHANNEL
NUMBER mode>
<COUNTER mode>
<OFF mode>
Press once. Press once.
Press once.
Each time you press DISPLAY, TV screen will change as
illustrated:
When you select the channel using the remote control
the Number buttons, select the desired channel
(position number).
H9945AD_1.indd 19H9945AD_1.indd 19 5/11/2005 6:47:40 PM5/11/2005 6:47:40 PM

DVD FUNCTIONS
–20 –EN
Before: Turn on the TV, amplifier and any other equipments which
are connected to this VCR/DVD. Make sure the TV and audio receiver
(commercially available) are set to the correct channel.
When you play NTSC recorded discs, the default setting converts this
to a modified PAL. (See “DISPLAY Setting” on page 30.)
(
page 22
)
VCR/DVDCOMBINATION
NA527AD
1 2 3
6
54
7
0
+10
8 9
STOP
PLAY
VCR DVD
press first.
Refer to page 7 to switch between the VCR mode and the DVD mode.
Hint
You can change the On-Screen language in “PLAYER MENU” setting.
(Refer to pages 29, 30.)
1. 2.
Insert a disc with label facing up.
3. 4. To stop playback.
Hint
• When you play MP3 or JPEG files, details are on page 22.
• A “prohibited icon”may appear at the top-right on the TV
screen when the operation is prohibited by the disc or this
VCR/DVD.
• Some DVDs may start playback from title 2 or 3 due to specific
programmes.
• During the playback of a 2-layered disc, pictures may stop for a
moment. This happens while the 1st layer is being switched to the
2nd layer. This is not a malfunction.
• A DVD-RW disc recorded in the VR mode may freeze momentarily
during playback depending on how the playlist was made and
edited (deleted titles, repeated recording).
DISC Menu
Some discs contain menus which allow you to customise disc playback.
Use Cursor K/ L/ s/ Bor the Number buttons to select an item,
then press ENTER or PLAY B.
Calling up a Menu Screen (for playback of a DVD Video)
• Press MENU to call up the DVD menu.
• Press TITLE to call up the title menu.
Cancelling the PBC (for playback of a Video CD)
1. Insert a Video CD. (Playback will start automatically.)
2. Press STOP C.
3. Enter track number of your choice with the Number buttons.
4. PBC is now cancelled and the playback of the Video CD will start.
Hint
• If the feature is not available, symbol may appear on the TV
screen.
• Menu operations may vary depending on the disc. Refer to the
manual accompanying the disc for more details.
Resume
VCR/DVDCOMBINATION
NA527AD
1 2 3
6
54
7
0
+10
8 9
STOP
PLAY
VCR DVD
press first.
Press STOP Cduring playback.
Resume message will appear on the
TV screen.
Press PLAY B, playback will resume
from the point at which playback
was stopped.
Hint
• To cancel resume, press STOP Cone more time during the stop
mode. On some discs, STOP Cwill not work while the Resume
message appears. Please wait until the message disappears.
• For MP3 and JPEG, playback will resume from the beginning of
the track at which playback was stopped.
• The resume information will be kept even when the power is
turned off.
Paused and Step-by-Step Playback
VCR/DVDCOMBINATION
NA527AD
1 2 3
6
54
7
0
+10
8 9
STOP
PLAY
VCR DVD
press first.
Press STILL/PAUSE Fduring playback.
• Playback will be paused and sound will be muted.
• Press STILL/PAUSE Fonce during Dual/Folder Playback to pause a
JPEG file only. Press STILL/PAUSE Fone more time to pause an MP3
track.
To continue playback, press PLAY B.
VCR/DVDCOMBINATION
NA527AD
1 2 3
6
54
7
0
+10
8 9
STOP
PLAY
VCR DVD
press first.
The disc goes forward by one frame each time STILL/PAUSE Fis
pressed during the pause mode.
To continue playback, press PLAY B.
Hint
• On DVDs, set “STILL MODE” to “FIELD” in the DISPLAY menu if pic-
tures in the pause mode are blurred. (Refer to pages 29, 30.)
Fast Forward/Reverse Search
VCR/DVDCOMBINATION
NA527AD
1 2 3
6
54
7
0
+10
8 9
STOP
PLAY
VCR DVD
press first.
Press FWD gor REV hrepeatedly during play-
back to select the required forward or reverse speed.
To continue playback, press PLAY B.
Hint
• On DVDs, set “STILL MODE” to “FIELD” in the DISPLAY menu if pic-
tures during Fast Forward and Reverse Search are blurred.
• For DVDs, Fast Forward or Reverse Search speed is different
depending on the disc.
•
For DVDs, approximate speed is 1(x2), 2(x8), 3(x20), 4(x50) and 5(x100).
• For Audio CDs, Video CDs and MP3, approximate speed is 1(x2),
2(x8) and 3(x30).
• For Audio CDs and MP3, sound will be output during Fast Forward
or Reverse Search.
E
1
Press 'PLAY' to play from here.
To play the beginning,
press 'STOP' first and then 'PLAY'.
Resume ON
<Example : DVD>
DVD FUNCTIONS
PLAYBACK
11
3
3
4
PULLOPEN
DV-NC200
OPERATE
OPEN/CLOSE
PLAYSTOP
DVDVCRCH
TIMER
RECPLAYREW FF
STOP/
EJECT
(TRACKING)
OUTPUT
4 311 23
H9945AD_2.indd 20H9945AD_2.indd 20 5/11/2005 7:11:37 PM5/11/2005 7:11:37 PM
Table of contents
Other Sharp DVD VCR Combo manuals

Sharp
Sharp DV-NC80W User manual

Sharp
Sharp DV-NC70H User manual

Sharp
Sharp DV-NC65H User manual

Sharp
Sharp DV-NC100S User manual

Sharp
Sharp DV-NC70U User manual

Sharp
Sharp DV-NC230SB User manual

Sharp
Sharp DV-NC70 User manual

Sharp
Sharp DV-NC65S User manual

Sharp
Sharp DV-NC85 User manual

Sharp
Sharp DV-NC85 User manual

Sharp
Sharp DV-RW360Y User manual

Sharp
Sharp DV-NC100H User manual

Sharp
Sharp DV-RW250S User manual

Sharp
Sharp DV-NC60W User manual

Sharp
Sharp DV-RW550U User manual

Sharp
Sharp DV-RW250H User manual

Sharp
Sharp DV-NC55U User manual

Sharp
Sharp DV-NC230(RU) User manual

Sharp
Sharp DV-NC70W User manual

Sharp
Sharp DV-RW550U User manual